ノーコードでクラウド上のデータとの連携を実現。
詳細はこちら →Act CRM ODBC Driver の30日間無償トライアルをダウンロード
30日間の無償トライアルへ製品の詳細
Act CRM ODBC Driver は、ODBC 接続をサポートするさまざまなアプリケーションからAct CRM への接続を実現するパワフルなツールです。
標準のODBC ドライバーインターフェースを使用して、データベースのようにAct CRM データにアクセスし、Companies、Contact、Groups、Opportunities などの読み、書き、更新を実行できます。
CData

こんにちは!ドライバー周りのヘルプドキュメントを担当している古川です。
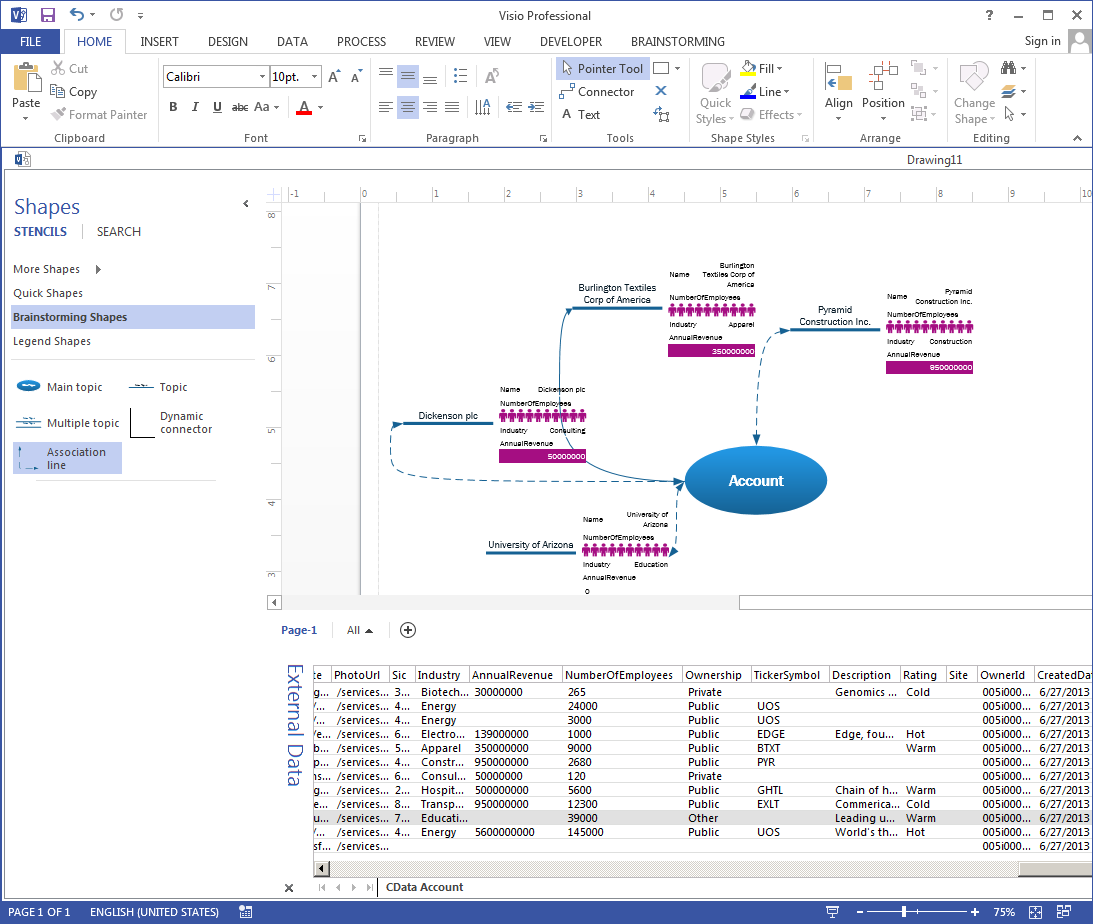
CData ODBC Driver for ActCRM を使ってVisio ダイアグラムへのデータ入力プロセスを自動化し、ダイアグラムを最新の状態に保つことができます。ドライバーはAct CRM データをODBC データソースとして出力し、Microsoft Office のようなODBC サポートを組み込んだアプリケーションからのアクセスを実現します。この記事では、Act CRM データをリンクしたVisio プロジェクトでブレーンストーミングを始めるためのシンプルなダイアグラムを作成する方法を紹介します。
CData ODBC ドライバは、以下のような特徴を持ったリアルタイムデータ連携ソリューションです。
CData ODBC ドライバでは、1.データソースとしてAct CRM の接続を設定、2.Visio 側でODBC Driver との接続を設定、という2つのステップだけでデータソースに接続できます。以下に具体的な設定手順を説明します。
まずは、本記事右側のサイドバーからActCRM ODBC Driver の無償トライアルをダウンロード・インストールしてください。30日間無償で、製品版の全機能が使用できます。
接続プロパティが未設定の場合は、はじめにODBC DSN(データソース名)に設定します。これはドライバーのインストールの最後の手順にあたります。Microsoft ODBC Data Source Administrator を使用して、ODBC DSN を作成および設定できます。
Authentication セクションのUser とPassword プロパティに、有効なAct! ユーザー資格情報を設定する必要があります。認証値に加えて、以下も参照してください。
Act! Premium への接続
認証値に加えて、Act! へのURL も設定が必要です。例:https://eup1-iis-04.eu.hosted.act.com/。
さらに、接続するActDatabase を指定する必要があります。これは、ご自分のアカウントの「About Act! Premium」メニューのページ右上にある「?」で確認することができます。表示されたウィンドウの「Database Name」を使用します。
Act! Premium Cloud への接続
Act! Premium Cloud アカウントに接続するには、ActCloudName プロパティも指定する必要があります。このプロパティはCloud アカウントのURL アドレスで確認できます。例:https://eup1-iis-04.eu.hosted.act.com/ActCloudName/。
ActCRM メタデータの取得は高負荷になる可能性があることに注意してください。CacheMetadata プロパティを設定して、メタデータをローカルに格納することをお勧めします。
以下の手順に従い、データ選択ウィザードを使ってダイアグラムにデータをインポートします。
以下の手順で、Act CRM エンティティを図形にリンクする方法の1つである、データから図形を作成する方法を示す簡単なダイアグラムを作成します。
「データ」タブから、外部のAct CRM データと図形を同期してダイアグラムを更新することができます。
このようにCData ODBC ドライバと併用することで、270を超えるSaaS、NoSQL データをコーディングなしで扱うことができます。30日の無償評価版が利用できますので、ぜひ自社で使っているクラウドサービスやNoSQL と合わせて活用してみてください。
CData ODBC ドライバは日本のユーザー向けに、UI の日本語化、ドキュメントの日本語化、日本語でのテクニカルサポートを提供しています。