製品をチェック

無償トライアル:

無償トライアルへ

製品の情報と無償トライアルへ:

Azure Analysis Services JDBC Driver

Azure Analysis Services データに連携するJava アプリケーションを素早く、簡単に開発できる便利なドライバー。

データ連携でお困りですか?

お問い合わせ

JDBC Data Source for AAS との間にInformatica マッピングを作成


標準のJDBC 接続プロセスを使用して、Informatica でAzure Analysis Services データオブジェクトを作成します。JAR をコピーし、接続してください。


azureanalysisservices ロゴ画像
jdbc ロゴ画像

JDBC

Informatica PowerCenter ロゴ画像

Informatica は、データを転送・変換するための強力で立派な手段を提供します。CData JDBC Driver for AAS を利用することで、Informatica の強力なデータ転送および操作機能とシームレスに統合される、業界で実証済みの標準に基づくドライバーにアクセスできます。このチュートリアルでは、Informatica PowerCenter でAzure Analysis Services を転送および参照する方法を示します。

ドライバーをデプロイ

ドライバーをInformatica PowerCenter サーバーに展開するために、インストールディレクトリのlib サブフォルダにあるCData JAR および.lic ファイルを次のフォルダにコピーします。Informatica-installation-directory\services\shared\jars\thirdparty.

Developer ツールでAzure Analysis Services を使用するには、インストールディレクトリのlib サブフォルダにあるCData JAR および.lic ファイルを次のフォルダにコピーする必要があります。

  • Informatica-installation-directory\client\externaljdbcjars
  • Informatica-installation-directory\externaljdbcjars

JDBC 接続の作成

以下のステップに従って、Informatica Developer に接続します。

  1. [Connection Explorer]ペインで[domain]を右クリックし、[Create a Connection]をクリックします。
  2. 表示される[New Database Connection]ウィザードで、接続の名前とId を入力し、[Type]メニューで[JDBC]を選択します。
  3. [JDBC Driver Class Name]のプロパティで次のコードを入力します。 cdata.jdbc.aas.AASDriver
  4. [Connection String]プロパティでは、Azure Analysis Services の接続プロパティを使用してJDBC URLを入力します。

    To connect to Azure Analysis Services, set the Url property to a valid server, for instance, asazure://southcentralus.asazure.windows.net/server, in addition to authenticating. Optionally, set Database to distinguish which Azure database on the server to connect to.

    Azure Analysis Services uses the OAuth authentication standard. OAuth requires the authenticating user to interact with Azure Analysis Services using the browser. You can connect without setting any connection properties for your user credentials. See the Help documentation for more information.

    ビルトイン接続文字列デザイナ

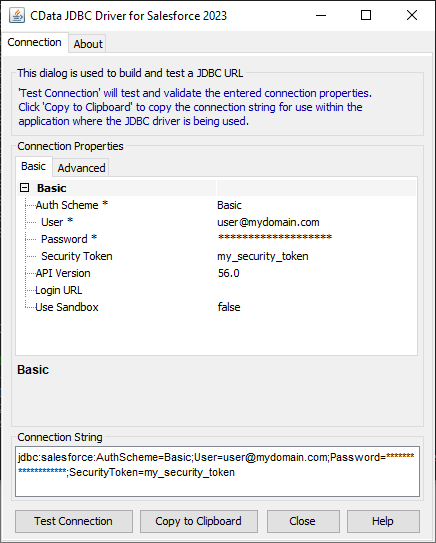
    JDBC URL の構成については、Azure Analysis Services JDBC Driver に組み込まれている接続文字列デザイナを使用してください。JAR ファイルのダブルクリック、またはコマンドラインからJAR ファイルを実行します。

    java -jar cdata.jdbc.aas.jar

    接続プロパティを入力し、接続文字列をクリップボードにコピーします。

    Using the built-in connection string designer to generate a JDBC URL (Salesforce is shown.)

    以下は一般的な接続文字列です。

    jdbc:aas:URL=asazure://REGION.asazure.windows.net/server;InitiateOAuth=GETANDREFRESH

Azure Analysis Services テーブルを参照

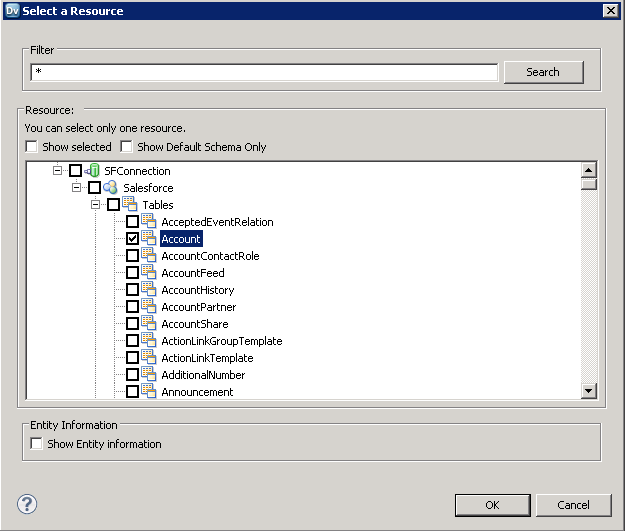
ドライバーJAR をクラスパスに追加してJDBC 接続を作成すると、Informatica のAzure Analysis Services エンティティにアクセスできるようになります。以下のステップに従ってAzure Analysis Services に接続し、Azure Analysis Services テーブルを参照します。

  1. リポジトリに接続します。
  2. [Connection Explorer]で、[connection]を右クリックし、[Connect]をクリックします。
  3. [Show Default Schema Only]オプションをクリアします。 The driver models Azure Analysis Services entities as relational tables.(Salesforce is shown.)

以下より、[Data Viewer]でAzure Analysis Services テーブルを参照できるようになります。テーブルの[node]を右クリックし、[Open]をクリックします。[Data Viewer]で[Run]をクリックします。

Table data and metadata in the Data Viewer.(Salesforce is shown.)

Azure Analysis Services データオブジェクトの作成

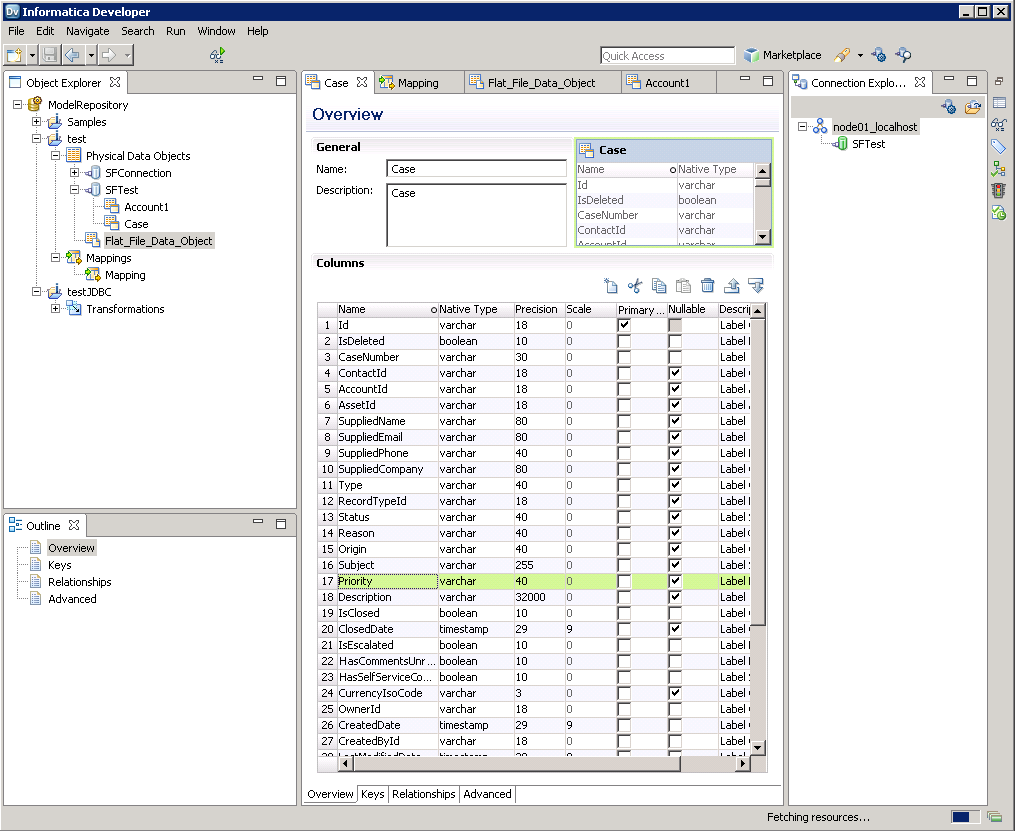
以下のステップに従って、プロジェクトにAzure Analysis Services テーブルを追加します。

  1. Azure Analysis Services でテーブルを選択し、右クリックして[Add to Project]をクリックします。
  2. 表示されるダイアログでリソースごとにデータオブジェクトを作成するオプションを選択します。
  3. [Select Location]ダイアログで、プロジェクトを選択します。

    マッピングの作成

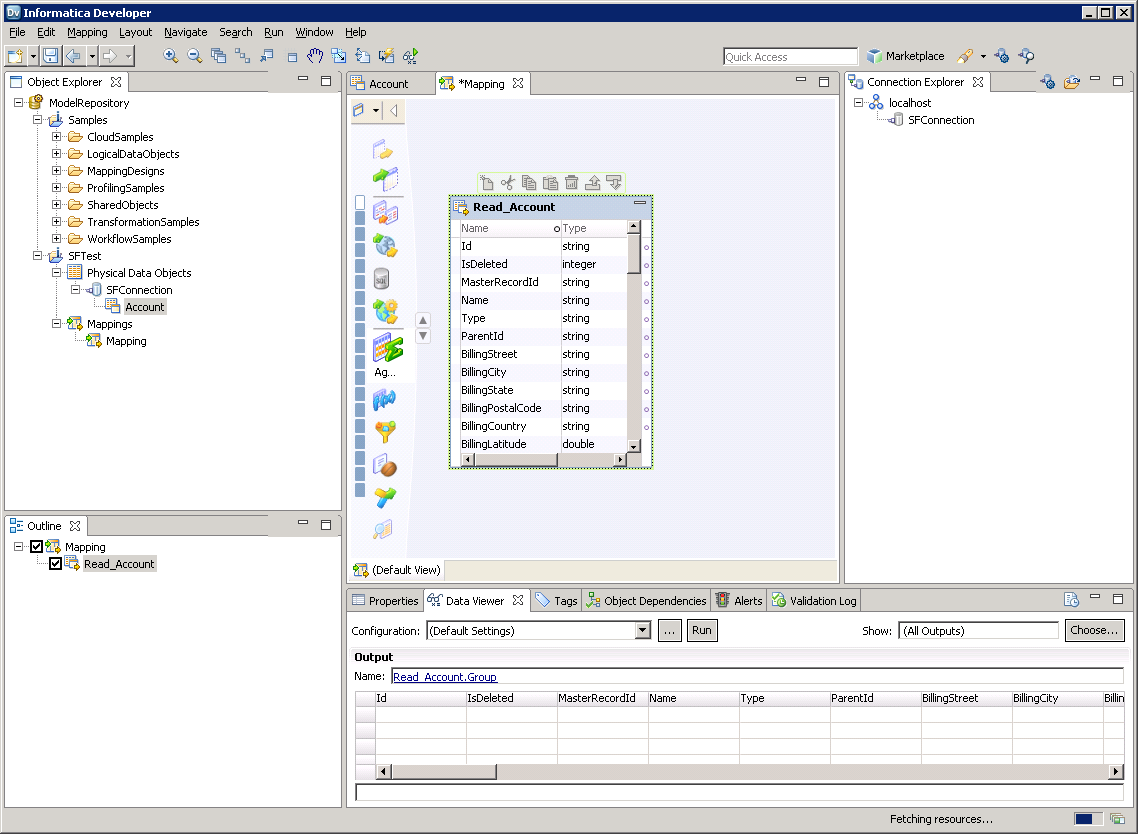
    以下のステップに従って、マッピングにAzure Analysis Services ソースを追加します。

    1. [Object Explorer]でプロジェクトを右クリックし、[New]->[Mapping]と進みます。
    2. Azure Analysis Services 接続のノードを展開し、テーブルのデータオブジェクトをエディターにドラッグします。.
    3. 表示されるダイアログで、[Read]オプションを選択します。
    The source Azure Analysis Services table in the mapping.(Salesforce is shown.)

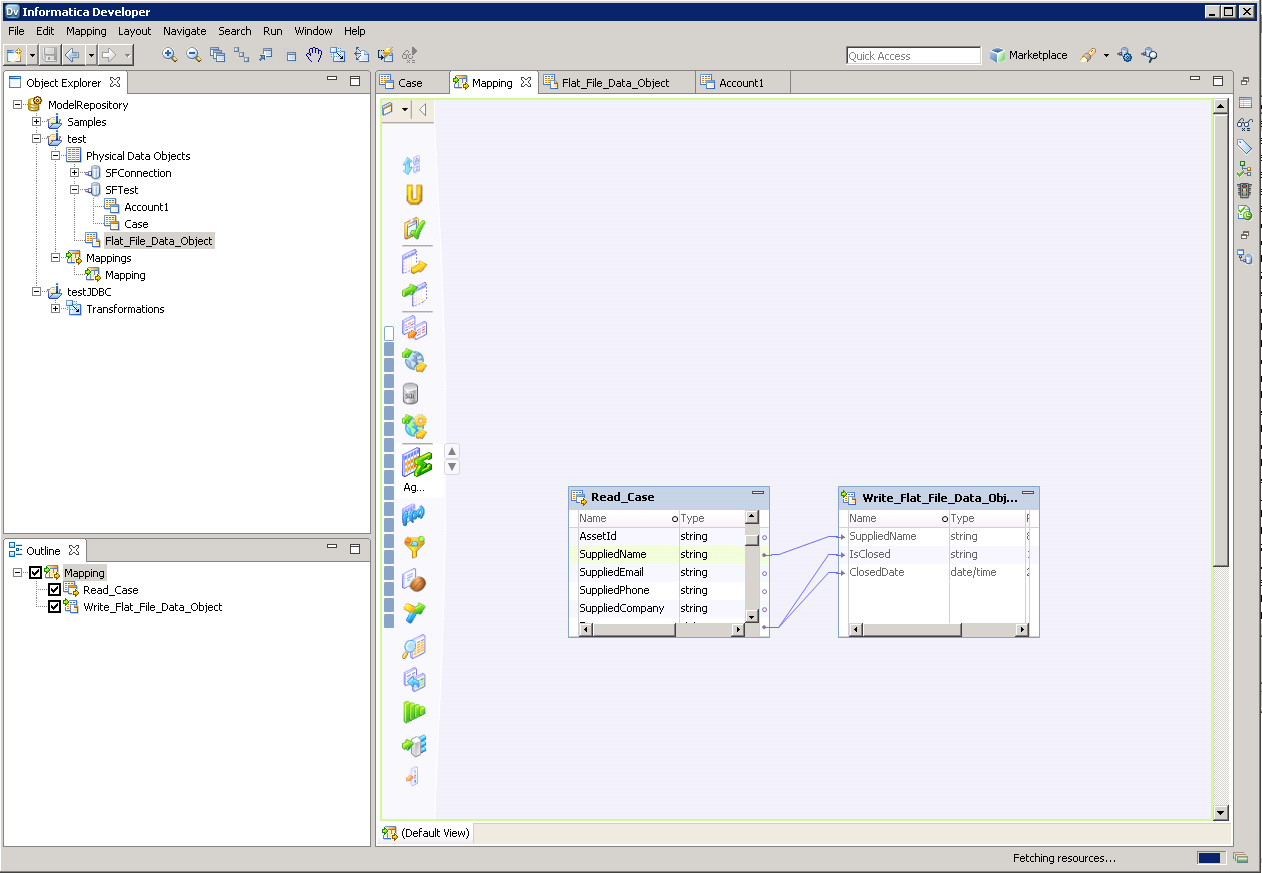
    以下のステップに従って、Azure Analysis Services カラムをフラットファイルにマッピングします。

    1. [Object Explorer]でプロジェクトを右クリックし、[New]->[Data Object]と進みます。
    2. [Flat File Data Object]->[Create as Empty]->[Fixed Width]と選択していきます。
    3. Azure Analysis Services オブジェクトのプロパティで必要な行を選択して右クリックし、[copy]をクリックします。行をフラットファイルのプロパティにペーストします。
    4. フラットファイルのデータオブジェクトをマッピングにドラッグします。
    5. 表示されるダイアログで、[Write]オプションを選択します。
    6. クリックしてドラッグすることで、列を接続します。

    Azure Analysis Services を転送するために、ワークスペースで右クリックし、[Run Mapping]をクリックします。

    The completed mapping.(Salesforce is shown.)