製品をチェック

無償トライアル:

無償トライアルへ

製品の情報と無償トライアルへ:

Azure Data Lake Storage ADO.NET Provider

Azure Data Lake Storage データに連携する.NET アプリケーションを素早く、簡単に開発できる便利なドライバー。

ADO.NET 経由でTIBCO Spotfire でAzure Data Lake Storage データに連携してをビジュアライズ


TIBCO Spotfire のダッシュボードにAzure Data Lake Storage データの連携が驚くほど簡単に。


加藤龍彦
ウェブデベロッパー


この記事では、CData ADO.NET Provider for ADLS をTIBCO Spotfire で使う方法を説明します。接続を確立して、簡単なダッシュボードを作成していきます。

  1. [Add Data Tables]をクリックして、CData ADO.NET データソースを追加します。
  2. [Add]>[Database]をクリックします。
  3. プロバイダーを選択して[Configure]をクリックします。
  4. 接続設定を定義します。一般的な接続文字列は次のとおりです。

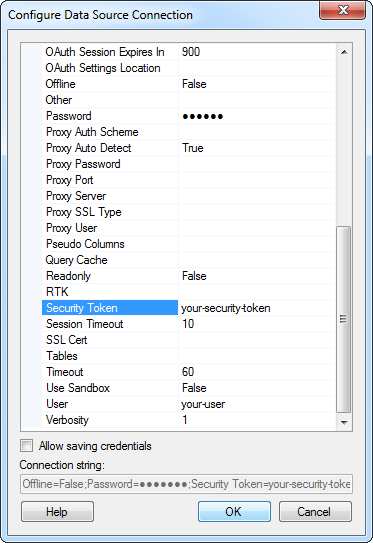
    Schema=ADLSGen2;Account=myAccount;FileSystem=myFileSystem;AccessKey=myAccessKey;

    Authenticating to a Gen 1 DataLakeStore Account

    Gen 1 uses OAuth 2.0 in Azure AD for authentication.

    For this, an Active Directory web application is required. You can create one as follows:

    1. Sign in to your Azure Account through the .
    2. Select "Azure Active Directory".
    3. Select "App registrations".
    4. Select "New application registration".
    5. Provide a name and URL for the application. Select Web app for the type of application you want to create.
    6. Select "Required permissions" and change the required permissions for this app. At a minimum, "Azure Data Lake" and "Windows Azure Service Management API" are required.
    7. Select "Key" and generate a new key. Add a description, a duration, and take note of the generated key. You won't be able to see it again.

    To authenticate against a Gen 1 DataLakeStore account, the following properties are required:

    • Schema: Set this to ADLSGen1.
    • Account: Set this to the name of the account.
    • OAuthClientId: Set this to the application Id of the app you created.
    • OAuthClientSecret: Set this to the key generated for the app you created.
    • TenantId: Set this to the tenant Id. See the property for more information on how to acquire this.
    • Directory: Set this to the path which will be used to store the replicated file. If not specified, the root directory will be used.

    Authenticating to a Gen 2 DataLakeStore Account

    To authenticate against a Gen 2 DataLakeStore account, the following properties are required:

    • Schema: Set this to ADLSGen2.
    • Account: Set this to the name of the account.
    • FileSystem: Set this to the file system which will be used for this account.
    • AccessKey: Set this to the access key which will be used to authenticate the calls to the API. See the property for more information on how to acquire this.
    • Directory: Set this to the path which will be used to store the replicated file. If not specified, the root directory will be used.

    Connection properties in the Configure Data Source Connection dialog. (Salesforce is shown.)
  5. ダッシュボードに追加したいテーブルを選択します。この例ではResources を使います。SQL クエリも指定できます。ドライバーは標準SQL シンタックスをサポートしています。 Tables and columns selected in the tree or specified by an SQL query. (Salesforce is shown.)
  6. ライブデータを使いたい場合は、[Keep Data Table External]オプションをクリックします。このオプションは、データの変更をリアルタイムでダッシュボードに反映します。

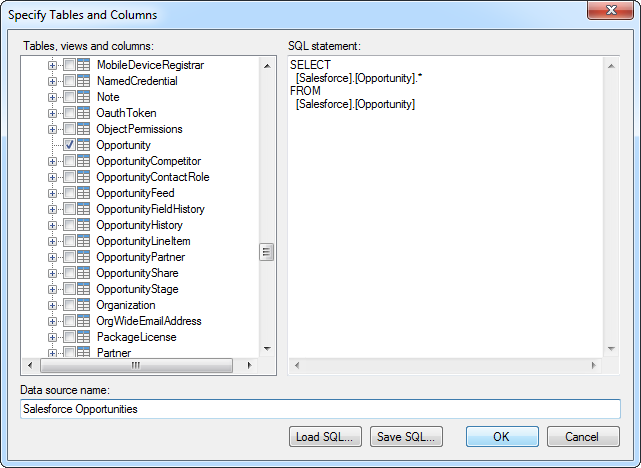
    データをメモリにロードしてローカルで処理したい場合は、[Import Data Table]オプションをクリックします。このオプションは、オフラインでの使用、またはスローなネットワーク接続によりダッシュボードがインタラクティブでない場合に使用します。

  7. テーブルを追加すると[Recommended Visualizations]ウィザードが表示されます。テーブルを選択すると、Spotfire はカラムのデータ型を使ってnumber、time、category カラムを検出します。この例ではNumbers セクションでPermission を、Categories セクションでFullPath を使用しています。Recommended visualizations for the imported data table. (Salesforce is shown.)

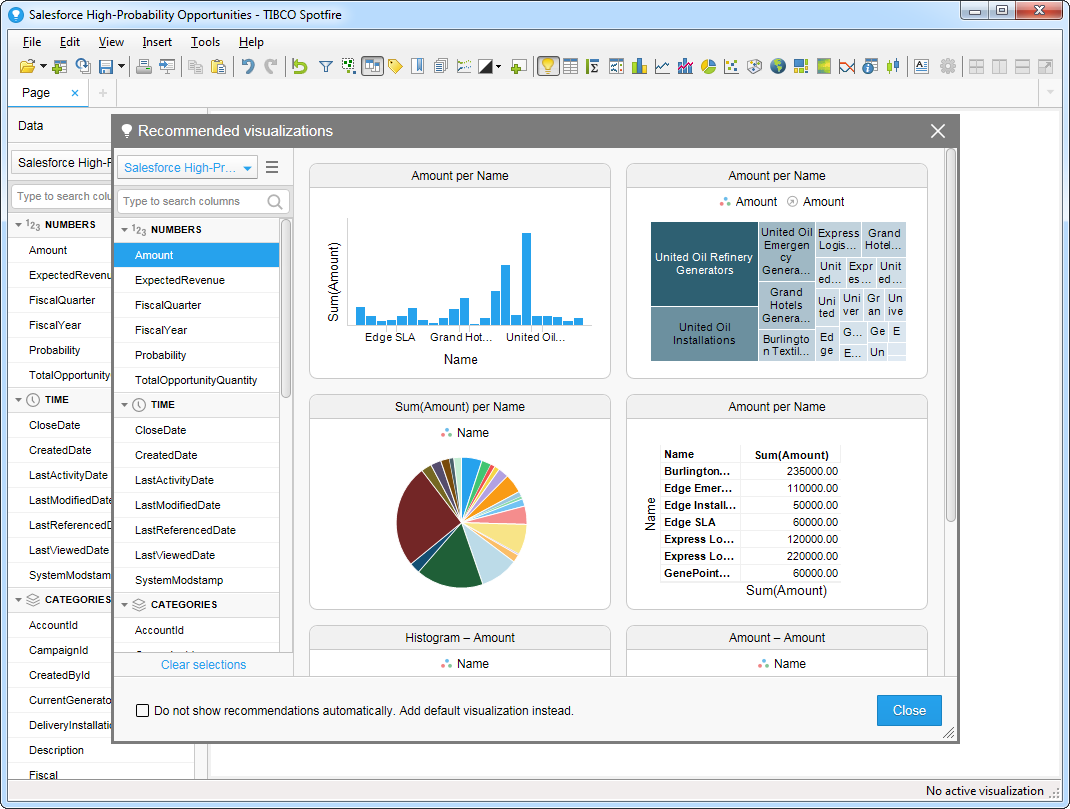
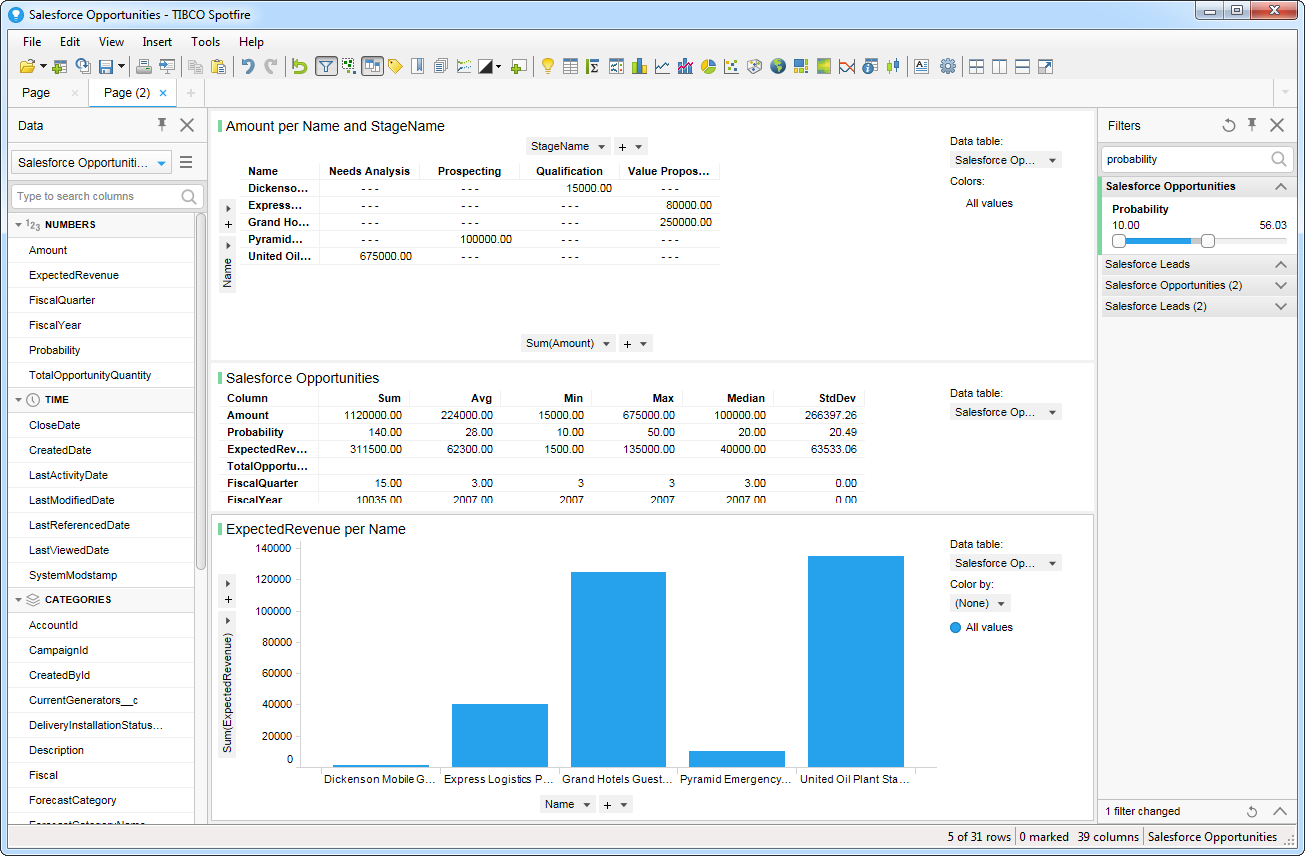
[Recommended Visualizations]ウィザードでいくつかビジュアライズしたら、ダッシュボードにその他の修正を加えられます。例えば、ページにフィルタを適用することで、高確率なopportunities にズームインできます。フィルタを追加するには、[Filter]ボタンをクリックします。各クエリで利用可能なフィルタは、[Filters]ペインに表示されます。

A simple dashboard with a global filter. (Salesforce is shown.)