製品をチェック

無償トライアル:

無償トライアルへ

製品の情報と無償トライアルへ:

Azure Data Lake Storage ODBC Driver

Azure Data Lake Storage ODBC Driver を使って、ODBC 接続をサポートするあらゆるアプリケーション・ツールからAzure Data Lake Storage にデータ連携。

Azure Data Lake Storage にデータベースと同感覚でアクセスして、Azure Data Lake Storage データに使い慣れたODBC インターフェースで連携。

データ連携でお困りですか?

お問い合わせ

PowerPivotでAzure Data Lake Storage データを連携して取得し分析


この記事では、PowerPivotからCData ODBC Driver for ADLS を使う方法を説明します。[Table Import Wizard]を使ってAzure Data Lake Storage データをロードします。インポートに使うクエリをビジュアルに作成、あるいはドライバーがサポートするSQL を使って作成できます。


古川えりか
コンテンツスペシャリスト


ODBC プロトコルは多くのBusiness Intelligence (BI) および帳票ツールで異なるデータベースのデータにアクセスするために使われています。CData ODBC Drive を使って、簡単にAzure Data Lake Storage をデータ連携できます。この記事では、CData Driver for ADLS を使ってPowerPivot にデータをインポートします。

Azure Data Lake Storage データに接続

下記の手順に従って、PowerPivot からAzure Data Lake Storage に接続します。

  1. 接続プロパティが未設定の場合には、DSN(データソース名)の設定を行います。Microsoft ODBC データソースアドミニストレーターを使ってODBC DSN を作成および設定できます。

    未指定の場合は、初めにODBC DSN (data source name) で接続プロパティを指定します。ドライバーのインストールの最後にアドミニストレーターが開きます。Microsoft ODBC Data Source Administrator を使用して、ODBC DSN を作成および構成できます。

    Authenticating to a Gen 1 DataLakeStore Account

    Gen 1 uses OAuth 2.0 in Azure AD for authentication.

    For this, an Active Directory web application is required. You can create one as follows:

    1. Sign in to your Azure Account through the .
    2. Select "Azure Active Directory".
    3. Select "App registrations".
    4. Select "New application registration".
    5. Provide a name and URL for the application. Select Web app for the type of application you want to create.
    6. Select "Required permissions" and change the required permissions for this app. At a minimum, "Azure Data Lake" and "Windows Azure Service Management API" are required.
    7. Select "Key" and generate a new key. Add a description, a duration, and take note of the generated key. You won't be able to see it again.

    To authenticate against a Gen 1 DataLakeStore account, the following properties are required:

    • Schema: Set this to ADLSGen1.
    • Account: Set this to the name of the account.
    • OAuthClientId: Set this to the application Id of the app you created.
    • OAuthClientSecret: Set this to the key generated for the app you created.
    • TenantId: Set this to the tenant Id. See the property for more information on how to acquire this.
    • Directory: Set this to the path which will be used to store the replicated file. If not specified, the root directory will be used.

    Authenticating to a Gen 2 DataLakeStore Account

    To authenticate against a Gen 2 DataLakeStore account, the following properties are required:

    • Schema: Set this to ADLSGen2.
    • Account: Set this to the name of the account.
    • FileSystem: Set this to the file system which will be used for this account.
    • AccessKey: Set this to the access key which will be used to authenticate the calls to the API. See the property for more information on how to acquire this.
    • Directory: Set this to the path which will be used to store the replicated file. If not specified, the root directory will be used.

    一般的な接続文字列は次のとおりです:

    Schema=ADLSGen2;Account=myAccount;FileSystem=myFileSystem;AccessKey=myAccessKey;

    Microsoft ODBC データソースアドミニストレーターで必要なプロパティを設定する方法は、ヘルプドキュメントの「はじめに」を参照してください。

  2. Excel で[PowerPivot]タブの[管理]アイコンをクリックしてPowerPivot を開きます。
  3. [外部データソースの取り込み]から[その他のソース]ボタンをクリックします。

    The Get External Data from Other Data Sources option in the PowerPivot window.
  4. OLEDB/ODBC ソースオプションを選択して、[次へ]をクリックします。The option to import from an OLEDB/ODBC data source in the Table Import Wizard.
  5. [ビルド]をクリックして[データリンクプロパティ]ダイアログを開きます。このダイアログでは、DSN に基づいて自動的に接続文字列がビルドされます。
  6. [プロバイダー]タブで[Microsoft OLEDB Provider for ODBC Drivers]オプションを選択します。
  7. [接続]タブで[データソース名を使用する]オプションを選択して、メニューからAzure Data Lake Storage DSN を選択します。CData Azure Data Lake Storage Source DSN はインストール時に作成されます。 The Data Link Properties dialog, where the DSN is selected in the Table Import Wizard. (Salesforce is shown.)

Azure Data Lake Storage データをインポート

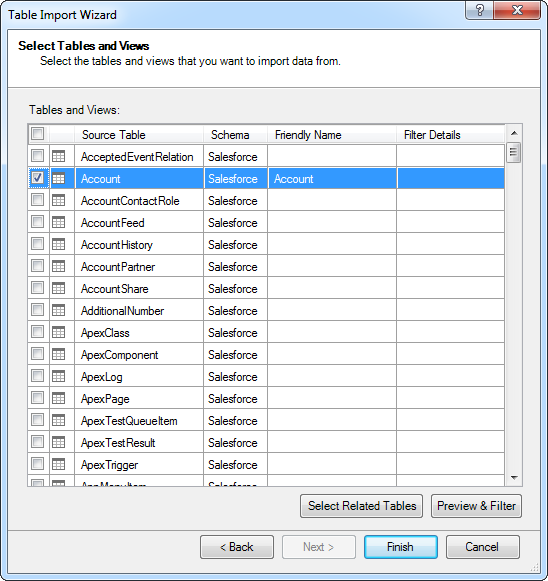
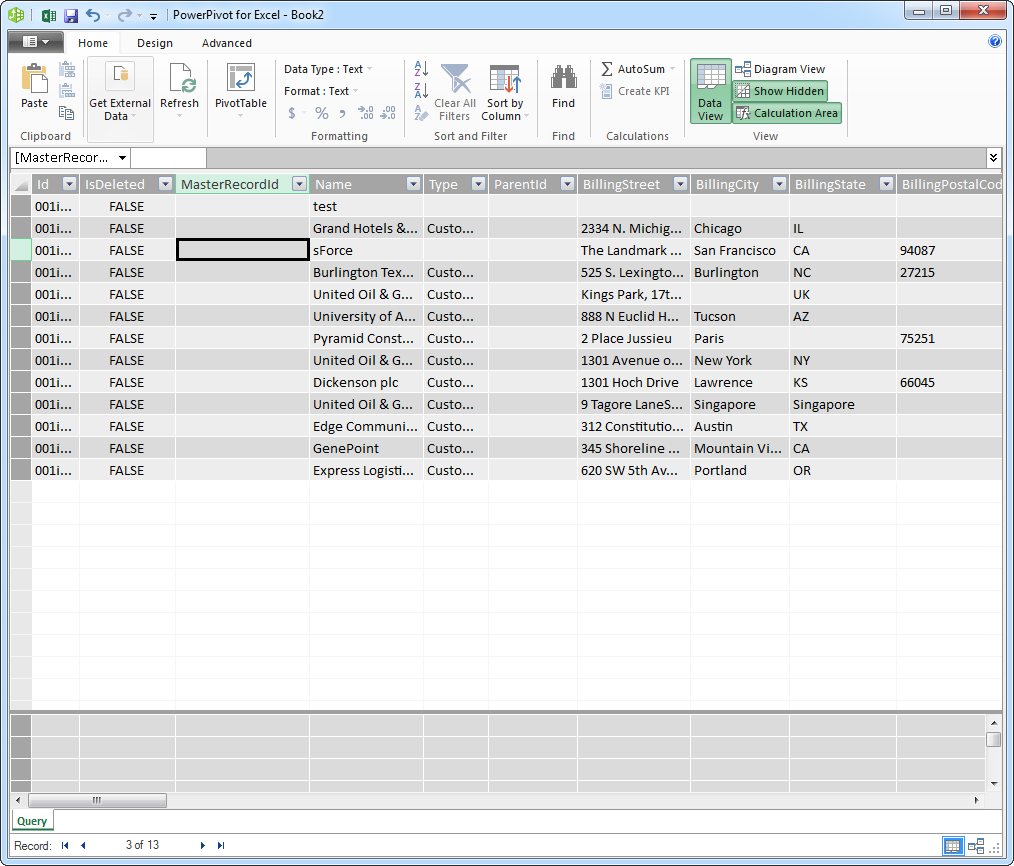
下記の手順に従って、ウィザードを使ってAzure Data Lake Storage のテーブルからデータをロードします。Azure Data Lake Storage のカラムをウィザードを使って選択、フィルタ、およびソートすると、PowerPivot は実行されるクエリを生成します。

  1. [テーブルのインポートウィザード]でDSN を選択してから、[テーブルとビューの一覧から選択し、インポートするデータを選択する]オプションを選択すると、Azure Data Lake Storage で利用できるテーブルとビューのリストを見ることができます。The list of available tables. (Salesforce is shown.)

  2. [プレビューとフィルター]をクリックして特定のカラムを選択、データをソート、およびフィルタをカラム値に基づいて視覚的にビルドします。 The data preview with an interface to filter and sort the results to be imported. (Salesforce is shown.)

カスタムクエリインポート

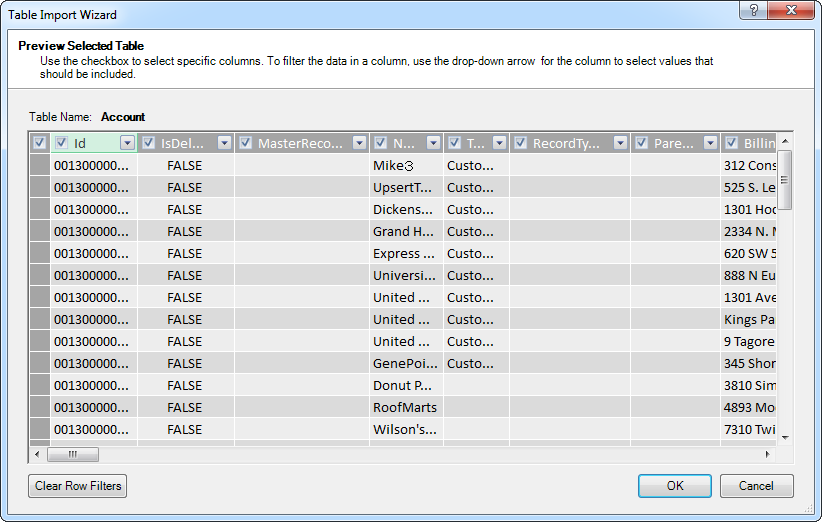
インポートするテーブルを選ぶ以外に、特定のカラムをインポートするクエリの指定やフィルタの定義もできます。ドライバーは元になるAzure Data Lake Storage API に相当する、シンプルで直観的なSQL ダイアレクトをサポートします。
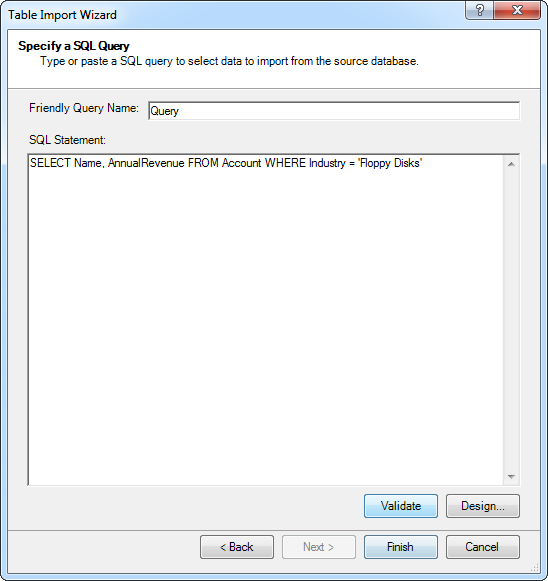
  1. [テーブルのインポートウィザード]でDSN を選択してから、[インポートするデータを指定するクエリを記述する]オプションを選択してクエリを書きます。Step two of the Table Import Wizard: Choose How to Import the Data.
  2. [SQL ステートメント]ボックスにクエリを入れます。 [検証]をクリックしてクエリステートメントが有効かどうかを確認します。 [デザイン]をクリックして結果をプレビューし、インポートする前にクエリを直します。

    WHERE 句を使ってフィルタライテリアクを指定できます。利用可能なSQL 機能の例については、ヘルプドキュメントの「サポートされるSQL」を参照してください。

    The query to be used to import the data. (Salesforce is shown.)
  3. ウィザードを終了して選んだクエリでデータをインポートします。 The imported data.