ノーコードでクラウド上のデータとの連携を実現。
詳細はこちら →Bullhorn CRM Driver の30日間無償トライアルをダウンロード
30日間の無償トライアルへCData


こんにちは!ドライバー周りのヘルプドキュメントを担当している古川です。
この記事では、CData JDBC Driver for BullhornCRM をRapidMiner のプロセスと簡単に統合する方法を示します。この記事では、CData JDBC Driver for BullhornCRM を使用してBullhorn CRM をRapidMiner のプロセスに転送します。
以下のステップに従ってBullhorn CRM へのJDBC 接続を確認できます。
jdbc:bullhorncrm:
cdata.jdbc.bullhorncrm.BullhornCRMDriver
Bullhorn CRM に接続するには、Bullhorn CRM アカウントの資格情報を入力します。また、DataCenterCode プロパティをデータセンターに対応するデータセンターコードに設定してください。詳しくは、こちら を参照してください。
CLS2、CLS21 などのコードはクラスタID で、ログインした際のブラウザのURL(アドレスバー)に含まれます。
例えば、
https://cls21.bullhornstaffing.com/BullhornSTAFFING/MainFrame.jsp?#no-baこちらのURL は、ログインしたユーザーがCLS21 クラスタに存在することを示しています。
ちなみに、コールバックURL の末尾に"/" を含む値、例えば http://localhost:33333/ を指定する場合は、アプリケーション設定で指定したコールバックURL と厳密に同じ値を指定する必要があります。このパラメータの文字が一致しない場合、エラーとなります。
Bullhorn CRM ではOAuth 2.0 認証標準を利用できます。 OAuth を使用して認証するには、すべてのシナリオでカスタムOAuth アプリケーションを作成して設定する必要があります。詳しい認証方法については、ヘルプドキュメントの「OAuth」セクションを参照してください。
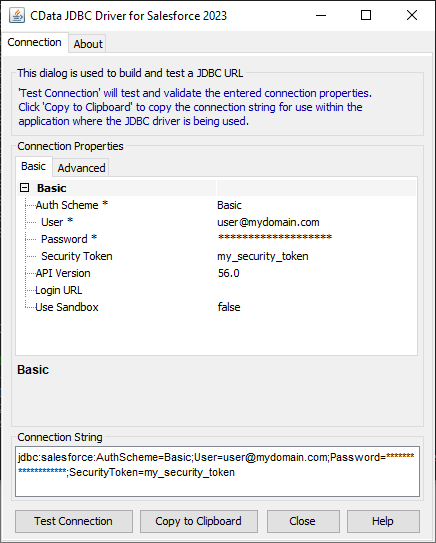
JDBC URL の構成については、Bullhorn CRM JDBC Driver に組み込まれている接続文字列デザイナを使用してください。JAR ファイルのダブルクリック、またはコマンドラインからJAR ファイルを実行します。
java -jar cdata.jdbc.bullhorncrm.jar
接続プロパティを入力し、接続文字列をクリップボードにコピーします。
以下は一般的な接続文字列です。
DataCenterCode=CLS33;OAuthClientId=myoauthclientid;OAuthClientSecret=myoauthclientsecret;InitiateOAuth=GETANDREFRESH
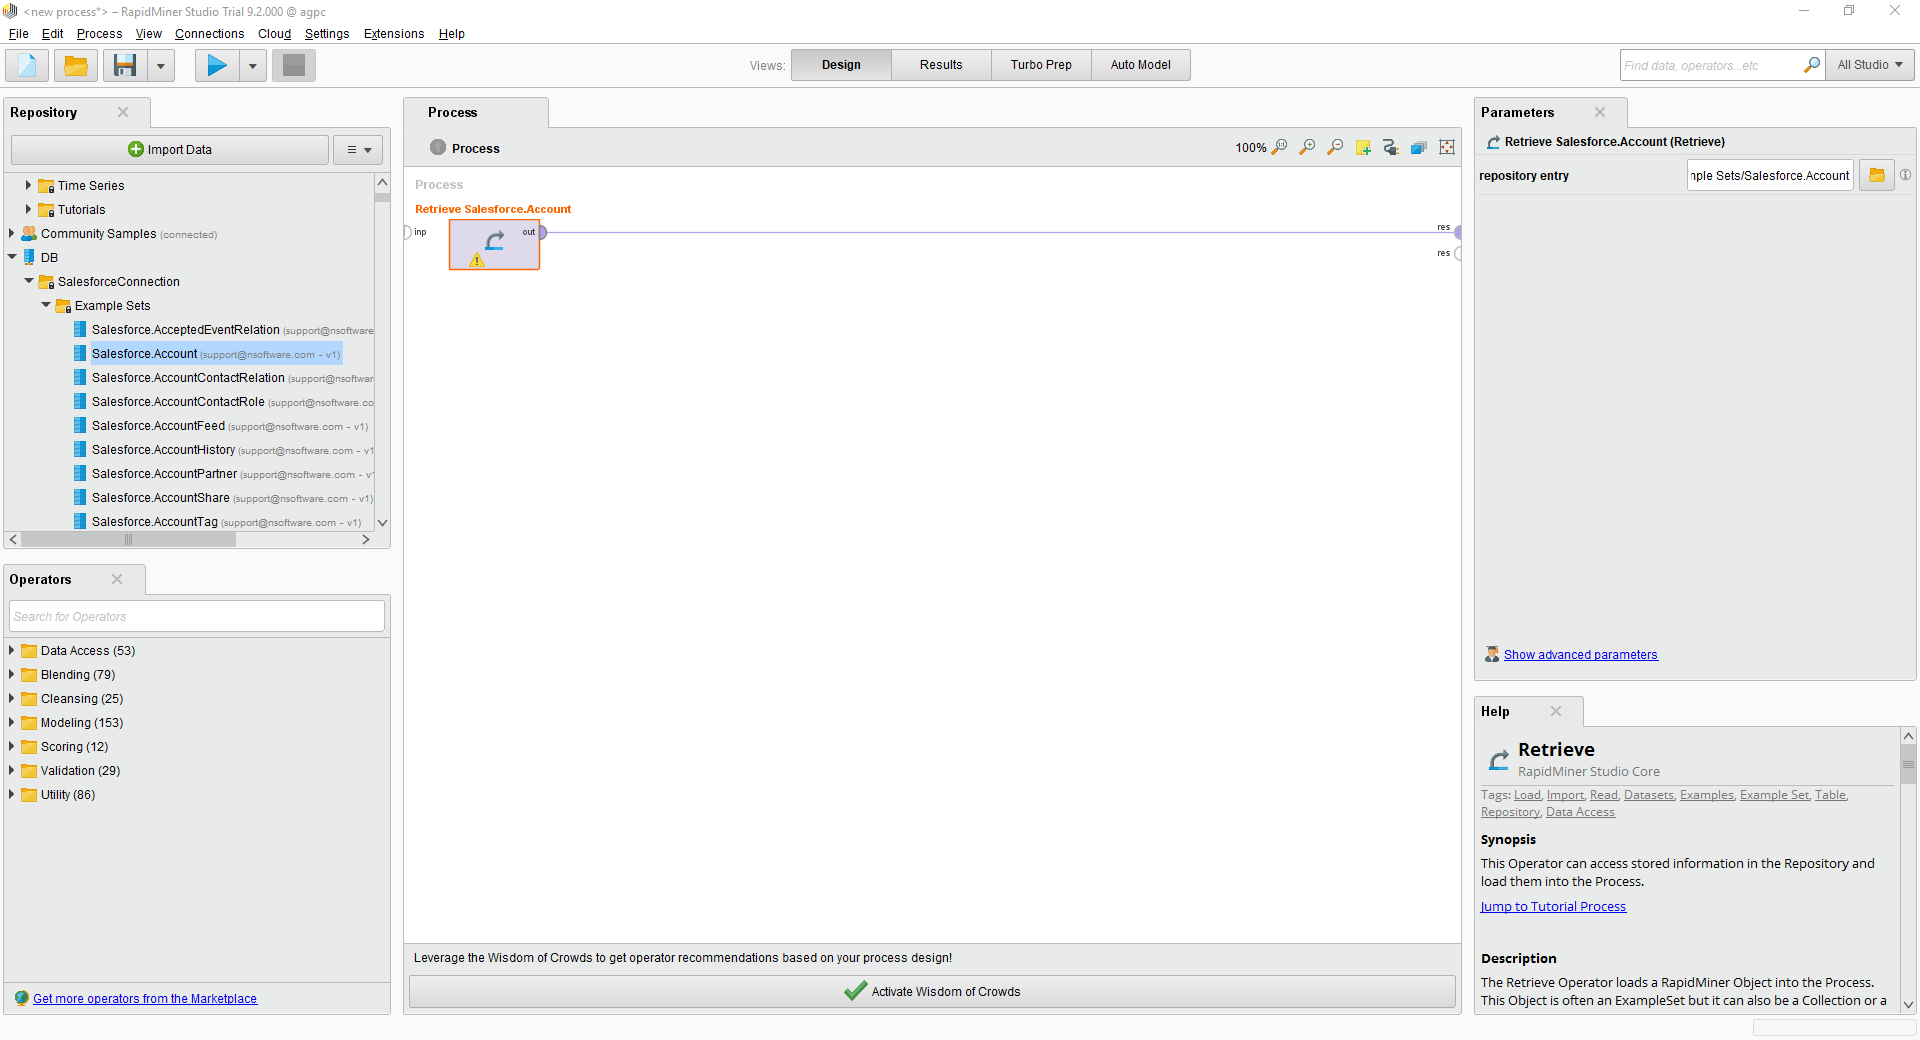
プロセス内の様々なRapidMiner オペレーターとのBullhorn CRM 接続を使用できます。Bullhorn CRM を取得するには、[Operators]ビューから[Retrieve]をドラッグします。
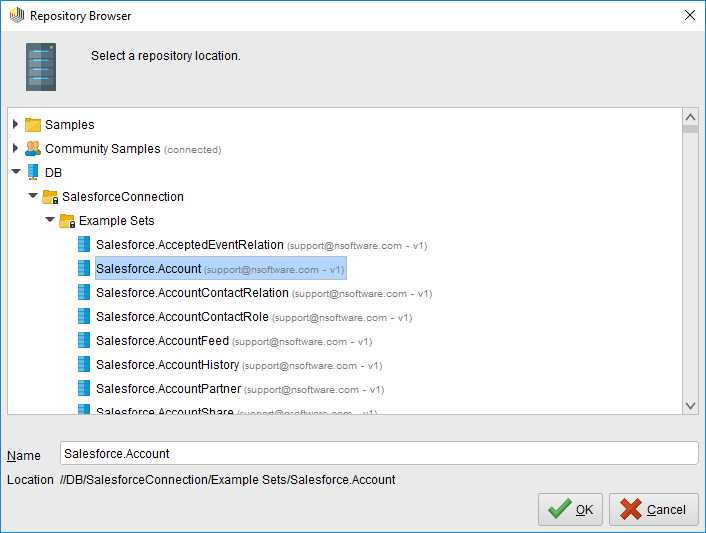 [Retrieve]オペレータを選択した状態で、[repository entry]の横にあるフォルダアイコンをクリックして[Parameters]ビューで取得するテーブルを定義できます。表示されるRepository ブラウザで接続ノードを展開し、目的のサンプルセットを選択できます。
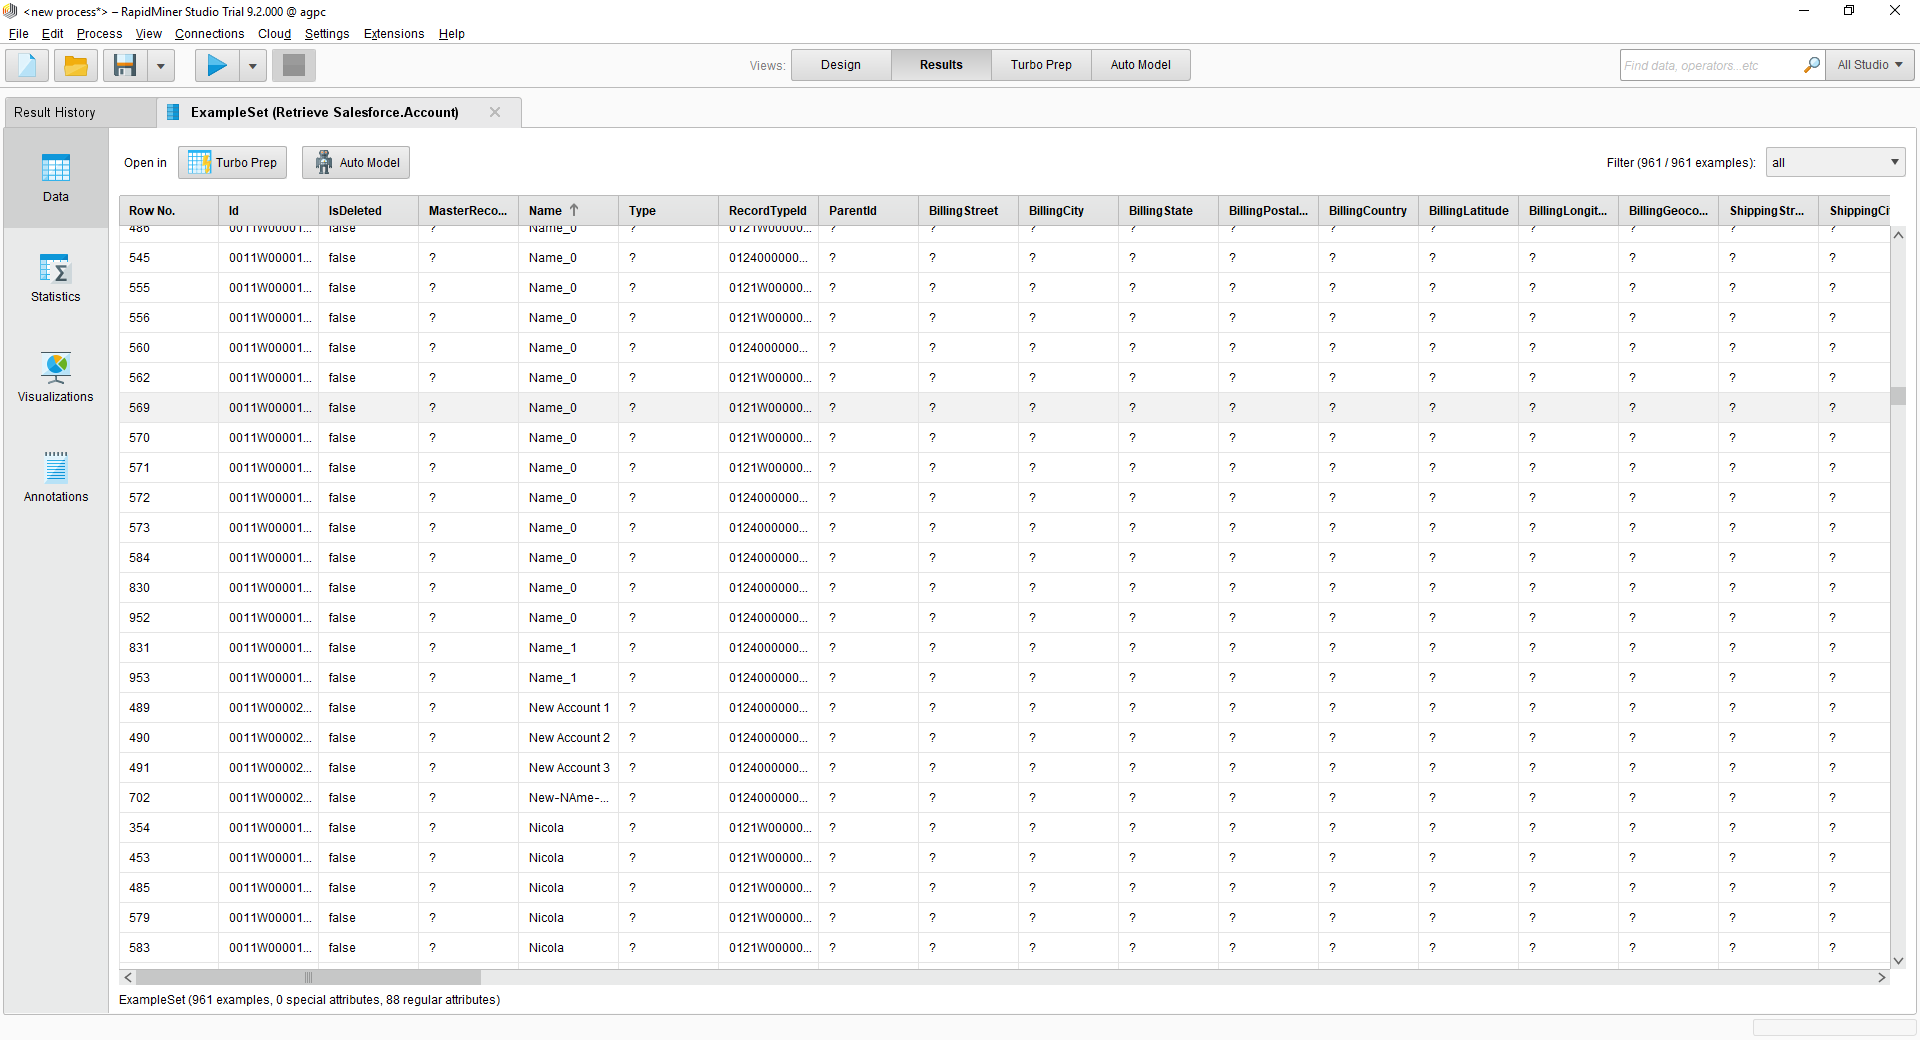
最後に、[Retrieve]プロセスから結果に出力をワイヤリングし、プロセスを実行してBullhorn CRM を確認します。