Discover how a bimodal integration strategy can address the major data management challenges facing your organization today.
Get the Report →


Edit and Search NetSuite External Objects in Salesforce
Salesforce Connect enables Salesforce users to connect to data from OData sources from Salesforce in the same way that users interact with standard Salesforce objects. Through Salesforce Connect, Salesforce customers can build real-time analysis from within their Salesforce dashboard and other Salesforce1 apps. In this article we are going to show you how you can enable bi-directional connectivity between NetSuite CRM and ERP data from Salesforce using the API Server from CData Software to create OData feeds of live NetSuite data.
The API Servers from CData Software is a lightweight Web application that proxies live data through standards-based interfaces like ODATA, SOAP, REST, HTML, RSS, ATOM, JSON, XLS, and CSV, making it easily accessible across platforms and devices. The CData API Server enables you to securely feed NetSuite Leads, Contacts, and Opportunities to Salesforce Connect.
In this article, we will consume NetSuite objects in Salesforce filter lists. We will also create related lists that show related NetSuite and Salesforce objects. You can follow the same general procedure for connecting to data from any other 80+ sources supported by the API Server, including — Microsoft Dynamics, QuickBooks, Oracle, Google services, etc.
The API Server makes it easy to work with nontraditional data sources like NetSuite as tables. The tables are intuitive and the underlying OData protocol is transparent. However, the benefits are immediately apparent: OData enables you to see changes to your data in real time.
See NetSuite as Salesforce Objects
After you have configured Salesforce to connect to the API Server, you can use NetSuite external objects just as you would standard Salesforce objects. For example, you can create a filter list to search NetSuite invoices from your dashboard:
")
Create a related list to display associated NetSuite invoices alongside your Salesforce accounts:
") Edit, save, and delete NetSuite employees from tabs on the Salesforce dashboard:
Edit, save, and delete NetSuite employees from tabs on the Salesforce dashboard:
")
Set Up the API Server
The same setup process can be followed for all instances of the API Server: deploy, connect, and authorize.
Deploy
The API Server runs on your own server. On Windows, you can deploy the stand-alone server. On a Java servlet container, drop in the API Server WAR file. You can also host the API Server in IIS. See the help documentation for more information and how-tos. You can find guides to deploying the API Server on Azure, Amazon EC2, and Heroku in the CData KB.
Connect
After you deploy, provide authentication values and other connection properties. The API Server uses authtoken-based authentication and supports the major authentication schemes. The API Server also supports SSL.
Additionally, set the CacheConnection and CacheProvider options to support global searches on external objects. Refer to the help documentation for more information.
Authorize
After you connect, allow the API Server access to each NetSuite table you want to work with.
Create a NetSuite Connect Data Source
After the API Server is running, follow the steps below to set up Connect to consume the API Server's NetSuite feed.
- Log into Salesforce and click Setup -> Develop -> External Data Sources.
- Click New External Data Source.
- Enter values for the following properties:
- External Data Source: Enter a label to be used in list views and reports.
- Name: Enter a unique identifier.
- Type: Select the option "Salesforce Connect: OData 4.0".
- URL: Enter the URL to the API Server's OData endpoint. The format of the OData URL is https://your-server:your-port/api.rsc.
- Select the Writable External Objects option.
- Select JSON in the Format menu.
- In the Authentication section, set the following properties:
- Identity Type: If all members of your organization will use the same credentials to access the API Server, select "Named Principal". If the members of your organization will connect with their own credentials, select "Per User".
- Authentication Protocol: Select Password Authentication to use HTTP Basic authentication.
- Certificate: Enter or browse to the certificate to be used to encrypt and authenticate communications from Salesforce to your server.
- Username: Enter the username for a user known to the API Server.
- Password: Enter the user's authtoken.

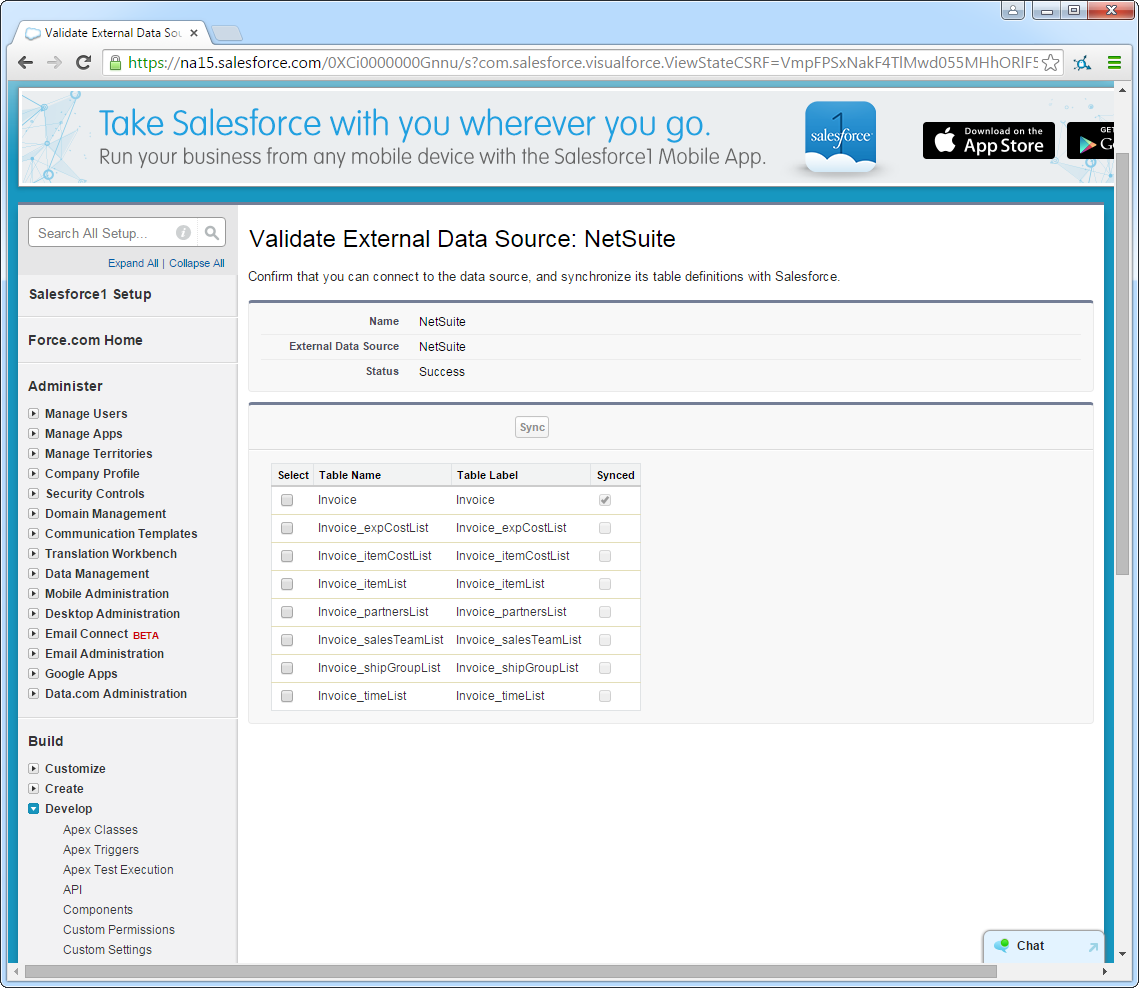
Synchronize NetSuite Objects
After you have created the external data source, follow the steps below to create NetSuite external objects that reflect any changes in the data source. You will synchronize the definitions for the NetSuite external objects with the definitions for NetSuite tables.
- Click the link for the external data source you created.
- Click Validate and Sync.
- Select the NetSuite tables you want to work with as external objects.
See NetSuite as a Database
The API Server enables you to use data access standards like OData to work with NetSuite data as a database, without loading the data into a database. The API Server abstracts NetSuite entities into normalized tables. This relational view provides data integrity: You can use the API Server to provide trusted OData feeds of NetSuite data (plus data from 80+ other sources).
Working with NetSuite transactions and lists is straightforward. To expand the lists of a table into separate tables, simply set the IncludeChildTables connection property to true and reconnect. When you connect, the API Server dynamically obtains the table definitions. In Salesforce Connect, you can sync these definitions with external objects.
Learn More
More information about Salesforce Lightning integration can be found on the Salesforce1 Lightning platform page. Learn more about the CData API Server online at www.cdata.com/apiserver/.
Data Connectors
ETL/ ELT Solutions
Cloud & API Connectivity
OEM & Custom Drivers