Discover how a bimodal integration strategy can address the major data management challenges facing your organization today.
Get the Report →Transfer data from Excel to QuickBooks using the CData Excel Add-In
The CData Excel Add-In for QuickBooks enables live editing of data directly from Excel. This article explains how to transfer data from Excel to QuickBooks. For this example, we will use the Customers table; however, the same process will work for any table that can be retrieved by the CData Excel Add-In. This technique is useful if you have a whole spreadsheet that you want to import into QuickBooks.
Please see the Getting Started section of the documentation if you are not familiar with connecting to QuickBooks. And ensure that the Insert option is enabled in the connection.
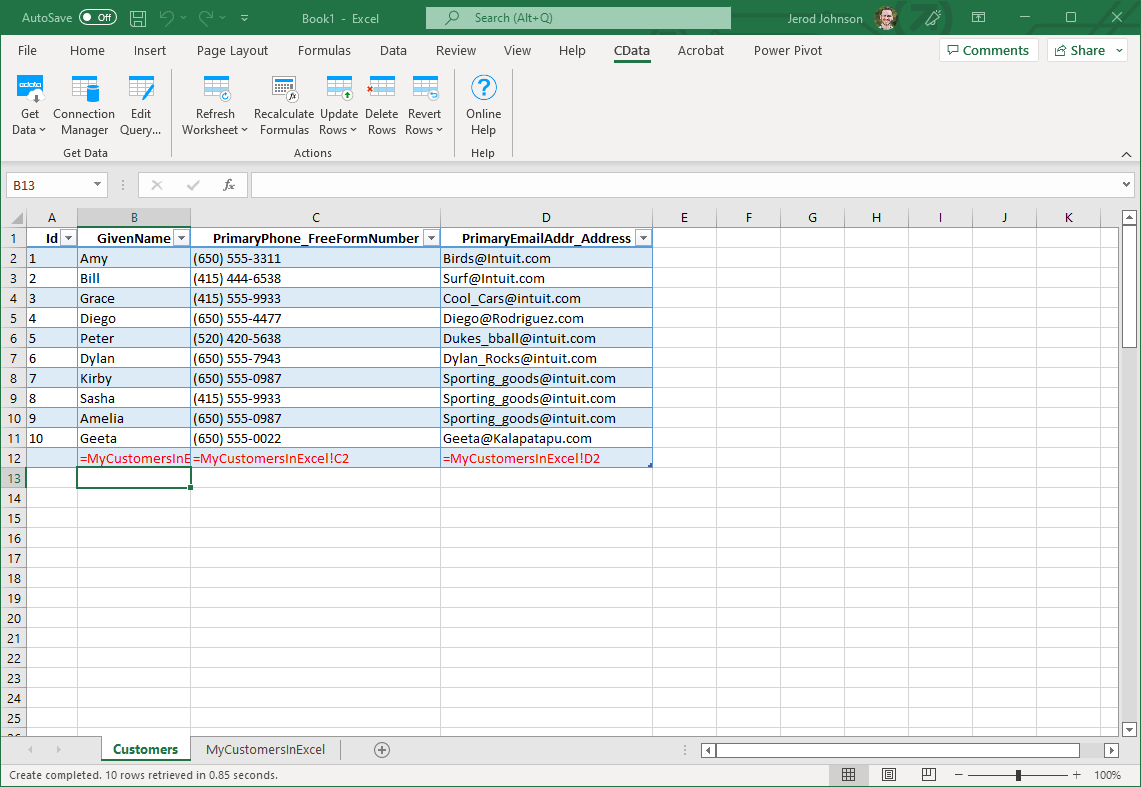
- Step 1: To insert data into QuickBooks, we first need to retrieve data from the QuickBooks table we want to add to. This links the Excel spreadsheet to the QuickBooks table selected. So start by selecting data from the Customers table using the From QuickBooks button in Excel.
- Step 2: After retrieving data from QuickBooks, we can add data from an existing spreadsheet in Excel. The easiest way to do this is by using a reference to the cell.

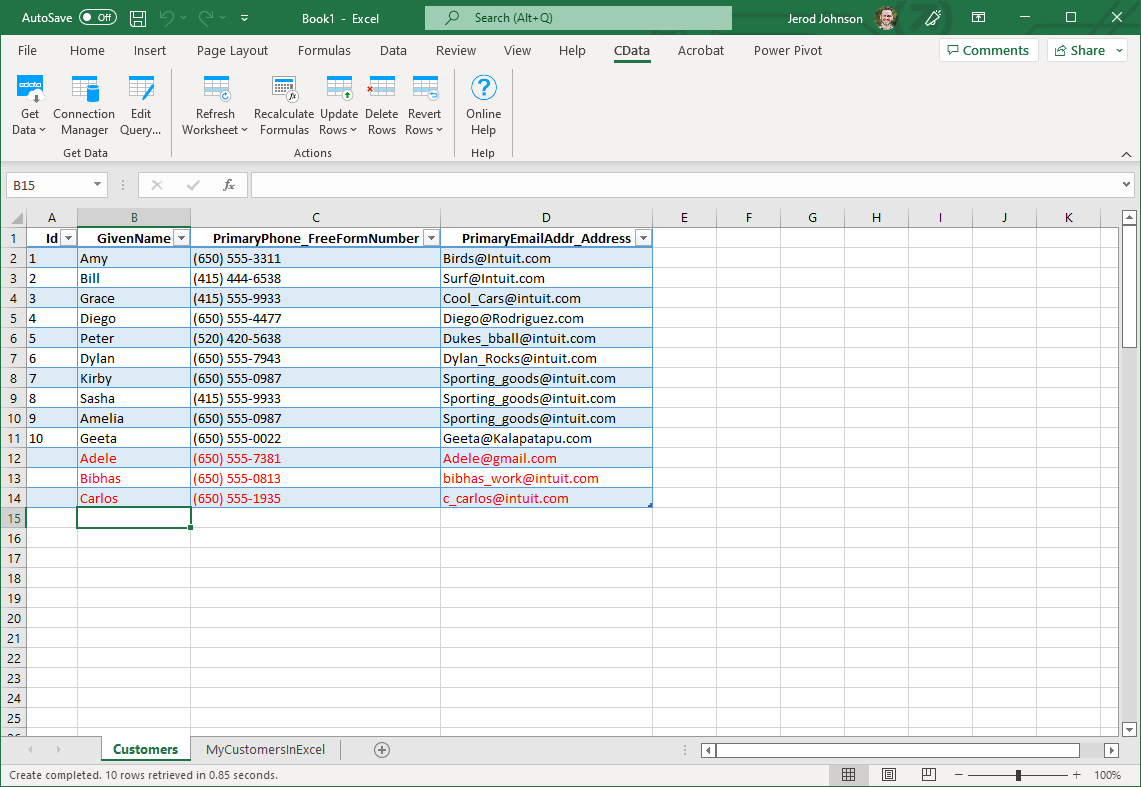
- Step 3: After using a formula to reference the cells we want to add to QuickBooks, we select the cells that we are inserting data into and drag the formula down as far as needed. The referenced values we want to add show up on the Customers sheet.

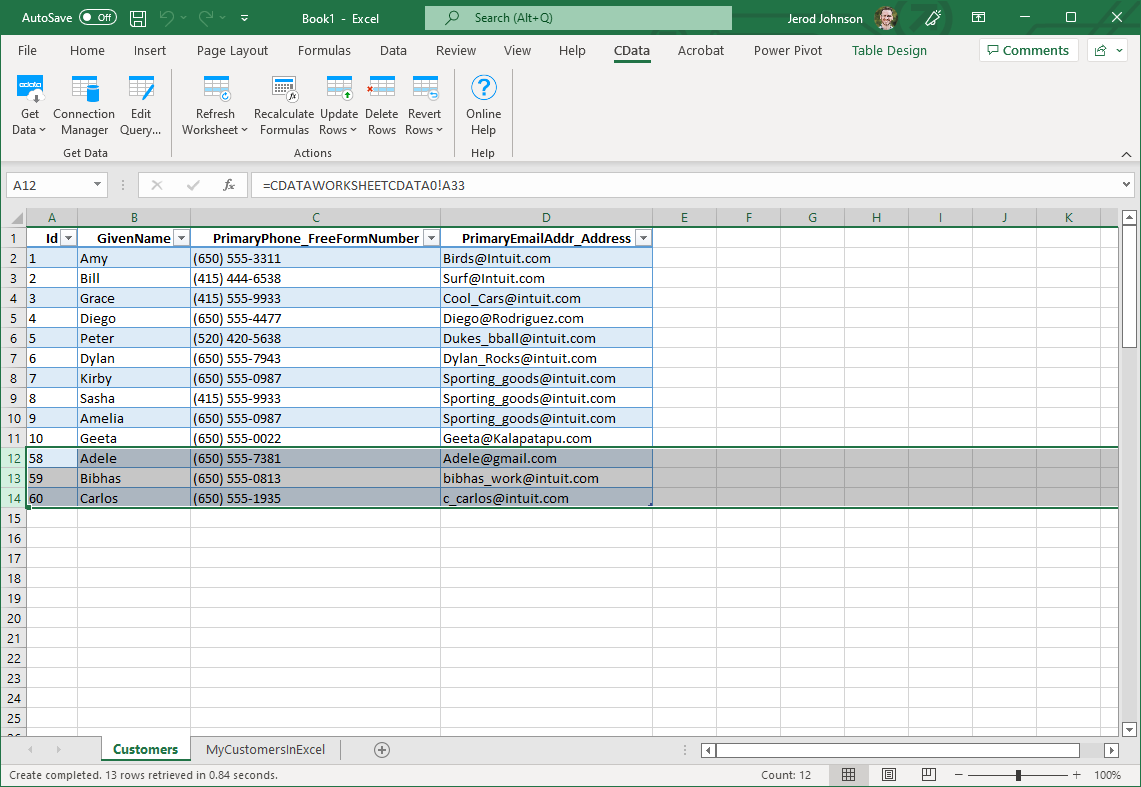
- Step 4: Next, we highlight the rows we want to insert and press the Insert Rows button.
As each row is inserted, the Id value will appear in the Id column and the row's text will change to black, indicating that the customer has been inserted into QuickBooks.


