Discover how a bimodal integration strategy can address the major data management challenges facing your organization today.
Get the Report →Analyze Act CRM Data in Infragistics Reveal
Use CData Connect Cloud to create on OData API on top of Act CRM data and visualize live Act CRM data in Infragistics Reveal.
Reveal, an offering from Infragistics, serves as a data visualization tool that seamlessly integrates with CData Connect Cloud. Together, they empower users to deliver dynamic dashboards using real-time data from a diverse range of data sources, including Act CRM data. In this article, we will guide you through the process of connecting to Act CRM via Connect Cloud and subsequently linking Connect Cloud with Infragistics Reveal to construct a straightforward dashboard.
Connect to Act CRM from Infragistics Reveal
To work with live Act CRM data in Infragistics Reveal, we need to connect to Act CRM from Connect Cloud, provide user access to the connection, and create OData endpoints for the Act CRM data.
(Optional) Add a New Connect Cloud User
As needed, create Users to connect to Act CRM through Connect Cloud.
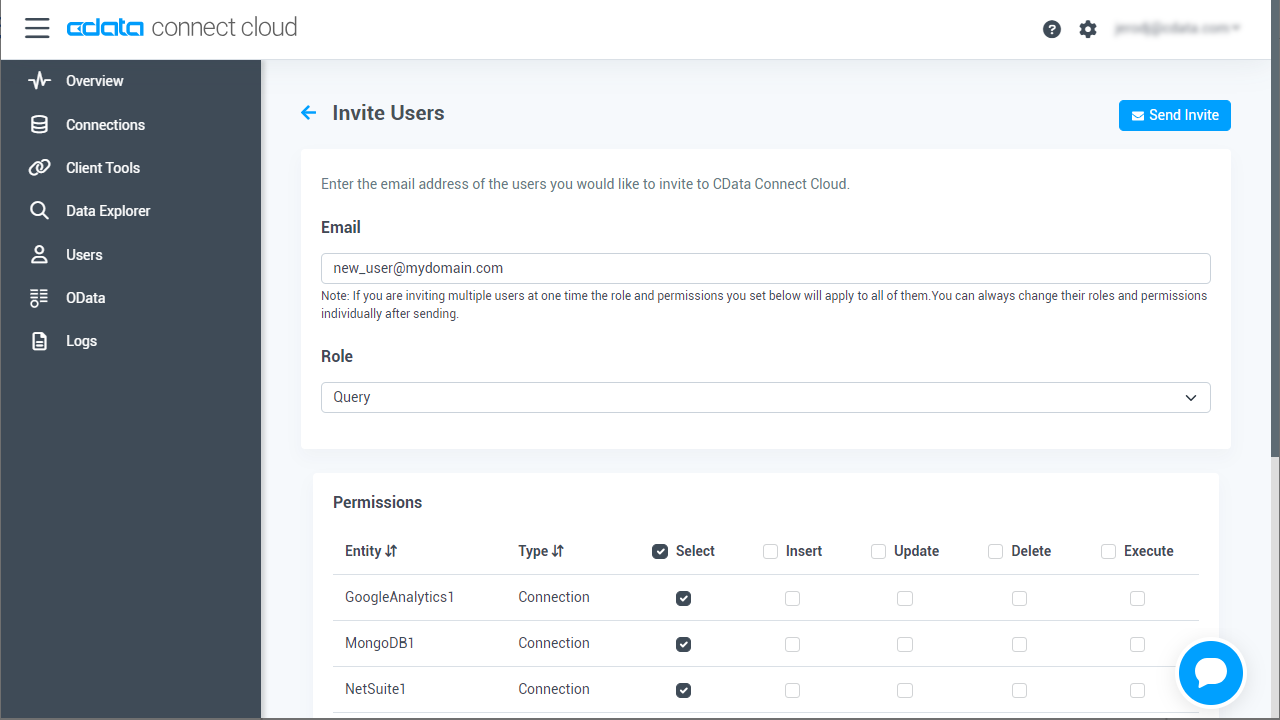
- Navigate to the Users page and click Invite Users
- Enter the new user's email address and click Send to invite the user
![Inviting a new user]()
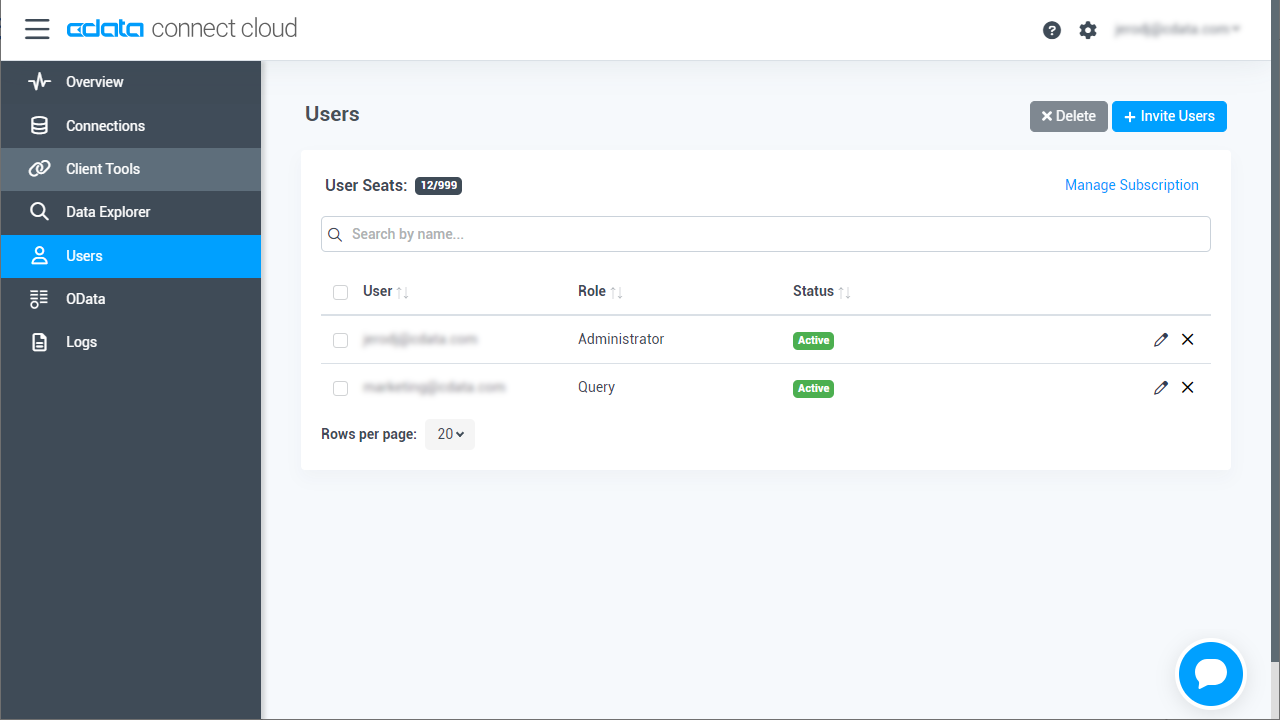
- You can review and edit users from the Users page
![Connect Cloud users]()
Add a Personal Access Token
If you are connecting from a service, application, platform, or framework that does not support OAuth authentication, you can create a Personal Access Token (PAT) to use for authentication. Best practices would dictate that you create a separate PAT for each service, to maintain granularity of access.
- Click on your username at the top right of the Connect Cloud app and click User Profile.
- Oa the User Profile page, scroll down to the Personal Access Tokens section and click Create PAT.
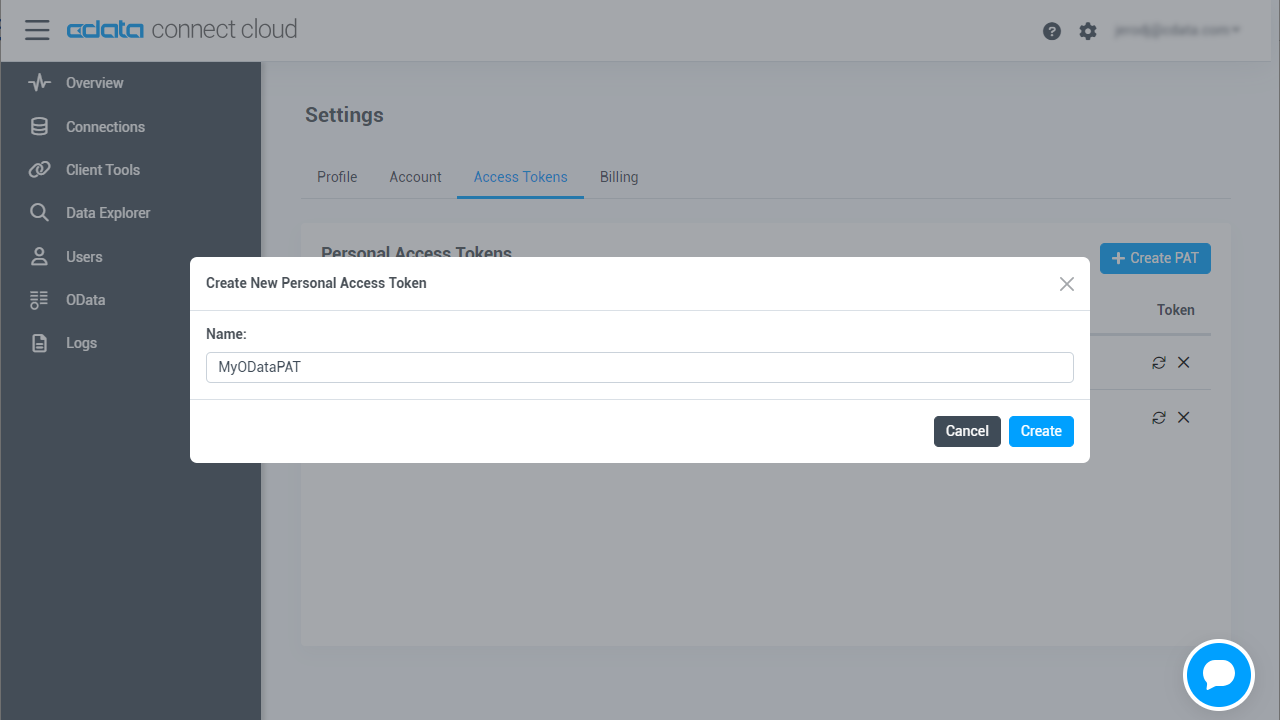
- Give your PAT a name and click Create.
![Creating a new PAT]()
- The personal access token is only visible at creation, so be sure to copy it and store it securely for future use.
Connect to Act CRM from Connect Cloud
CData Connect Cloud uses a straightforward, point-and-click interface to connect to data sources.
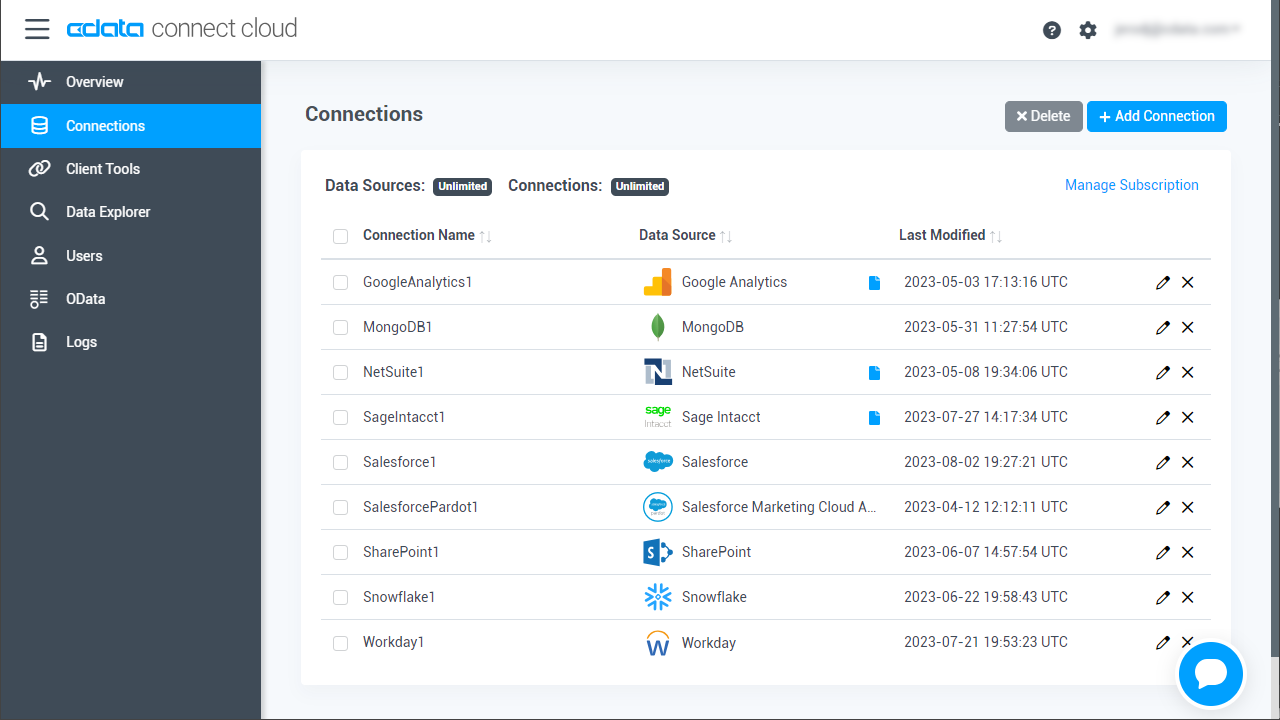
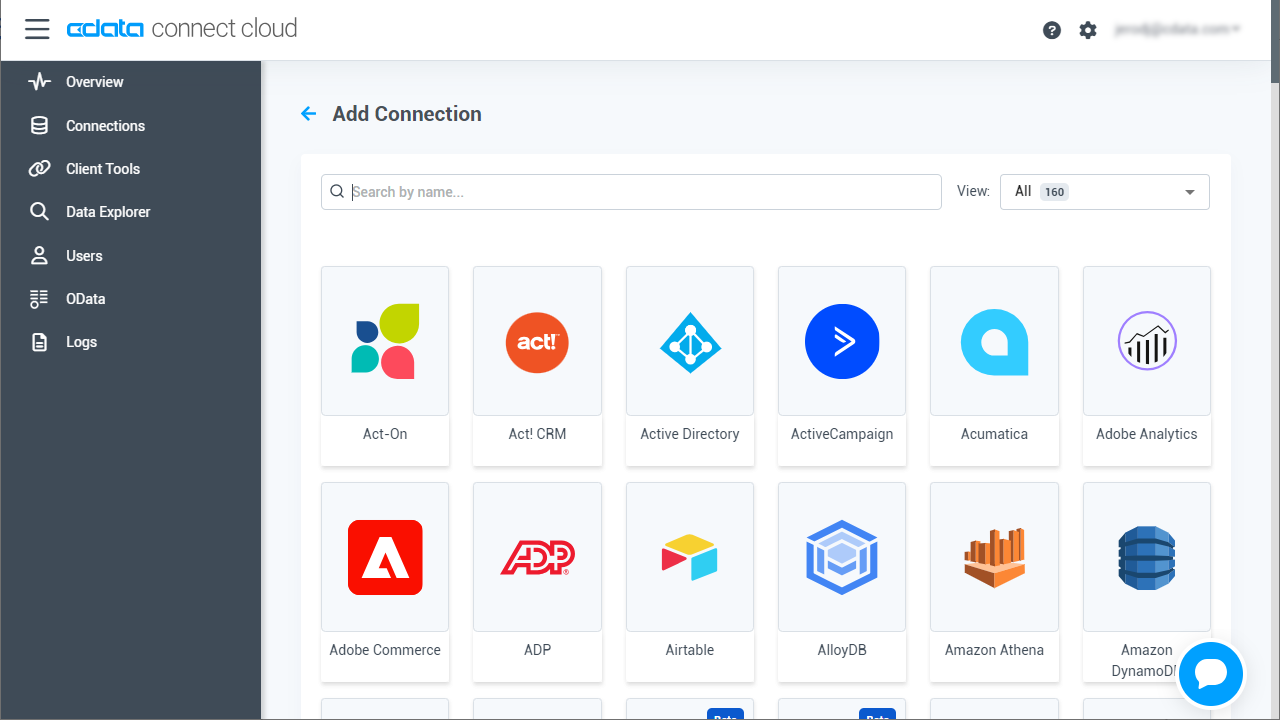
- Log into Connect Cloud, click Connections and click Add Connection
![Adding a Connection]()
- Select "Act CRM" from the Add Connection panel
![Selecting a data source]()
-
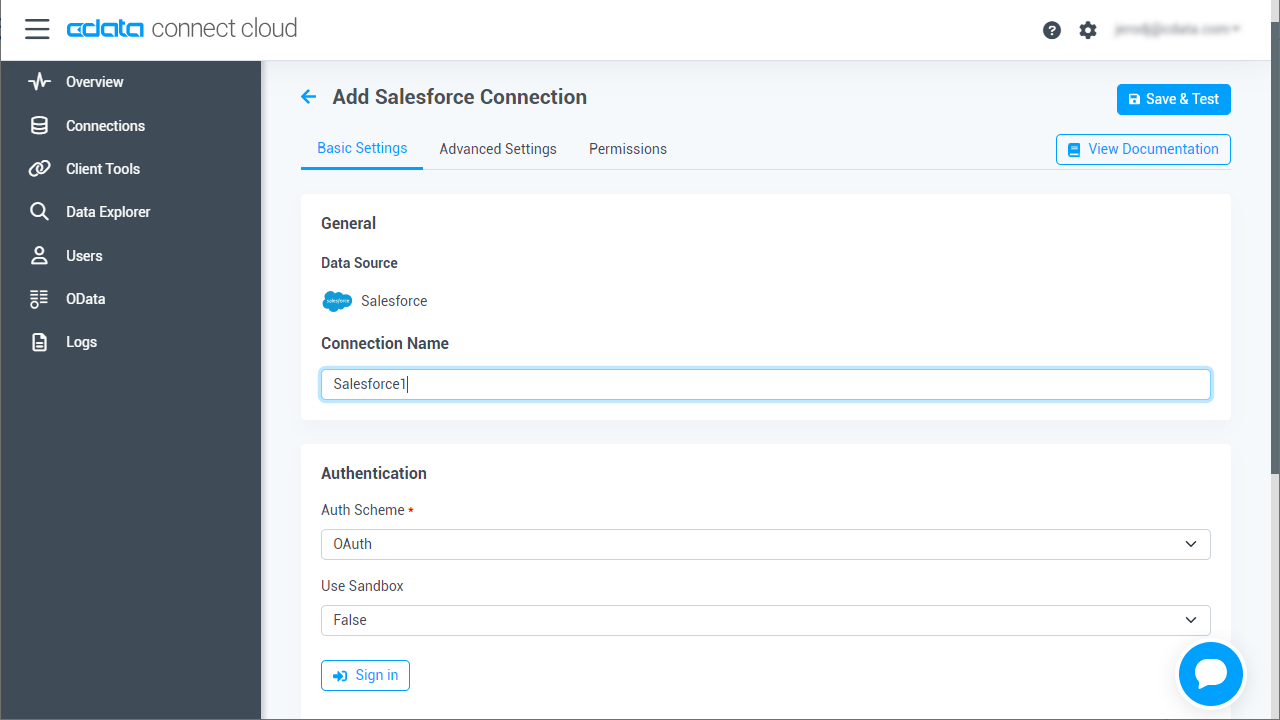
Enter the necessary authentication properties to connect to Act CRM.
The User and Password properties, under the Authentication section, must be set to valid Act! user credentials. In addition to the authentication values, see the following:
-
Connecting to Act! Premium
In addition to the authentication values, the URL to Act! is also required; for example https://eup1-iis-04.eu.hosted.act.com/.
Additionally, you must specify the ActDatabase you will connect to. This is found by going to the About Act! Premium menu of your account, at the top right of the page, in the ? menu. Use the Database Name in the window that appears.
-
Connecting to Act! Premium Cloud
To connect to your Act! Premium Cloud account, you also need to specify the ActCloudName property. This property is found in the URL address of the Cloud account; for example https://eup1-iis-04.eu.hosted.act.com/ActCloudName/.
Note that retrieving ActCRM metadata can be expensive. It is advised that you set the CacheMetadata property to store the metadata locally.
![Configuring a connection (Salesforce is shown)]()
-
- Click Create & Test
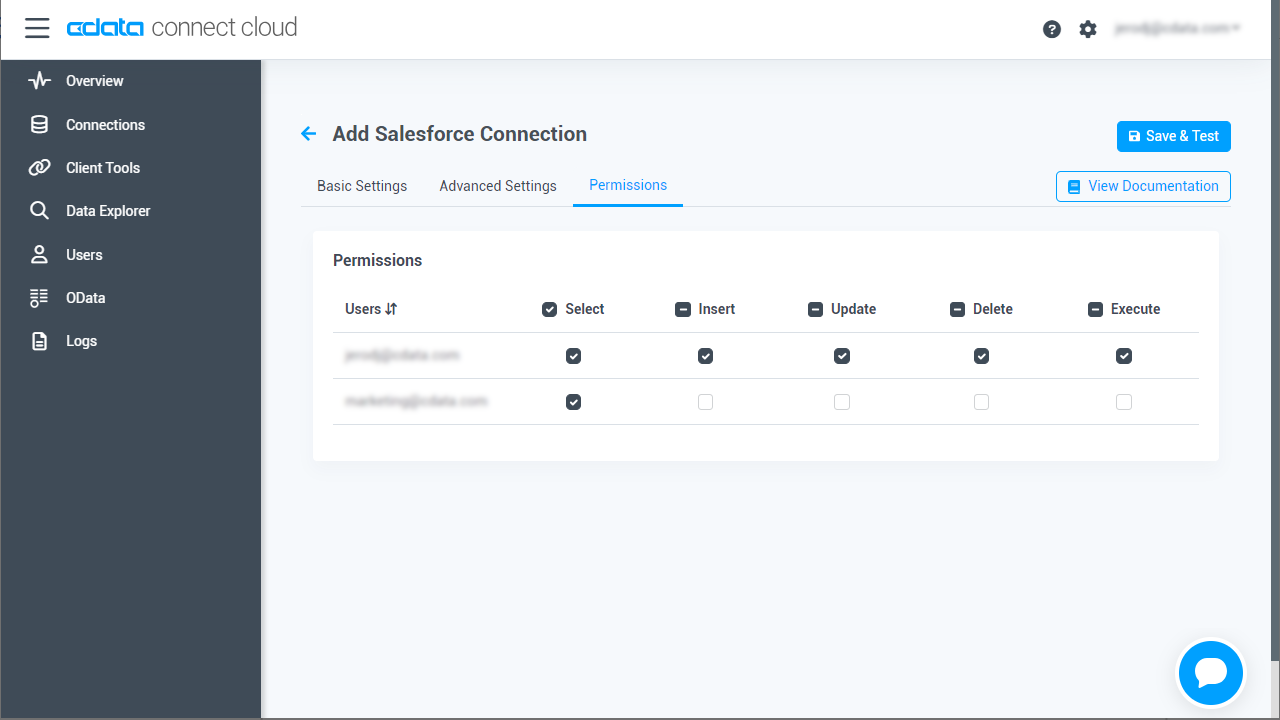
- Navigate to the Permissions tab in the Add Act CRM Connection page and update the User-based permissions.
![Updating permissions]()
Add Act CRM OData Endpoints in Connect Cloud
After connecting to Act CRM, create OData Endpoints for the desired table(s).
- Navigate to the OData page and click Add to create new OData endpoints
- Select the Act CRM connection (e.g. ActCRM1) and click Next
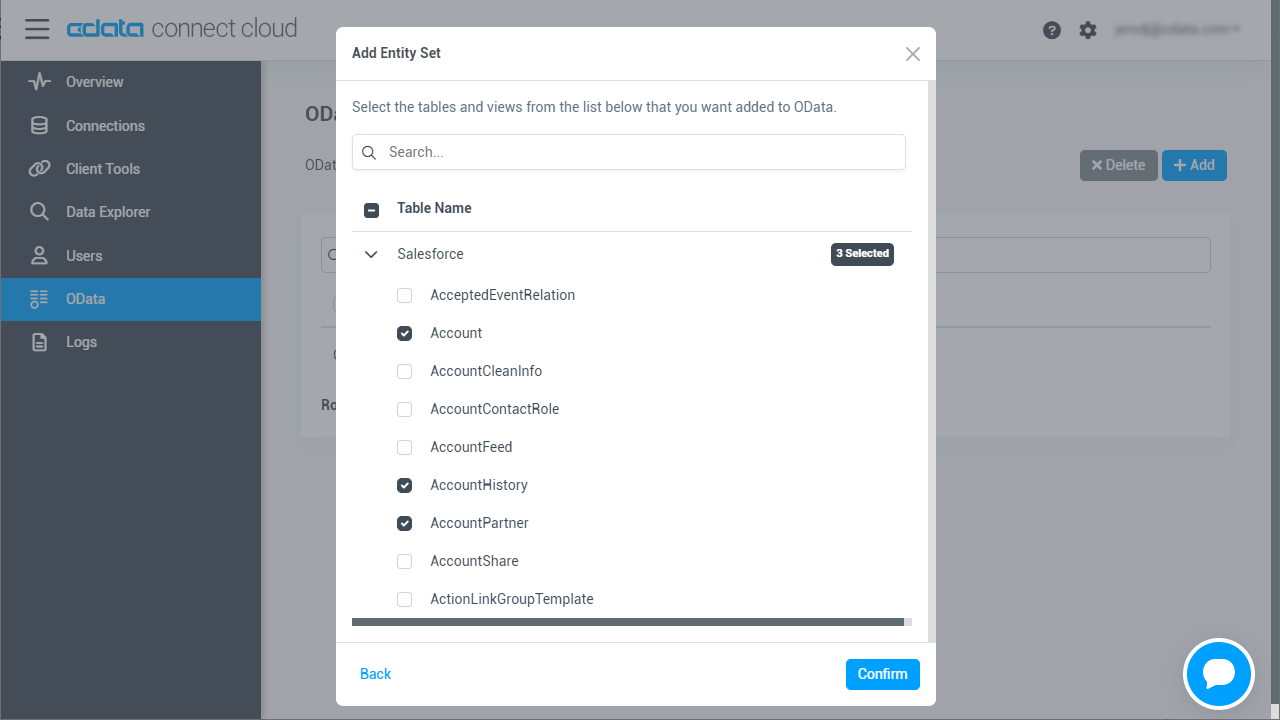
- Select the table(s) you wish to work with and click Confirm
![Selecting Tables (Salesforce is shown)]()
With the connection and OData endpoints configured, you are ready to connect to Act CRM data from Infragistics Reveal.
Create a Dashboard in Reveal
With Connect Cloud configured, we can visualize Act CRM data in Reveal.
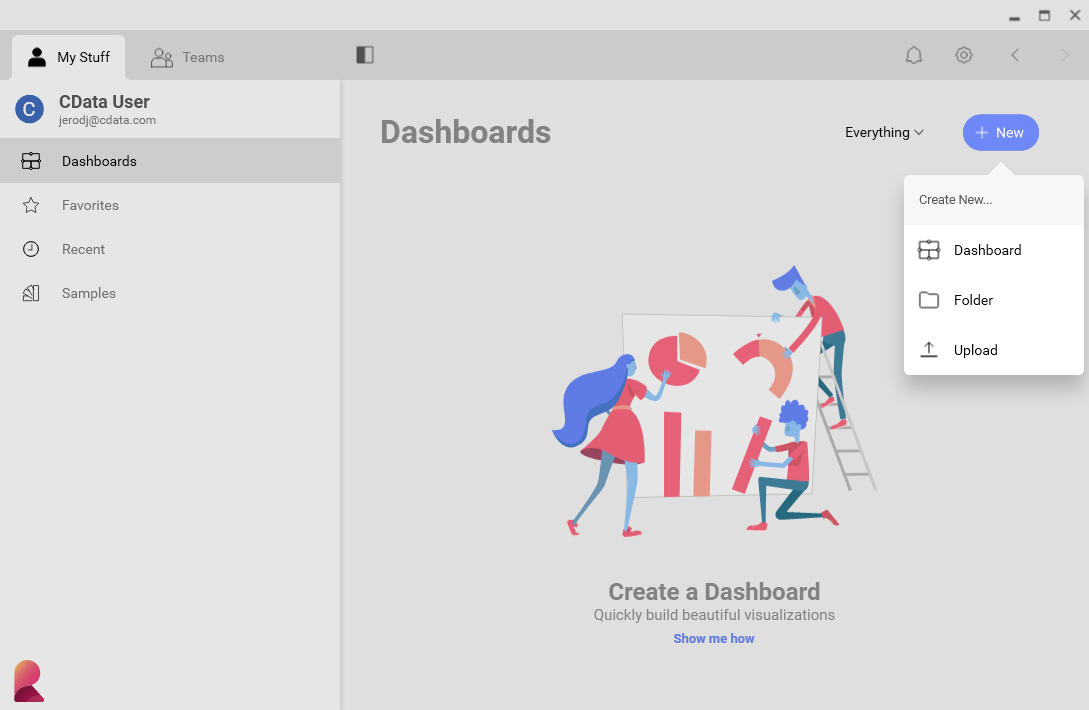
- Log into Reveal and click Dashboards -> New
![Adding a new dashboard]()
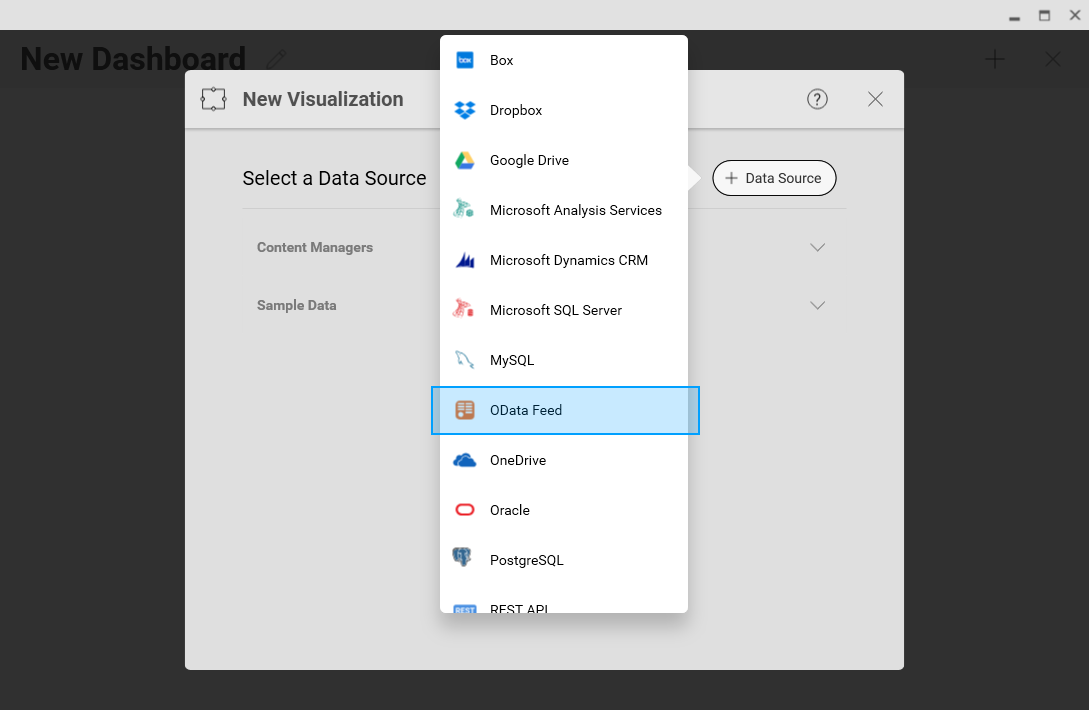
- Click Data Sources -> OData Feed
![Adding a new OData data source]()
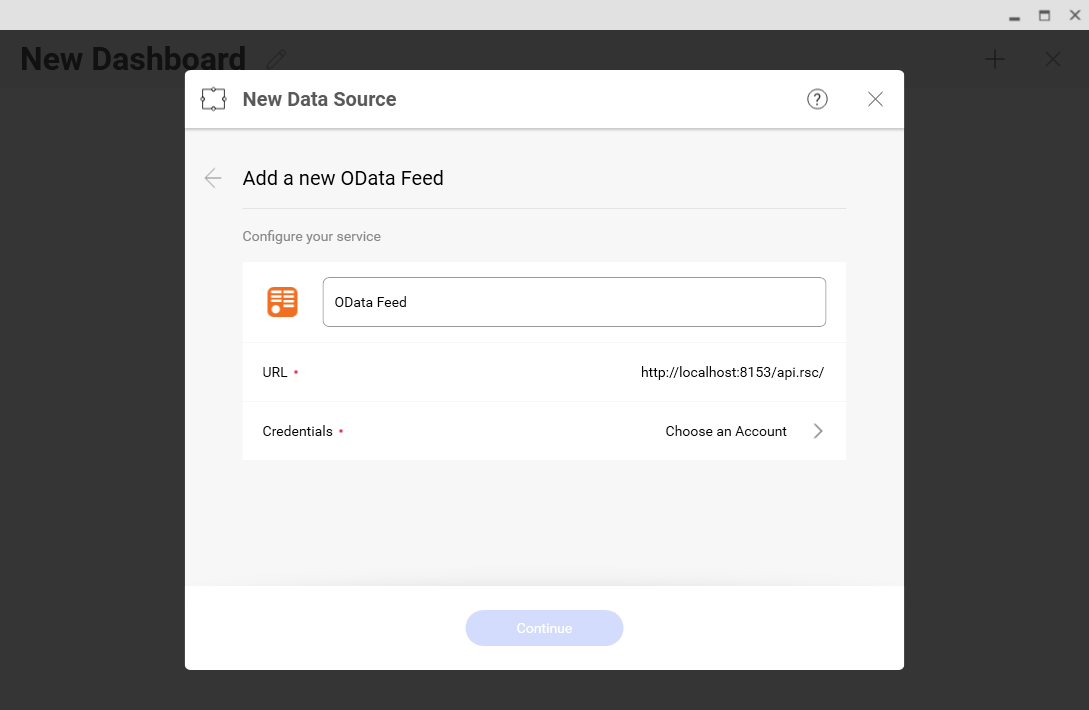
- Specify the Connect Cloud OData API endpoint URL (found on the OData page): https://cloud.cdata.com/api/odata/service
![Configuring the OData URL]()
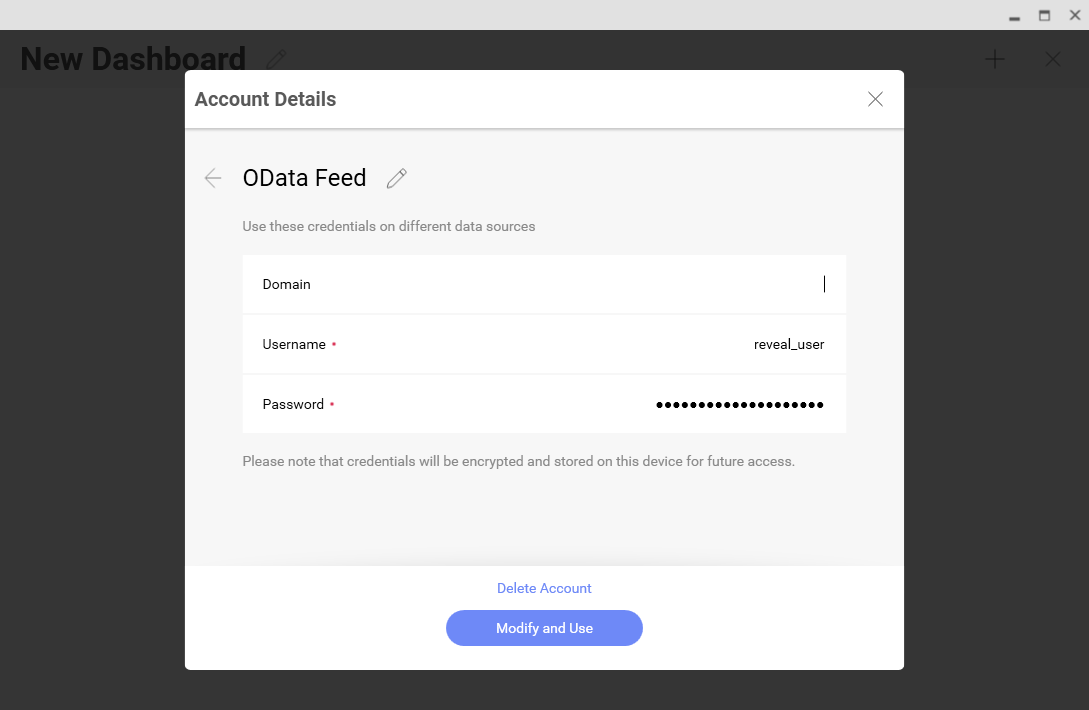
- Select Generic Credentials and
- Set Username to a Connect Cloud username (e.g. user@mydomain.com)
- Set Password to the PAT for the user
![Configuring the credentials]()
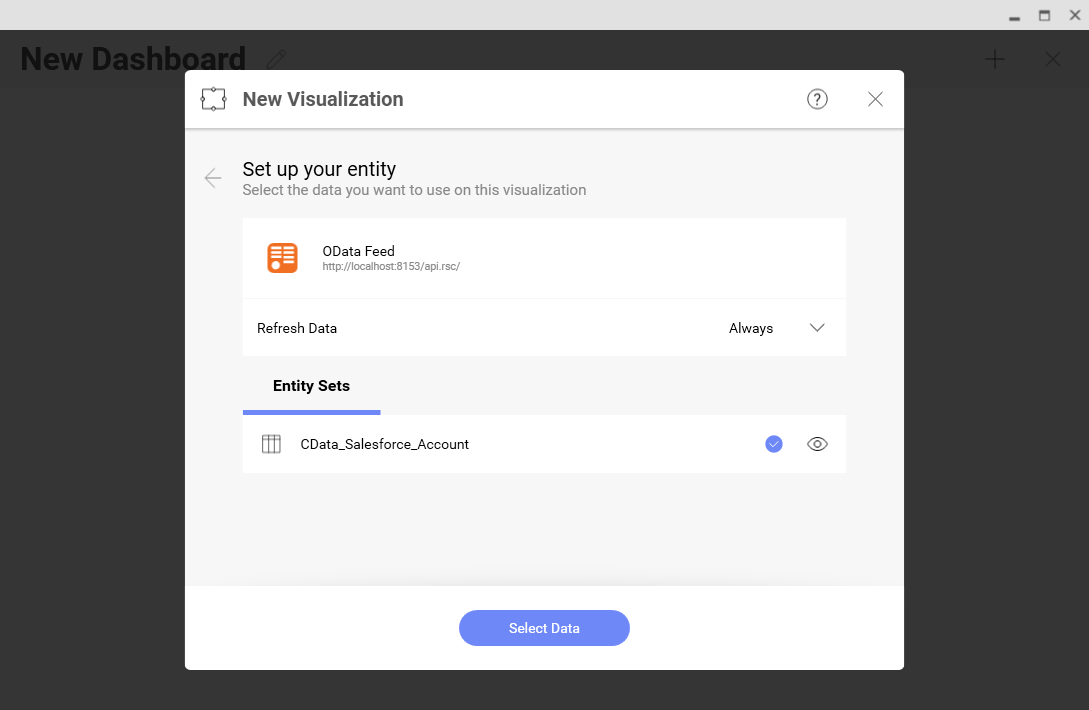
- Select the entity you wish to visualize
![Selecting an entity to visualize (Salesforce is shown.)]()
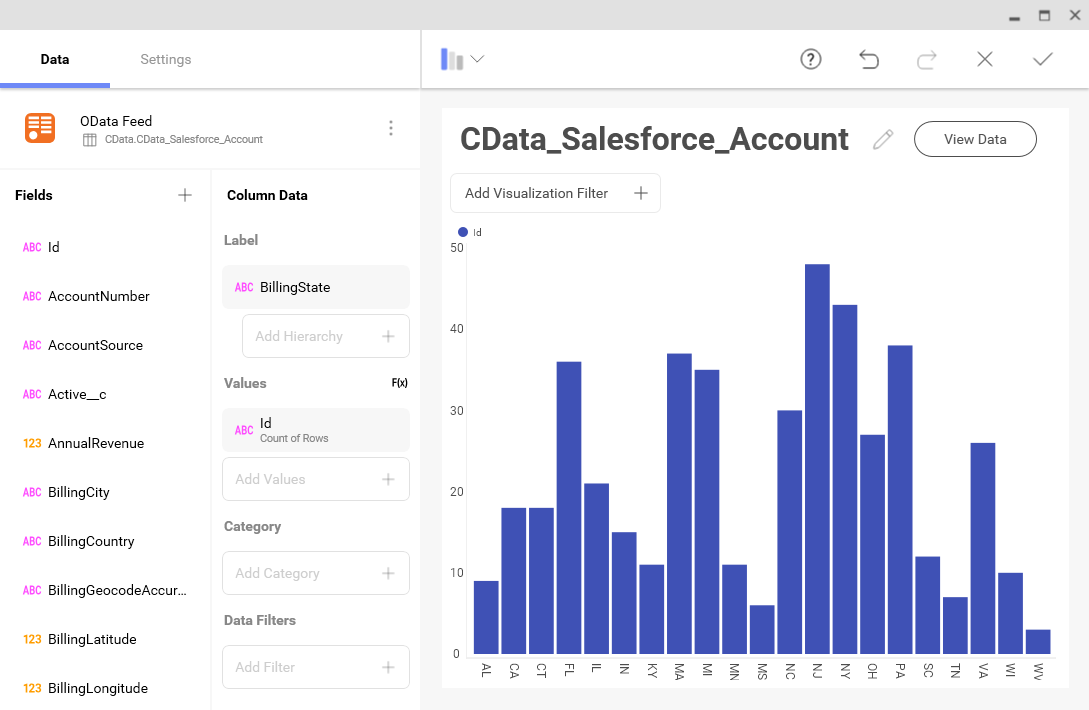
- Select fields and choose a chart type
![Visualizing data in Reveal (Salesforce is shown.)]()
More Information & Free Trial
At this point, you have created a simple dashboard from live Act CRM data. For more information on creating OData feeds from Act CRM (and more than 100 other sources), visit the Connect Cloud page. Sign up for a free trial and start working live Act CRM data in tools that consume OData APIs.


