Discover how a bimodal integration strategy can address the major data management challenges facing your organization today.
Get the Report →Process & Analyze Oracle Eloqua Data in Databricks (AWS)
Use CData, AWS, and Databricks to perform data engineering and data science on live Oracle Eloqua Data.
Databricks is a cloud-based service that provides data processing capabilities through Apache Spark. When paired with the CData JDBC Driver, customers can use Databricks to perform data engineering and data science on live Oracle Eloqua data. This article walks through hosting the CData JDBC Driver in AWS, as well as connecting to and processing live Oracle Eloqua data in Databricks.
With built-in optimized data processing, the CData JDBC Driver offers unmatched performance for interacting with live Oracle Eloqua data. When you issue complex SQL queries to Oracle Eloqua, the driver pushes supported SQL operations, like filters and aggregations, directly to Oracle Eloqua and utilizes the embedded SQL engine to process unsupported operations client-side (often SQL functions and JOIN operations). Its built-in dynamic metadata querying allows you to work with and analyze Oracle Eloqua data using native data types.
Install the CData JDBC Driver in Databricks
To work with live Oracle Eloqua data in Databricks, install the driver on your Databricks cluster.
- Navigate to your Databricks administration screen and select the target cluster.
- On the Libraries tab, click "Install New."
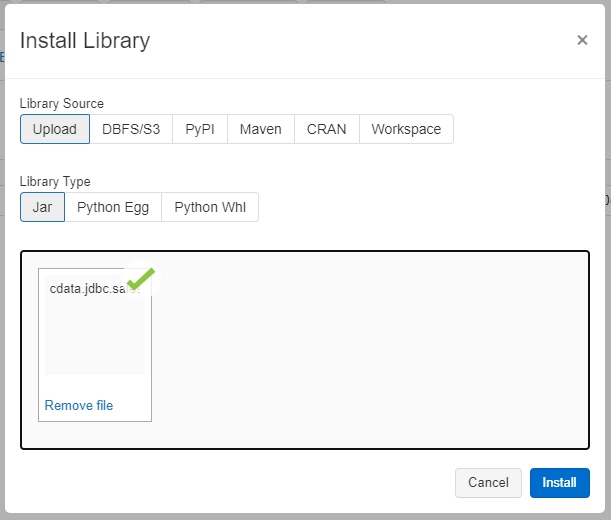
- Select "Upload" as the Library Source and "Jar" as the Library Type.
- Upload the JDBC JAR file (cdata.jdbc.oracleeloqua.jar) from the installation location (typically C:\Program Files\CData[product_name]\lib).

Access Oracle Eloqua Data in your Notebook: Python
With the JAR file installed, we are ready to work with live Oracle Eloqua data in Databricks. Start by creating a new notebook in your workspace. Name the notebook, select Python as the language (though Scala is available as well), and choose the cluster where you installed the JDBC driver. When the notebook launches, we can configure the connection, query Oracle Eloqua, and create a basic report.
Configure the Connection to Oracle Eloqua
Connect to Oracle Eloqua by referencing the JDBC Driver class and constructing a connection string to use in the JDBC URL. Additionally, you will need to set the RTK property in the JDBC URL (unless you are using a Beta driver). You can view the licensing file included in the installation for information on how to set this property.
Step 1: Connection Information
driver = "cdata.jdbc.oracleeloqua.OracleEloquaDriver"
url = "jdbc:oracleeloqua:RTK=5246...;User=user;Password=password;Company=CData;"
Built-in Connection String Designer
For assistance in constructing the JDBC URL, use the connection string designer built into the Oracle Eloqua JDBC Driver. Either double-click the JAR file or execute the jar file from the command-line.
java -jar cdata.jdbc.oracleeloqua.jar
Fill in the connection properties and copy the connection string to the clipboard.
There are two authentication methods available for connecting to Oracle Eloqua: Login and OAuth. The Login method requires you to have the Company, User, and Password of the user.
If you do not have access to the username and password or do not wish to require them, you can use OAuth authentication. OAuth is better suited for allowing other users to access their own data. Using login credentials is better suited for accessing your own data.

Load Oracle Eloqua Data
Once you configure the connection, you can load Oracle Eloqua data as a dataframe using the CData JDBC Driver and the connection information.
Step 2: Reading the data
remote_table = spark.read.format ( "jdbc" ) \
	.option ( "driver" , driver) \
	.option ( "url" , url) \
	.option ( "dbtable" , "Campaign") \
	.load ()
Display Oracle Eloqua Data
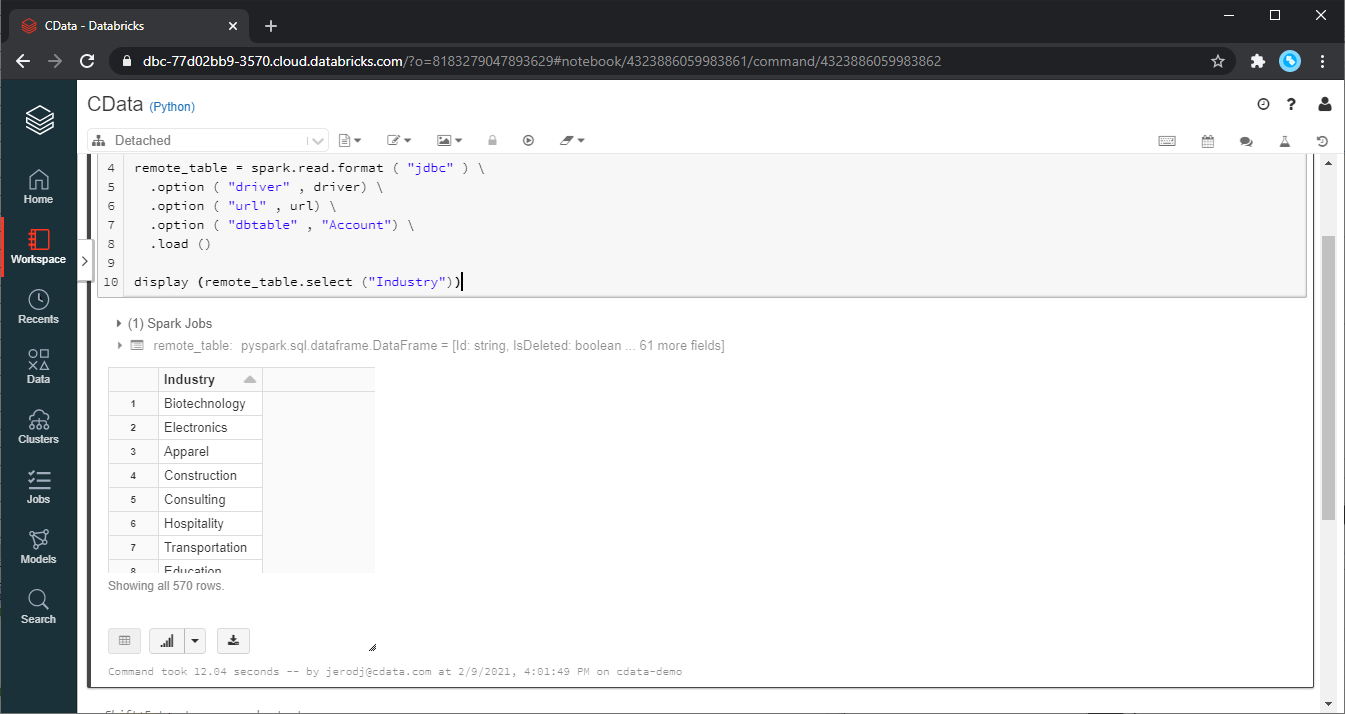
Check the loaded Oracle Eloqua data by calling the display function.
Step 3: Checking the result
display (remote_table.select ("Name"))

Analyze Oracle Eloqua Data in Databricks
If you want to process data with Databricks SparkSQL, register the loaded data as a Temp View.
Step 4: Create a view or table
remote_table.createOrReplaceTempView ( "SAMPLE_VIEW" )
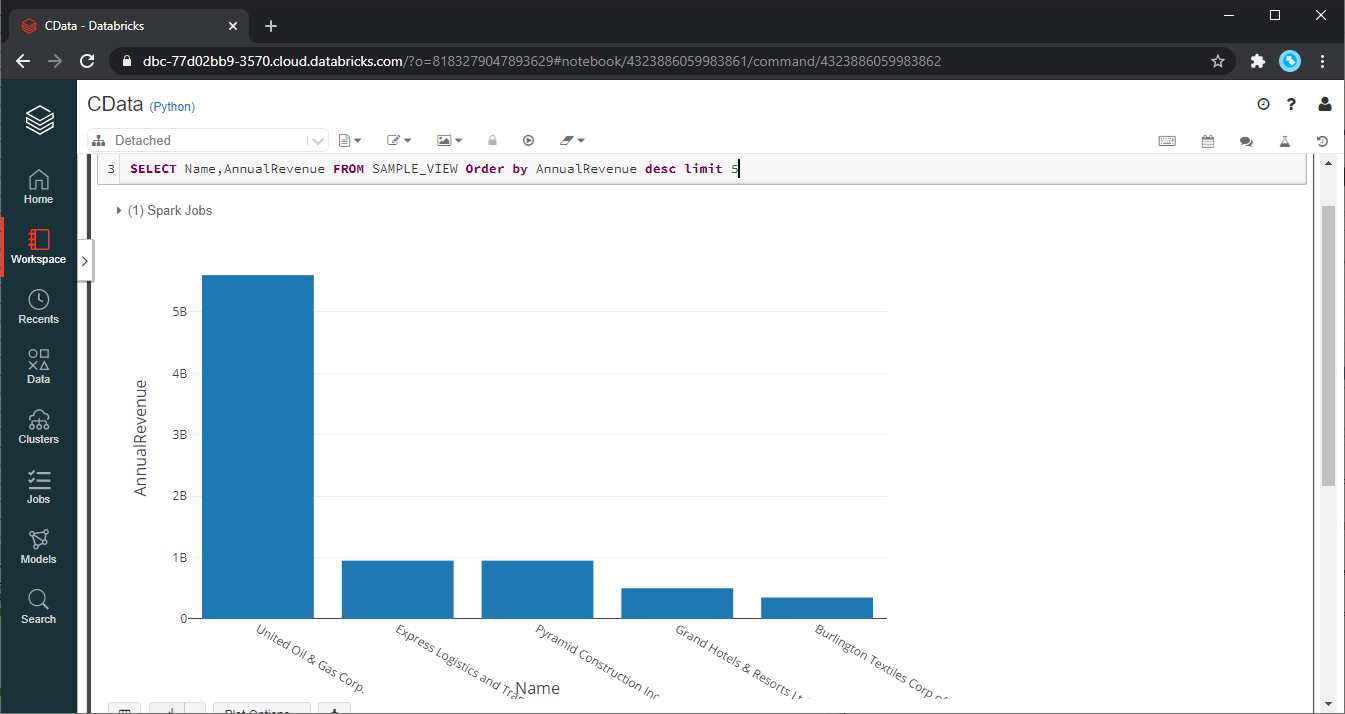
With the Temp View created, you can use SparkSQL to retrieve the Oracle Eloqua data for reporting, visualization, and analysis.
% sql

SELECT Name, ActualCost FROM SAMPLE_VIEW ORDER BY ActualCost DESC LIMIT 5

The data from Oracle Eloqua is only available in the target notebook. If you want to use it with other users, save it as a table.
remote_table.write.format ( "parquet" ) .saveAsTable ( "SAMPLE_TABLE" )
Download a free, 30-day trial of the CData JDBC Driver for Eloqua and start working with your live Oracle Eloqua data in Databricks. Reach out to our Support Team if you have any questions.


