Discover how a bimodal integration strategy can address the major data management challenges facing your organization today.
Get the Report →Creating MYOB AccountRight-Connected Applications in Unqork
You can use CData Connect Cloud to feed MYOB AccountRight data to Unqork and build custom business apps.
Overview
You can use CData Connect Cloud to feed MYOB AccountRight data to Unqork. From there you can build custom business applications in a visual, drag-and-drop interface. So, how does this process work?
Unqork is a completely visual, no-code application development platform that helps large organizations build complex custom software. CData Connect Cloud exposes MYOB AccountRight as a REST endpoint, which you can then query from Unqork with simple HTTP requests. This enables you to create your own custom application with MYOB AccountRight data.
What You'll Learn
In this article, you'll learn how to:
- Add a CData Connect Cloud user
- Add a Personal Access Token for the Connect Cloud user
- Connect to MYOB AccountRight from Connect Cloud
- Add MYOB AccountRight OData endpoints in Connect Cloud
- Register MYOB AccountRight (via Connect Cloud) as on Unqork service
- Create a simple Unqork application to display MYOB AccountRight data
Connect to MYOB AccountRight from Unqork
To work with live MYOB AccountRight data in Unqork, you need to:
- Connect to MYOB AccountRight from CData Connect Cloud
- Provide user access to the new connection in CData Connect Cloud
- Create OData endpoints for MYOB AccountRight data
(Optional) Add a New Connect Cloud User
As needed, create Users to connect to MYOB AccountRight through Connect Cloud.
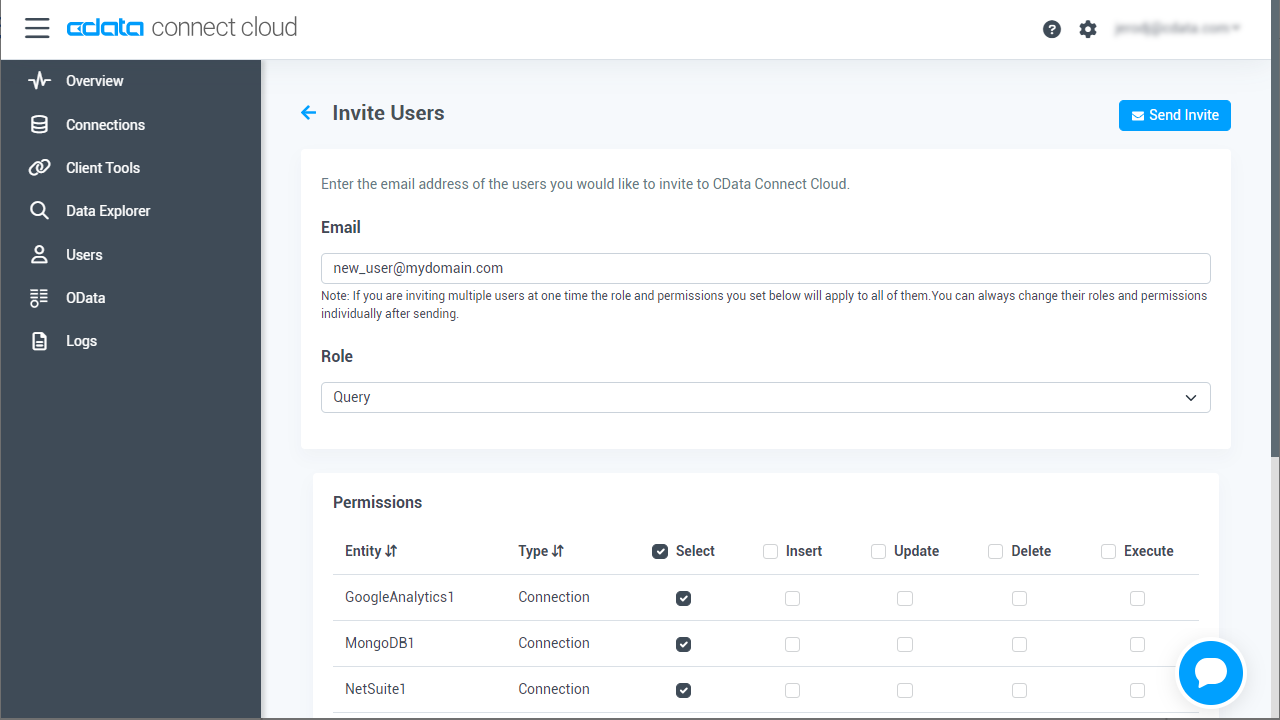
- Navigate to the Users page and click Invite Users
- Enter the new user's email address and click Send to invite the user
![Inviting a new user]()
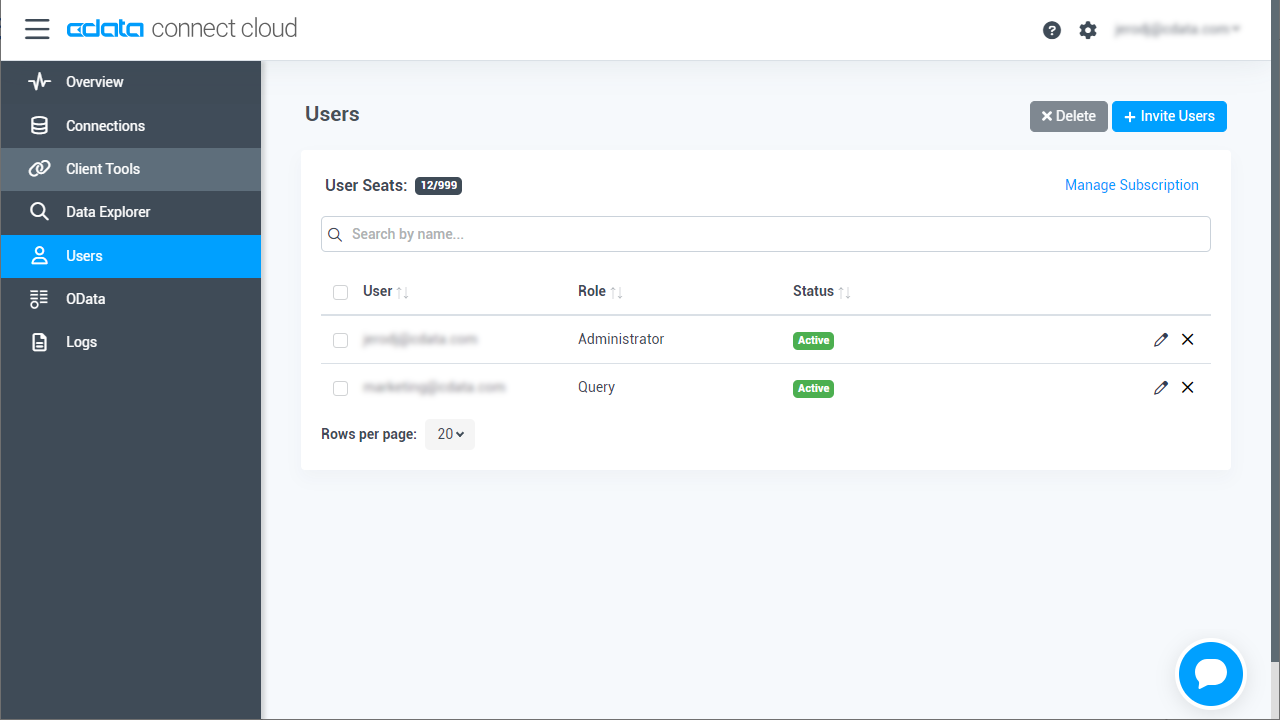
- You can review and edit users from the Users page
![Connect Cloud users]()
Add a Personal Access Token
If you are connecting from a service, application, platform, or framework that does not support OAuth authentication, you can create a Personal Access Token (PAT) to use for authentication. Best practices would dictate that you create a separate PAT for each service, to maintain granularity of access.
- Click on your username at the top right of the Connect Cloud app and click User Profile.
- On the User Profile page, scroll down to the Personal Access Tokens section and click Create PAT.
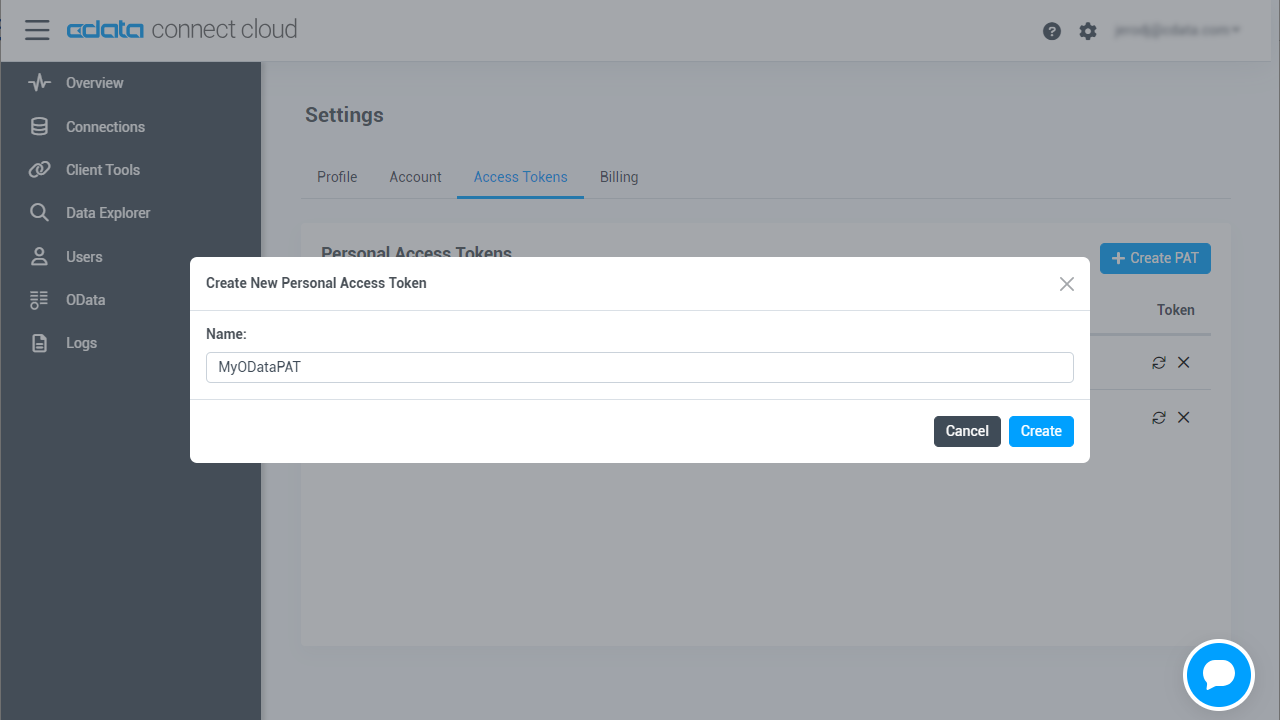
- Give your PAT a name and click Create.
![Creating a new PAT]()
- The personal access token is only visible at creation, so be sure to copy it and store it securely for future use.
Connect to MYOB AccountRight from Connect Cloud
CData Connect Cloud uses a straightforward, point-and-click interface to connect to data sources.
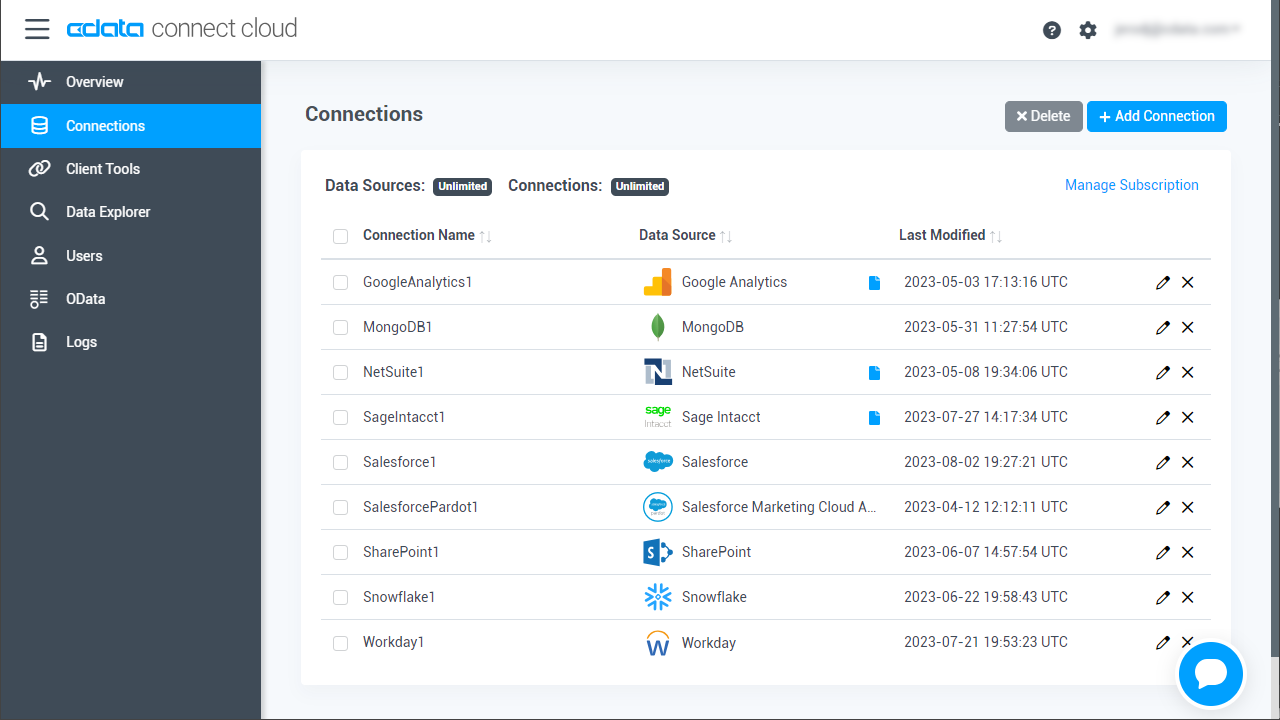
- Log into Connect Cloud, click Connections and click Add Connection
![Adding a Connection]()
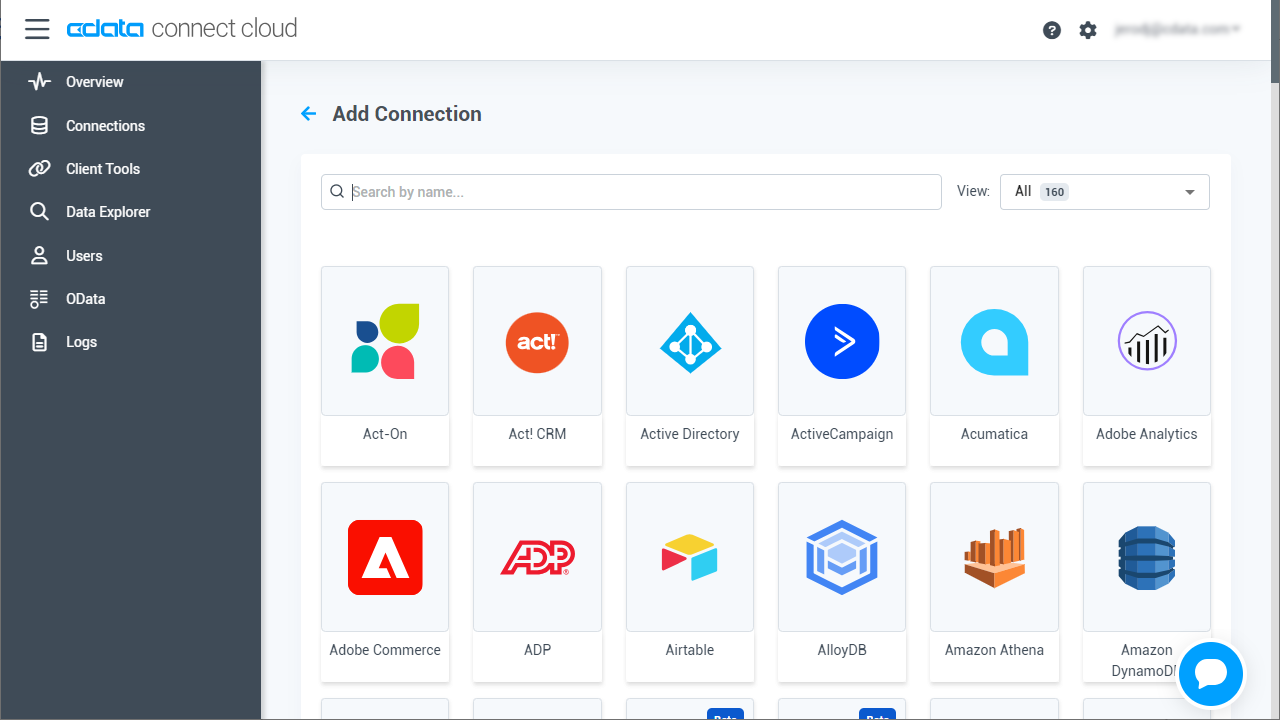
- Select "MYOB AccountRight" from the Add Connection panel
![Selecting a data source]()
-
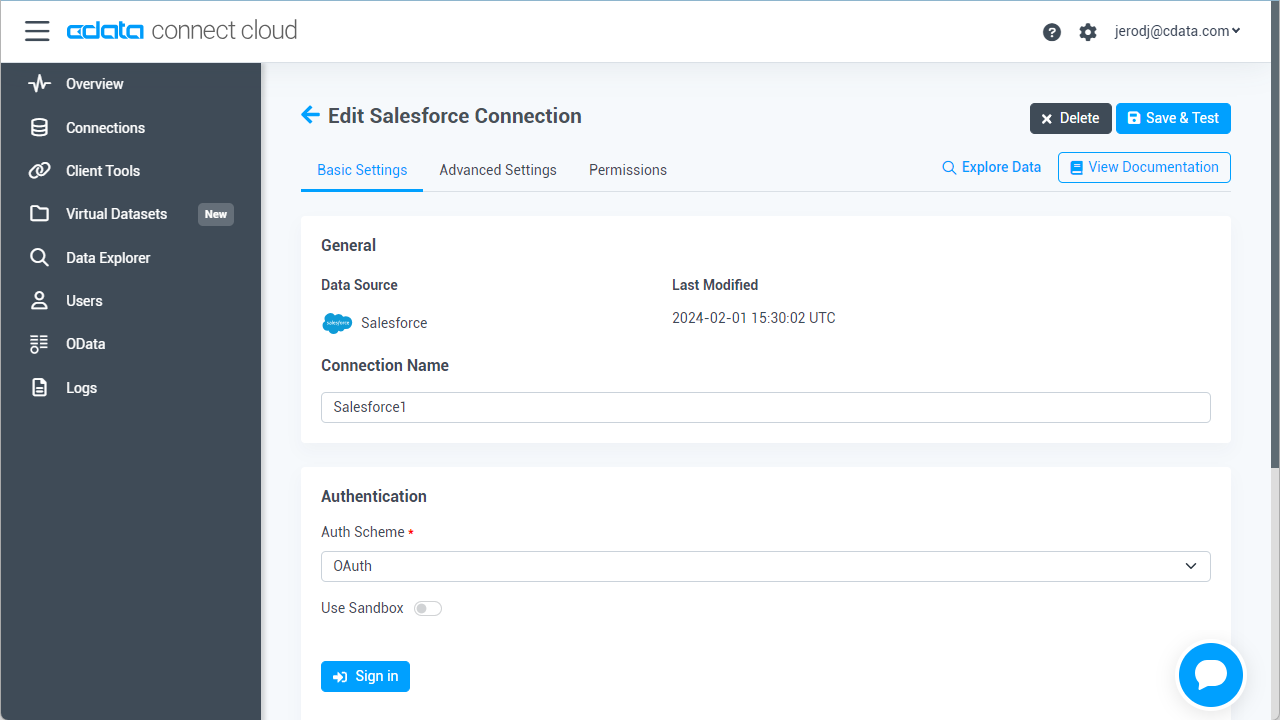
MYOB AccountRight uses OAuth to authenticate. Click "Sign in" to authenticate with MYOB AccountRight.
![Authenticating with OAuth (Salesforce is shown).]()
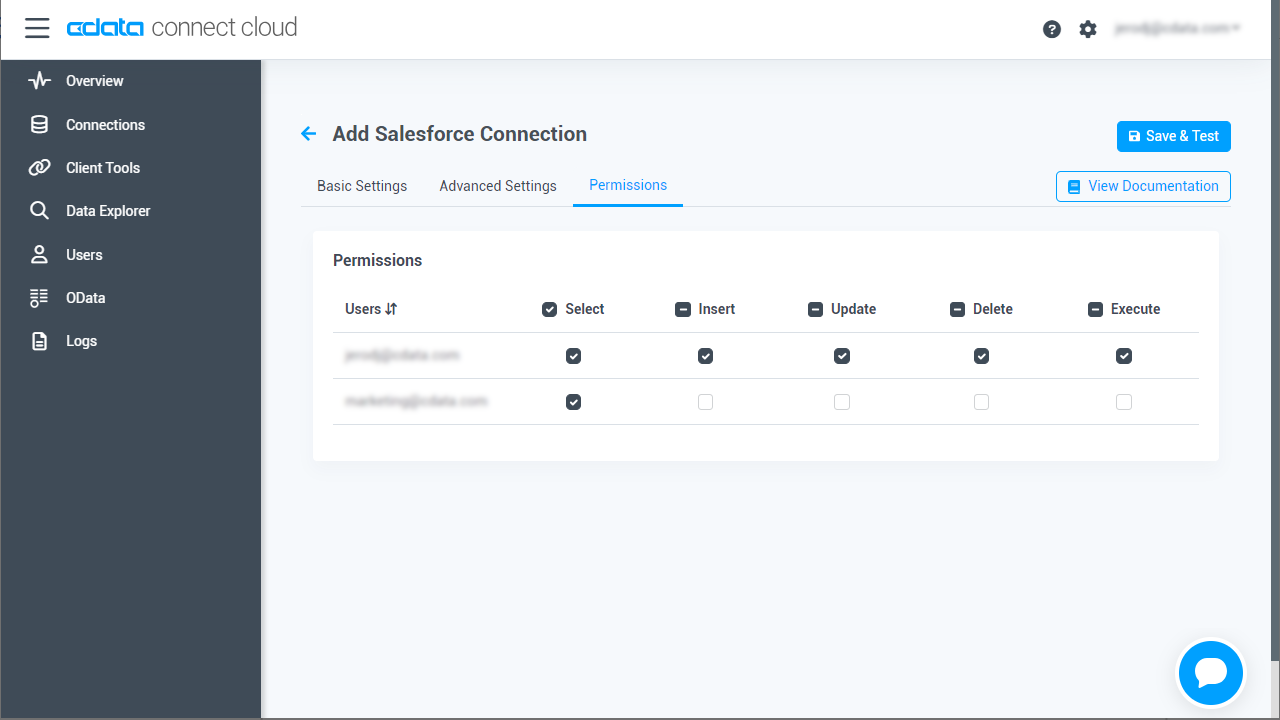
- Navigate to the Permissions tab in the Add MYOB AccountRight Connection page and update the User-based permissions.
![Updating permissions]()
Add MYOB AccountRight OData Endpoints in Connect Cloud
After connecting to MYOB AccountRight, create OData Endpoints for the desired table(s).
- Navigate to the OData page and click Add to create new OData endpoints
- Select the MYOB AccountRight connection (e.g. MYOB1) and click Next
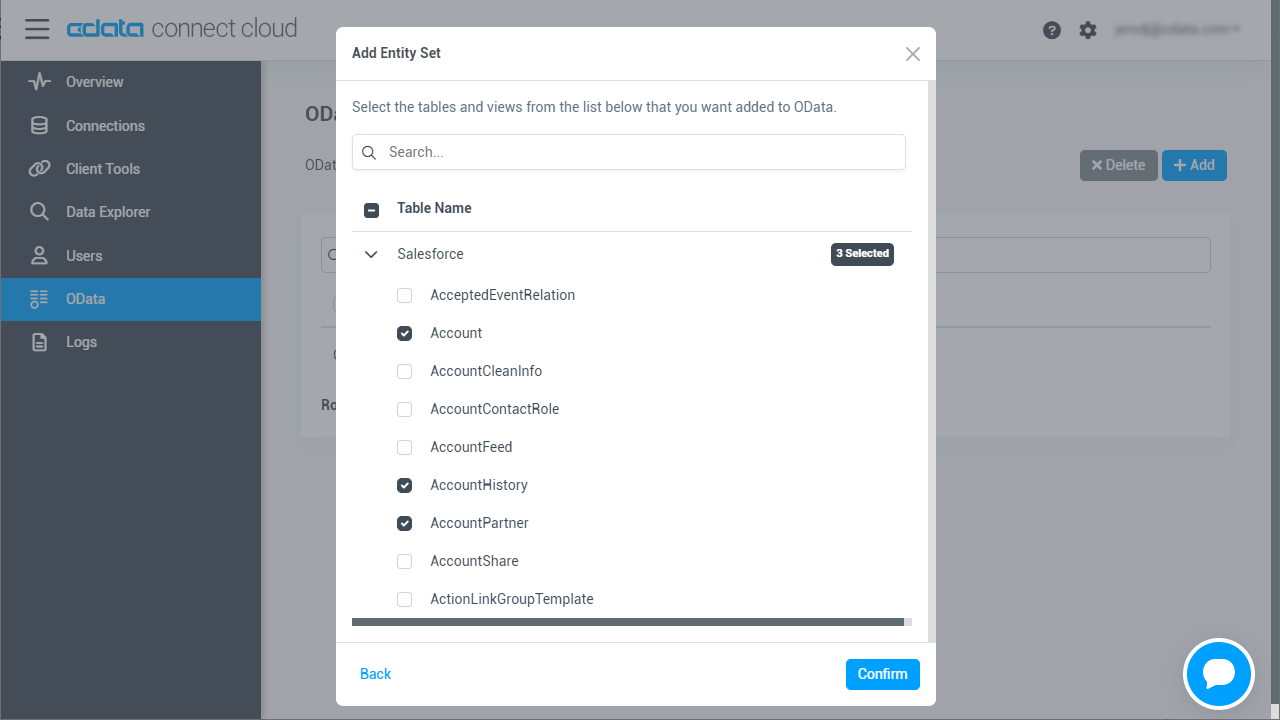
- Select the table(s) you wish to work with and click Confirm
![Selecting Tables (Salesforce is shown)]()
Sample URLs for OData Feeds
Once you have configured a connection to MYOB AccountRight, created a user, and created OData endpoints in Connect Cloud, you can access OData feeds for MYOB AccountRight data. Below, you will see the URLs to access tables and the list of tables. For information on accessing the tables, you can navigate to the OData page for Connect Cloud. For the URLs, you will need the URL of Connect Cloud: https://cloud.cdata.com/api/odata/service.
| Table | URL | |
|---|---|---|
| Entity (table) List | https://cloud.cdata.com/api/odata/service/ | |
| Metadata | https://cloud.cdata.com/api/odata/service/$metadata | |
| Accounts | https://cloud.cdata.com/api/odata/service/Accounts |
As with standard OData feeds, if you wish to limit the fields returned, you can add a $select parameter to the query, along with other standard OData URL parameters, such as $filter, $orderby, $skip, and $top. See the help documentation for more information on supported OData queries.
With the connection and OData endpoints configured, you are ready to connect to MYOB AccountRight data from Unqork.
Create a Simple Application for MYOB AccountRight Data
With the REST API configured for MYOB AccountRight through Connect Cloud, you are ready to create a MYOB AccountRight-connected application in Unqork. Here are the basic steps to this process:
- Register MYOB AccountRight (via Connect Cloud) as an Unqork service
- Create a workspace in Unqork
- Create a module-type application
Register MYOB AccountRight (via Connect Cloud) as an Unqork Service
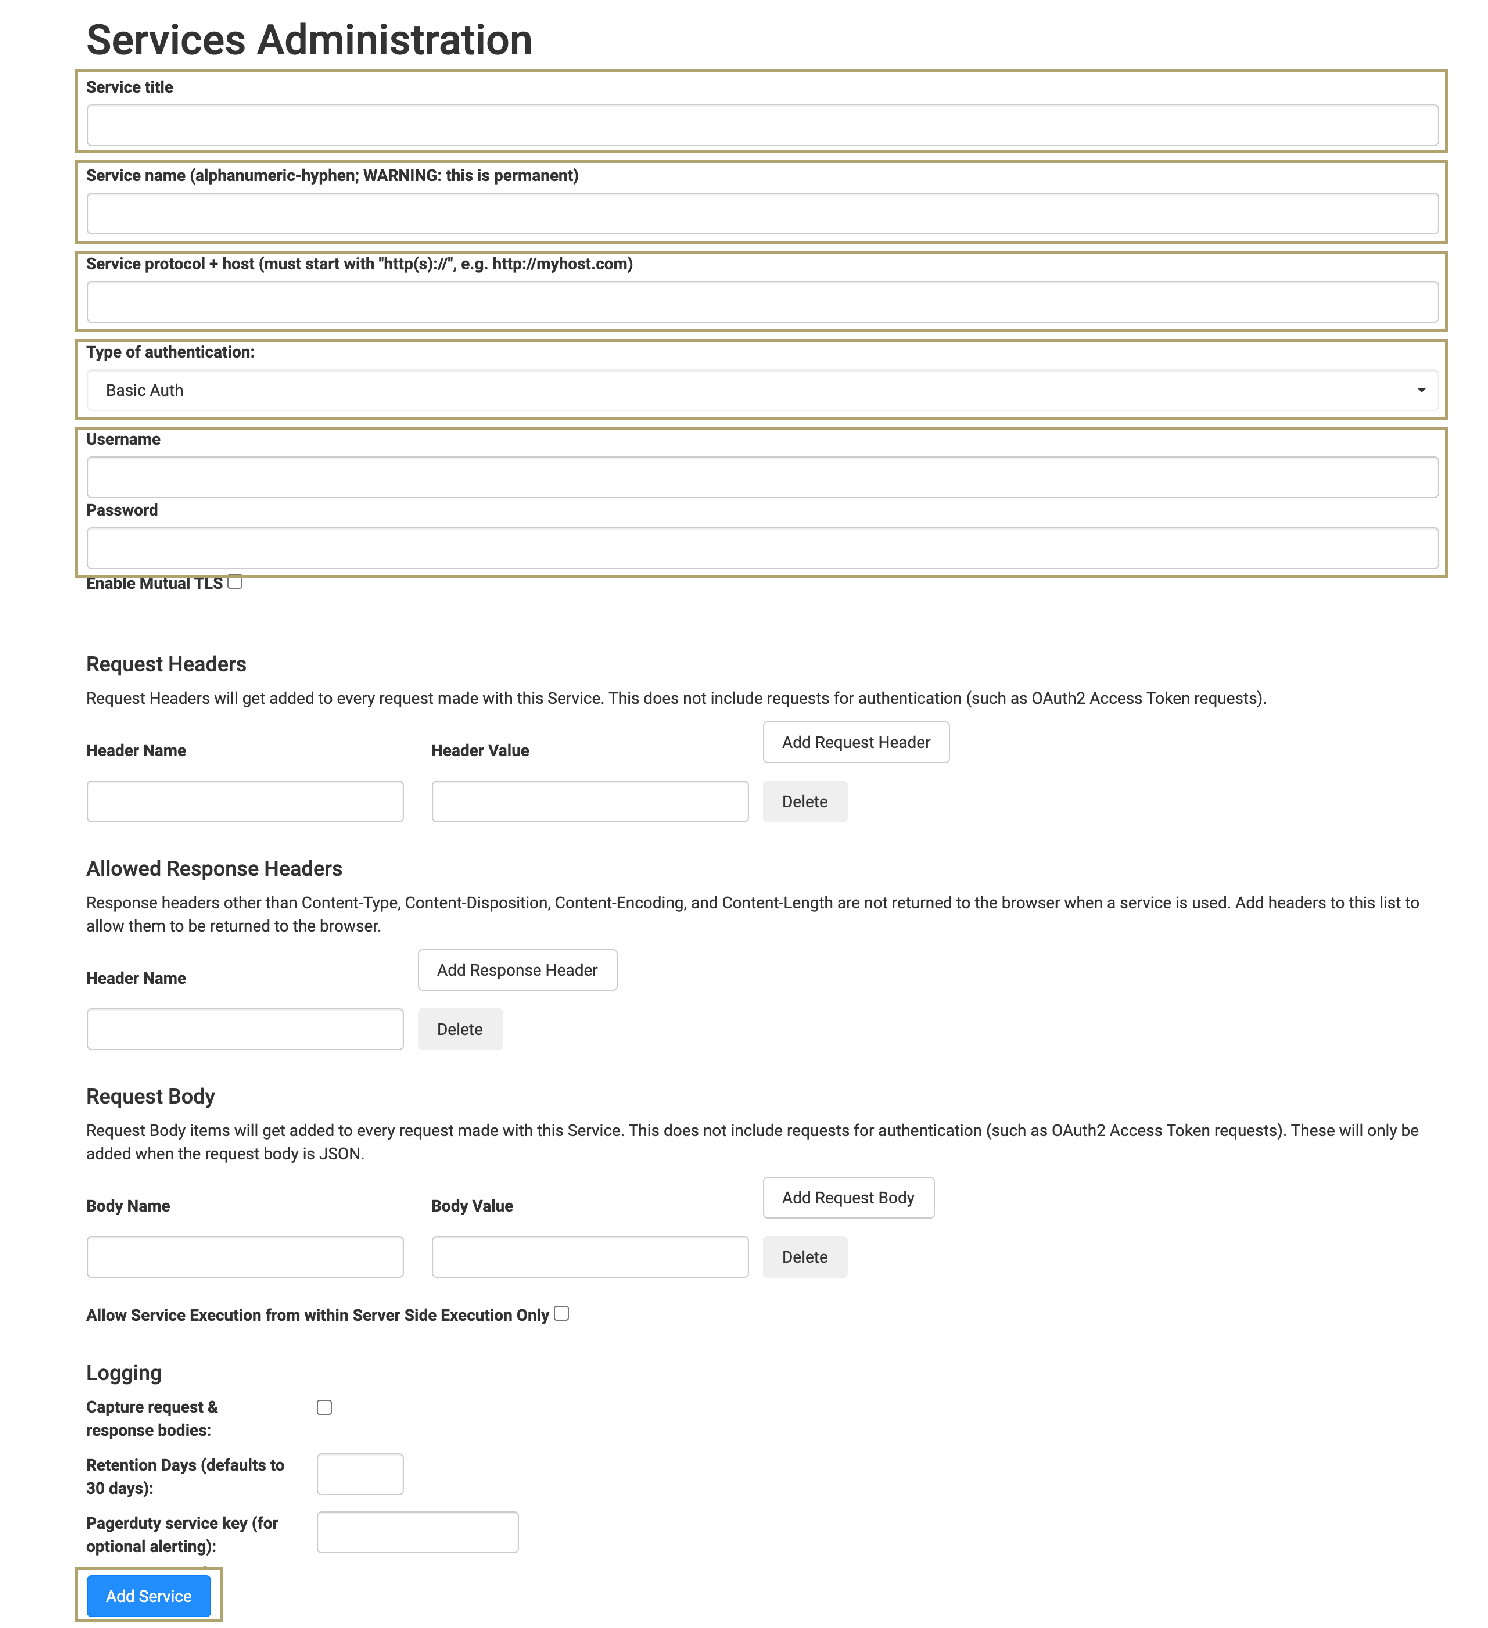
To connect to Connect Cloud, you need to give your environment permission to connect with an external service. Do this through Services Administration.
- Click the Settings drop-down at the top right corner of the Unqork Designer Platform.
- Click Administration.
- Under Integrations, click Services Administration.
- Enter a Service Title, for example, Connect Cloud.
- Enter a Service Name, for example, cdataConnect.
- Enter a Service protocol + host. This is the API endpoint you want to reference. For example, https://cloud.cdata.com/api/odata/service.
- Select Basic Auth from the Type of Authentications drop-down.
- Enter the Connect Cloud user ID (e.g. user@mydomain.com) in the User Name field.
- Enter the Connect Cloud user PAT in the Password field.
![Adding a Service for Connect Cloud]()
- Click Add Service.
Create a Workspace
Unqork lets you create your own workspace, which is a virtual container for you and your team to store and organize your applications. Once you build a workspace, you can add applications to it.
To create a workspace:
- Click Create Workspace
- Enter a unique Workspace Name
- Click Create
Your workspace tile appears under the Workspaces tab.
Create a Module-Type Application
With your workspace added, you are ready to create your application. You have the choice between a module-type and workflow-type application. For this use case, make a module-type application.
- Navigate to the Apps tab from your open workspace.
- Click Create App.
- Enter a unique App Name.
- Select a preview style from the Style drop-down. A style specifies your application's appearance to your and-users. If left blank, your application uses the environment's default style.
- Select Module from the App Type drop-down.
- Select New Entrypoint Module from the App Entrypoint Module drop-down.
- Click Create.
You will land on the Modules tab of your new application. It should look like the following:

Click the title to name the module in the Module Editor.
To complete your application, you need the following components:
- Hidden component: stores the data retrieved by the Plug-In
- Initializer component: executes the Plug-In when displaying tables
- Plug-In component: retrieves MYOB AccountRight data through Connect Cloud and stores it in the Hidden component
- ViewGrid component: creates on HTML table from the data stored in the Hidden component
Configure the Hidden Component
This Hidden component stores the MYOB AccountRight data retrieved through Connect Cloud.
- Drag and drop a Hidden component onto your canvas.
- Enter a Property ID and Canvas Label Text.
NOTE: Property IDs must be in Camel Case (stylized as camelCase). For example, hiddenComponent. Since the Hidden component is not visible to and-users, use your Property ID as the Canvas Label Text.
- Click Save.
Configure the Plug-in Component
Next, add a Plug-In component to request data from Connect Cloud. This component connects with the service you set up in Services Administration.
- Drag and drop a Plug-In component onto your canvas, placing it below the Hidden component.
- Enter a Property ID and Canvas Label Text.
NOTE: You must use Camel Case (stylized as camelCase). For naming best practices, start your Plug-In's Property ID with plugin. For example, pluginGetAWProducts.
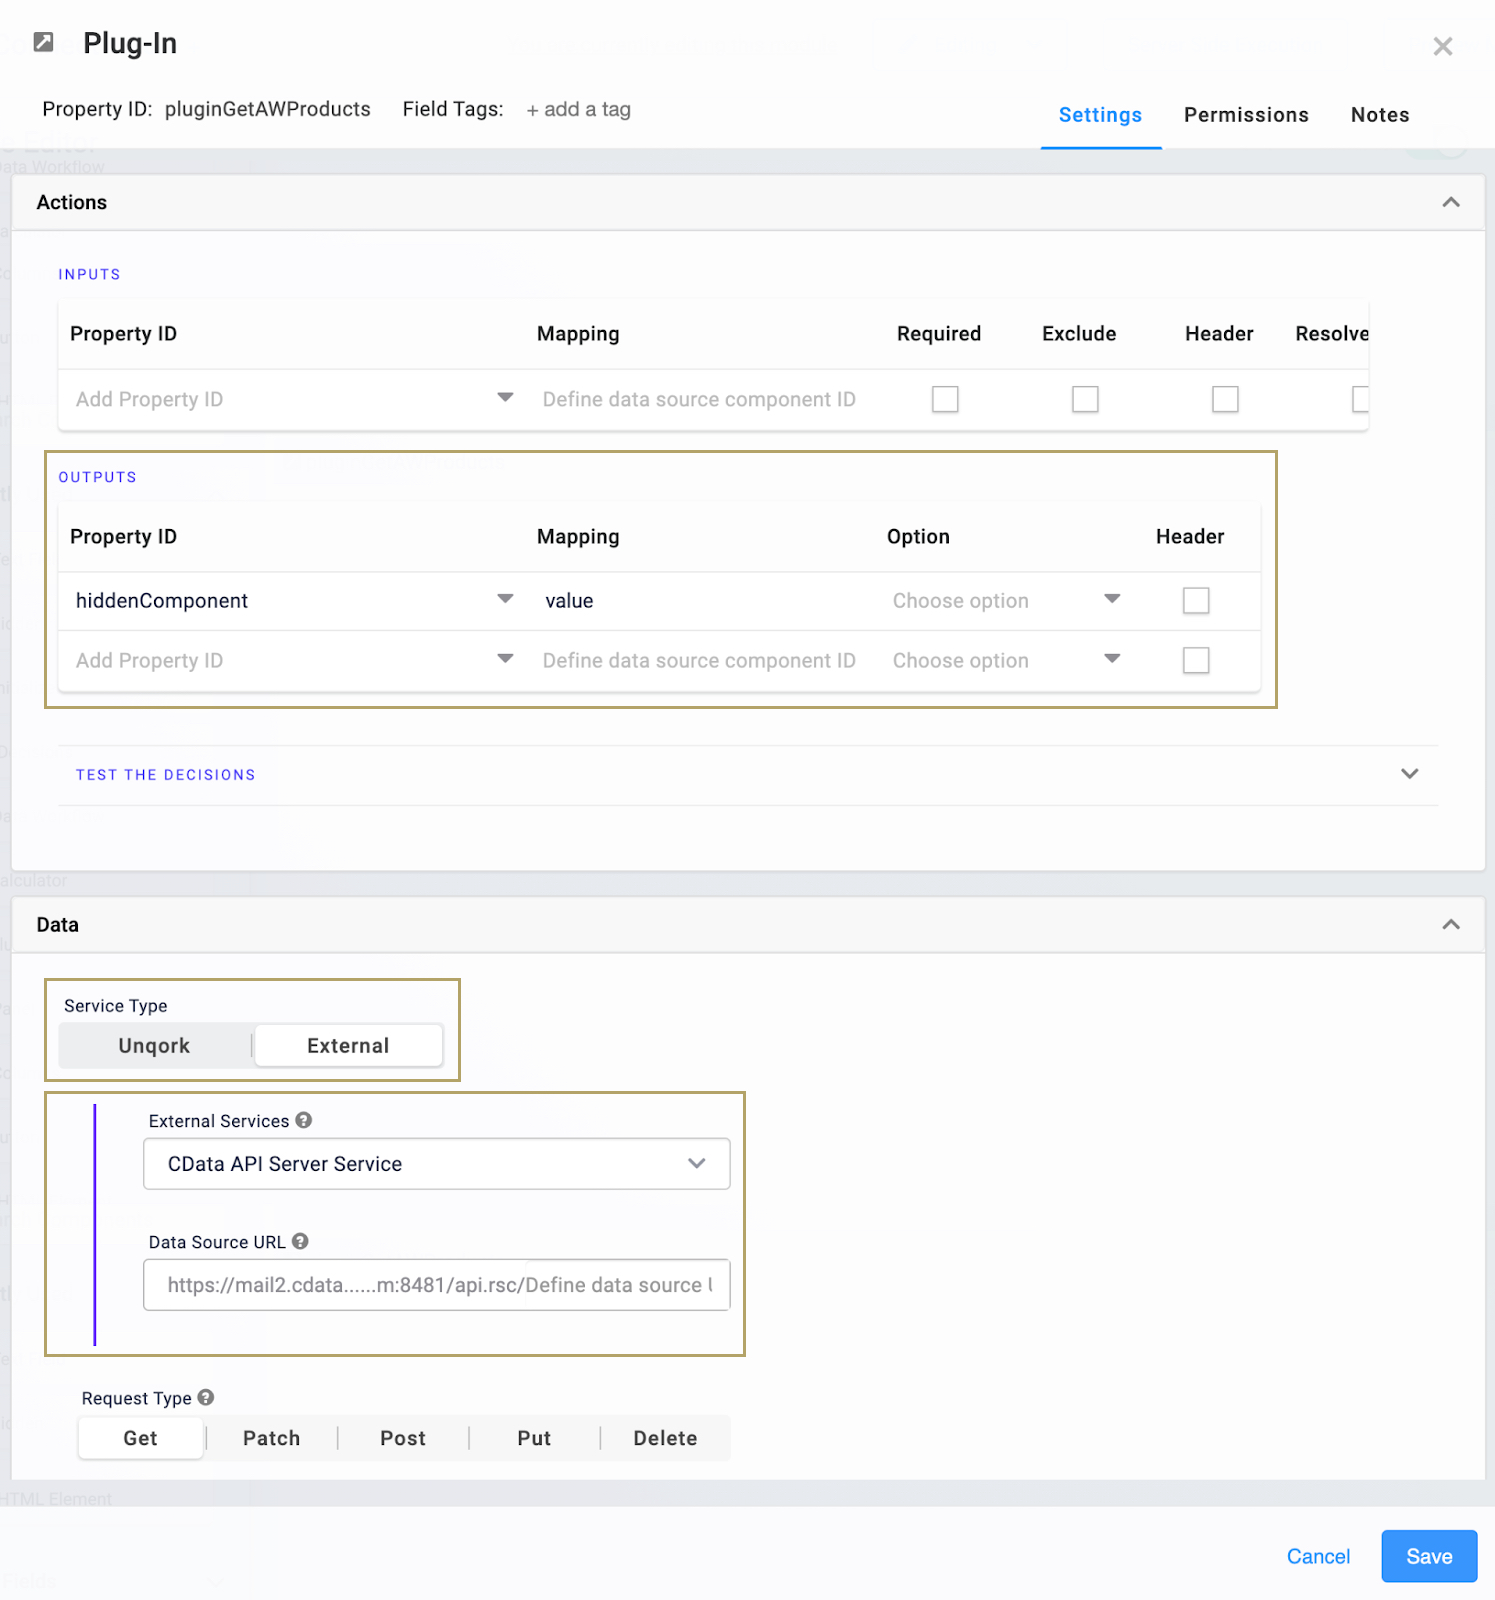
- Configure the Outputs table as follows:
- Enter the Property ID of your Hidden component in the Property ID column.
- Enter value in the Mapping column.
- Select External as the Service Type
- From the External Services drop-down, select your Connect Cloud service. This is the external service you set up in Services Administration.
- Add the specific endpoint for your Connect Cloud resources to the and of the Data Sources URL. For example, AdventureWorks2012_Production_Product.
![Highlighting a specific endpoint in Connect Cloud]()
NOTE: Your Data Sources URL will have a value similar to: https://cloud.cdata.com/api/odata/service/AdventureWorks2012_Production_Product.
- Click Save.
Configure the Initializer Component
The Initializer component is what fires the Plug-In to retrieve your MYOB AccountRight data.
- Drag and drop on Initializer component onto your canvas, placing it above the Plug-In component.
- Enter a Property ID and Canvas Label Text.
NOTE: You must use Camel Case (stylized as camelCase). For naming best practices, start your Initializer's Property Name with init. For example, initGetAWProducts.
- Set New Submission as the Trigger Type.
- In the Outputs table, enter the following:
- Enter the Property ID of your Plug-In in the Property ID column's field.
- Enter trigger in the Type column's field.
- Enter GO in the Value column's field.
- Click Save.
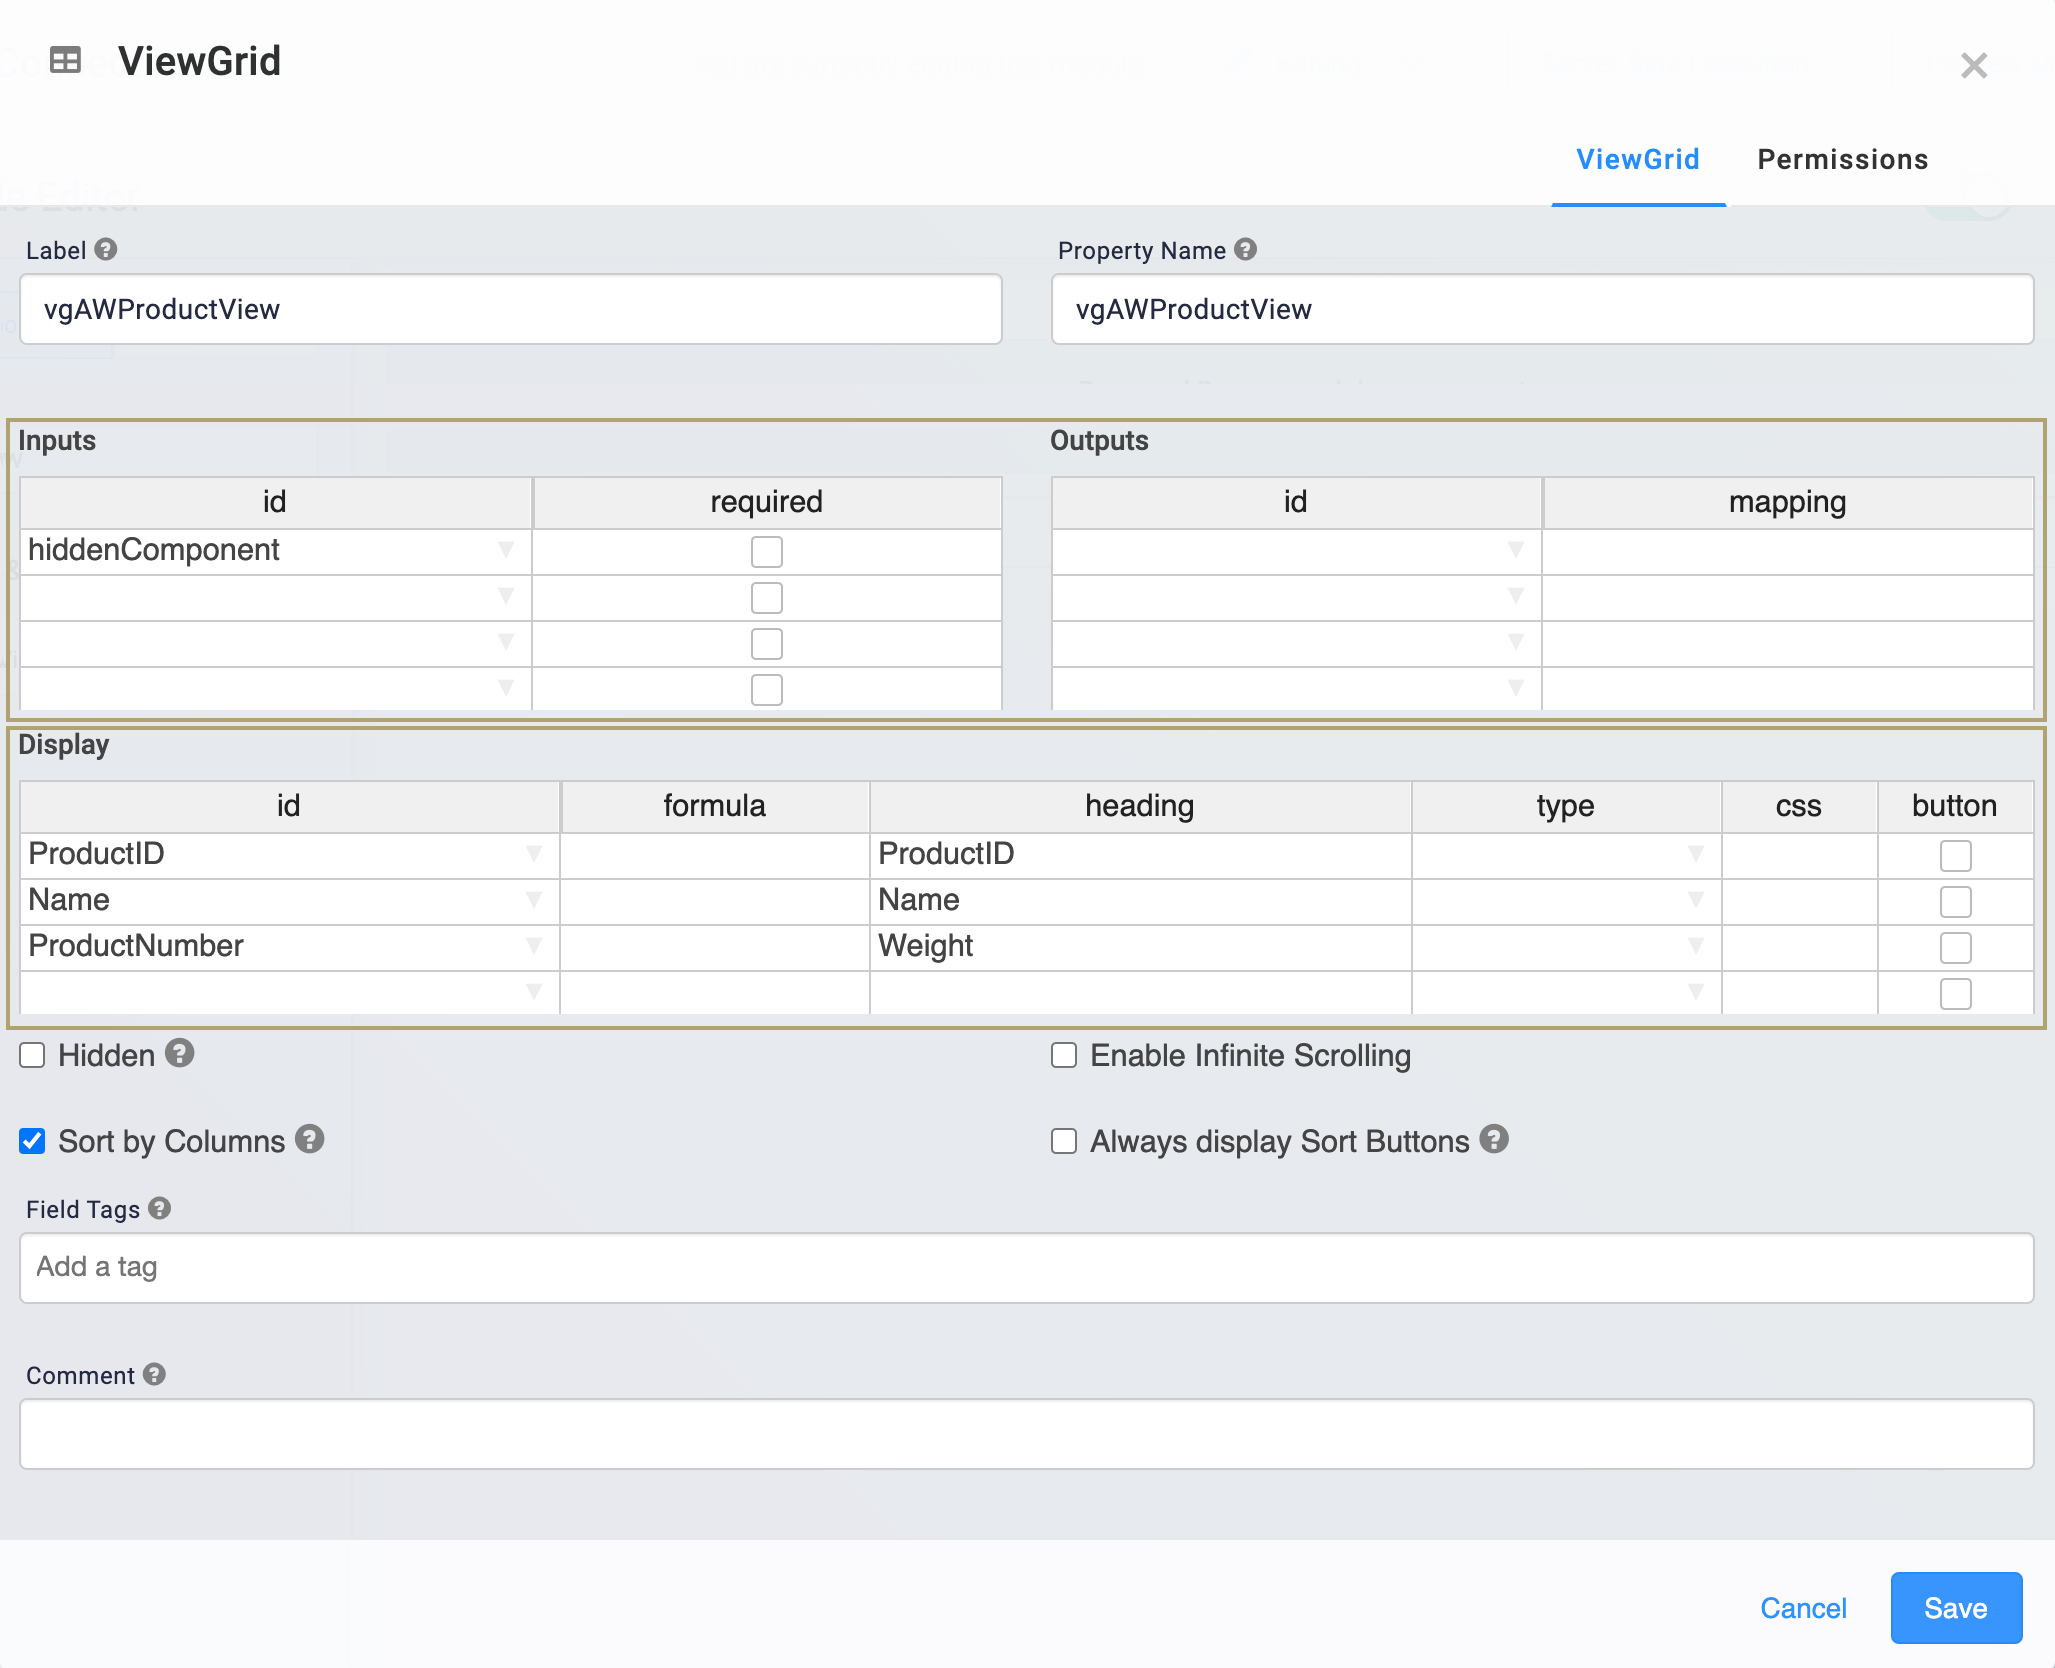
Configure the ViewGrid Component
The ViewGrid component references the data stored in your Hidden component. Then, it displays the MYOB AccountRight data to your and-users in a dashboard (or table).
- Drag and drop a ViewGrid component onto your canvas, placing it below the Plug-In component.
- Enter a Label and Property Name.
NOTE: You must use Camel Case (stylized as camelCase). For naming best practices, start your ViewGrid's Property Name with vg. For example, vgAWProductView.
- In the Inputs table, set id to the Property ID of the hidden component.
- In the Display table:
- In the id column: enter the IDs of the fields you want to display.
- In the handing column: enter the title you want for each field. This is how the field will display to your and-users.
![Configuring the ViewGrid Inputs and Display]()
- Click Save.
- Save your module.
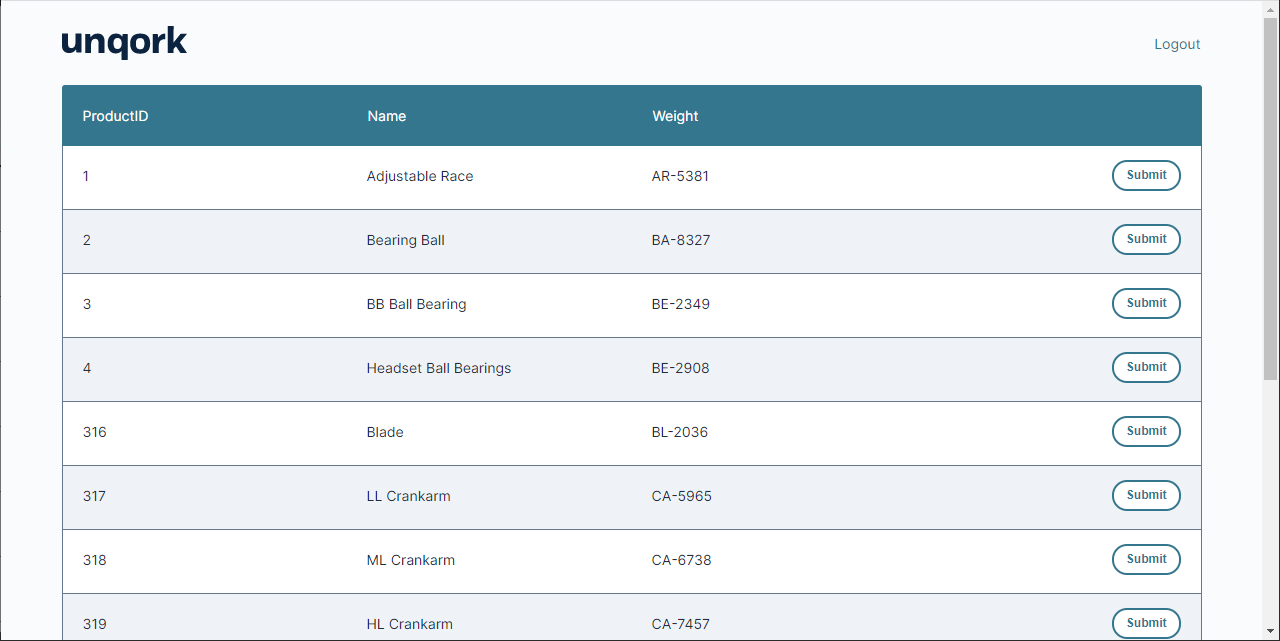
Once you add and configure the above components, you can preview how your application looks to and-users. In the Module Editor, click Preview Module to see the front-facing view (or "Express View") of the module.
Your Express View module should look something like this:
More Information & Free Trial
With Connect Cloud and Unqork, you can easily build MYOB AccountRight-connected applications. Request a free trial of Connect Cloud and start working with MYOB AccountRight data in Unqork today.


