Discover how a bimodal integration strategy can address the major data management challenges facing your organization today.
Get the Report →How to Use a Microsoft Access Database to Update Salesloft Data in Real Time
Update Salesloft data by creating a linked table in Microsoft Access with the CData Salesloft ODBC Driver.
CData ODBC drivers connect your data to any database management tool that supports Open Database Connectivity (ODBC). This includes many of the most popular productivity tools, adding new capabilities for document sharing and collaboration. Using the CData ODBC driver for Salesloft, you can update live Salesloft data in Microsoft Access; for example, you can make updates that can be immediately seen by other users.
Connect to Salesloft as an ODBC Data Source
If you have not already, first specify connection properties in an ODBC DSN (data source name). This is the last step of the driver installation. You can use the Microsoft ODBC Data Source Administrator to create and configure ODBC DSNs.
SalesLoft authenticates using the OAuth authentication standard or an API Key. OAuth requires the authenticating user to interact with SalesLoft using the browser.Using OAuth
For OAuth authentication, create an OAuth app to obtain the OAuthClientId, OAuthClientSecret, and CallbackURL connection properties. See the OAuth section in the Help documentation for an authentication guide.Using APIKey
Alternatively, you can authenticate with an APIKey. Provision an API key from the SalesLoft user interface: https://accounts.salesloft.com/oauth/applications/. You will receive a Key which will be used when issuing requests.
Create a Linked Table to Accounts Data
Follow the steps below to create a linked table, which enables you to access live Accounts data.
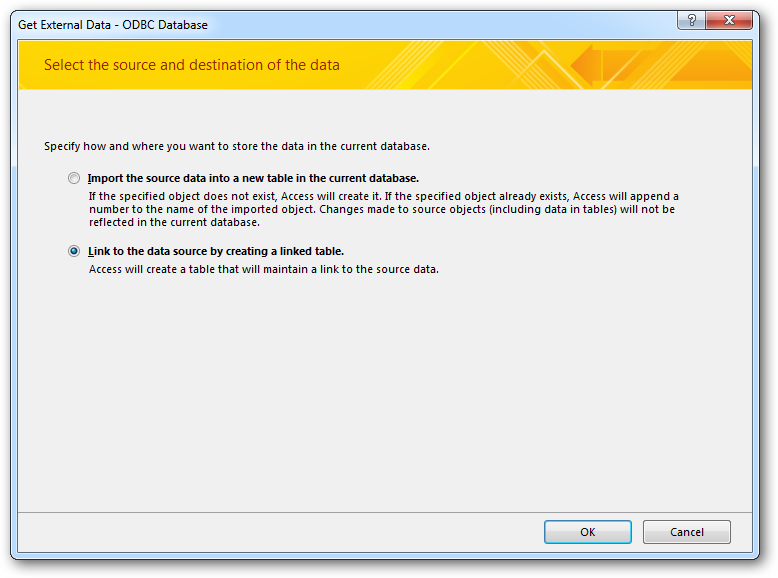
- On the External Data tab in Access, click ODBC Database.
![Use the Get External Data wizard to work with ODBC data sources in Access.]()
- Select the option to link to the data source. A linked table will enable you to read from and write data to the Accounts table.
![Linked Tables enable you use the live connection to Salesloft that is provided by the driver.]()
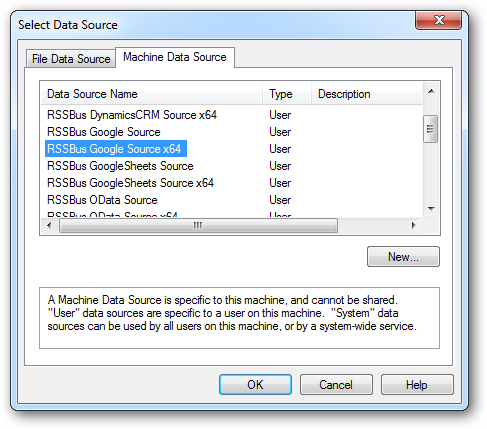
Select the CData Salesloft data source from the Machine Data Source tab.
![DSNs listed in the Get External Data wizard.]()
-
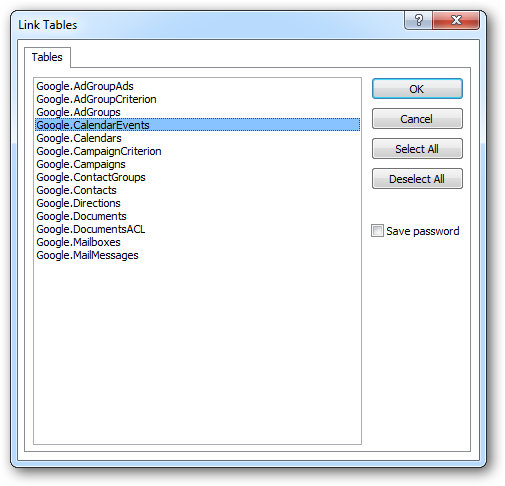
Select the Accounts table. For more information on this table, see the "Data Model" chapter in the help documentation.
![Available tables. (Google is shown.)]()
-
Double-click the linked table to make edits. The linked table will always have up-to-date data and any changes will be reflected back to the underlying table.
![A linked table to the live data. (Google is shown.)]()


