ノーコードでクラウド上のデータとの連携を実現。
詳細はこちら →Acumatica Driver の30日間無償トライアルをダウンロード
30日間の無償トライアルへ製品の詳細
Acumatica のAccounts、Bills、Customers、Leads などの会計データに連携するJava アプリケーションを素早く、簡単に開発できる便利なドライバー。
CData


こんにちは!ウェブ担当の加藤です。マーケ関連のデータ分析や整備もやっています。
Crystal Reports には、JDBC 標準向けのサポートが組み込まれています。この記事では、Acumatica の機能を持つ帳票を作成するレポート作成ウィザードの使い方を説明します。
CData JDBC Driver for Acumatica を、ドライバーのJAR をCrystal Reports のクラスパスに含めてインストール:DataDriverCommonElement の下のClassPath element のパスに、 .jar を含むファイルのフルパスを追加します。
CRConfig.xml は通常C:\Program Files (x86)\SAP BusinessObjects\SAP BusinessObjects Enterprise XI 4.0\java に配置されます。— パスはインストールによって若干異なる場合があります。ドライバーのJAR はインストールディレクトリの[lib]サブフォルダ内にあります。
ClassPath にJAR を追加したら、Crystal Reports を再起動します。
下記の手順に従って、レポート作成ウィザードを使ってAcumatica 接続を作成します。
ウィザードでJDBC 接続URL を選択します。
jdbc:acumatica:Url = https://try.acumatica.com/ISV/entity/Default/17.200.001/;User=user;Password=password;Company=CompanyName;
ドライバーのクラス名を設定:
cdata.jdbc.acumatica.AcumaticaDriver
Acumatica に接続するには、次の接続プロパティを設定してください。
詳細については、CData ドライバードキュメントの「はじめに」を参照してください。
JDBC 接続をAcumatica に追加したら、レポート作成ウィザードを使ってAcumatica を帳票に追加できます。
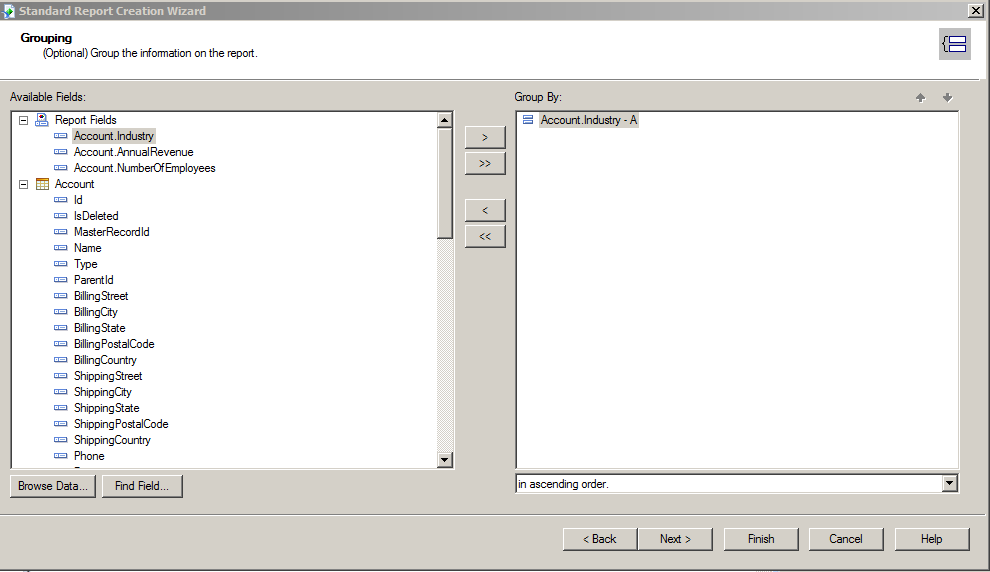
帳票に必要なテーブルやフィールドを選択して、データソースを設定します。この例では、Events テーブルのId およびlocation_displayname カラムを使います。
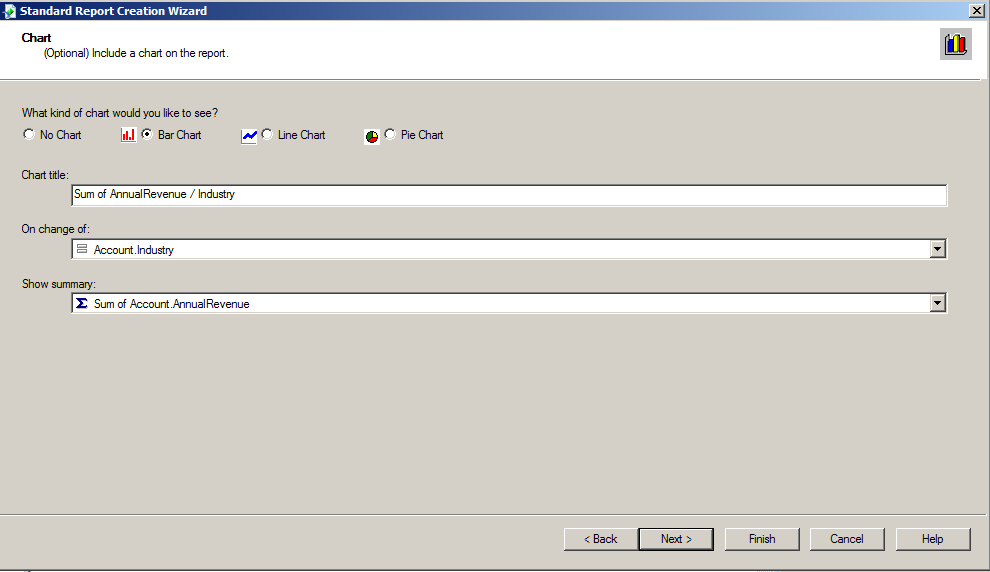
チャートの種類を設定 ウィザードを完了すると、Crystal Reports はAcumatica データ に実行されるSQL クエリをビルドします。ドライバーは、ライブAcumatica データ に対してクエリを実行します。
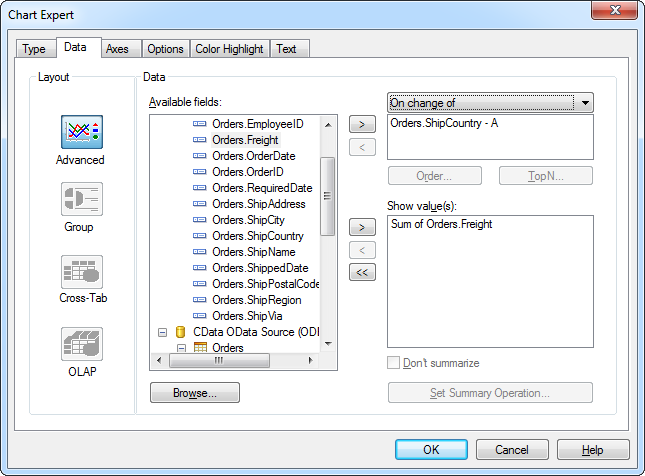
データのインポートが終わったら、データをサマライズもしくはソートするチャートやレポートオブジェクトを作成できます。[Insert]>[Chart]をクリックして、チャートエキスパートを開きます。Total location_displayname by Id を表すグラフを作成するには、Id を[On Change Of]メニューセレクションの下のボックスに追加してからlocation_displayname を[Show Values]の下のボックスに追加します。
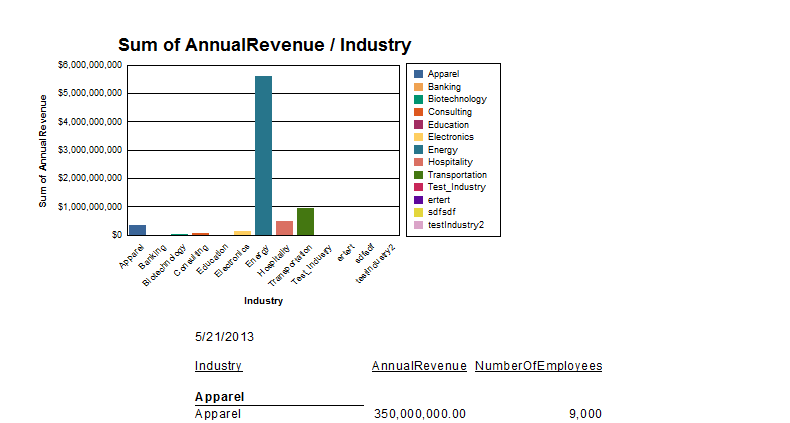
完成した帳票をプレビューして、チャートにデータが入っていることを確認します。Null 値を取り除きたい場合は、SelectionFormula を使います。