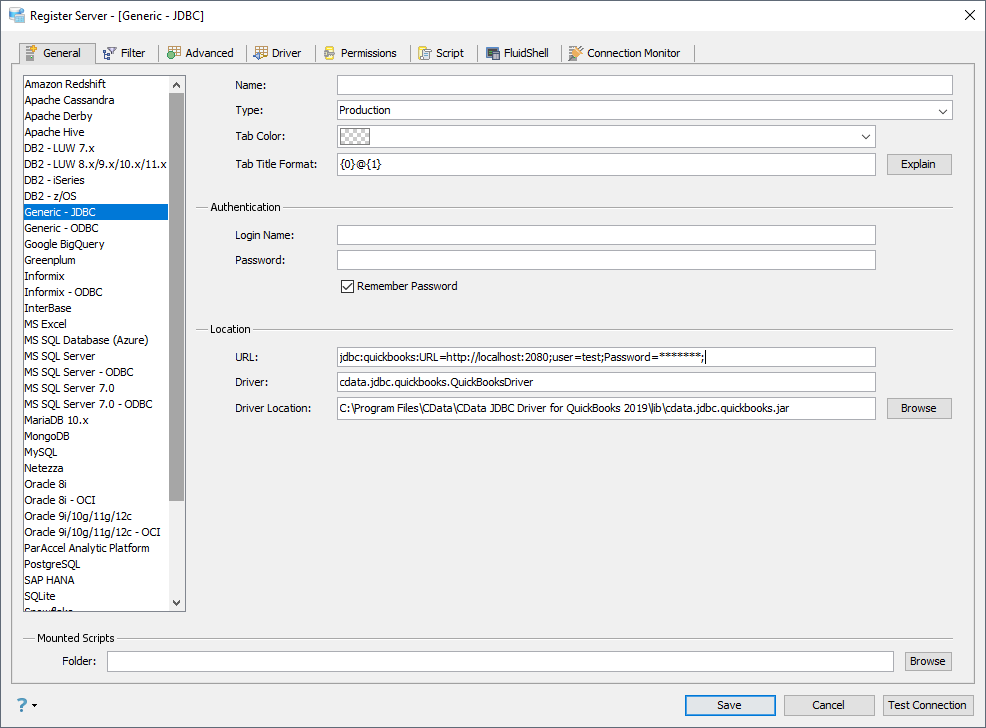
CData JDBC Driver for ADP は、Aqua Data Studio のようなIDE のウィザード・アナリティクスにADP データを統合します。本記事では、ADP データをコネクションマネージャーに接続してクエリを実行する手順を説明します。
JDBC Data Source の設定
コネクションマネージャーで、新しいJDBC データソースとして、接続プロパティ設定を行い、保存します。ADP データがAqua Data Studio ツールから使えるようになります。
- Aqua Data Studio で、Server メニューから Register Server を選択します。
- Register Server フォームで、 'Generic - JDBC' コネクションを選びます。
- 次のJDBC 接続プロパティを設定します:
- Name:任意の名前、データソースの名前など。
- Driver Location:Browse ボタンをクリックして、インストールディレクトリのlib フォルダの cdata.jdbc.adp.jar ファイルを選択します。
- Driver:クラス名に cdata.jdbc.adp.ADPDriver を入力。
- URL:jdbc:adp: から始まるJDBC URL を入力します。接続プロパティをカンマ区切りで書きます。接続プロパティの詳細は、ヘルプドキュメントを参照してください。一般的な接続文字列は:
jdbc:adp:OAuthClientId=YourClientId;OAuthClientSecret=YourClientSecret;SSLClientCert='c:\cert.pfx';SSLClientCertPassword='admin@123'
Connect to ADP by specifying the following properties:
- SSLClientCert: Set this to the certificate provided during registration.
- SSLClientCertPassword: Set this to the password of the certificate.
- UseUAT: The connector makes requests to the production environment by default. If using a developer account, set UseUAT = true.
- RowScanDepth: The maximum number of rows to scan for the custom fields columns available in the table. The default value will be set to 100. Setting a high value may decrease performance.
The connector uses OAuth to authenticate with ADP. OAuth requires the authenticating user to interact with ADP using the browser. For more information, refer to the OAuth section in the Help documentation.
ADP データにクエリを実行
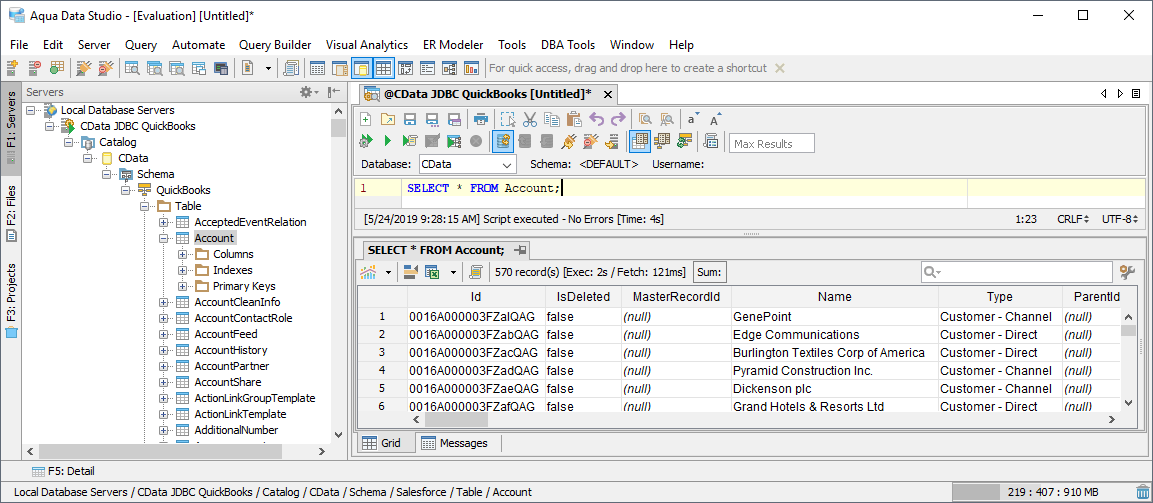
接続したテーブルにクエリを実行してみます。