ノーコードでクラウド上のデータとの連携を実現。
詳細はこちら →CData


こんにちは!リードエンジニアの杉本です。
CData API Server と ADO.NET Provider / JDBC Driver for ADLS を使って、AI アシスタントPEP(https://pep.work/) から Azure Data Lake Storage に接続して、チャットボットでリアルタイムAzure Data Lake Storageデータを使った応答を可能にする方法を説明します。
次のステップに従い、セキュアな REST API サービスを立ち上げます
API Server はサーバー上で稼働します。Windows 版は、製品に組み込まれているスタンドアロンのサーバーかIIS に配置して稼働させることができます。Java 版では、Java servlet コンテナにAPI Server のWAR ファイルを配置します。 デプロイの詳細は製品ヘルプを参照してください。API Server を Microsoft Azure、 Amazon EC2、Heroku にデプロイする方法はKB に記事があります。
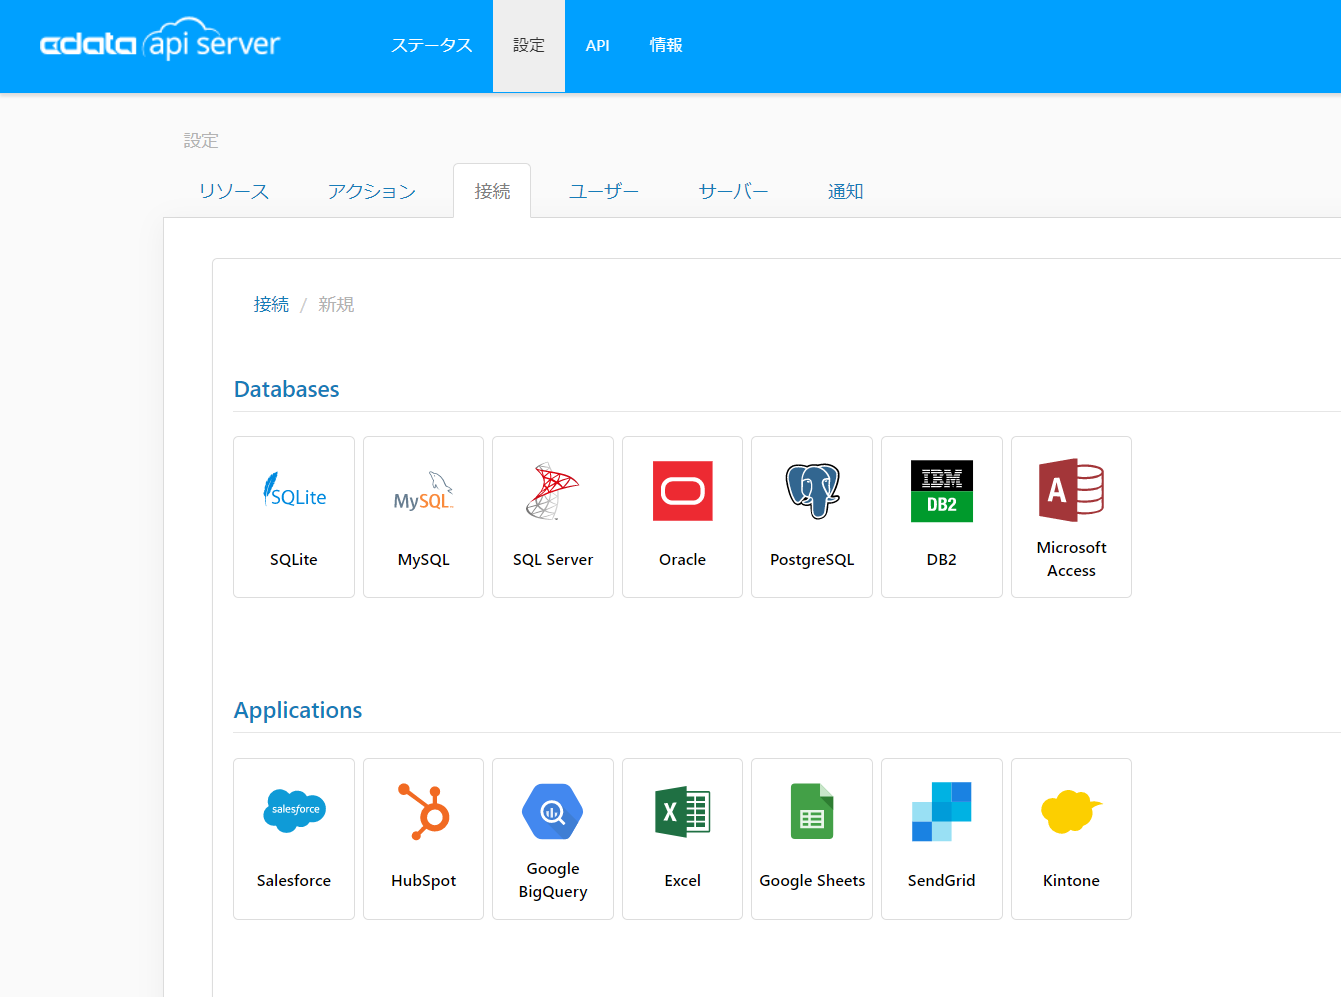
API Server の管理コンソールで[設定]→[接続]から新しい接続を追加してAzure Data Lake Storage を追加します。
Azure Data Lake Storage のアイコンがデフォルトのAPI Server の接続先にない場合には、API Server がJava 版の場合はJDBC Drivers、API Server がWindows 版の場合はADO.NET Data ProvidersからAzure Data Lake Storage ドライバーをAPI Server と同じマシンにインストールして、API Server を再起動します。
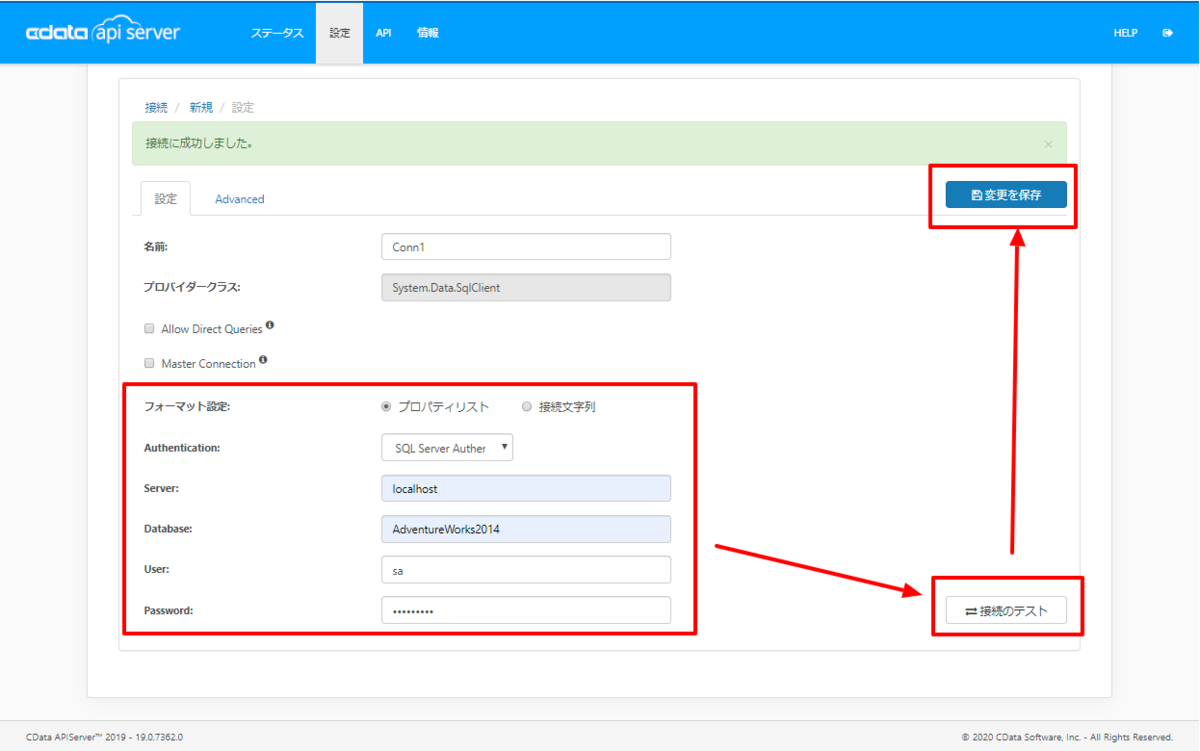
Azure Data Lake Storage への接続に必要な認証情報を入力します。接続のテストを行い、接続を確認して、設定を保存します。
Gen 1 DataLakeStorage アカウントに接続するには、はじめに以下のプロパティを設定します。
Gen 1 は、認証方法としてAzure Active Directory OAuth(AzureAD)およびマネージドサービスID(AzureMSI)をサポートしています。認証方法は、ヘルプドキュメントの「Azure DataLakeStorage Gen 1 への認証」セクションを参照してください。
Gen 2 DataLakeStorage アカウントに接続するには、はじめに以下のプロパティを設定します。
Gen 2は、認証方法としてアクセスキー、共有アクセス署名(SAS)、Azure Active Directory OAuth(AzureAD)、マネージドサービスID(AzureMSI)など多様な方法をサポートしています。AzureAD、AzureMSI での認証方法は、ヘルプドキュメントの「Azure DataLakeStorage Gen 2 への認証」セクションを参照してください。
アクセスキーを使用して接続するには、AccessKey プロパティを取得したアクセスキーの値に、AuthScheme を「AccessKey」に設定します。
Azure ポータルからADLS Gen2 ストレージアカウントのアクセスキーを取得できます。
共有アクセス署名を使用して接続するには、SharedAccessSignature プロパティを接続先リソースの有効な署名に設定して、AuthScheme を「SAS」に設定します。 共有アクセス署名は、Azure Storage Explorer などのツールで生成できます。
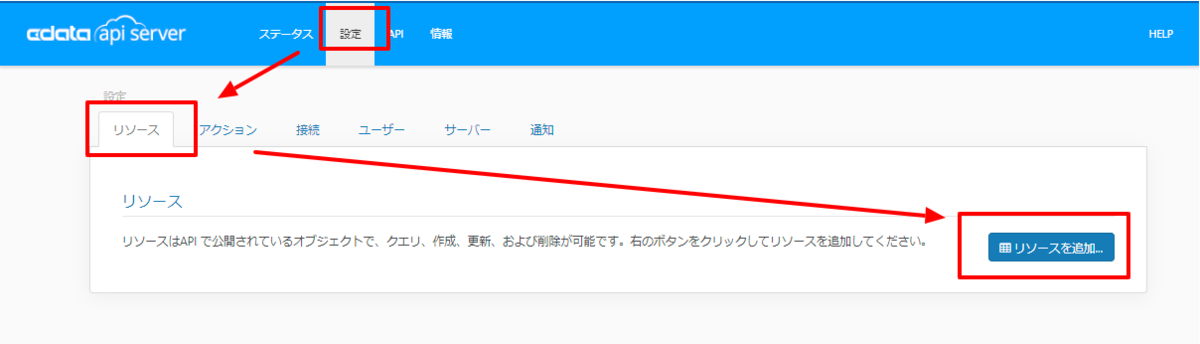
接続を確立後、[設定]→[リソース]の画面で からREST API として公開するエンティティを選択します。
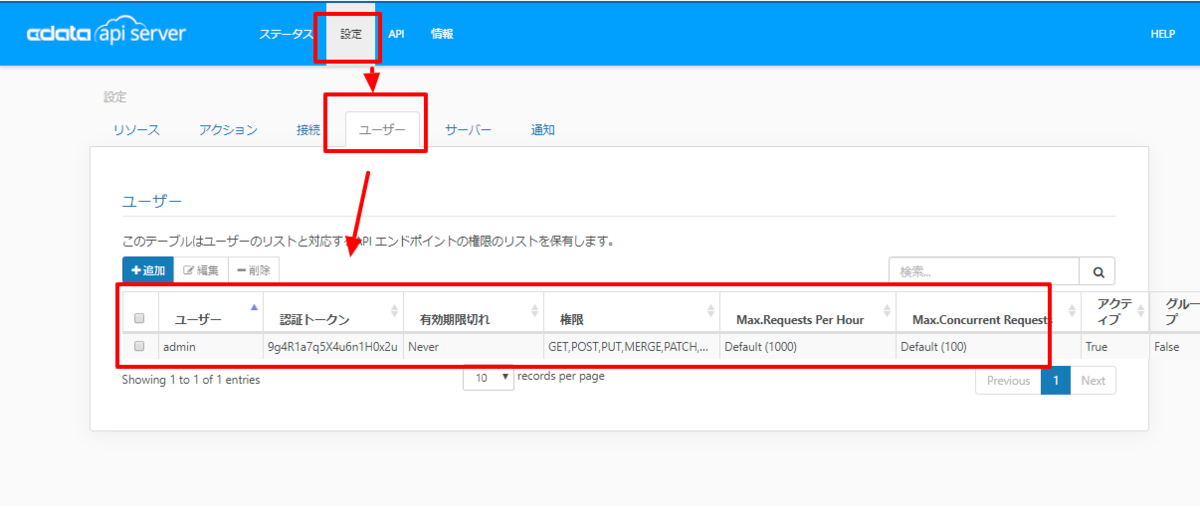
[設定]→[ユーザー]からAPI にアクセスできるユーザーの認証設定を行います。API Server はトークンでの認証を行うことができます。 IP アドレスでAPI へのアクセスを制限することも可能です。デフォルトではローカルマシンからのアクセスのみが許可されています。SSL の設定も可能です。
オンプレミスRDB やExcel/CSV などのファイルのデータを使用する場合には、API Server のCloug Gateway / SSH ポートフォワーディングが便利です。是非、Cloud Gatway の設定方法 記事を参考にしてください。
前項まででAPI ができたので、ここからはPEP 側での設定作業です。
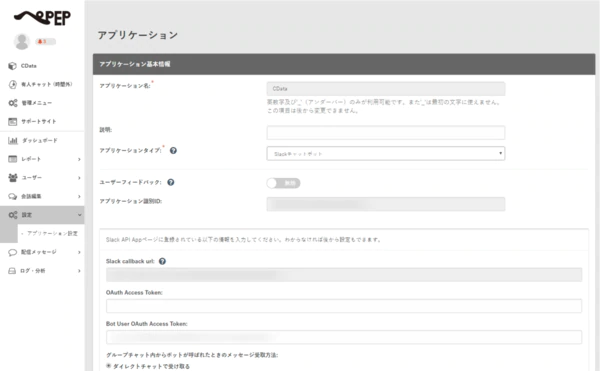
PEP 側ではあらかじめSlack などのアプリケーションを構成しておきます。ここにAPI Server をコールするAI アシスタントのシナリオを追加していきます。
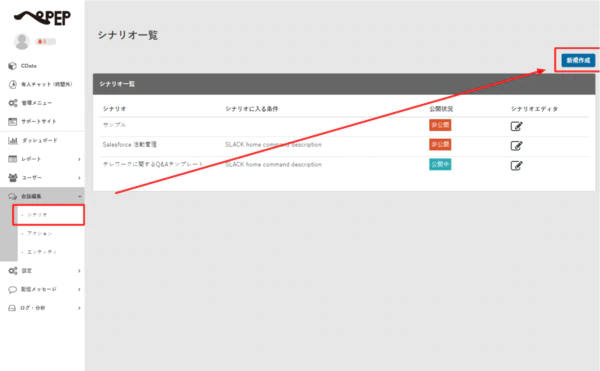
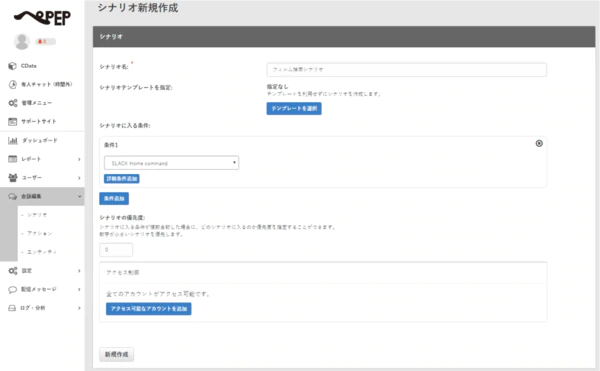
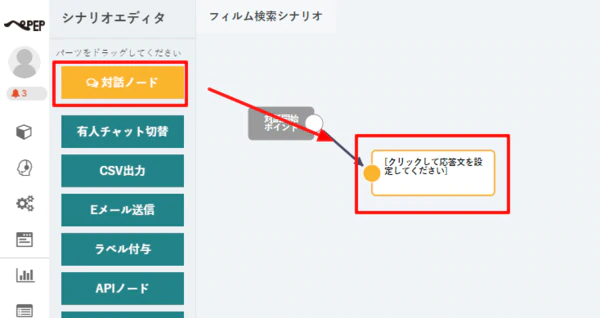
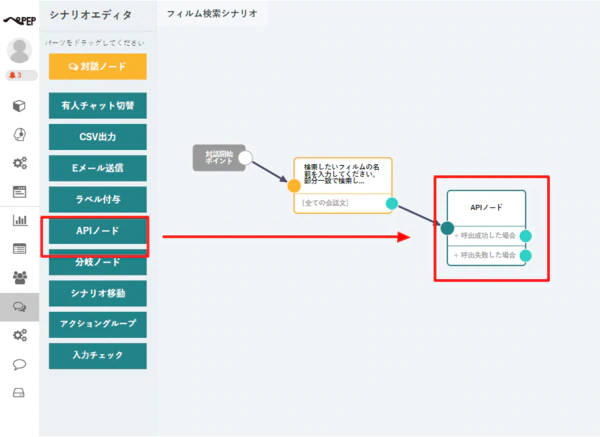
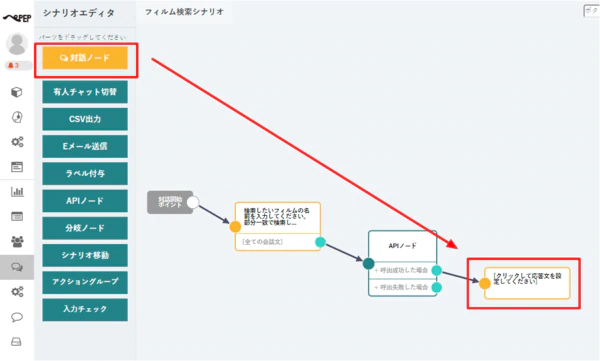
具体的にAPI連携を含めたシナリオを作っていきます。
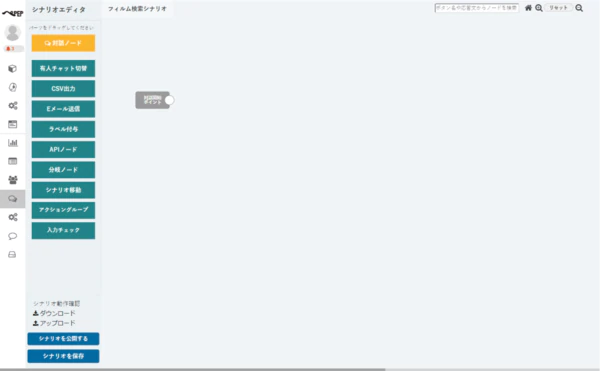
これで保存すると、API ノードが使えるようになります。
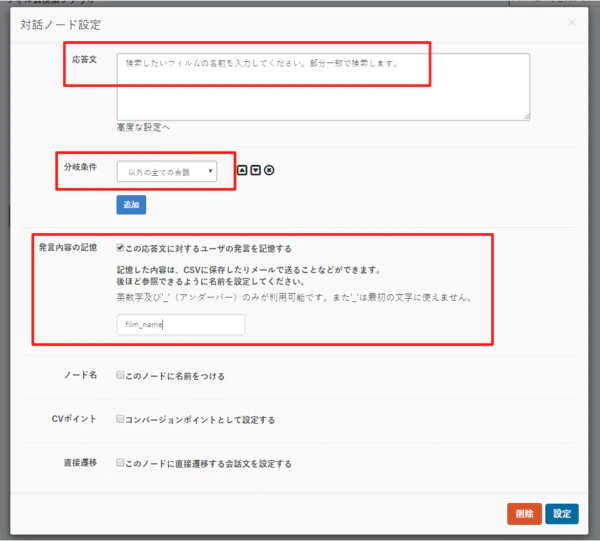
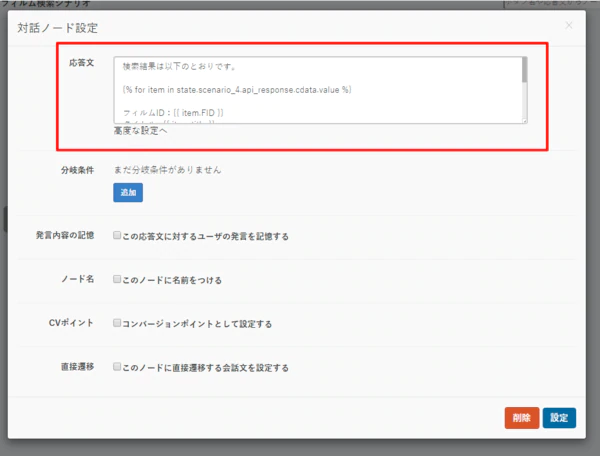
最後に後続の対話ノードを構成し、取得した検索結果を表示します。
対話ノードの応答文には、以下のような文章を埋め込みます。
検索結果は以下のとおりです。

    {% for item in state.scenario_4.api_response.film_search.value %}
    フィルムID:{{ item.FID }}
    タイトル : {{ item.title }}
    値段:{{ item.price }}
    カテゴリー:{{ item.category }}
    俳優: -----

    {% endfor %}
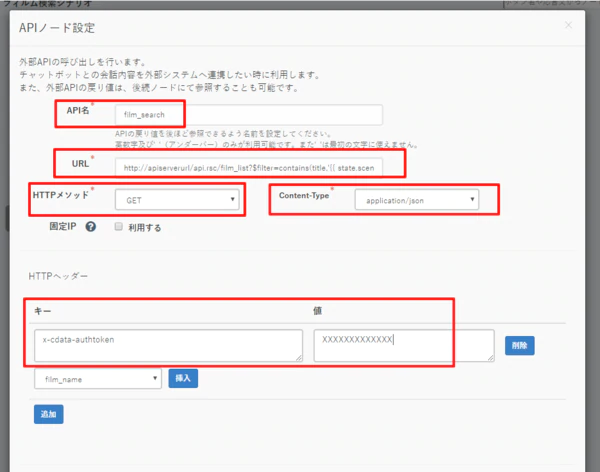
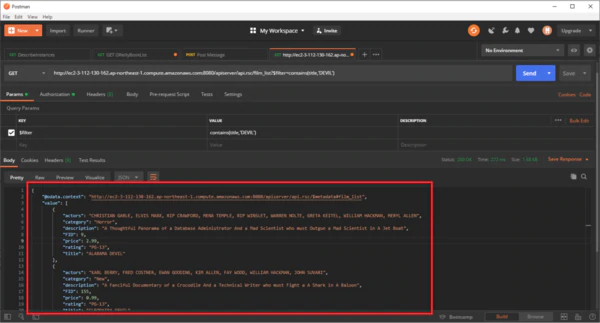
ここでポイントになるのは、API Server から受け取るJSONのレスポンスの分解方法です。
API Server のレスポンスはオブジェクト直下にvalueという配列要素があり、このレスポンスは「{{state.scenario_4.api_response.film_search.value}}」の形でアクセスできます。
設定イメージ:state.シナリオID.api_response.APIノード名.value
これを「FOR」での繰り返し処理で取得して、文章として表示する仕組みになっています。
これで設定は完了です。実際に動かしてみると、Azure Data Lake Storage →API Server → PEP 経由でデータを取得して表示していることがわかるかと思います。
CData API Server は、無償版および30日の無償トライアルがあります。是非、API Server ページ から製品をダウンロードしてお試しください。