製品をチェック

無償トライアル:

無償トライアルへ

製品の情報と無償トライアルへ:

Azure Data Lake Storage JDBC Driver

Azure Data Lake Storage データに連携するJava アプリケーションを素早く、簡単に開発できる便利なドライバー。

データ連携でお困りですか?

お問い合わせ

Pentaho Report Designer にAzure Data Lake Storage データに連携して分析


Pentaho BI ツールでAzure Data Lake Storage のレポートを作成。


加藤龍彦
ウェブデベロッパー

azuredatalake ロゴ画像

JDBC Driver

jdbc ロゴ画像
Pentaho Report Designer ロゴ画像


CData JDBC Driver for ADLS はダッシュボードや帳票ツールからリアルタイムAzure Data Lake Storage データへの連携を可能にします。この記事では、Azure Data Lake Storage をJDBC データソースとして接続する方法と、Pentaho でAzure Data Lake Storage を元に帳票を作成する方法を説明します。

接続と帳票の作成

  1. インストールディレクトリの[lib]サブフォルダ内のJAR ファイルをコピーし、Pentaho のディレクトリ内の\Report-Designer\lib\jdbc\ フォルダに配置します。
  2. \Report-Designer\ フォルダのreport-designer.bat ファイルを起動し、Report-Designer UI を開きます。
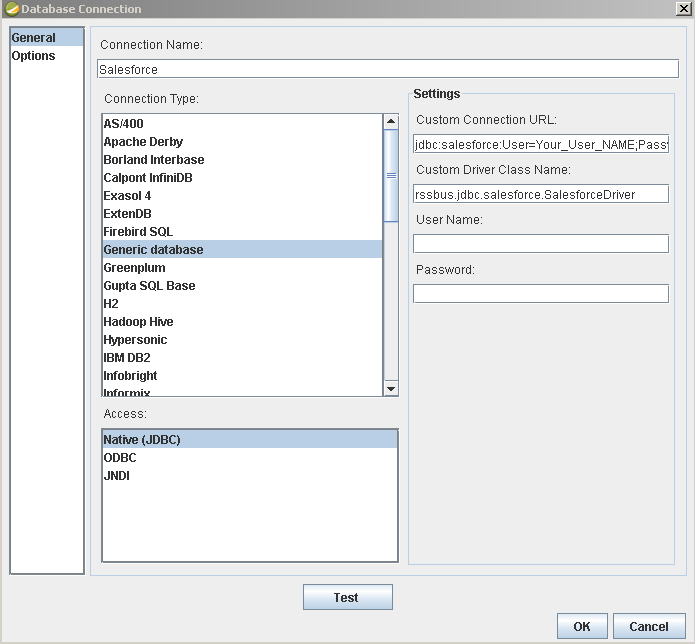
  3. 以下の手順でドライバーを新しいデータソースに設定します。[Data]>[Add Data Source]>[Advanced]>[JDBC (Custom)]とクリックし、新しいAzure Data Lake Storage 接続を作成します。ダイアログが表示されたら、次のように接続プロパティを設定します。

    • Custom Connection URL property:JDBC URL を入力。初めに以下を入力し jdbc:adls: 次にセミコロン区切りで接続プロパティを入力します。

      Authenticating to a Gen 1 DataLakeStore Account

      Gen 1 uses OAuth 2.0 in Azure AD for authentication.

      For this, an Active Directory web application is required. You can create one as follows:

      1. Sign in to your Azure Account through the .
      2. Select "Azure Active Directory".
      3. Select "App registrations".
      4. Select "New application registration".
      5. Provide a name and URL for the application. Select Web app for the type of application you want to create.
      6. Select "Required permissions" and change the required permissions for this app. At a minimum, "Azure Data Lake" and "Windows Azure Service Management API" are required.
      7. Select "Key" and generate a new key. Add a description, a duration, and take note of the generated key. You won't be able to see it again.

      To authenticate against a Gen 1 DataLakeStore account, the following properties are required:

      • Schema: Set this to ADLSGen1.
      • Account: Set this to the name of the account.
      • OAuthClientId: Set this to the application Id of the app you created.
      • OAuthClientSecret: Set this to the key generated for the app you created.
      • TenantId: Set this to the tenant Id. See the property for more information on how to acquire this.
      • Directory: Set this to the path which will be used to store the replicated file. If not specified, the root directory will be used.

      Authenticating to a Gen 2 DataLakeStore Account

      To authenticate against a Gen 2 DataLakeStore account, the following properties are required:

      • Schema: Set this to ADLSGen2.
      • Account: Set this to the name of the account.
      • FileSystem: Set this to the file system which will be used for this account.
      • AccessKey: Set this to the access key which will be used to authenticate the calls to the API. See the property for more information on how to acquire this.
      • Directory: Set this to the path which will be used to store the replicated file. If not specified, the root directory will be used.

      以下は一般的なJDBC URL です:

      jdbc:adls:Schema=ADLSGen2;Account=myAccount;FileSystem=myFileSystem;AccessKey=myAccessKey;
    • Custom Driver Class Name:cdata.jdbc.adls.ADLSDriver と入力。
    • User Name:認証するユーザーネーム。
    • Password:認証するパスワード。
    Required connection properties defined in the JDBC URL. (Salesforce is shown.)

レポートに Azure Data Lake Storage データを追加

これで、Azure Data Lake Storage の帳票を作成する準備が整いました。

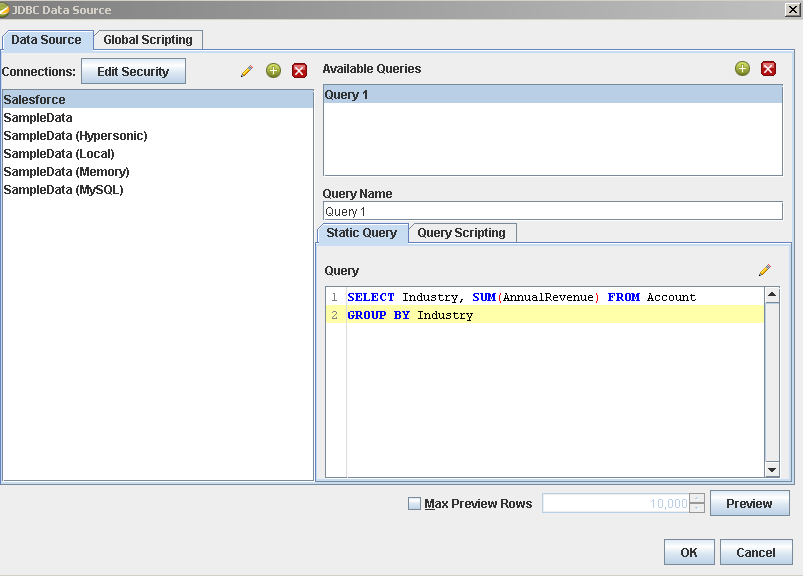
  1. 帳票にAzure Data Lake Storage データソースを追加します:[Data]>[Add Data Source]>[JDBC]をクリックし、データソースを選択します。

  2. クエリを設定します。この記事では次を使います:

    SELECT FullPath, Permission FROM Resources WHERE Type = 'FILE' The query to retrieve data, specified in the JDBC data source configuration wizard. (Salesforce is shown.)
  3. 帳票にチャートをドラッグし、ダブルクリックしてチャートを編集します。帳票を実行して、チャートを表示します。このクエリ結果を使って、Resources テーブルのシンプルなチャートを作成することができます。
  4. 帳票を実行して、チャートを見てみましょう。
A chart generated from up-to-date data. (Salesforce is shown.)