ノーコードでクラウド上のデータとの連携を実現。
詳細はこちら →Azure Data Lake Storage ODBC Driver の30日間無償トライアルをダウンロード
30日間の無償トライアルへ製品の詳細
Azure Data Lake Storage ODBC Driver を使って、ODBC 接続をサポートするあらゆるアプリケーション・ツールからAzure Data Lake Storage にデータ連携。
Azure Data Lake Storage にデータベースと同感覚でアクセスして、Azure Data Lake Storage データに使い慣れたODBC インターフェースで連携。
こんにちは!ドライバー周りのヘルプドキュメントを担当している古川です。
Azure Data Lake Storage データをDB にコピーするニーズは多いです。例えば、データのバックアップのため、 データをDB にデータレイク的に格納して他のアプリケーションやBI、ETL ツールから連携利用するなどです。
ただし、JSON やXML 形式であったりスキーマレスなデータなどを、DB に格納できるようにスキーマ定義をしながらデータを同期することは大きな手間です。 しかも、SaaS やNoSQL などのデータはスキーマレスであったり、スキーマが頻繁に変更されます。
Driver 技術では、Azure Data Lake Storage データをテーブルにモデル化し、スキーマを付与してDB への格納を容易にします。 本記事では、CACHE コマンドだけで、SQL Server にAzure Data Lake Storage データの同期を取る方法を説明します。
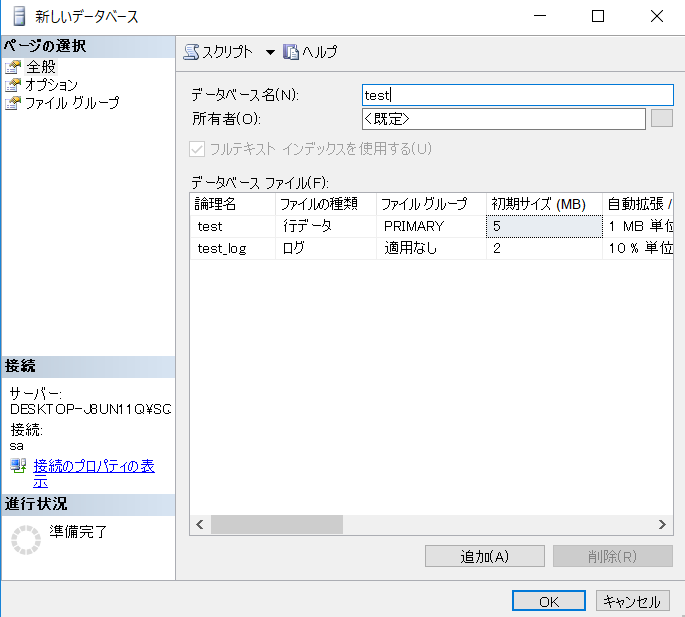
この例では、SQL Server を使います。難しい手順は不要で、SQL Server に任意の名前の新しい同期DB を作成しておくだけです。
CData ODBC ドライバは、以下のような特徴を持った製品です。
CData ODBC ドライバでは、1.データソースとしてAzure Data Lake Storage の接続を設定、2.SQL Server 側でODBC Driver との接続を設定、という2つのステップだけでデータソースに接続できます。以下に具体的な設定手順を説明します。
まずは、本記事右側のサイドバーからADLS ODBC Driver の無償トライアルをダウンロード・インストールしてください。30日間無償で、製品版の全機能が使用できます。
ODBC 接続プロパティの指定がまだの場合は、DSN (データソース名)で接続設定を行います。Microsoft ODBC データソースアドミニストレーターを使ってODBC DSN を作成および設定できます。ODBC ドライバーのインストール完了時にODBC DSN 設定画面が立ち上がります。 Microsoft ODBC データソースアドミニストレーターを開いて設定を行うことも可能です。 必要なプロパティを設定する方法は、ヘルプドキュメントの「はじめに」をご参照ください。
Gen 1 DataLakeStorage アカウントに接続するには、はじめに以下のプロパティを設定します。
Gen 1 は、認証方法としてAzure Active Directory OAuth(AzureAD)およびマネージドサービスID(AzureMSI)をサポートしています。認証方法は、ヘルプドキュメントの「Azure DataLakeStorage Gen 1 への認証」セクションを参照してください。
Gen 2 DataLakeStorage アカウントに接続するには、はじめに以下のプロパティを設定します。
Gen 2は、認証方法としてアクセスキー、共有アクセス署名(SAS)、Azure Active Directory OAuth(AzureAD)、マネージドサービスID(AzureMSI)など多様な方法をサポートしています。AzureAD、AzureMSI での認証方法は、ヘルプドキュメントの「Azure DataLakeStorage Gen 2 への認証」セクションを参照してください。
アクセスキーを使用して接続するには、AccessKey プロパティを取得したアクセスキーの値に、AuthScheme を「AccessKey」に設定します。
Azure ポータルからADLS Gen2 ストレージアカウントのアクセスキーを取得できます。
共有アクセス署名を使用して接続するには、SharedAccessSignature プロパティを接続先リソースの有効な署名に設定して、AuthScheme を「SAS」に設定します。 共有アクセス署名は、Azure Storage Explorer などのツールで生成できます。
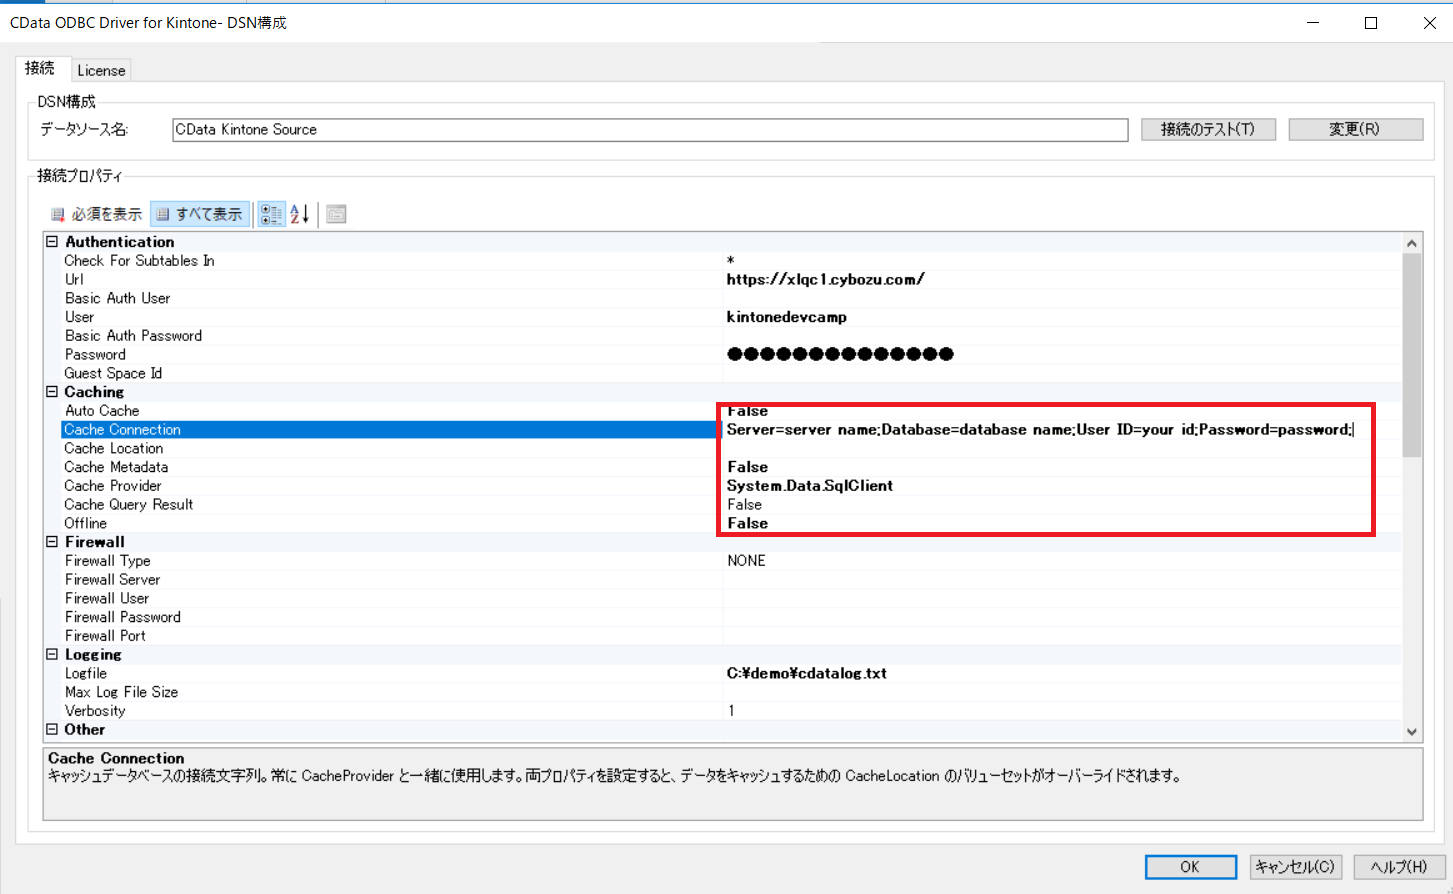
通常のDSN 設定に加え、キャッシュ関連項目の設定が必要です:
Cache Connection:以下をセミコロン区切りで入力
Cache Provider:SQL Server ではSystem.Data.SqlClient
Server=server name;Database=database name;User ID=your id;Password=password;
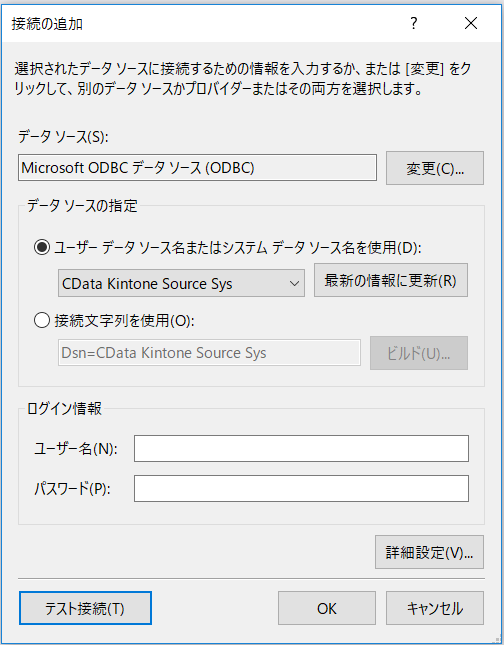
Visual Studio のサーバーエクスプローラーから「データ接続」を右クリックして「接続の追加」を選択します。
データソース選択画面で「Microsoft ODBC データソース」を選択します。
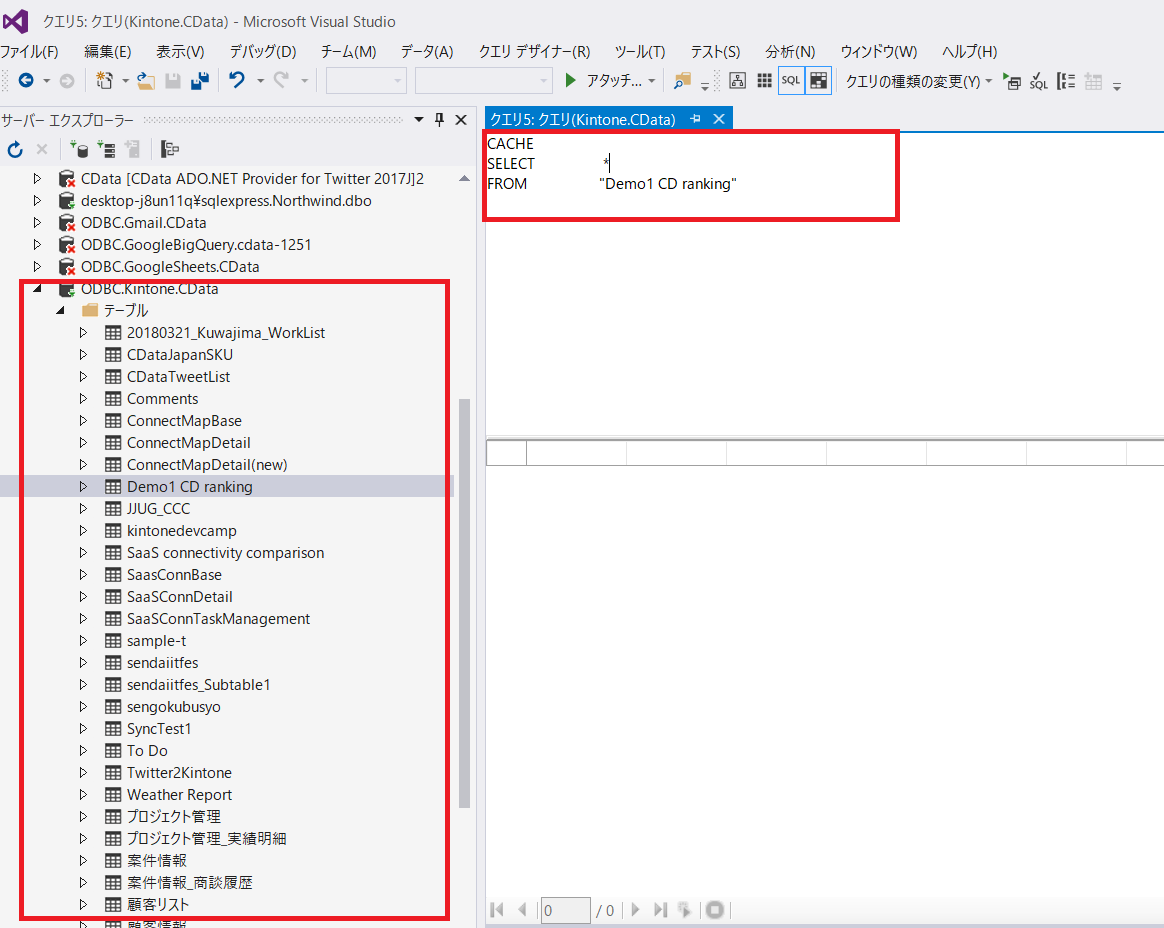
サーバーエクスプローラーには、「ODBC.Azure Data Lake Storage.CData」というコネクションができています。 展開するとAzure Data Lake Storage データがテーブルよびビューとしてモデル化されて表示されます。 これらのオブジェクトは通常のSQL で操作することができます。
以下のキャッシュコマンドを作成し、実行します。 実行時にクエリテキストエラーが出ても気にせず続行してください。
CACHE SELECT * FROM "Target Table"
データベースの下にkintone の選択したアプリが同期されています。キレイにDB 向けにスキーマも付いてます。普通にSQL でアプリケーション内で使ってください。