ノーコードでクラウド上のデータとの連携を実現。
詳細はこちら →Bullhorn CRM Data Provider の30日間無償トライアルをダウンロード
30日間の無償トライアルへCData


こんにちは!ウェブ担当の加藤です。マーケ関連のデータ分析や整備もやっています。
データバインドによって、UI コントロールからデータに接続できます。 CData ADO.NET Provider for BullhornCRM を使って、Visual Studio 上でWindows Forms およびWeb Forms とBullhorn CRM をデータバインドできます。この記事で、Bullhorn CRM を、ウィザードから変更をリアルタイムで反映するチャートにデータバインドする方法を説明します。 Code Walk-through セクションではチャートはほんの10行のコードで作成します。
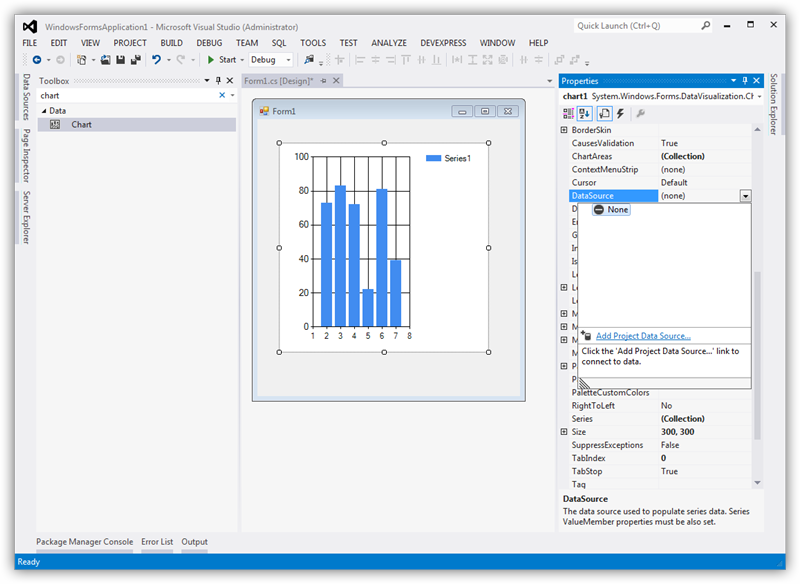
データバインドは3つのステップから構成されます。コントロールのインスタンス作成、データソースの設定、最後にデータバインドです。
下の手続きにより、データソース構成ウィザードを使ってチャートコントロールとBullhorn CRM との接続を作成します。ウィザード上でデータバインドをするBullhorn CRM エンティティを使います。
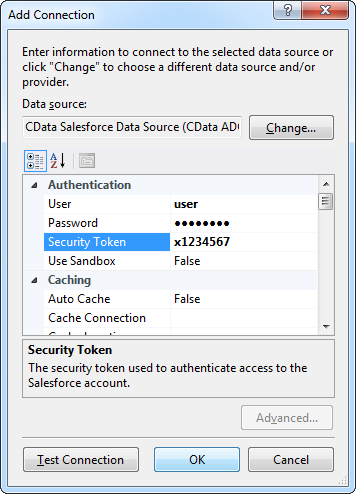
データ接続の選択ダイアログで、「変更」をクリックして、CData Bullhorn CRM データソースを選択して、接続プロパティを入力します。下は代表的な接続文字列ですです。:
DataCenterCode=CLS33;OAuthClientId=myoauthclientid;OAuthClientSecret=myoauthclientsecret;
Bullhorn CRM に接続するには、Bullhorn CRM アカウントの資格情報を入力します。また、DataCenterCode プロパティをデータセンターに対応するデータセンターコードに設定してください。詳しくは、こちら を参照してください。
CLS2、CLS21 などのコードはクラスタID で、ログインした際のブラウザのURL(アドレスバー)に含まれます。
例えば、
https://cls21.bullhornstaffing.com/BullhornSTAFFING/MainFrame.jsp?#no-baこちらのURL は、ログインしたユーザーがCLS21 クラスタに存在することを示しています。
ちなみに、コールバックURL の末尾に"/" を含む値、例えば http://localhost:33333/ を指定する場合は、アプリケーション設定で指定したコールバックURL と厳密に同じ値を指定する必要があります。このパラメータの文字が一致しない場合、エラーとなります。
Bullhorn CRM ではOAuth 2.0 認証標準を利用できます。 OAuth を使用して認証するには、すべてのシナリオでカスタムOAuth アプリケーションを作成して設定する必要があります。詳しい認証方法については、ヘルプドキュメントの「OAuth」セクションを参照してください。
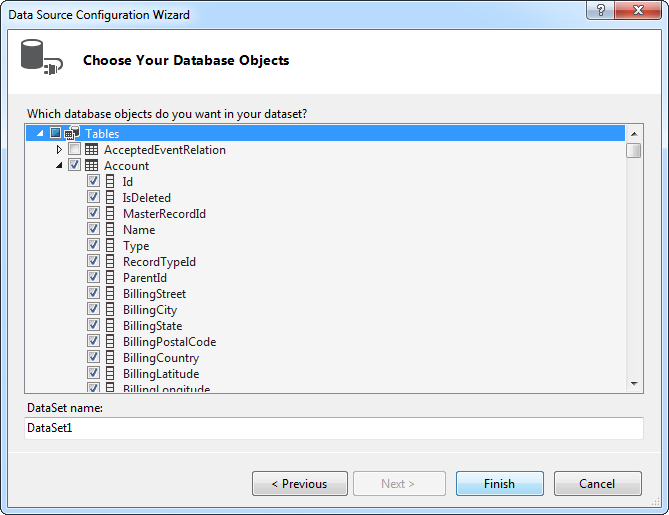
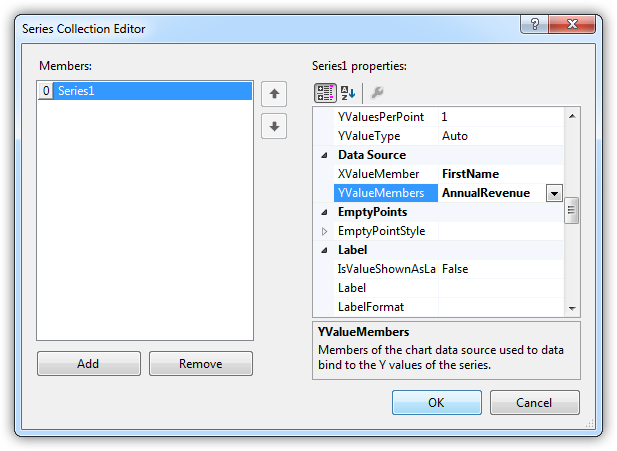
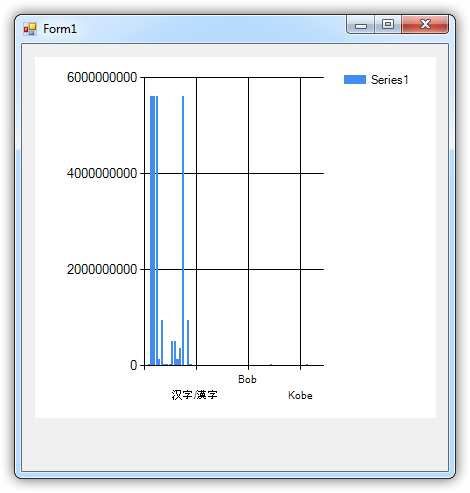
データソースの追加とデータベースオブジェクトを選択したら、チャートにオブジェクトをバインドします。この例では、X軸に Id をY軸に CandidateName を設定します。
チャートはこれでBullhorn CRM にデータバインドされました。チャートを実行して最新のデータを表示させましょう。
Bullhorn CRM へのデータバインドはほんの数行のコードのみが必要で、3つの簡単なステップで完了できます。
下に完全なコードを示します:
BullhornCRMConnection conn = new BullhornCRMConnection("DataCenterCode=CLS33;OAuthClientId=myoauthclientid;OAuthClientSecret=myoauthclientsecret;");
BullhornCRMCommand comm = new BullhornCRMCommand("SELECT Id, CandidateName FROM Candidate WHERE CandidateName = '山田太郎'", conn);
BullhornCRMDataAdapter da = new BullhornCRMDataAdapter(comm);
DataSet dataset = new DataSet();
da.Fill(dataset);

chart1.DataSource = dataset;
chart1.Series[0].XValueMember = "Id";
chart1.Series[0].YValueMembers = "CandidateName";
// Insert code for additional chart formatting here.
chart1.DataBind();