ノーコードでクラウド上のデータとの連携を実現。
詳細はこちら →Certinia ODBC Driver の30日間無償トライアルをダウンロード
30日間の無償トライアルへ製品の詳細
Certinia ODBC Driver を使って、ODBC 接続をサポートするあらゆるアプリケーション・ツールからCertinia にデータ連携。
Certinia データにデータベースと同感覚でアクセスして、Certinia のInvoices、Expenses、Accounts など多様なデータに使い慣れたODBC インターフェースで双方向連携。
こんにちは!ドライバー周りのヘルプドキュメントを担当している古川です。
Informatica は、データ転送用の強力で洗練された手段を提供します。CData ODBC Driver for Certinia を利用することで、Informatica の強力なデータ転送と操作機能でシームレスに統合された、業界が認めた標準ドライバーにアクセスできるようになります。このチュートリアルでは、Informatica PowerCenter でシンプルなWorkflow を作成してCertinia データを抽出し、フラットファイルにロードする方法について説明します。
CData ODBC ドライバは、以下のような特徴を持ったリアルタイムデータ連携ソリューションです。
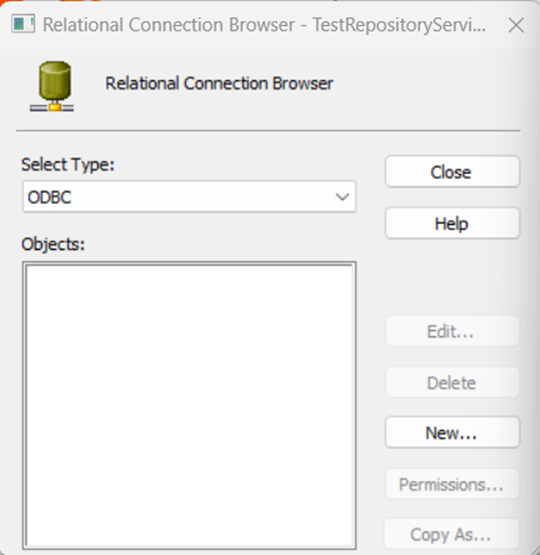
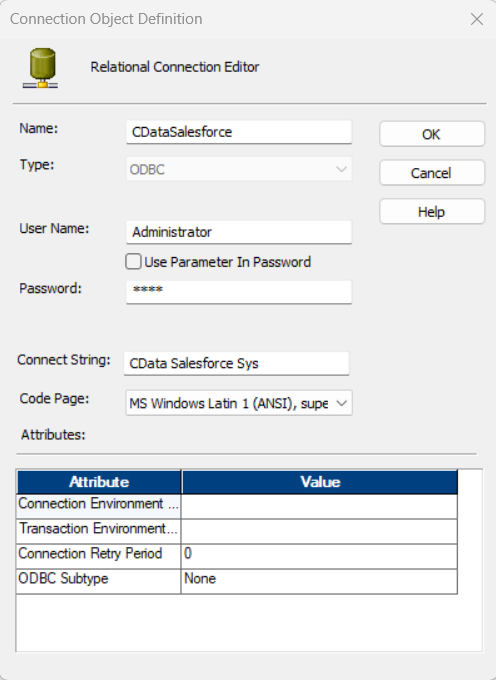
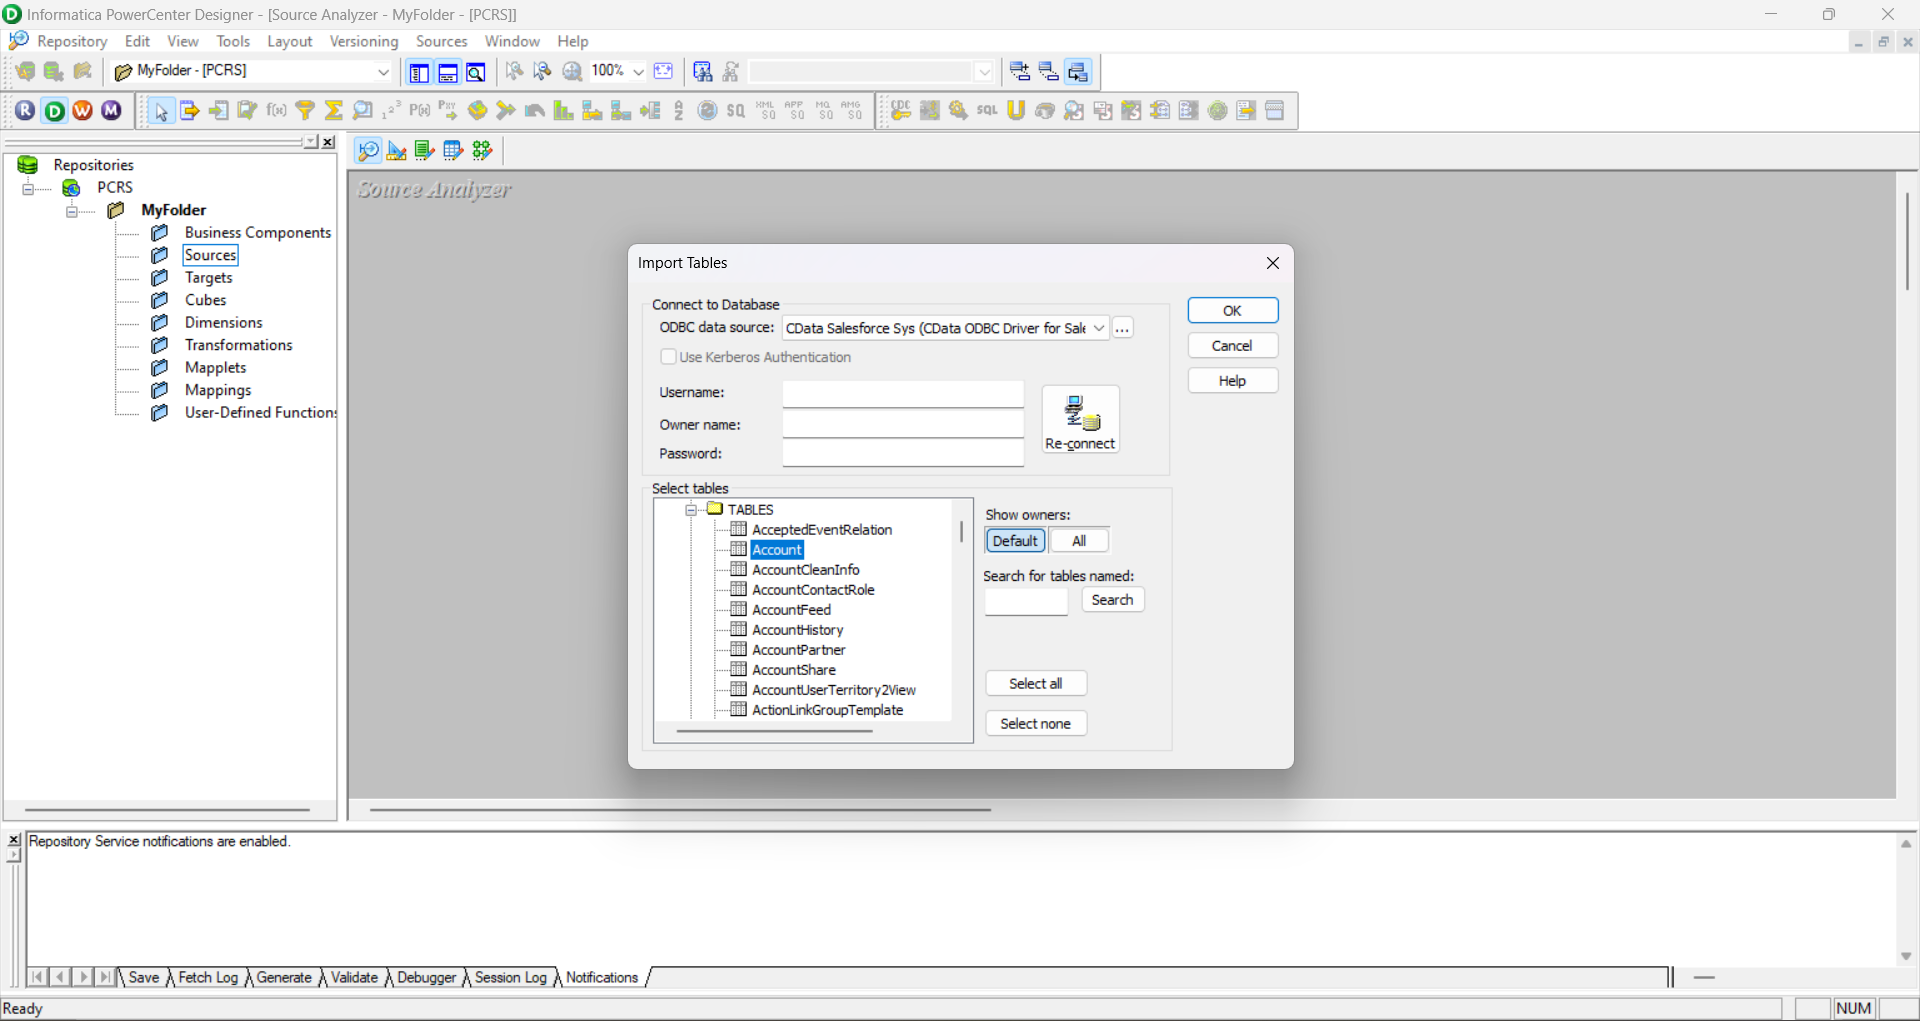
CData ODBC ドライバでは、1.データソースとしてCertinia の接続を設定、2.Informatica PowerCenter 側でODBC Driver との接続を設定、という2つのステップだけでデータソースに接続できます。以下に具体的な設定手順を説明します。
まずは、本記事右側のサイドバーからCertinia ODBC Driver の無償トライアルをPowerCenter サーバーとクライアントマシーンにドライバーをインストールします。30日間無償で、製品版の全機能が使用できます。
どちらにおいても、データソースのODBC DSN で接続プロパティを指定します。これはドライバーインストール時の最後の手順にあたります。Microsoft ODBC データソースアドミニストレーターを使ってODBC DSN を作成および設定できます。
デフォルトでは、CData 製品は本番環境に接続します。サンドボックスアカウントを使用するには、UseSandbox をtrue に設定します。User にサンドボックスのユーザー名を指定してください。
Certinia への接続に使用できる認証方法は以下のとおりです。
User およびPassword をログインクレデンシャルに設定します。さらにSecurityToken を設定します。SecurityToken については、信頼できるIP アドレスに利用中のIP を追加することで指定する必要がなくなります。
セキュリティトークンを無効にするには、以下の手順を実行してください。
セキュリティトークンの取得には、以下を実行してください。
すべてのOAuth フローで、AuthScheme をOAuth に設定する必要があります。詳しい設定方法については、ヘルプドキュメントの「OAuth」セクションを参照してください。
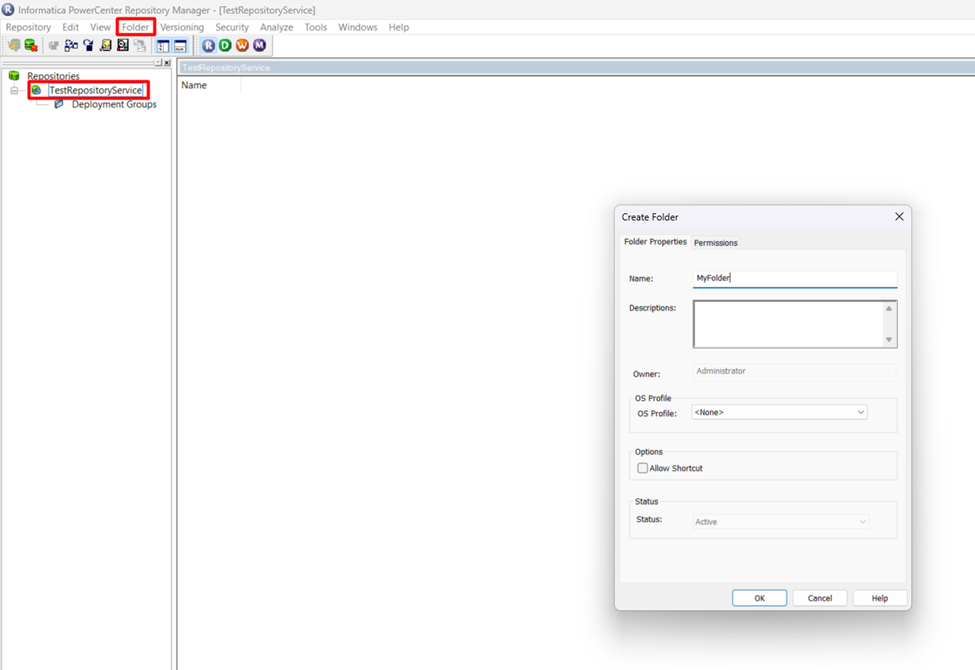
次のステップに従ってPowerCenter でワークフローを作成し、Certinia データをプルしてフラットファイルにプッシュします。
CData=PMODBC.DLL
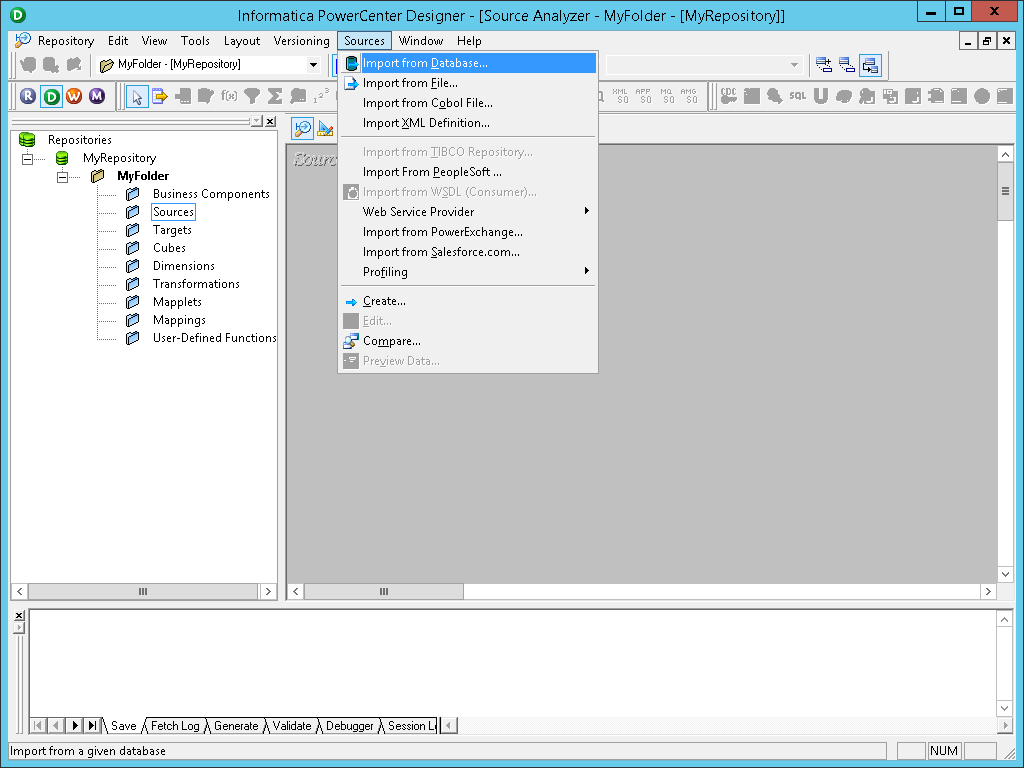
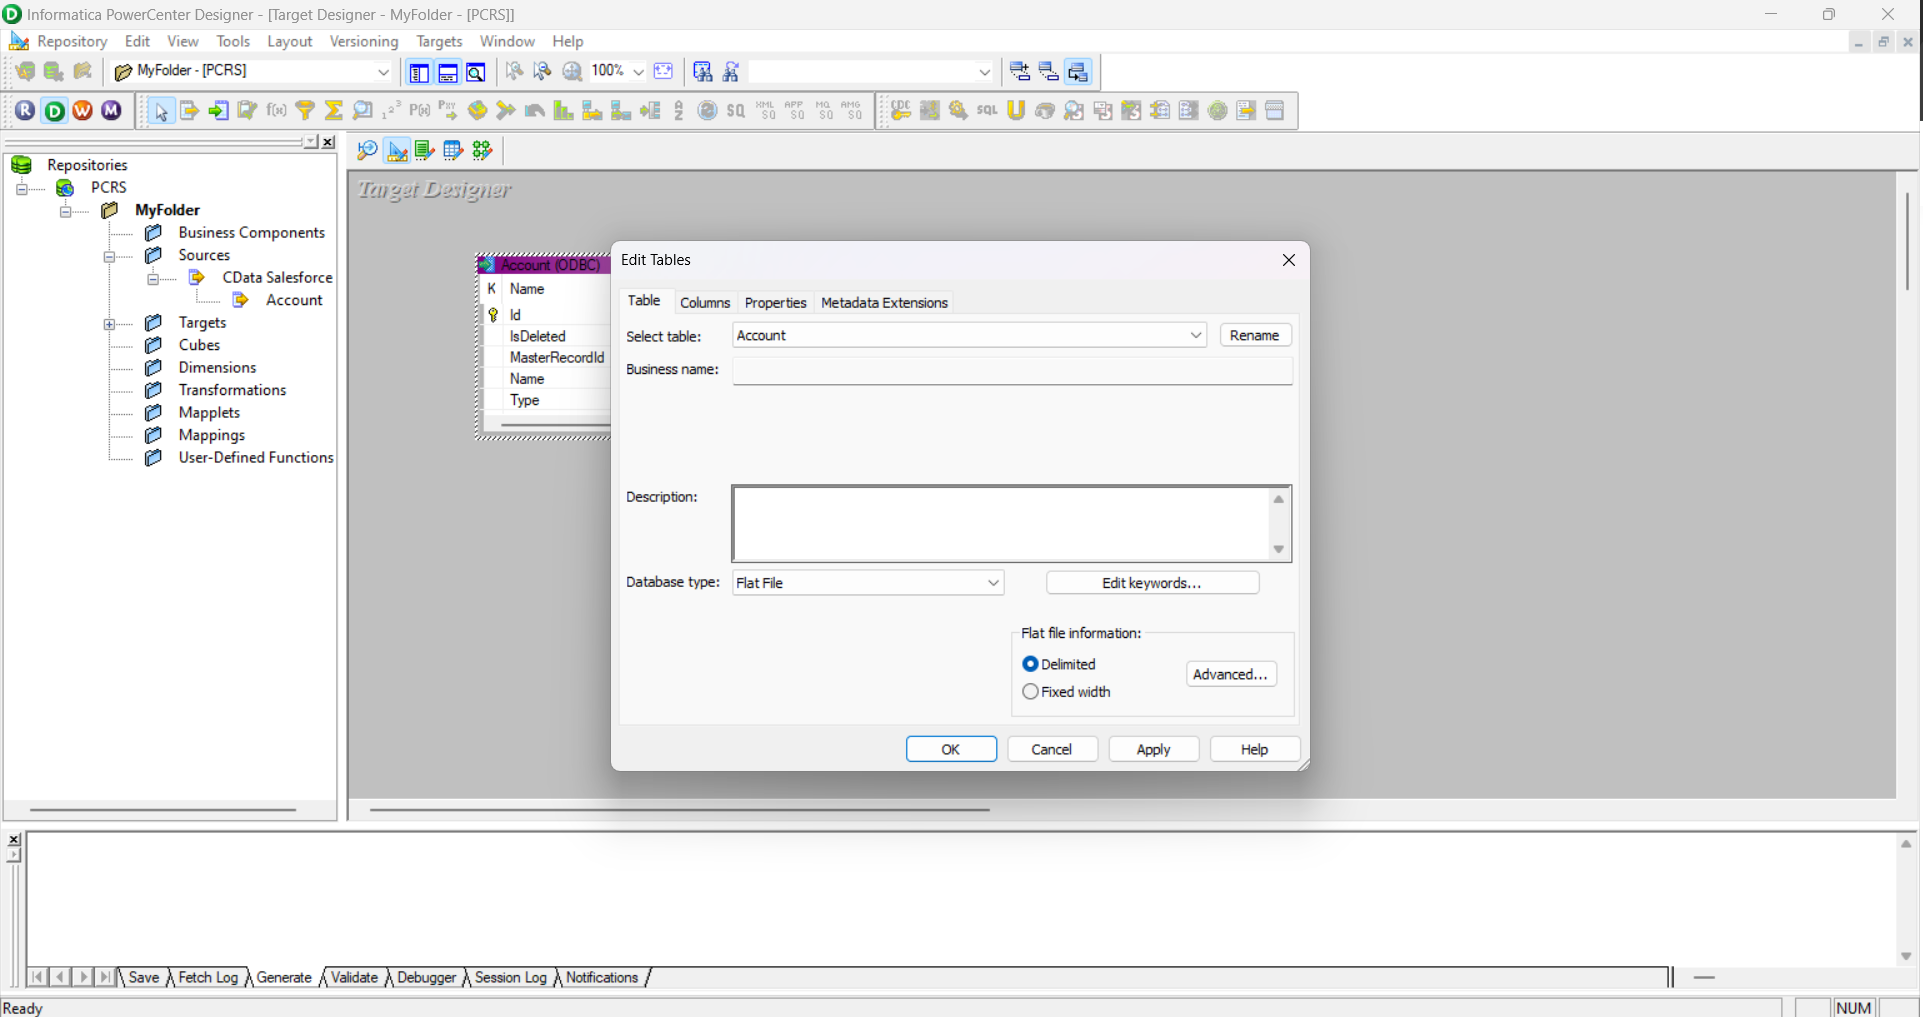
ソース、ターゲット、マッピングを作成して保存したら、ワークフローを作成することができるようになります。
ワークフローを作成したら、PowerCenter Workflow Manager を開いてワークフローにアクセスして開始し、Certinia データをフラットファイルに素早く転送できます。ODBC Driver for Certinia を使用して、ソースとターゲットをPowerCenter から設定することで、Informatica PowerCenter でCertinia データをお好みのエレガントで強力な機能に統合することができます。
このようにCData ODBC ドライバと併用することで、270を超えるSaaS、NoSQL データをコーディングなしで扱うことができます。30日の無償評価版が利用できますので、ぜひ自社で使っているクラウドサービスやNoSQL と合わせて活用してみてください。
CData ODBC ドライバは日本のユーザー向けに、UI の日本語化、ドキュメントの日本語化、日本語でのテクニカルサポートを提供しています。