ノーコードでクラウド上のデータとの連携を実現。
詳細はこちら →FreshBooks ODBC Driver の30日間無償トライアルをダウンロード
30日間の無償トライアルへ製品の詳細
FreshBooks ODBC ドライバーは、ODBC 接続をサポートする任意のアプリケーションからリアルタイムなFreshBooks データに直接接続できるパワフルなツールです。標準のODBC ドライバーインターフェースを使用して、データベースのようにFreshBooks データにアクセスし、FreshBooks の顧客、トランザクション、請求書、販売レシートなどの読み、書き、更新を実行できます。
CData


こんにちは!ドライバー周りのヘルプドキュメントを担当している古川です。
CData ODBC Drivers は、ODBC ドライバーをサポートするあらゆる環境から利用可能です。本記事では、PyCharm からのCData ODBC Driver for FreshBooks の利用を説明します。CData ODBC Deriver をデータソースとして設定する方法、データソースをクエリして結果を表示するためのPyCharm の簡単なコードを含みます。
はじめに、このチュートリアルではCData ODBC Driver for FreshBooks とPyCharm が、既にインストールされていることを前提としています。
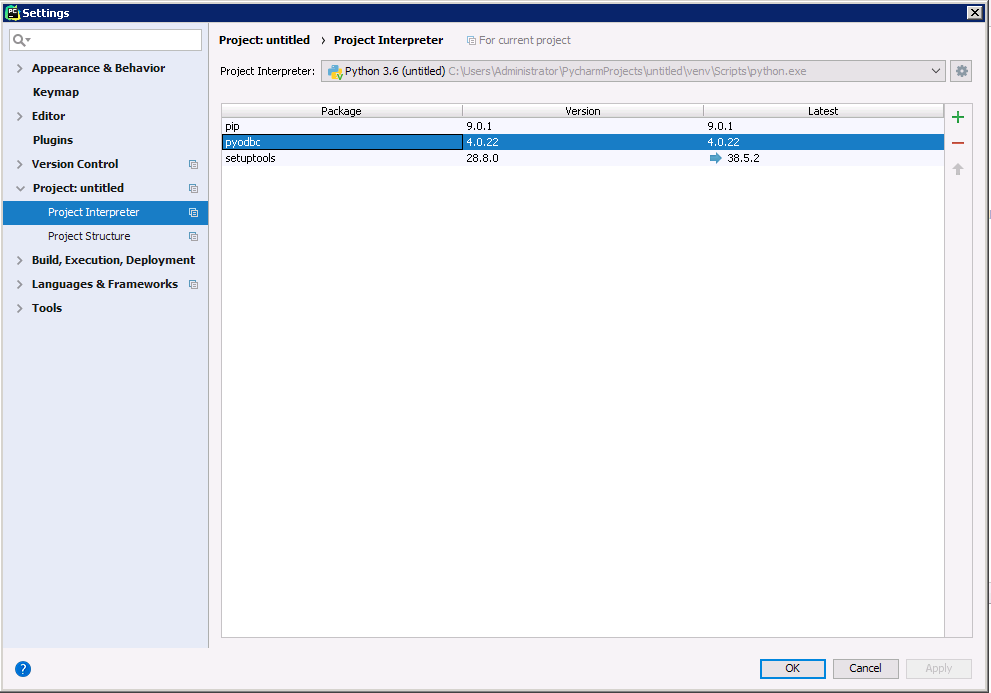
以下のステップに従って、pyodbc モジュールをプロジェクトに追加します。
CData ODBC ドライバは、以下のような特徴を持ったリアルタイムデータ連携ソリューションです。
CData ODBC ドライバでは、1.データソースとしてFreshBooks の接続を設定、2.PyCharm 側でODBC Driver との接続を設定、という2つのステップだけでデータソースに接続できます。以下に具体的な設定手順を説明します。
まずは、本記事右側のサイドバーからFreshBooks ODBC Driver の無償トライアルをダウンロード・インストールしてください。30日間無償で、製品版の全機能が使用できます。
これで、ODBC 接続文字列またはDSN で接続できます。お客様のOS でDSN を作成するためのガイドについては、CData ドライバードキュメントの[はじめに]セクションを参照してください。
FreshBooks はOAuth 認証標準を利用しています。OAuth を使って認証するには、アプリケーションを作成してOAuthClientId、OAuthClientSecret、およびCallbackURL 接続プロパティを取得しなければなりません。
詳細はヘルプドキュメントの「はじめに」を参照してください。
以下はDSN の構文です。
[CData FreshBooks Source]
Driver = CData ODBC Driver for FreshBooks
Description = My Description
CompanyName = CData
Token = token
Cursor をインスタンス化し、Cursor クラスのexecute メソッドを使用してSQL ステートメントを実行します。
import pyodbc

cnxn = pyodbc.connect('DRIVER={CData ODBC Driver for FreshBooks};CompanyName = CData;Token = token;')
cursor = cnxn.cursor()
cursor.execute("SELECT Username, Credit FROM Clients WHERE Email = 'Captain Hook'")
rows = cursor.fetchall()
for row in rows:
  print(row.Username, row.Credit)
CData ODBC Driver を使用してPyCharm でFreshBooks に接続すると、FreshBooks にアクセスできるPython アプリケーションを標準データベースのように構築できるようになります。このチュートリアルに関する質問、コメント、フィードバックがある場合には、support@cdata.com までご連絡ください。
このようにCData ODBC ドライバと併用することで、270を超えるSaaS、NoSQL データをコーディングなしで扱うことができます。30日の無償評価版が利用できますので、ぜひ自社で使っているクラウドサービスやNoSQL と合わせて活用してみてください。
CData ODBC ドライバは日本のユーザー向けに、UI の日本語化、ドキュメントの日本語化、日本語でのテクニカルサポートを提供しています。