ノーコードでクラウド上のデータとの連携を実現。
詳細はこちら →Jira Service Desk Driver の30日間無償トライアルをダウンロード
30日間の無償トライアルへ製品の詳細
Jira Service Desk データに連携するJava アプリケーションを素早く、簡単に開発できる便利なドライバー。
CData


こんにちは!ウェブ担当の加藤です。マーケ関連のデータ分析や整備もやっています。
JDBI は、Fluent スタイルとSQL オブジェクトスタイルという2つの異なるスタイルAPI を公開する、Java 用のSQL コンビニエンスライブラリです。CData JDBC Driver for JiraServiceDesk は、Java アプリケーションとリアルタイムJira Service Desk データ のデータ連携を実現します。これらの技術を組み合わせることによって、Jira Service Desk データ へのシンプルなコードアクセスが可能になります。ここでは、基本的なDAO(Data Access Object )とそれに付随するJira Service Desk データ の読み書きのためのコードの作成について説明します。
以下のインターフェースは、実装されるSQL ステートメントごとに単一のメソッドを作成するためのSQL オブジェクトの正しい動作を宣言します。
public interface MyRequestsDAO {
  //insert new data into Jira Service Desk
  @SqlUpdate("INSERT INTO Requests (CurrentStatus, ReporterName) values (:currentStatus, :reporterName)")
  void insert(@Bind("currentStatus") String currentStatus, @Bind("reporterName") String reporterName);

  //request specific data from Jira Service Desk (String type is used for simplicity)
  @SqlQuery("SELECT ReporterName FROM Requests WHERE CurrentStatus = :currentStatus")
  String findReporterNameByCurrentStatus(@Bind("currentStatus") String currentStatus);

  /*
   * close with no args is used to close the connection
   */
  void close();
}
必要な接続プロパティを収集し、Jira Service Desk に接続するための適切なJDBC URL を作成します。
任意のJira Service Management Cloud またはJira Service Management Server インスタンスへの接続を確立できます。接続するにはURL プロパティを設定します。
デフォルトでは、CData 製品はシステムフィールドのみを表示します。Issues のカスタムフィールドにアクセスするには、IncludeCustomFields を設定します。
ローカルサーバーアカウントで認証するためには、次の接続プロパティを指定します。
Cloud アカウントに接続するには、APIToken を取得する必要があります。API トークンを生成するには、Atlassian アカウントにログインして「API トークン」 -> 「API トークンの作成」をクリックします。生成されたトークンが表示されます。
データに接続するには以下を設定します。
ちなみに、Cloud アカウントへの接続でパスワード認証を使うことも可能ですが、非推奨となっています。
この場合、AuthSchemeをすべてのOAuth フローでOAuth に設定する必要があります。また、すべてのシナリオでカスタムOAuth アプリケーションを作成して構成する必要があります。詳しくは、ヘルプドキュメントの「OAuth」セクションを参照してください。
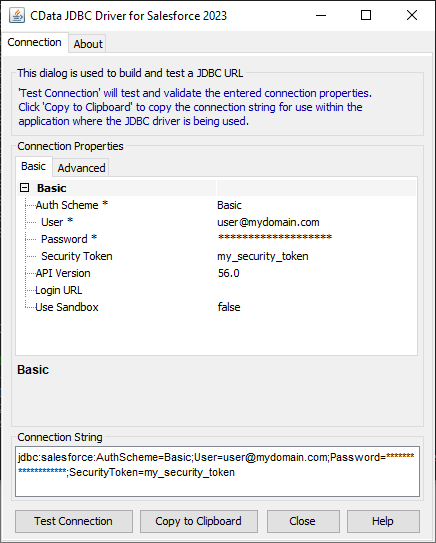
JDBC URL の構成については、Jira Service Desk JDBC Driver に組み込まれている接続文字列デザイナーを使用してください。JAR ファイルのダブルクリック、またはコマンドラインからJAR ファイルを実行します。
java -jar cdata.jdbc.jiraservicedesk.jar
接続プロパティを入力し、接続文字列をクリップボードにコピーします。
Jira Service Desk の接続文字列は、通常次のようになります。
jdbc:jiraservicedesk:ApiKey=myApiKey;User=MyUser;InitiateOAuth=GETANDREFRESH
構成済みのJDBC URL を使用して、DAO インターフェースのインスタンスを取得します。以下に示す特定のメソッドはインスタンスにバインドされたハンドルを開くため、ハンドルとバインドされたJDBC 接続を開放するには、インスタンスを明示的に閉じる必要があります。
DBI dbi = new DBI("jdbc:jiraservicedesk:ApiKey=myApiKey;User=MyUser;InitiateOAuth=GETANDREFRESH");
MyRequestsDAO dao = dbi.open(MyRequestsDAO.class);

//do stuff with the DAO

dao.close();
Jira Service Desk への接続を開いた状態で以前定義したメソッドを呼び出すだけで、Jira Service Desk のRequests エンティティからデータを取得できます。
//disply the result of our 'find' method
String reporterName = dao.findReporterNameByCurrentStatus("Open");
System.out.println(reporterName);
以前定義した方法を使用すれば、Jira Service Desk にデータを書き込むことも簡単になります。
//add a new entry to the Requests entity
dao.insert(newCurrentStatus, newReporterName);
JDBI ライブラリはJDBC 接続を処理できるため、CData JDBC Driver for JiraServiceDesk と統合することで、SQL Object API for JiraServiceDesk を簡単に作成できます。今すぐ無料トライアルをダウンロードし、Java アプリケーションでリアルタイムJira Service Desk を操作しましょう。