ノーコードでクラウド上のデータとの連携を実現。
詳細はこちら →Jira Service Desk Driver の30日間無償トライアルをダウンロード
30日間の無償トライアルへ製品の詳細
Jira Service Desk データに連携するJava アプリケーションを素早く、簡単に開発できる便利なドライバー。
こんにちは!ウェブ担当の加藤です。マーケ関連のデータ分析や整備もやっています。
CData JDBC Driver for JiraServiceDesk は、JDBC をサポートするIDE にリアルタイムJira Service Desk データへの仮想DB 連携を実現します。JDBC 標準では、ビルトインのデータアクセスウィザードや、迅速な開発をサポートするその他のツールを使用できます。この記事では、NetBeans でJira Service Desk に接続する方法を説明します。接続を作成して[Table Editor]でJira Service Desk を編集および保存、 していきます。
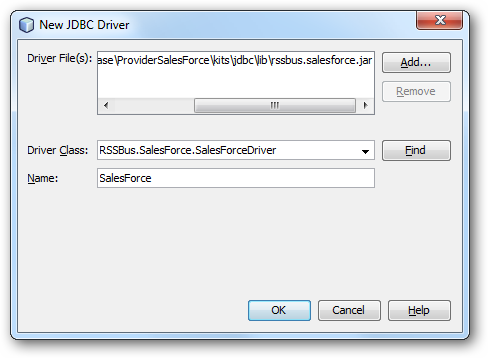
JDBC データソースを作成するには、[Service]ウィンドウの[Database]ノードを展開し、[Drivers]ノードを右クリックして[New Driver]を選択します。[New Driver]ウィザードが表示されたら、以下の情報を入力します:
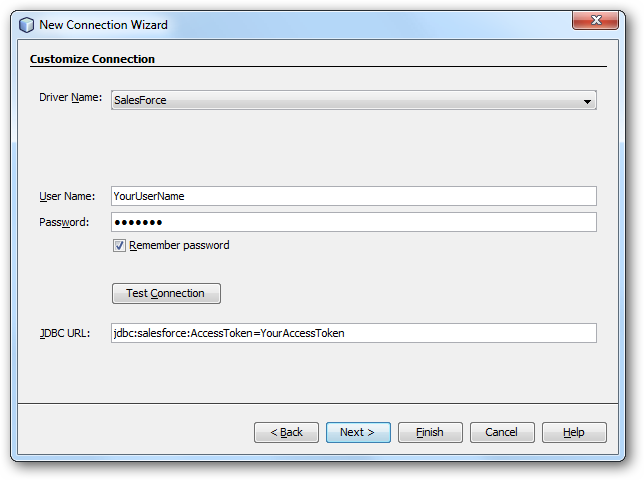
下記の手順に従って、必要な接続プロパティを定義します:
[Service]ウィンドウで、[Database]ノードを右クリックし[New Connection]をクリックします。
[New Connection]ウィザードで次の接続プロパティを入力します:
JDBC URL:JDBC URL を指定。
任意のJira Service Management Cloud またはJira Service Management Server インスタンスへの接続を確立できます。接続するにはURL プロパティを設定します。
デフォルトでは、CData 製品はシステムフィールドのみを表示します。Issues のカスタムフィールドにアクセスするには、IncludeCustomFields を設定します。
ローカルサーバーアカウントで認証するためには、次の接続プロパティを指定します。
Cloud アカウントに接続するには、APIToken を取得する必要があります。API トークンを生成するには、Atlassian アカウントにログインして「API トークン」 -> 「API トークンの作成」をクリックします。生成されたトークンが表示されます。
データに接続するには以下を設定します。
ちなみに、Cloud アカウントへの接続でパスワード認証を使うことも可能ですが、非推奨となっています。
この場合、AuthSchemeをすべてのOAuth フローでOAuth に設定する必要があります。また、すべてのシナリオでカスタムOAuth アプリケーションを作成して構成する必要があります。詳しくは、ヘルプドキュメントの「OAuth」セクションを参照してください。
以下は一般的なJDBC URL です:
jdbc:jiraservicedesk:ApiKey=myApiKey;User=MyUser;
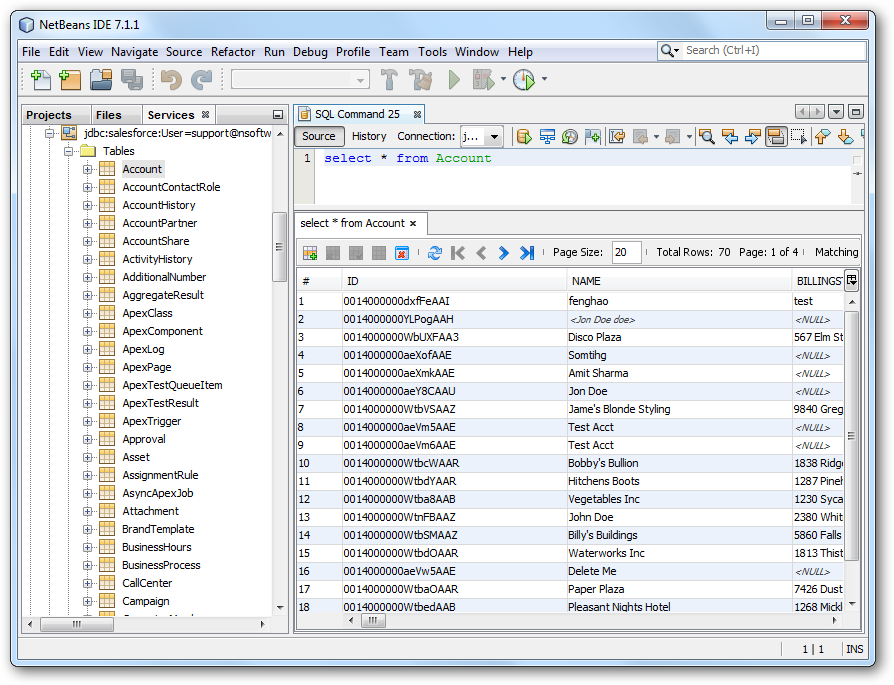
Jira Service Desk に接続するには、[Database]ノードにある接続を右クリックし[Connect]をクリックします。接続が確立されたら、展開してスキーマ情報を見ることができます。
[Data Views]ウィンドウにテーブルをロードするには、テーブルを右クリックしてから[View Data]をクリックします。 [Data Views]ウィンドウではレコードの挿入、更新、および削除もできます。