ノーコードでクラウド上のデータとの連携を実現。
詳細はこちら →Jira Service Desk ODBC Driver の30日間無償トライアルをダウンロード
30日間の無償トライアルへ製品の詳細
Jira Service Desk ODBC Driver を使って、ODBC 接続をサポートするあらゆるアプリケーション・ツールからJira Service Desk にデータ連携。
Jira Service Desk データにデータベースと同感覚でアクセスして、Jira Service Desk データに使い慣れたODBC インターフェースで双方向連携。
CData


こんにちは!ドライバー周りのヘルプドキュメントを担当している兵藤です。
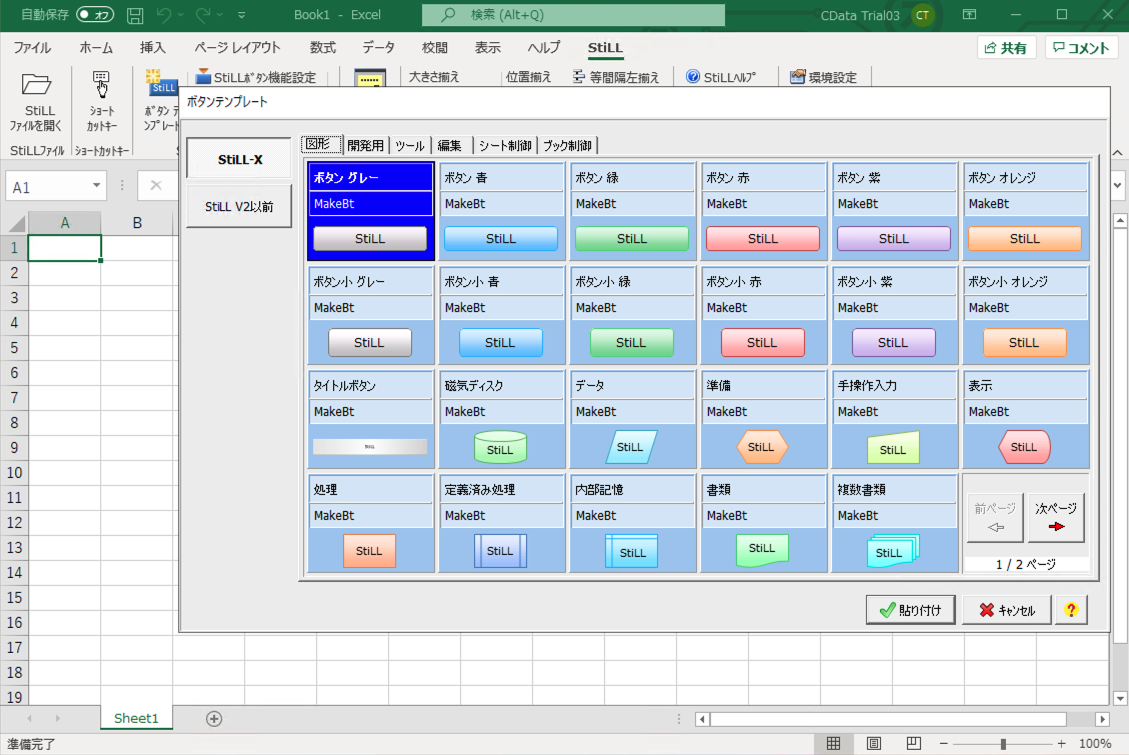
Excel をUIにした業務アプリ開発ツール「StiLL Standard」には、ODBC でデータベースからのデータを使う機能が備わっているので、これを使ってJira Service Desk データ連携を行うことが可能です。 通常、Jira Service Desk などのSaaS として提供されるアプリケーションにはWeb API でアクセスしますが、CData ODBC Driver によって、RDB にアクセスするのと同感覚で、Jira Service Desk のデータを扱うことができます。
CData ODBC ドライバは、以下のような特徴を持ったリアルタイムデータ連携ソリューションです。
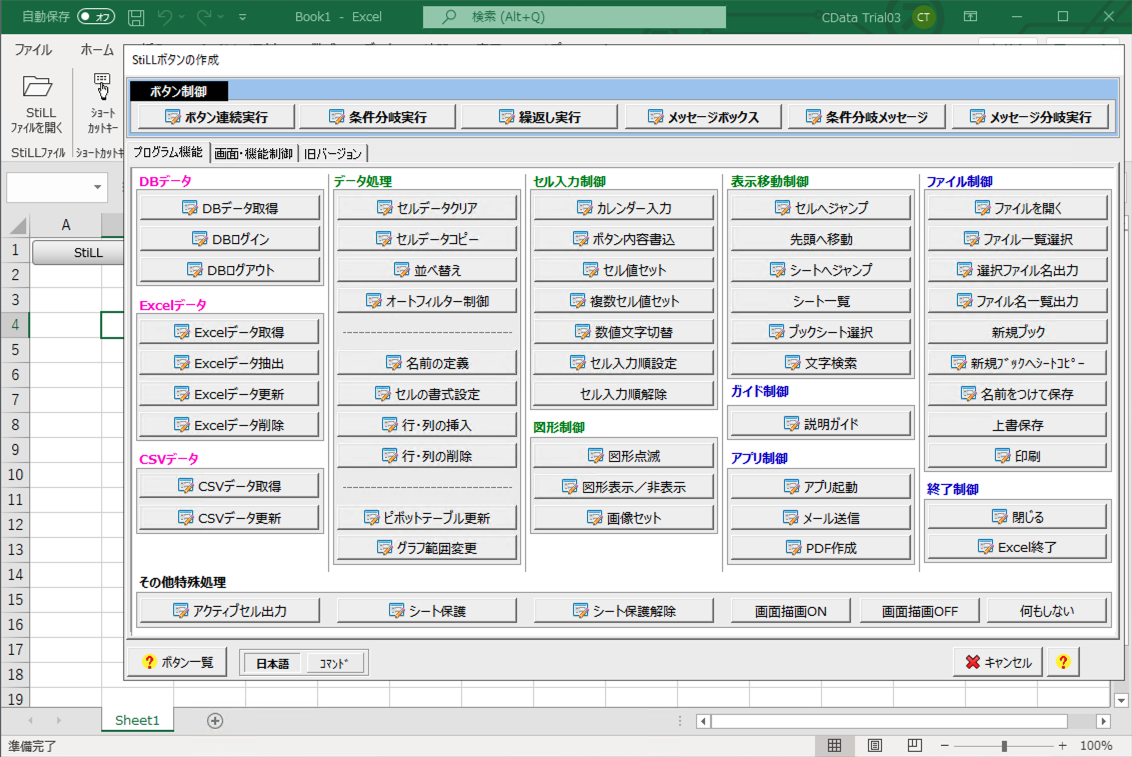
CData ODBC ドライバでは、1.データソースとしてJira Service Desk の接続を設定、2.StiLL 側でODBC Driver との接続を設定、という2つのステップだけでデータソースに接続できます。以下に具体的な設定手順を説明します。
まずは、本記事右側のサイドバーからJiraServiceDesk ODBC Driver の無償トライアルをダウンロード・インストールしてください。30日間無償で、製品版の全機能が使用できます。
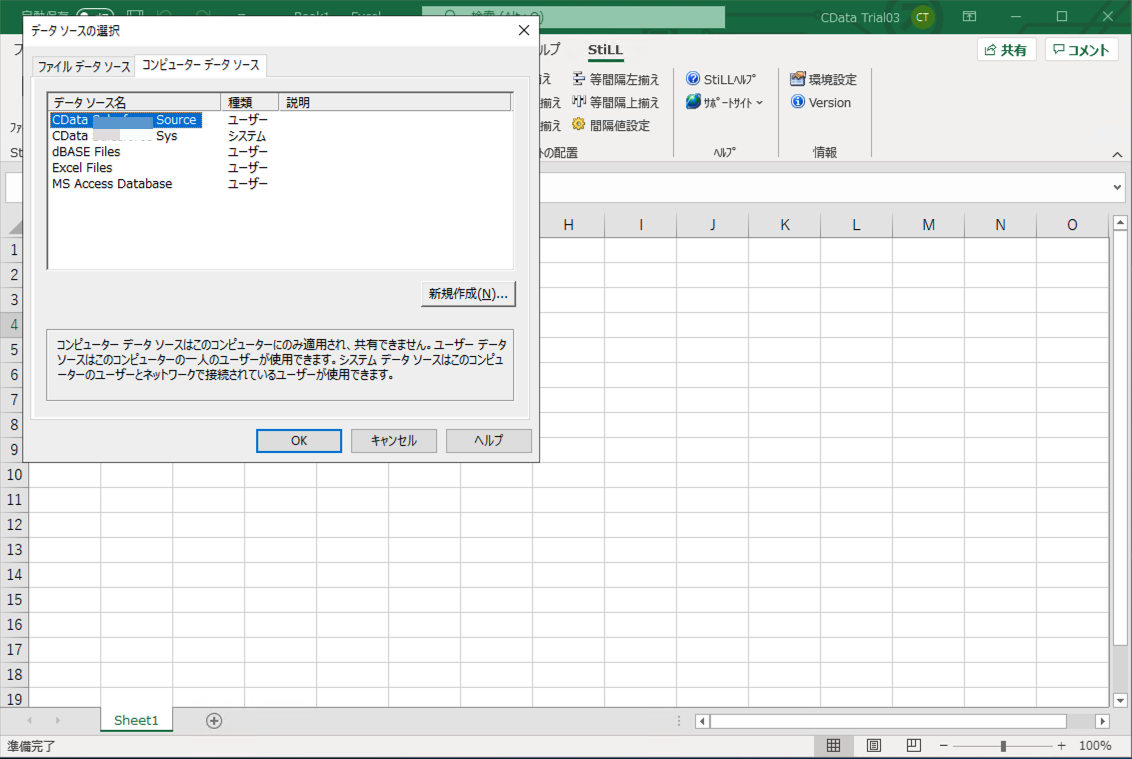
CData ODBC Driver for JiraServiceDesk のDSN をStiLL で選択します。
未指定の場合は、初めにODBC DSN (data source name) で接続プロパティを指定します。ドライバーのインストールの最後にアドミニストレーターが開きます。Microsoft ODBC Data Source Administrator を使用して、ODBC DSN を作成および構成できます。
任意のJira Service Management Cloud またはJira Service Management Server インスタンスへの接続を確立できます。接続するにはURL プロパティを設定します。
デフォルトでは、CData 製品はシステムフィールドのみを表示します。Issues のカスタムフィールドにアクセスするには、IncludeCustomFields を設定します。
ローカルサーバーアカウントで認証するためには、次の接続プロパティを指定します。
Cloud アカウントに接続するには、APIToken を取得する必要があります。API トークンを生成するには、Atlassian アカウントにログインして「API トークン」 -> 「API トークンの作成」をクリックします。生成されたトークンが表示されます。
データに接続するには以下を設定します。
ちなみに、Cloud アカウントへの接続でパスワード認証を使うことも可能ですが、非推奨となっています。
この場合、AuthSchemeをすべてのOAuth フローでOAuth に設定する必要があります。また、すべてのシナリオでカスタムOAuth アプリケーションを作成して構成する必要があります。詳しくは、ヘルプドキュメントの「OAuth」セクションを参照してください。
DSN はビルトインのMicrosoft ODBC データソースアドミニストレーターで設定できます。これはドライバーのインストールの最後の手順です。 Microsoft ODBC データソースアドミニストレーターを使ってDSN を作成および設定する方法は、ヘルプドキュメントの「はじめに」をご参照ください。
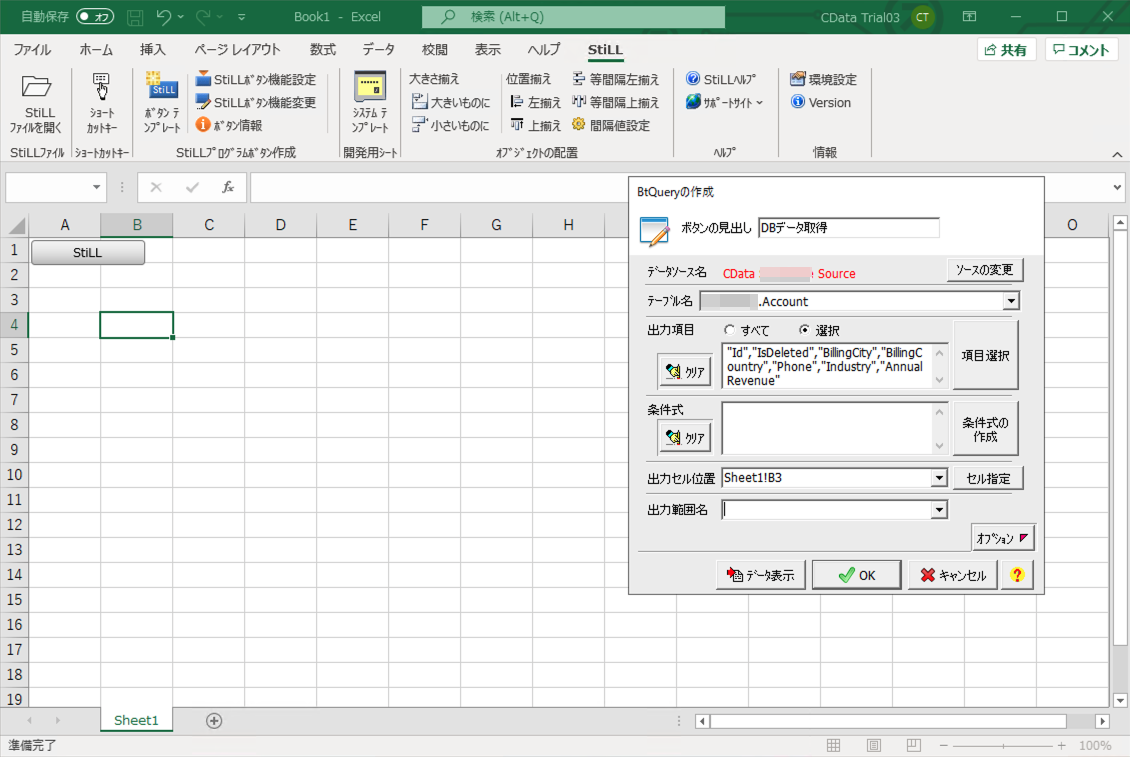
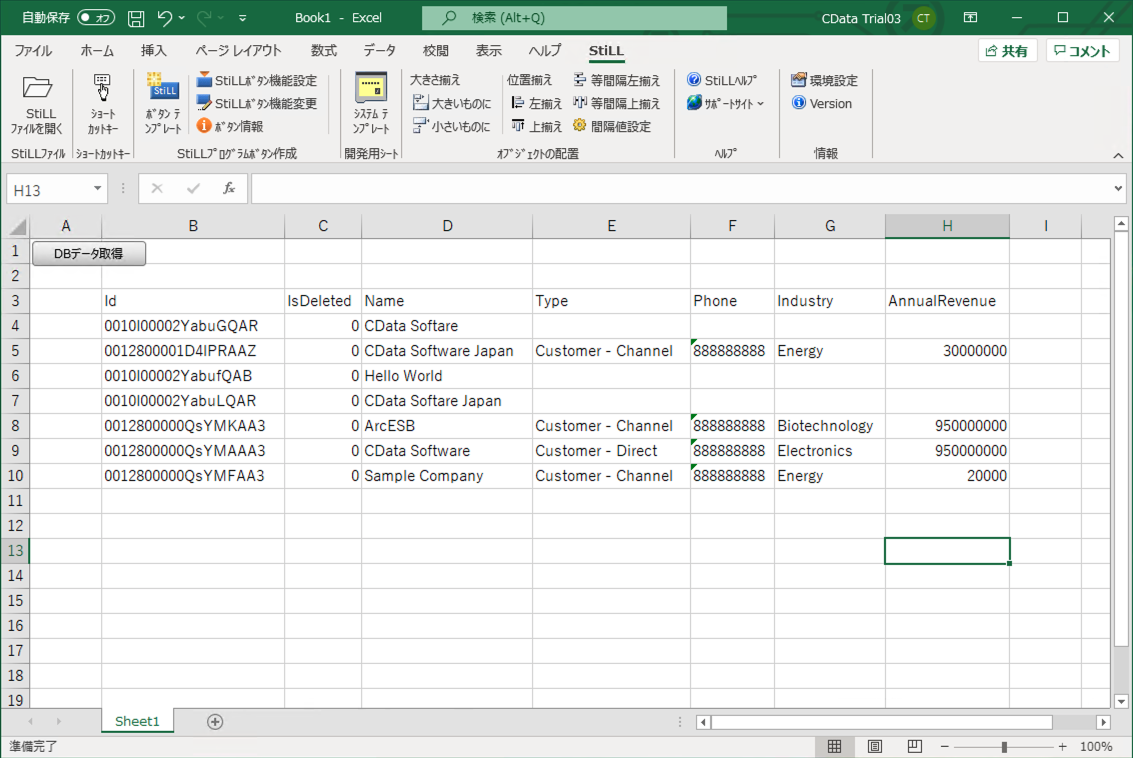
StiLL ボタンのBtQuery ウィザードが開くので、Jira Service Desk からデータを指定して、StiLL アプリケーションに取り込みます。
このようにCData ODBC ドライバと併用することで、270を超えるSaaS、NoSQL データをコーディングなしで扱うことができます。30日の無償評価版が利用できますので、ぜひ自社で使っているクラウドサービスやNoSQL と合わせて活用してみてください。
CData ODBC ドライバは日本のユーザー向けに、UI の日本語化、ドキュメントの日本語化、日本語でのテクニカルサポートを提供しています。