Discover how a bimodal integration strategy can address the major data management challenges facing your organization today.
Get the Report →


Transfer Company File Data using the CData Excel Add-In
This article will show how to use the CData Excel Add-In for QuickBooks to manage multiple connections and transfer records from one company to another. You can follow the steps below with desktop editions of QuickBooks, QuickBooks Online, and QuickBooks POS. This article details transferring Customer records, but the same approach can be used to transfer Accounts, Invoices, or any other QuickBooks entities.
See the "Getting Started" section of the documentation if you are not familiar with connecting to QuickBooks.
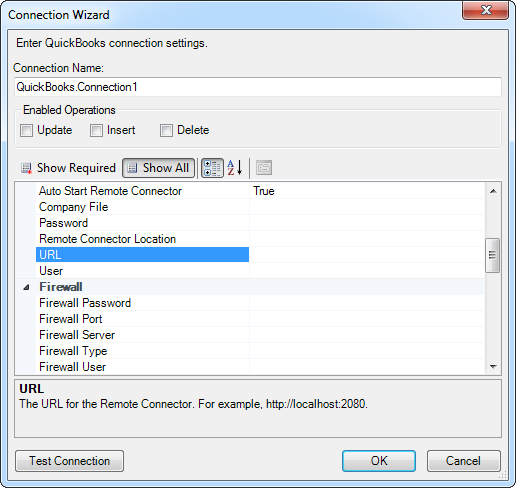
Create connections to the two QuickBooks companies. To create a new connection, click the From QuickBooks button on the CData ribbon and then click Edit in the Data Selection dialog. Make sure you enable updates and inserts in the Connection Wizard that is displayed.
![]()
To connect to Desktop editions of QuickBooks and QuickBooks POS, use the Remote Connector application installed with the application. The Remote Connector is a lightweight, stand-alone server that enables you to connect to remote QuickBooks instances. It is also used to connect your application to QuickBooks in situations where direct COM access to QuickBooks is not available (e.g., ASP.NET, Java, or a company file on a remote machine).
QuickBooks Online uses the OAuth authentication standard. To connect to QuickBooks Online, you will need to obtain the OAuth values.
For a guide to connect to your edition of QuickBooks, see the "Getting Started" chapter in the help documentation
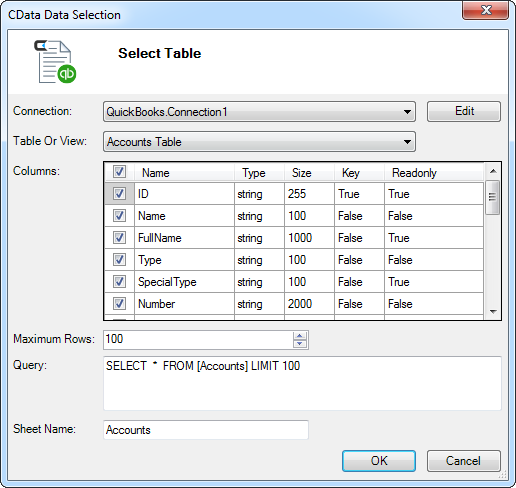
- Click From QuickBooks button on the ribbon to open the Data Select dialog and select the columns you want to transfer. In this article, you will retrieve information like the customer's name, phone, and email from the Customers table.
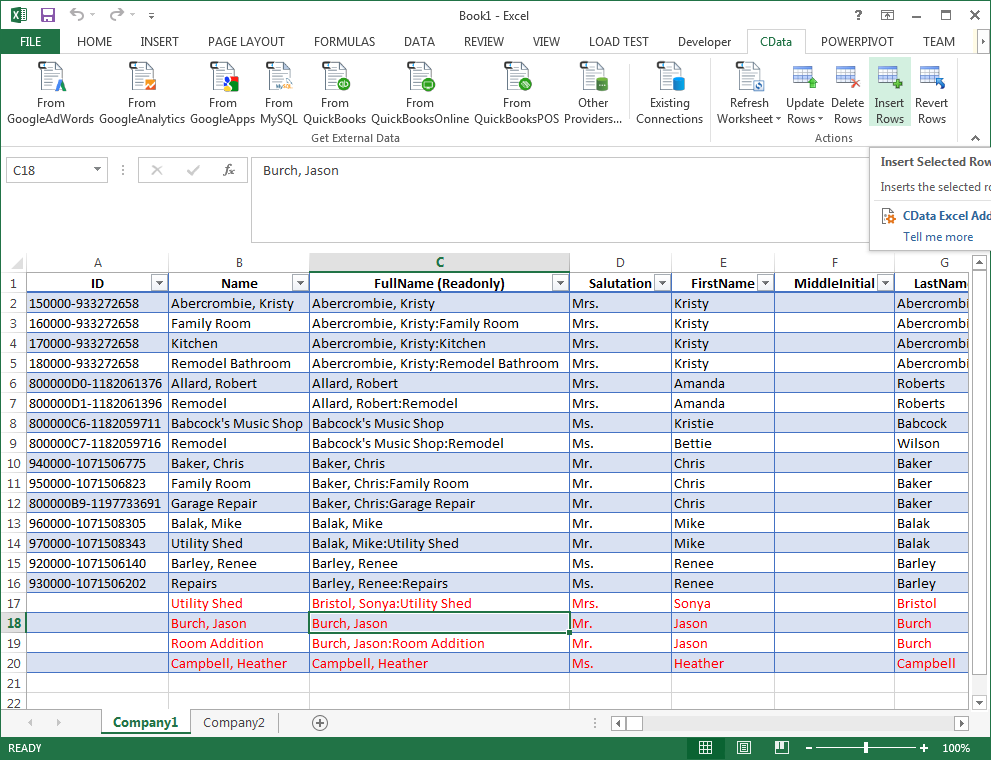
Having both worksheets, you can copy the information from one table to the other. Changed cells are marked in red.
To save the changes to the company file, select the changed cells and click Insert Rows. Once the insert is completed, the new rows will change to black. You can view the transferred rows by clicking Refresh Rows in the spreadsheet for the other company file.
![]()
 Retrieving data links the spreadsheet to the company file. If you want to add customers, you will still need to link the spreadsheet. You can do so by setting LIMIT to 1. The resulting SELECT command will get only the headers and one row of data.
Data Connectors
ETL/ ELT Solutions
Cloud & API Connectivity
OEM & Custom Drivers