Discover how a bimodal integration strategy can address the major data management challenges facing your organization today.
Get the Report →


Analyze Salesforce Data with PowerPivot
The ODBC protocol is used by a wide variety of Business Intelligence (BI) and reporting tools to get access to data from different databases. The CData ODBC Drivers bring the same power and ease of use to nontraditional data sources such as Salesforce, Microsoft CRM, QuickBooks, etc. This article uses the CData ODBC Driver for Salesforce to import data into PowerPivot.
Connect to Salesforce
Follow the steps below to connect to Salesforce in PowerPivot.
- If you have not already, configure an ODBC data source name (DSN) for Salesforce in the Microsoft ODBC Data Source Administrator. This is the last step of the driver installation. See "Getting Started" in the help documentation for a guide.
- In Excel, click the PowerPivot Window icon on the PowerPivot tab to open PowerPivot.
- Launch the Table Import Wizard: Click Get External Data -> Other Data Sources button.
- Select the OLEDB/ODBC source option.
- In the Table Import Wizard that is displayed, click Build to automatically build a connection string based on the DSN.
- In the Connection tab, click the "Use data source name" option and then select the Salesforce DSN in the menu.
![]()

Import Table Data
After selecting the DSN in the Table Import Wizard, follow the steps below to use the wizard to load data from a Salesforce table. As you use the wizard to select, filter and sort columns of [datasource], PowerPivot generates the query to be executed.
-
After selecting the DSN in the Table Import Wizard, select the option to select from a list of tables. The available tables are displayed. Select the tables that you want to import.
![]()
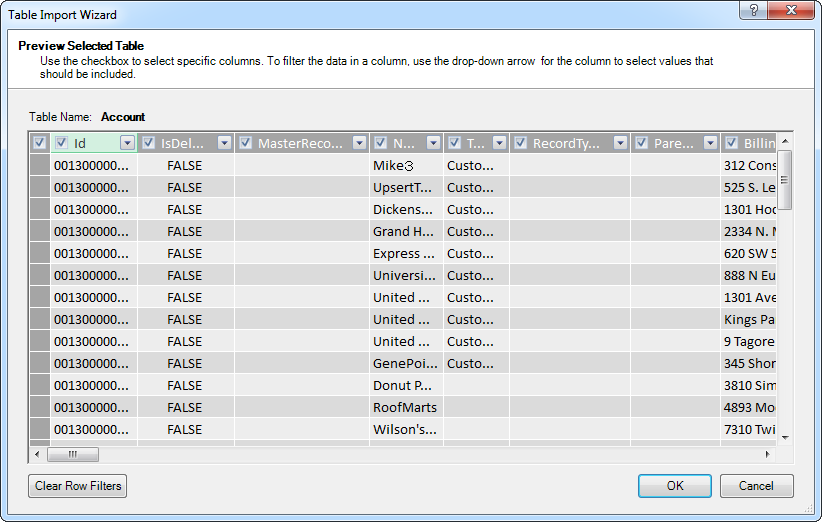
- Click Preview & Filter to select specific columns, sort data, and visually build filters based on column values.
![]()

Custom Query Import
Besides choosing the table to be imported, you can also specify a query to import specific columns and define filters. The driver supports a simple, intuitive SQL syntax that corresponds to the capabilities of the underlying Salesforce API.
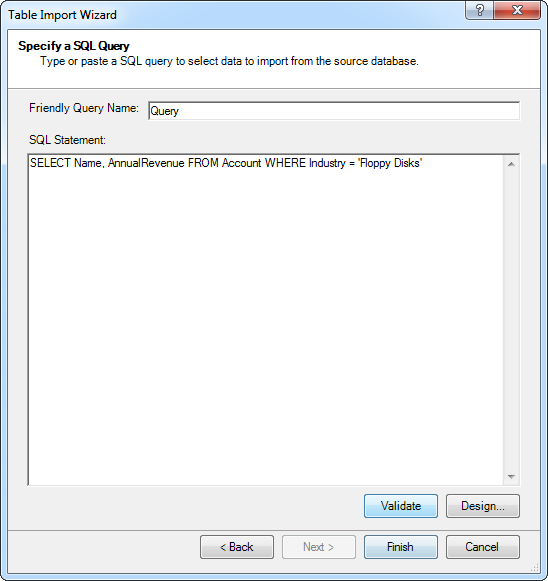
- After selecting the DSN in the Table Import Wizard, select the option to write a query.
In the SQL Statement box, enter the query. Click Validate to check that the syntax of the query is valid. Click Design to preview the results and adjust the query before import.
You can use WHERE clauses to specify filter criteria. See the "Supported SQL" chapter in the help documentation for examples of the available SQL functionality.
![]()
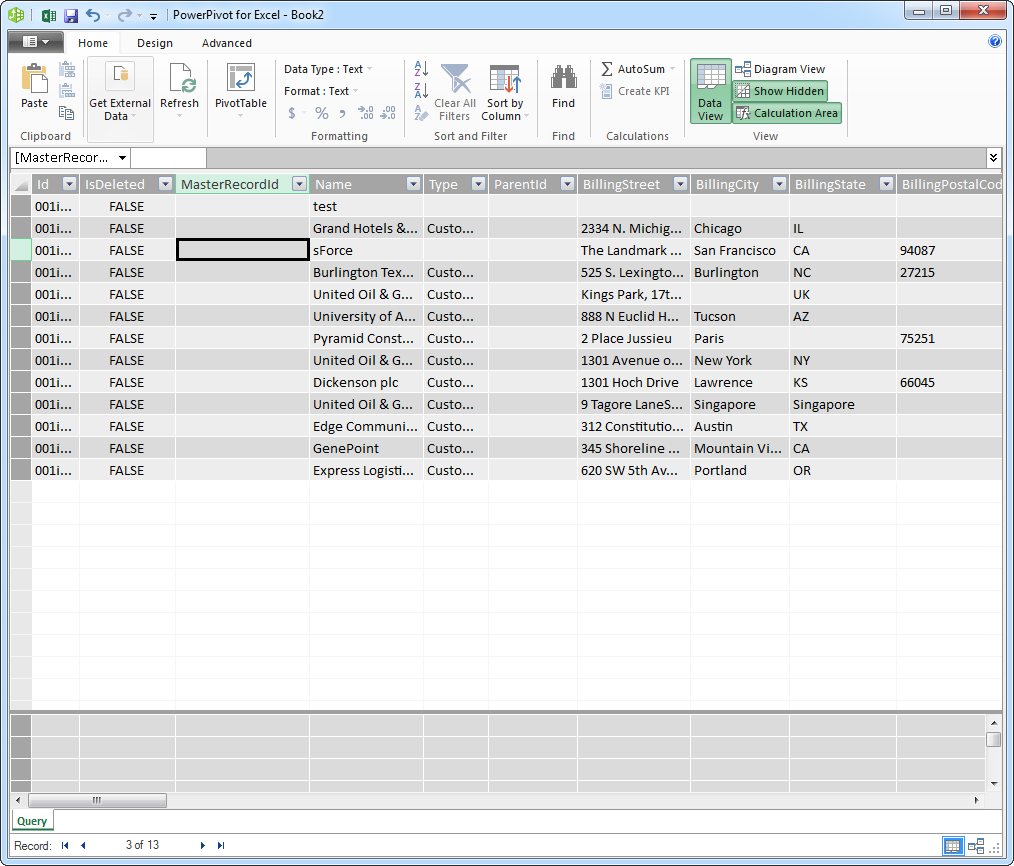
- Finish the wizard to import the data for your chosen query.
![]()
Data Connectors
ETL/ ELT Solutions
Cloud & API Connectivity
OEM & Custom Drivers