Discover how a bimodal integration strategy can address the major data management challenges facing your organization today.
Get the Report →


Databind Wijmo Grid to Salesforce.com Data
The CData API Server provides Salesforce data (along with 80+ other sources) as Web services, which enable connectivity to live data. This article shows how to consume JSONP-formatted Salesforce data from a Wijmo Grid.
- If you have not already connected successfully in the administration console, see the "Getting Started" chapter in the help documentation for a guide.
- Load the required Wijmo, jQuery, and Knockout libraries:
<script class=lazyload data-src="http://code.jquery.com/jquery-1.11.1.min.js"></script>
<script class=lazyload data-src="http://code.jquery.com/ui/1.11.0/jquery-ui.min.js"></script>

<!--Theme-->
<link href="http://cdn.wijmo.com/themes/aristo/jquery-wijmo.css" rel="stylesheet" type="text/css">

<!--Wijmo Widgets CSS-->
<link href="http://cdn.wijmo.com/jquery.wijmo-pro.all.3.20161.90.min.css" rel="stylesheet" type="text/css">

<!--Wijmo Widgets JavaScript-->
<script class=lazyload data-src="http://cdn.wijmo.com/jquery.wijmo-open.all.3.20161.90.min.js"></script>
<script class=lazyload data-src="http://cdn.wijmo.com/jquery.wijmo-pro.all.3.20161.90.min.js"></script>
<script class=lazyload data-src="http://cdn.wijmo.com/interop/wijmo.data.ajax.3.20161.90.js"></script>

<!--Knockout JS Library-->
<!-- Both of the links below can work -->
<script class=lazyload data-src="http://cdn.wijmo.com/wijmo/external/knockout-2.2.0.js"></script>
<!--<script class=lazyload data-src="http://cdn.wijmo.com/amd-js/3.20161.90/knockout-3.1.0.js"></script>-->

<!--Wijmo Knockout Integration Library-->
<script class=lazyload data-src="http://cdn.wijmo.com/interop/knockout.wijmo.3.20161.90.js"></script>
-
Create a ViewModel and connect to it using the ODataView:
<script id="scriptInit"> $.support.cors = true; var viewModel; function ViewModel() { var AccountView = new wijmo.data.ODataView("http://MyServer:MyPort/api.rsc/Account", { ajax: { dataType: "jsonp", username: "MyUser", password: "MyAuthtoken", data: { "$inlinecount": null } }, pageSize: 10 }); accountView.refresh(); accountView.nextPage(); this.account = accountView; this.prevPage = function () {accountView.prevPage();}; this.nextPage = function () {accountView.nextPage();}; } $(document).ready(function () { viewModel = new ViewModel(); ko.applyBindings(viewModel, $(".container").get(0)); }); </script> -
Databind: Below is a simple table with some paging buttons, which you can paste into the body section of your markup.
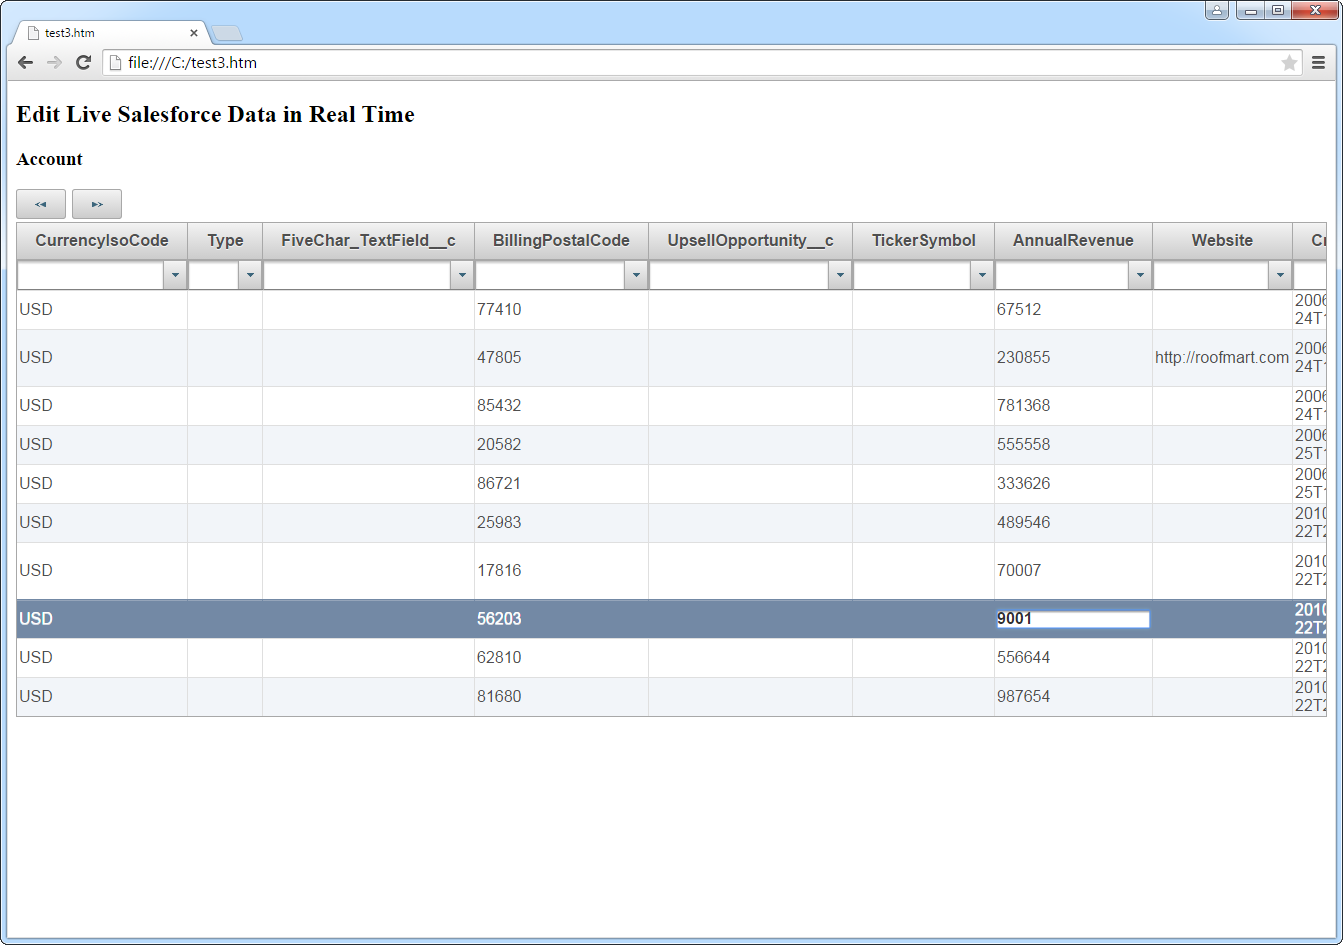
<h2>Edit Live Salesforce Data in Real Time</h2>

<h3>Account</h3>
<div>
  <button title="previous page" class="pagebuttons" data-bind="click: prevPage, button: {}"><span class="ui-icon ui-icon-seek-prev" /></button>
  <button title="next page" class="pagebuttons" data-bind="click: nextPage, button: {}"><span class="ui-icon ui-icon-seek-next" /></button>
</div>
<table id="demo-grid" data-bind="wijgrid: {
  data: products,
  allowEditing: true,
  showFilter: true,
  allowPaging: true,
  pagerSettings: { position: 'none'},
  columnsAutogenerationMode: 'append',
}" >
</table>
Below is the resulting grid. You can filter, sort, edit, and save. Paging makes working with large datasets manageable.
Data Connectors
ETL/ ELT Solutions
Cloud & API Connectivity
OEM & Custom Drivers