Discover how a bimodal integration strategy can address the major data management challenges facing your organization today.
Get the Report →Launch the CData Sync AMI on Amazon Web Services
CData Sync is a lightweight web application that helps you easily replicate data into any data warehouse in minutes. The CData Sync Amazon Machine Instance (AMI) comes as a Linux-based instance with CData Sync pre-configured and ready to run, with no additional configuration necessary.
The AMI can be found in the AWS Marketplace as CData Sync. You can launch a new instance of CData Sync from the Amazon AMI in three simple steps.
-
Subscribe to the AMI, and accept the Terms and Conditions. Once you are subscribed, you can launch a new instance of CData Sync.
-
Configure the instance-type, instance details, volume, tags, and security group. CData Sync runs on the default HTTPS port (443); ensure this port is accessible from the IP address you connect to CData Sync. Next, create a new key-pair or select an existing one.
-
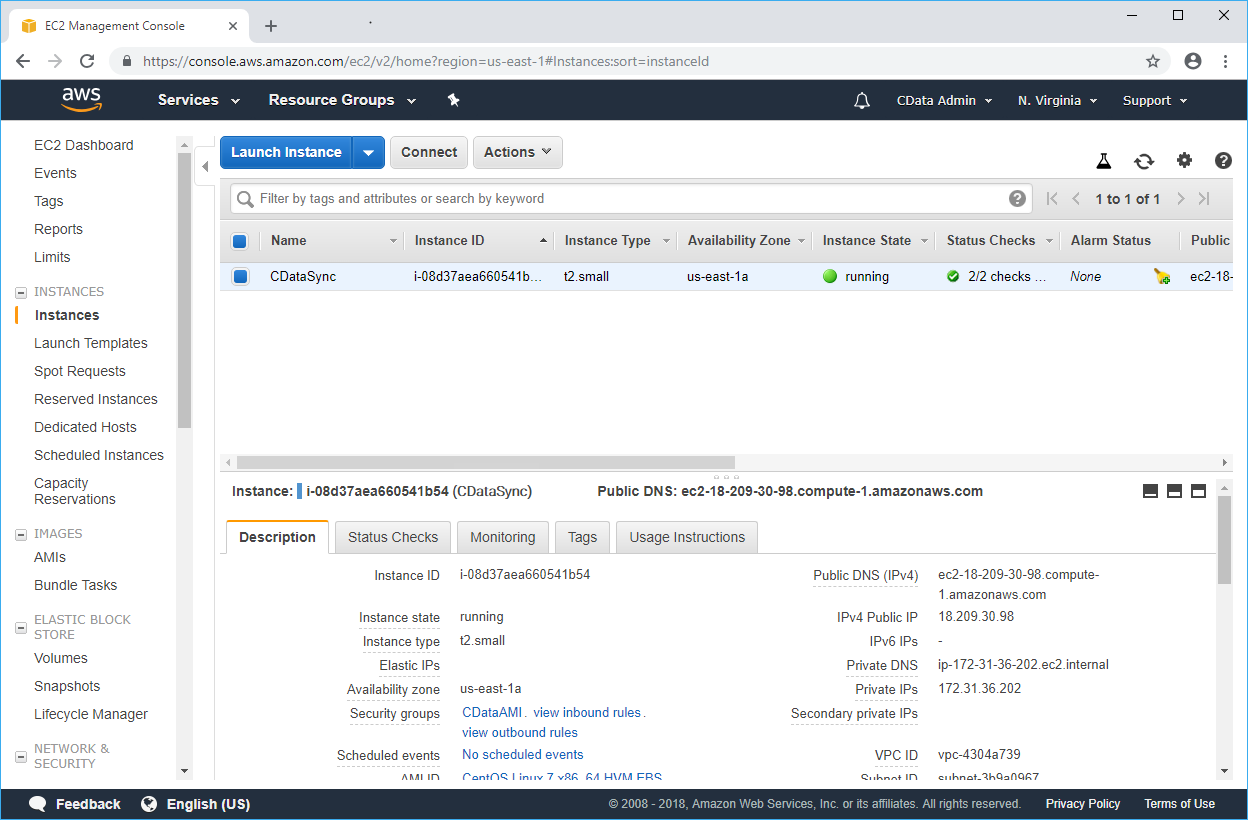
Once the instance has launched, it will be listed in your instances running EC2. You can then access CData Sync in your browser at the URL:
https://<instance_public_dns>
To log in, the default username is 'admin,' and the password is 'Sync21:' prepended to the instance's randomly generated Instance-ID, which you can find from the EC2 management console. For example: Sync21:i-08d37aea660541b....

You can now connect to your data sources, secure connections with SSL, and standard authentication methods. See the "Getting Started" chapter in the help for a guide to setting the required connection properties and setting up access control.
Advanced configuration
The CData Sync AMI works out-of-the-box without additional configuration. However, advanced users can customize CData Sync to manage replications with more precision.
Access to the Instance via SSH
Connecting to the EC2 instance via SSH can be useful for advanced configuration of the service. The CData Sync AMI is based on a standard Ubuntu 16 VM, and the main user is ubuntu. You can connect to it via SSH using the key-pair selected when launching the instance:
ssh -i my_key_pair.pem ubuntu@<instance_public_dns>
Stop, Start, or Restart the CData Sync service
CData Sync runs using Jetty. Once connected to the instance, use systemctl to manage the Jetty service:
sudo systemctl restart cdatasync
sudo systemctl stop cdatasync
sudo systemctl start cdatasync
Connect to Additional Data Sources
CData Sync supports several replication sources and destinations out of the box, but there are many additional connectors available. New connectors can be added through the UI. However you may be required to manually update or add the connector to your instance, following the steps below:
The CData Sync AMI is licensed for a base number of connections. If you would like to add more connections, contact our sales team.
- SSH into the AMI
- Stop the jetty service
sudeo systemctl stop cdatasync
- Open a new command prompt and copy the connector to your instance using scp:
scp -i ./path/to/my_key_pair.pem ./pat/to/cdata.jdbc.salesforce.jar ubuntu@<instance_public_dns>:/home/ubuntu/cdata.jdbc.salesforce.jar
- In the previous command prompt, copy the connector to the libs folder:
sudo cp /home/ubuntu/cdata.jdbc.salesforce.jar /opt/sync/libs/cdata.jdbc.salesforce.jar
- After copying the JAR file, restart the jetty service:
sudo systemctl start cdatasync
Install a Trusted Certificate
By default, the CData Sync AMI generates a new self-signed certificate upon creation, preventing any two AMIs from sharing the same certificate. However, not all client applications accept self-signed certificates. To get around this, you can replace the default certificate with a trusted one.
First, obtain a trusted certificate from a certificate provider. This certificate must match the public URL provided by AWS.
In the AMI, the Jetty web-container handles the SSL configuration. Import your certificate as a new keystore file in your EC2 instance. In the file /opt/datasync/etc/ssl.xml, modify the lines referencing the path to the current certificate keystore with the new path and password:
<Set name='KeyStorePath'><Property name='jetty.base' default='.'/>/etc/my_trusted_keystore</Set>
<Set name='KeyStorePassword'>my_keystore_password</Set>
Note that the keystore path is a relative path starting from the Jetty Base directory (/opt/datasync). After saving the modifications to this file, restart the Jetty service for these changes to take effect.


