Discover how a bimodal integration strategy can address the major data management challenges facing your organization today.
Get the Report →LINQ to Act CRM Data
LINQ offers versatile querying capabilities within the .NET Framework (v3.0+), offering a straightforward method for programmatic data access through CData ADO.NET Data Providers. In this article, we demonstrate the use of LINQ to retrieve information from the Act CRM Data Provider.
This article illustrates using LINQ to access tables within the Act CRM via the CData ADO.NET Data Provider for Act CRM. To achieve this, we will use LINQ to Entity Framework, which facilitates the generation of connections and can be seamlessly employed with any CData ADO.NET Data Providers to access data through LINQ.
See the help documentation for a guide to setting up an EF 6 project to use the provider.
- In a new project in Visual Studio, right-click on the project and choose to add a new item. Add an ADO.NET Entity Data Model.
- Choose EF Designer from Database and click Next.
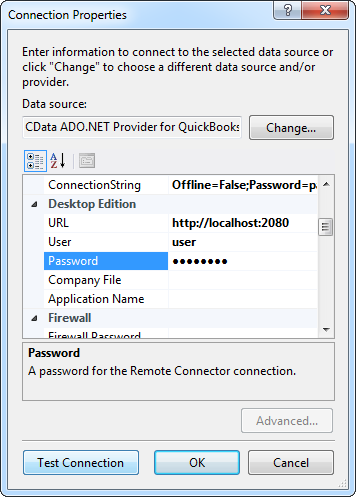
- Add a new Data Connection, and change your data source type to "CData Act CRM Data Source".
Enter your data source connection information.
The User and Password properties, under the Authentication section, must be set to valid Act! user credentials. In addition to the authentication values, see the following:
-
Connecting to Act! Premium
In addition to the authentication values, the URL to Act! is also required; for example https://eup1-iis-04.eu.hosted.act.com/.
Additionally, you must specify the ActDatabase you will connect to. This is found by going to the About Act! Premium menu of your account, at the top right of the page, in the ? menu. Use the Database Name in the window that appears.
-
Connecting to Act! Premium Cloud
To connect to your Act! Premium Cloud account, you also need to specify the ActCloudName property. This property is found in the URL address of the Cloud account; for example https://eup1-iis-04.eu.hosted.act.com/ActCloudName/.
Note that retrieving ActCRM metadata can be expensive. It is advised that you set the CacheMetadata property to store the metadata locally.
Below is a typical connection string:
URL=https://myActCRMserver.com;User=myUser;Password=myPassword;ActDatabase=MyDB;-
- If saving your entity connection to App.Config, set an entity name. In this example we are setting ActCRMEntities as our entity connection in App.Config.
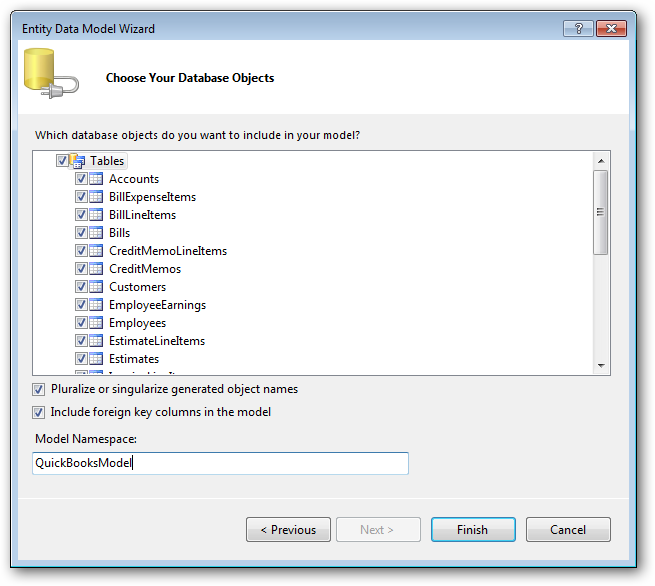
- Enter a model name and select any tables or views you would like to include in the model.


Using the entity you created, you can now perform select , update, delete, and insert commands. For example:
ActCRMEntities context = new ActCRMEntities();

var activitiesQuery = from activities in context.Activities
  select activities;

foreach (var result in activitiesQuery) {
  Console.WriteLine("{0} {1} ", result.Id, result.ActivityDisplayName);
}
See "LINQ and Entity Framework" chapter in the help documentation for example queries of the supported LINQ.


