Discover how a bimodal integration strategy can address the major data management challenges facing your organization today.
Get the Report →Connect to Act CRM Data from a Connection Pool in JBoss
Integrate Act CRM data into Java servlets: Use the Management Console in JBoss to install the Act CRM JDBC Driver.
CData JDBC drivers can be configured in JBoss by following the standard procedure for connection pooling. This article details how to access Act CRM data from a connection pool in JBoss applications. This article details how to use the JBoss Management Interface to configure the CData JDBC Driver for Act CRM. You will then access Act CRM data from a connection pool.
Create a JDBC Data Source for Act CRM from the Management Console
Follow the steps below to add the driver JAR and define required connection properties.
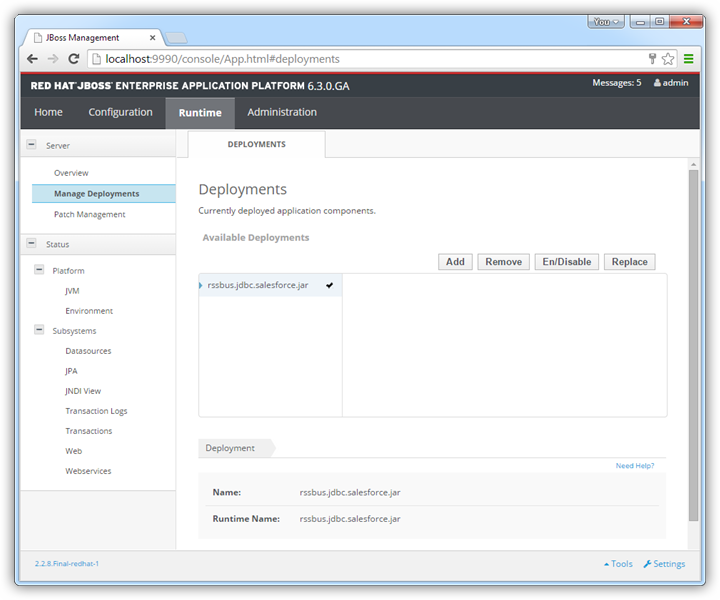
- In the Runtime menu, select the Domain or Server menu, depending on whether you are deploying to a managed domain or to a stand-alone server, and click "Manage deployments" to open the Deployments page.
- Click Add. In the resulting wizard, add the JAR file and license for the driver, located in the lib subfolder of the installation directory. Finish the wizard with the defaults, select the driver, and click Enable.
![The deployed JAR. (Salesforce is shown.)]()
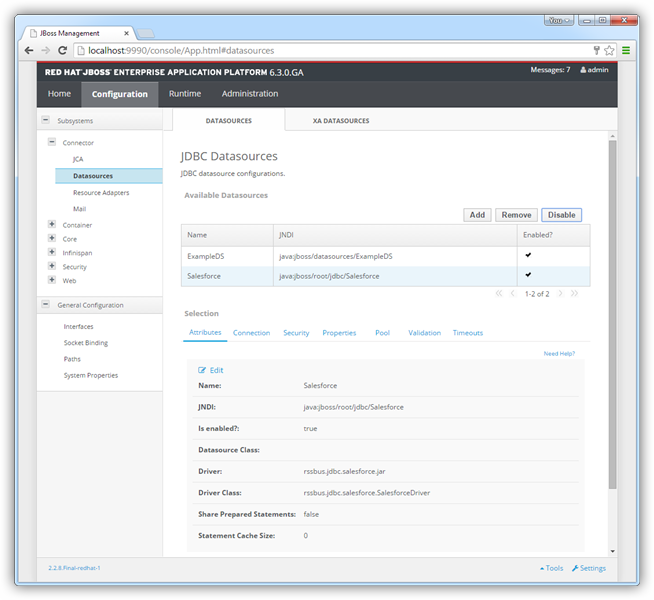
- In the Configuration menu, click Subsystems -> Connector -> Datasources. This opens the JDBC Datasources page.
- Click Add and, in the resulting wizard, enter a name for the driver and the JNDI name. For example:
java:jboss/root/jdbc/ActCRM - Select the driver that you added above.
Enter the JDBC URL and the username and password. The syntax of the JDBC URL is jdbc:actcrm: followed by a semicolon-separated list of connection properties.
The User and Password properties, under the Authentication section, must be set to valid Act! user credentials. In addition to the authentication values, see the following:
-
Connecting to Act! Premium
In addition to the authentication values, the URL to Act! is also required; for example https://eup1-iis-04.eu.hosted.act.com/.
Additionally, you must specify the ActDatabase you will connect to. This is found by going to the About Act! Premium menu of your account, at the top right of the page, in the ? menu. Use the Database Name in the window that appears.
-
Connecting to Act! Premium Cloud
To connect to your Act! Premium Cloud account, you also need to specify the ActCloudName property. This property is found in the URL address of the Cloud account; for example https://eup1-iis-04.eu.hosted.act.com/ActCloudName/.
Note that retrieving ActCRM metadata can be expensive. It is advised that you set the CacheMetadata property to store the metadata locally.
Built-in Connection String Designer
For assistance in constructing the JDBC URL, use the connection string designer built into the Act CRM JDBC Driver. Either double-click the JAR file or execute the jar file from the command-line.
java -jar cdata.jdbc.actcrm.jarFill in the connection properties and copy the connection string to the clipboard.
![Using the built-in connection string designer to generate a JDBC URL (Salesforce is shown.)]()
A typical connection string is below:
jdbc:actcrm:URL=https://myActCRMserver.com;User=myUser;Password=myPassword;ActDatabase=MyDB;-
- Test the connection and finish the wizard. Select the Act CRM data source and click Enable.

More JBoss Integration
The steps above show how to configure the driver in a simple connection pooling scenario. For more information, refer to the Data Source Management chapter in the JBoss EAP documentation.


