Discover how a bimodal integration strategy can address the major data management challenges facing your organization today.
Get the Report →Use Updategrams with Amazon Athena Data
You can use updategrams to insert, update, and delete Amazon Athena data. This guide shows how to use the CData BizTalk Adapter for Amazon Athena to generate updategram schemas and instances.
In this article, you will create updategrams that can be executed by the CData BizTalk Adapter for Amazon Athena. You will design a schema and use it as a template for generating insert, update, and delete updategrams.
Add the Adapter for Amazon Athena to Your Project
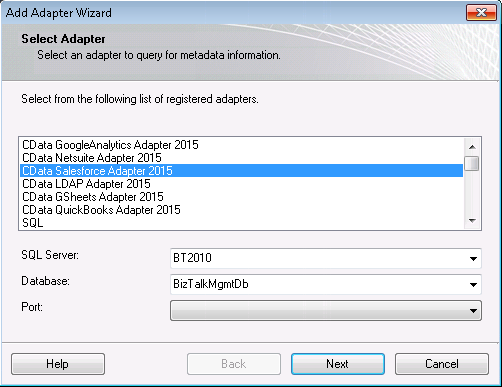
Use the Add Adapter wizard to add the adapter to a BizTalk Server project in Visual Studio. You will use the adapter to query Amazon Athena for metadata about the table you want to modify.
- Right-click on the project in the Solution Explorer and click Add -> Add Generated Items.
- Select Add Adapter Metadata in the resulting dialog box.
- In the resulting Add Adapter Wizard, select the CData BizTalk Adapter for Amazon Athena from the list view.
- In the Port menu, leave the selection blank. Or, select a receive location or send port that has been configured to use the adapter.
- When you click Next, the Schema Wizard is displayed.
Generate a Schema for an Updategram
Follow the steps below to create a schema in a BizTalk Server project in Visual Studio.
- If you have not already done so, add the Amazon Athena adapter to your project.
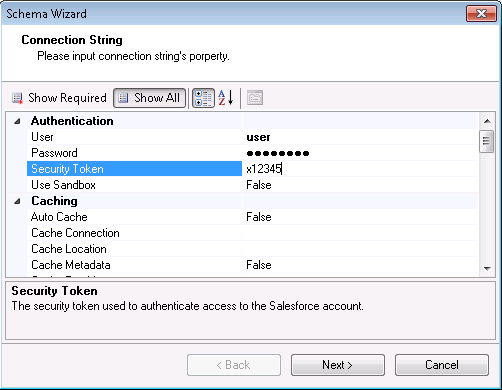
- On the Connection String page of the Add Adapter wizard, enter authentication credentials and other connection properties, if they were not already configured in the send port or receive location. Below is a typical connection string:
AccessKey='a123';SecretKey='s123';Region='IRELAND';Database='sampledb';S3StagingDirectory='s3://bucket/staging/';Authenticating to Amazon Athena
To authorize Amazon Athena requests, provide the credentials for an administrator account or for an IAM user with custom permissions: Set AccessKey to the access key Id. Set SecretKey to the secret access key.
Note: Though you can connect as the AWS account administrator, it is recommended to use IAM user credentials to access AWS services.
Obtaining the Access Key
To obtain the credentials for an IAM user, follow the steps below:
- Sign into the IAM console.
- In the navigation pane, select Users.
- To create or manage the access keys for a user, select the user and then select the Security Credentials tab.
To obtain the credentials for your AWS root account, follow the steps below:
- Sign into the AWS Management console with the credentials for your root account.
- Select your account name or number and select My Security Credentials in the menu that is displayed.
- Click Continue to Security Credentials and expand the Access Keys section to manage or create root account access keys.
Authenticating from an EC2 Instance
If you are using the CData Data Provider for Amazon Athena 2018 from an EC2 Instance and have an IAM Role assigned to the instance, you can use the IAM Role to authenticate. To do so, set UseEC2Roles to true and leave AccessKey and SecretKey empty. The CData Data Provider for Amazon Athena 2018 will automatically obtain your IAM Role credentials and authenticate with them.
Authenticating as an AWS Role
In many situations it may be preferable to use an IAM role for authentication instead of the direct security credentials of an AWS root user. An AWS role may be used instead by specifying the RoleARN. This will cause the CData Data Provider for Amazon Athena 2018 to attempt to retrieve credentials for the specified role. If you are connecting to AWS (instead of already being connected such as on an EC2 instance), you must additionally specify the AccessKey and SecretKey of an IAM user to assume the role for. Roles may not be used when specifying the AccessKey and SecretKey of an AWS root user.
Authenticating with MFA
For users and roles that require Multi-factor Authentication, specify the MFASerialNumber and MFAToken connection properties. This will cause the CData Data Provider for Amazon Athena 2018 to submit the MFA credentials in a request to retrieve temporary authentication credentials. Note that the duration of the temporary credentials may be controlled via the TemporaryTokenDuration (default 3600 seconds).
Connecting to Amazon Athena
In addition to the AccessKey and SecretKey properties, specify Database, S3StagingDirectory and Region. Set Region to the region where your Amazon Athena data is hosted. Set S3StagingDirectory to a folder in S3 where you would like to store the results of queries.
If Database is not set in the connection, the data provider connects to the default database set in Amazon Athena.
See the "BizTalk Configuration" chapter in the help documentation for more information on the required connection properties.
![The connection string used by the adapter. (Salesforce is shown.)]()
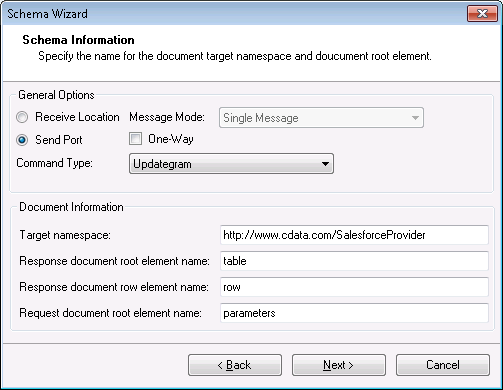
- On the Schema Information page, click Send Port in the General Options section. Select Updategram from the CommandType menu. If you are using the adapter in a solicit-response send port, disable the One-Way option.
![Schema options that are specific to the adapter configured in a solicit-response send port. (Salesforce is shown.)]()
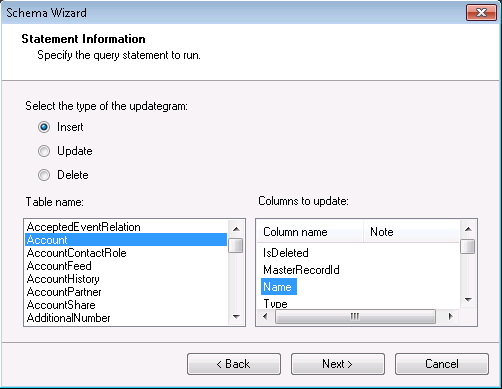
On the next page, Statement Information, select the type of the updategram: Insert, Update, or Delete. Select the Table name and the columns you want to include in the schema. If you want to update or delete, the Id column is required.
Note: When you create the updategram, you are limited to modifying the columns you include in the schema.
![Schema options that specify the table and columns to be modified. (Salesforce is shown.)]()
- Click Next to view a summary of the schema and finish the wizard to create the schema. The resulting .xsd file is added to your project.
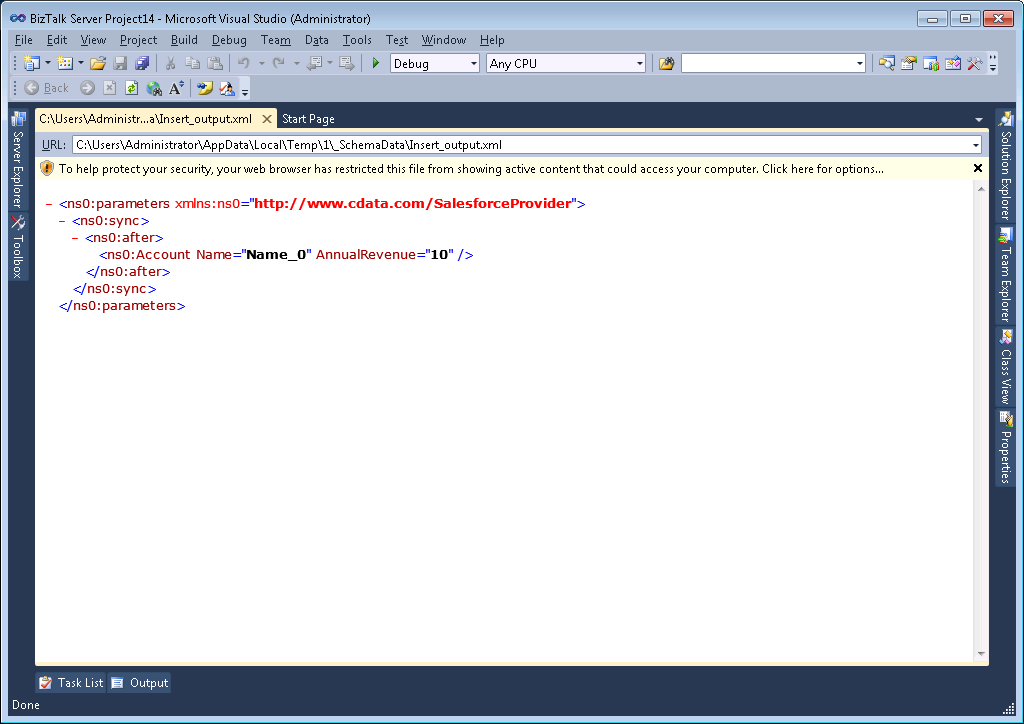
Generate Insert, Update, and Delete Instance Messages
After you create the updategram schema, you can use the .xsd file to generate the updategram: Right-click the .xsd file and select Generate Instance. You can also use this file as a template to manually create updategrams. Below are example generated updategram instances for inserts, updates, and deletes:
Insert
An example of INSERT is below. In this instance, there is only an after block, which specifies how the data will change.
<ns0:parameters xmlns:ns0="http://www.cdata.com/AmazonAthenaProvider">
  <ns0:sync>
    <ns0:before></ns0:before>
    <ns0:after>
      <ns0:Customers Name="Name_0" TotalDue="TotalDue_1" />
    </ns0:after>
  </ns0:sync>
</ns0:parameters>
Update
An example of UPDATE is below. In this instance, there is both a before block (how the data currently exists in the table) and an after block (how the data will change).
<ns0:parameters xmlns:ns0="http://www.cdata.com/AmazonAthenaProvider">
  <ns0:sync>
    <ns0:before>
      <ns0:Customers Id=001d000000YBRseAAH></ns0:Customers>
    </ns0:before>
    <ns0:after>
      <ns0:Customers Name="Name_0" TotalDue="TotalDue_1" ></ns0:Customers>
    </ns0:after>
  </ns0:sync>
</ns0:parameters>
Delete
An example for DELETE is below. The after block will be empty to show that it is removing the item.
<ns0:parameters xmlns:ns0="http://www.cdata.com/AmazonAthenaProvider">
  <ns0:sync>
    <ns0:before>
      <ns0:Customers Id=001d000000YBRseAAH></ns0:Customers>
    </ns0:before>
    <ns0:after></ns0:after>
  </ns0:sync>
</ns0:parameters>
Processing Schemas
To use updategrams to insert, update, or delete Amazon Athena records, see the tutorial.


