Discover how a bimodal integration strategy can address the major data management challenges facing your organization today.
Get the Report →Create SharePoint Excel Services-Connected Nintex Workflows
Use CData Connect Server to connect to SharePoint Excel Services from Nintex Workflow Cloud and build custom workflows using live SharePoint Excel Services data.
Nintex Workflow Cloud is a cloud-based platform where you can design workflows to automate simple or complex processes using drag-and-drop interactions — without writing any code. When paired with CData Connect Server, you get instant, cloud-to-cloud access to SharePoint Excel Services data for business applications. This article shows how to create a virtual database for SharePoint Excel Services in Connect Server and build a simple workflow from SharePoint Excel Services data in Nintex.
CData Connect Server provides a pure SQL Server interface for SharePoint Excel Services, allowing you to build workflows from live SharePoint Excel Services data in Nintex Workflow Cloud — without replicating the data to a natively supported database. Nintex allows you to access data directly using SQL queries. Using optimized data processing out of the box, CData Connect Server pushes all supported SQL operations (filters, JOINs, etc.) directly to SharePoint Excel Services, leveraging server-side processing to quickly return the requested SharePoint Excel Services data.
Create a Virtual SQL Server Database for SharePoint Excel Services Data
CData Connect Server uses a straightforward, point-and-click interface to connect to data sources and generate APIs.
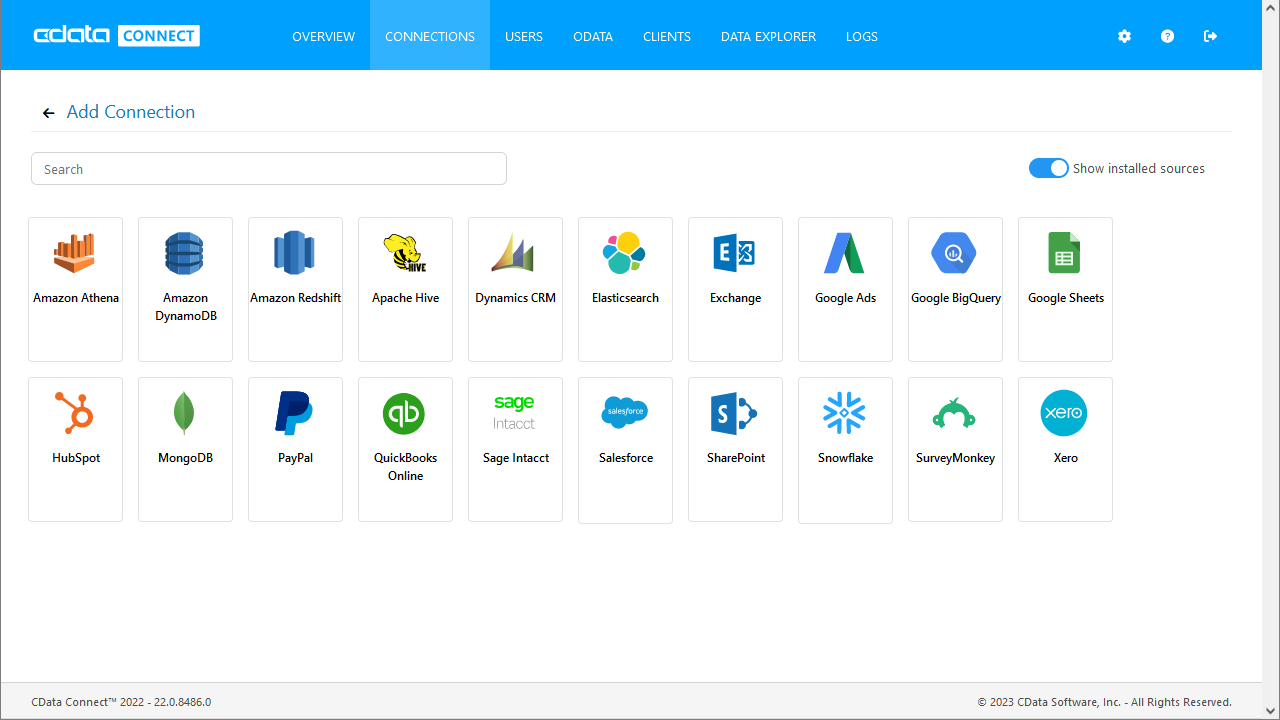
- Log into Connect Server and click Connections.
![Adding a connection]()
- Select "SharePoint Excel Services" from Available Data Sources.
-
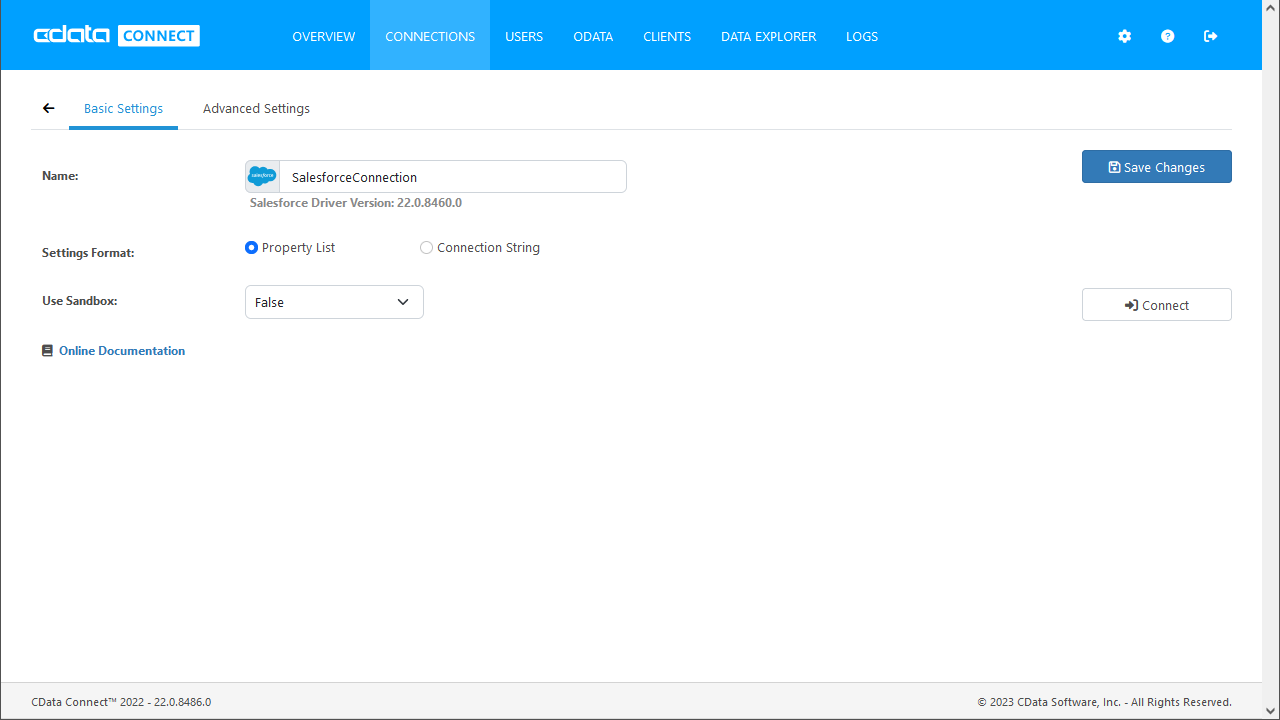
Enter the necessary authentication properties to connect to SharePoint Excel Services.
The URL, User, and Password properties, under the Authentication section, must be set to valid credentials for SharePoint Online, SharePoint 2010, or SharePoint 2013. Additionally, the Library property must be set to a valid SharePoint Document Library and the File property must be set to a valid .xlsx file in the indicated Library.
![Configuring a connection (SQL Server is shown).]()
- Click Save Changes
- Click Privileges -> Add and add the new user (or an existing user) with the appropriate permissions.
With the virtual database created, you are ready to connect to SharePoint Excel Services data from Nintex.
Connect to SharePoint Excel Services in Nintex
The steps below outline creating a new connection for access to SharePoint Excel Services CData Connect Server from Nintex to create a new SharePoint Excel Services data source.
- Log into Nintex Workflow Cloud
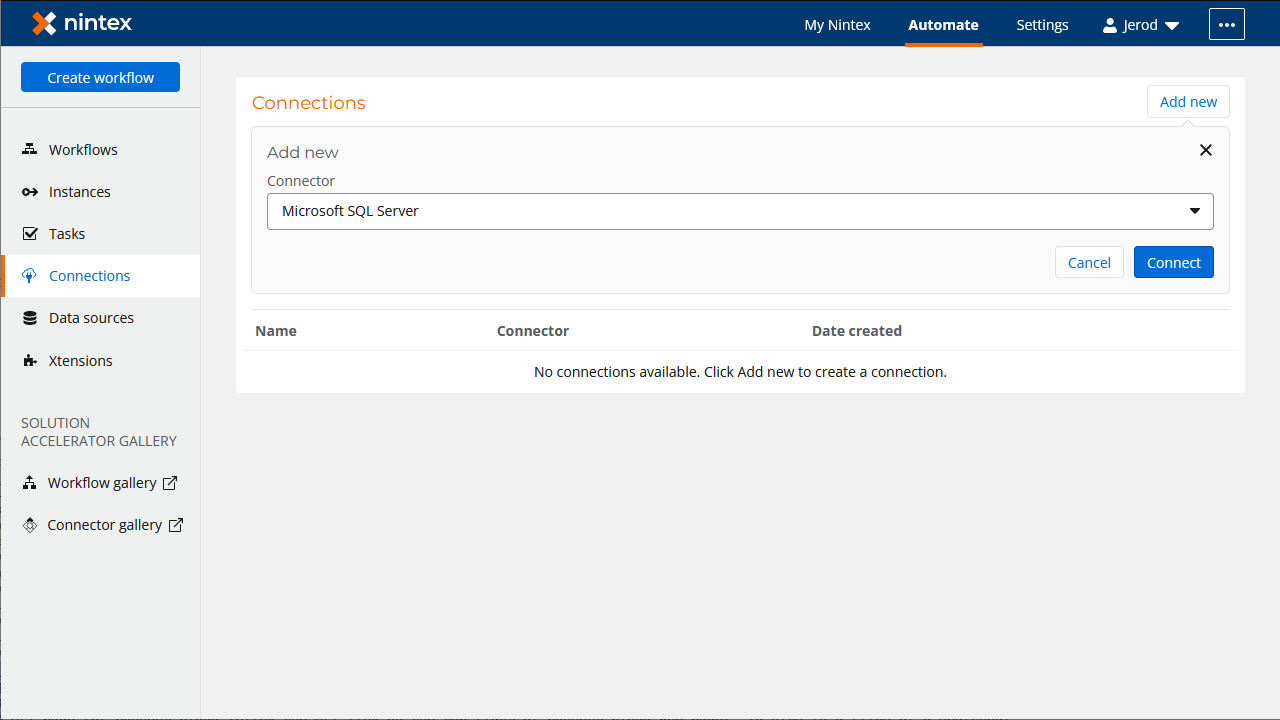
- In the Connections tab, click "Add new"
- Select SQL Server as the connector and click "Connect"
![Adding a new SQL Server Connection]()
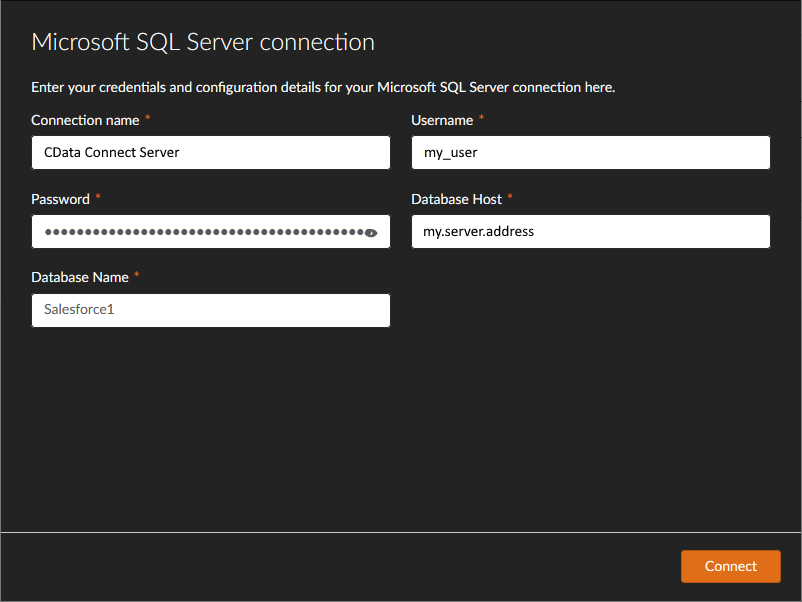
- In the SQL Server connection wizard, set the following properties:
- Connection Name: name the connection (e.g., CData Connect Server SharePoint Excel Services Connection)
- Username: your Connect Server username
- Password: your Connect Server password
- Database Host: your Connect Server SQL Server endpoint (e.g., connect_server_url)
- Database Name: the virtual SharePoint Excel Services database (e.g., ExcelServices1)
![Configuring the Connection to Connect Server]()
- Click "Connect"
- Configure the connection permissions and click "Save permissions"
![Configuring permissions and saving the Connection]()
Create a Simple SharePoint Excel Services Workflow
With the connection to CData Connect Server configured, we are ready to build a simple workflow to access SharePoint Excel Services data. Start by clicking the "Create workflow" button.
Configure the Start Event Action
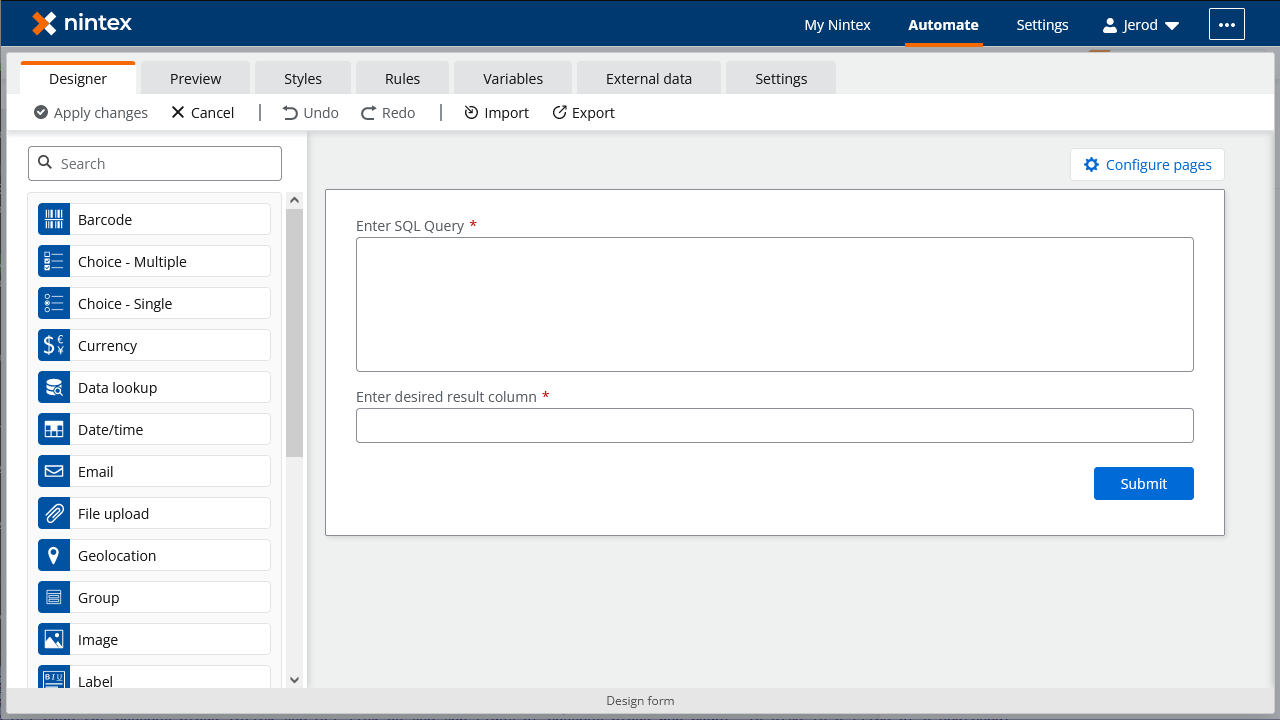
- Click the start event task and select the "Form" event
- Click "Design form"
- Drag a "Text - Long" element onto the Form and click the element to configure it
- Set "Title" to "Enter SQL query"
- Set "Required" to true
- Drag a "Text - Short" element onto the Form and click the element to configure it
- Set "Title" to "Enter desired result column"
- Set "Required" to true
Configure an "Execute a Query" Action
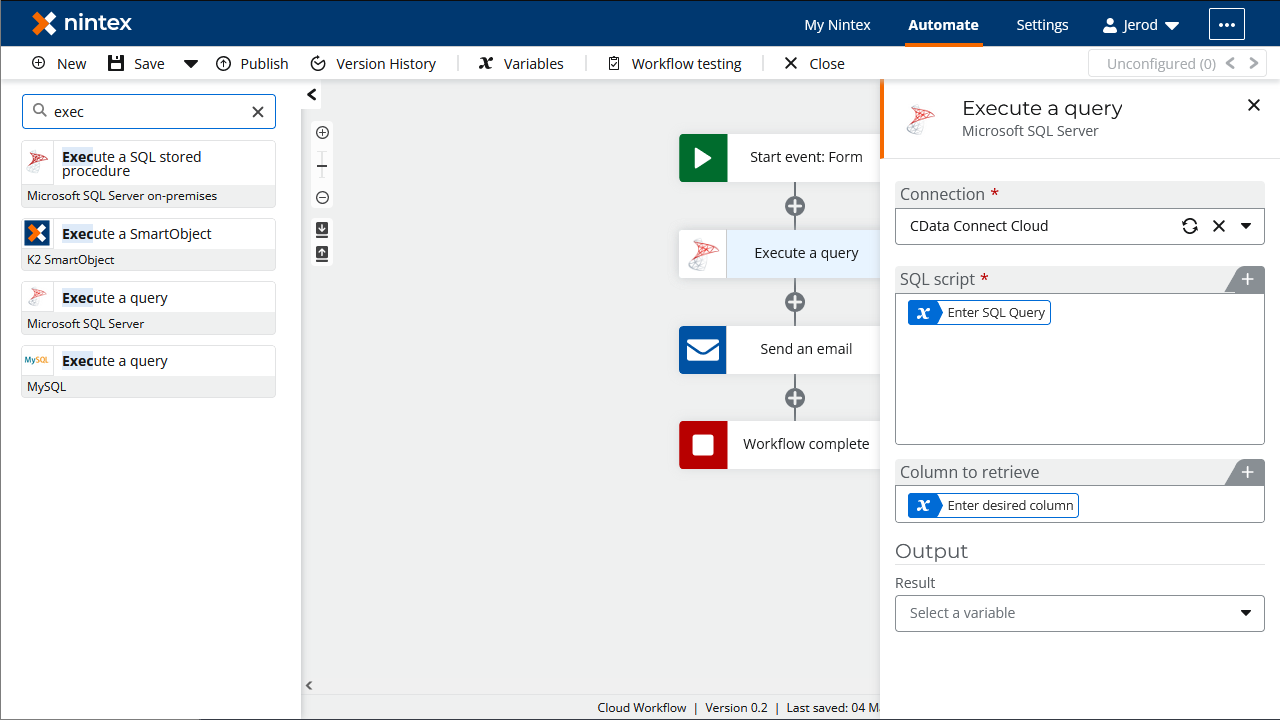
- Add an "Execute a query" action after the "Start event: Form" action and click to configure the action
- Set "SQL Script" to the "Enter SQL Query" variable from the "Start event" action
- Set "Column to retrieve" to the "Enter desired result column" variable from the "Start event" action
- Set "Retrieved column" to a new variable (e.g., "values")
Configure a "Send an Email" Action
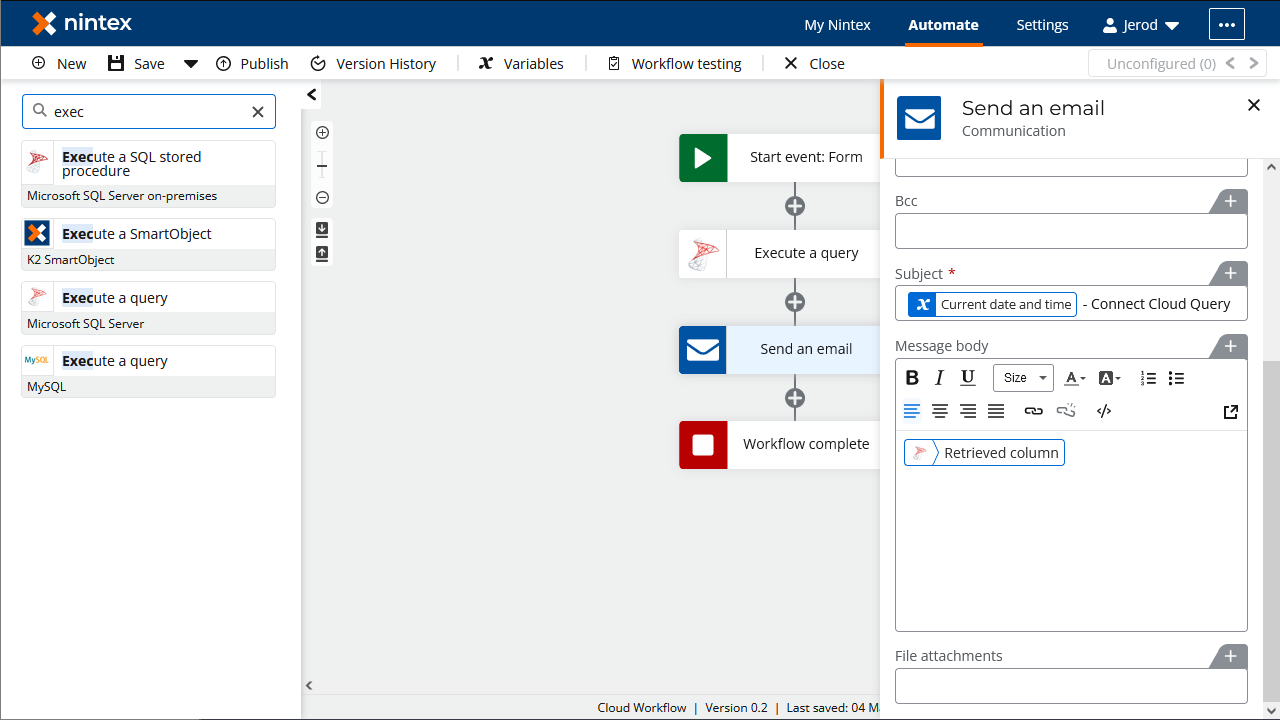
- Add a "Send an email" action after the "Execute a query" action and click to configure the action
- Set the "Recipient email address"
- Set the "Subject"
- Set the "Message body" to the variable created for the retrieved column
Once you configure the actions, click "Save," name the Workflow, and click "Save" again. You now have a simple workflow that will query SharePoint Excel Services using SQL and send an email with the results.
To learn more about SQL data access to 200+ SaaS, Big Data, and NoSQL sources directly from your cloud applications, check out the CData Connect Server. Sign up for a free trial and reach out to our Support Team if you have any questions.


