Discover how a bimodal integration strategy can address the major data management challenges facing your organization today.
Get the Report →Configure a Solicit-Response Send Port for the CData BizTalk Adapter for NetSuite
Use the adapter for NetSuite with a solicit-response send port to execute updategrams and data manipulation SQL in BizTalk.
This section provides step-by-step instructions for creating, configuring, and testing a static solicit-response send port using the CData BizTalk Adapter for NetSuite. You can use a static solicit-response send port to execute commands and access the results in BizTalk. You can use send ports to execute updategram commands, SQL commands, and stored procedure operations.
Create and Configure the Send Port
Create a static solicit-response send port and configure it to use the adapter as its transport type.
- If you have not already done so, open your BizTalk application in the BizTalk Administration Console.
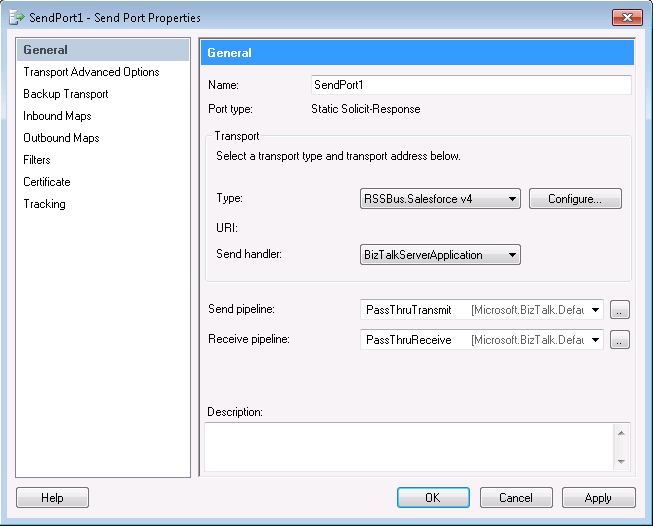
- In the node for your BizTalk application, right-click Send Ports and select New -> Static Solicit-Response Send Port. The Send Port Properties dialog is displayed.
- In the Send Port properties, enter a name for the receive port.
- In the Transport Type menu, select CData.NetSuite;.
- In the Send pipeline menu, select the default option, PassThruTransmit.
- In the Receive pipeline menu, select the default option, PassThruReceive.

Configure the Adapter
Define the command the adapter will execute in the Transport Properties dialog.
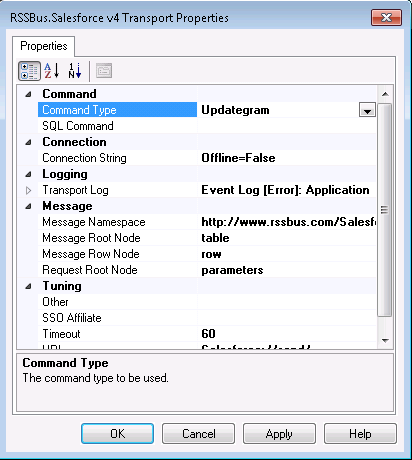
- In the send port properties, click the Configure button. The Adapter Transport Properties dialog is displayed.
- In the CommandType property, select the command type you want.
- If you want to execute an SQL command, enter the command in the SQL Command box.

Configure the Connection to NetSuite
Configure credentials and other properties required to connect to NetSuite in the Connection String Options dialog.
- In the send port properties, click Configure. The adapter properties dialog is displayed.
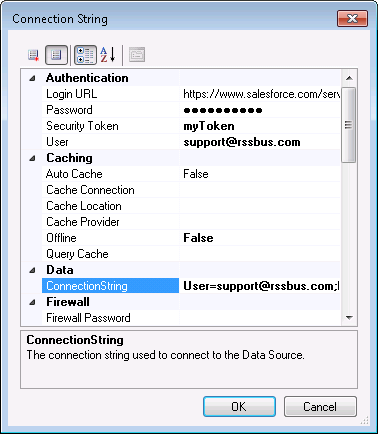
- Click the button in the Connection String property. The Connection String Options dialog is displayed.
- Enter the connection properties. Below is a typical connection string:
Account Id=XABC123456;Password=password;User=user;Role Id=3;Version=2013_1;The User and Password properties, under the Authentication section, must be set to valid NetSuite user credentials. In addition, the AccountId must be set to the ID of a company account that can be used by the specified User. The RoleId can be optionally specified to log in the user with limited permissions.
See the "Getting Started" chapter of the help documentation for more information on connecting to NetSuite.
- Click Test Connection to verify the values and test connectivity.
 The updategram tutorial for the adapter for NetSuite walks through the steps to create a simple application that uses a solicit-response send port to execute an insert updategram to NetSuite.


