Discover how a bimodal integration strategy can address the major data management challenges facing your organization today.
Get the Report →How to connect to QuickBooks POS Data from MS Excel on Mac OS X
Create a Data Source Name in iODBC with the CData ODBC Driver for QuickBooks POS and work with QuickBooks POS data in Microsoft Excel on Mac OS X.
Microsoft Excel features calculations, graphing tools, pivot tables, and a macro programming language that allows users to work with data in many of the ways that suit their needs, whether on a Windows machine or a Macintosh machine. This article walks through creating a DSN for QuickBooks POS data in iODBC and accessing QuickBooks POS data in Microsoft Excel, all on a machine running Mac OS X.
Installing the CData ODBC Drivers on Mac OS X
The CData ODBC Driver for QuickBooks POS is preconfigured for the iODBC driver manager, as are many other products like Microsoft Excel. This makes the driver easy to use with these tools.
Licensing the Driver
In a terminal run the following commands to license the driver. To activate a trial license, omit the key input.
cd "/Applications/CData ODBC Driver for QuickBooks POS/bin"
sudo ./install-license <key>
Defining a DSN for iODBC with odbc.ini
You can define ODBC data sources in sections in the odbc.ini file. User data sources can only be accessed by the user account whose home folder the odbc.ini is located in. System data sources can be accessed by all users. You can find the correct odbc.ini in the following paths:
| Privileges | Path | |
|---|---|---|
| User | /Users/myuser/Library/ODBC/odbc.ini | |
| System | /Library/ODBC/odbc.ini |
Modifying iODBC's system-wide settings requires elevated permissions; to do so, you can use following to open a text editor from the terminal:
sudo nano /Library/ODBC/odbc.ini
When you are connecting to a local QuickBooks instance, you do not need to set any connection properties.
Requests are made to QuickBooks POS through the Remote Connector. The Remote Connector runs on the same machine as QuickBooks POS and accepts connections through a lightweight, embedded Web server. The server supports SSL/TLS, enabling users to connect securely from remote machines.
The first time you connect, you will need to authorize the Remote Connector with QuickBooks POS. See the "Getting Started" chapter of the help documentation for a guide.
When you configure the DSN, you may also want to set the Max Rows connection property. This will limit the number of rows returned, which is especially helpful for improving performance when designing reports and visualizations.
In addition to the connection properties required to connect to QuickBooks POS, the Driver property specifies either a driver definition in the odbcinst.ini file or the path to the driver library. Place your connection properties at the beginning of odbc.ini:
[CData QuickBooks POS Sources]
Driver = CData ODBC Driver for QuickBooks POS
If you wish to authenticate using OAuth, you will need to add an additional connection property to ensure that the OAuth flow can execute properly:
Other = CheckPromptMode=False
Mac OS validates our drivers separately so you need to copy the license file to the appropriate path as well. After you have configured odbc.ini, run the following command.
sudo cp /Applications/CData ODBC Driver for QuickBooks POS/lib/CData.ODBC.QuickBooksPOS.lic /Users/<YOUR_USER>/Library/Containers/com.microsoft.Excel/Data/.cdata/
Additionally, in the ODBC Data Sources section, the DSN must be set to a driver defined in the odbcinst.ini file. For example, below is the entry for the DSN created during the driver install:
[ODBC Data Sources]
CData QuickBooks POS Source = CData ODBC Driver for QuickBooks POS
Registering a DSN for iODBC with odbcinst.ini
You may need to modify the installed driver definition if you change the path to the driver library. To register an ODBC driver, modify the odbcinst.ini file. With iODBC, drivers can be available to only one user account or drivers can be available system wide. You can find the correct odbcinst.ini in the following paths:
| Privileges | Path | |
|---|---|---|
| User | /Users/myuser/Library/ODBC/odbcinst.ini | |
| System | /Library/ODBC/odbcinst.ini |
Drivers are defined in sections in the odbcinst.ini file. The section name specifies the name of the driver. In this section, the Driver property specifies the path to the driver library. The driver library is the .dylib file located in the lib subfolder of the installation directory, by default in /Applications/CData ODBC Driver for QuickBooks POS.
[CData ODBC Driver for QuickBooks POS]
Driver = /Applications/CData ODBC Driver for QuickBooks POS/lib/libquickbookspos.odbc.dylib
The ODBC Drivers section must also contain a property with the driver name, set to "Installed".
[ODBC Drivers]
CData ODBC Driver for QuickBooks POS = Installed
Testing the Connection
You can test your connection using the iODBC administrator.
- Open a terminal and enter the following command to start the iODBC Administrator with the necessary permissions:
sudo /Applications/iODBC/iODBC\ Administrator64.app/Contents/MacOS/iODBC\ Administrator64
- On the Users tab, select CData QuickBooks POS Source.
- Click the Test button.
Accessing QuickBooks POS Data from Microsoft Excel
You can use the DSN configured above to access QuickBooks POS data from Microsoft Excel.
- Open Microsoft Excel and open a spreadsheet (new or existing).
- Navigate to the data ribbon and select New Database Query From Database
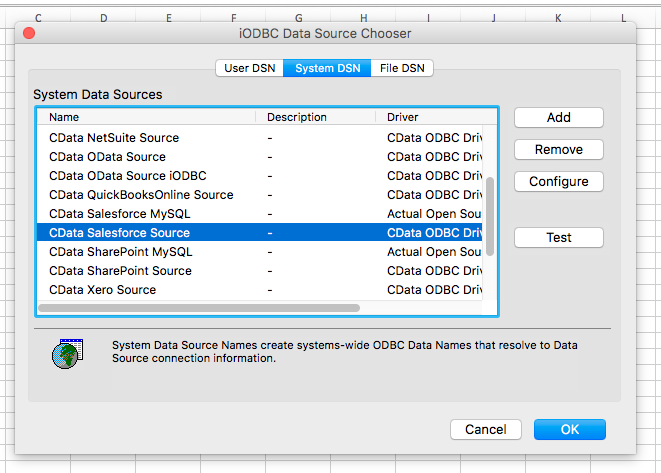
- Select the User or System DSN that you previously configured and click OK.
![Choosing the DSN (Salesforce is shown.)]()
- Build your SQL query in the Microsoft Query wizard:
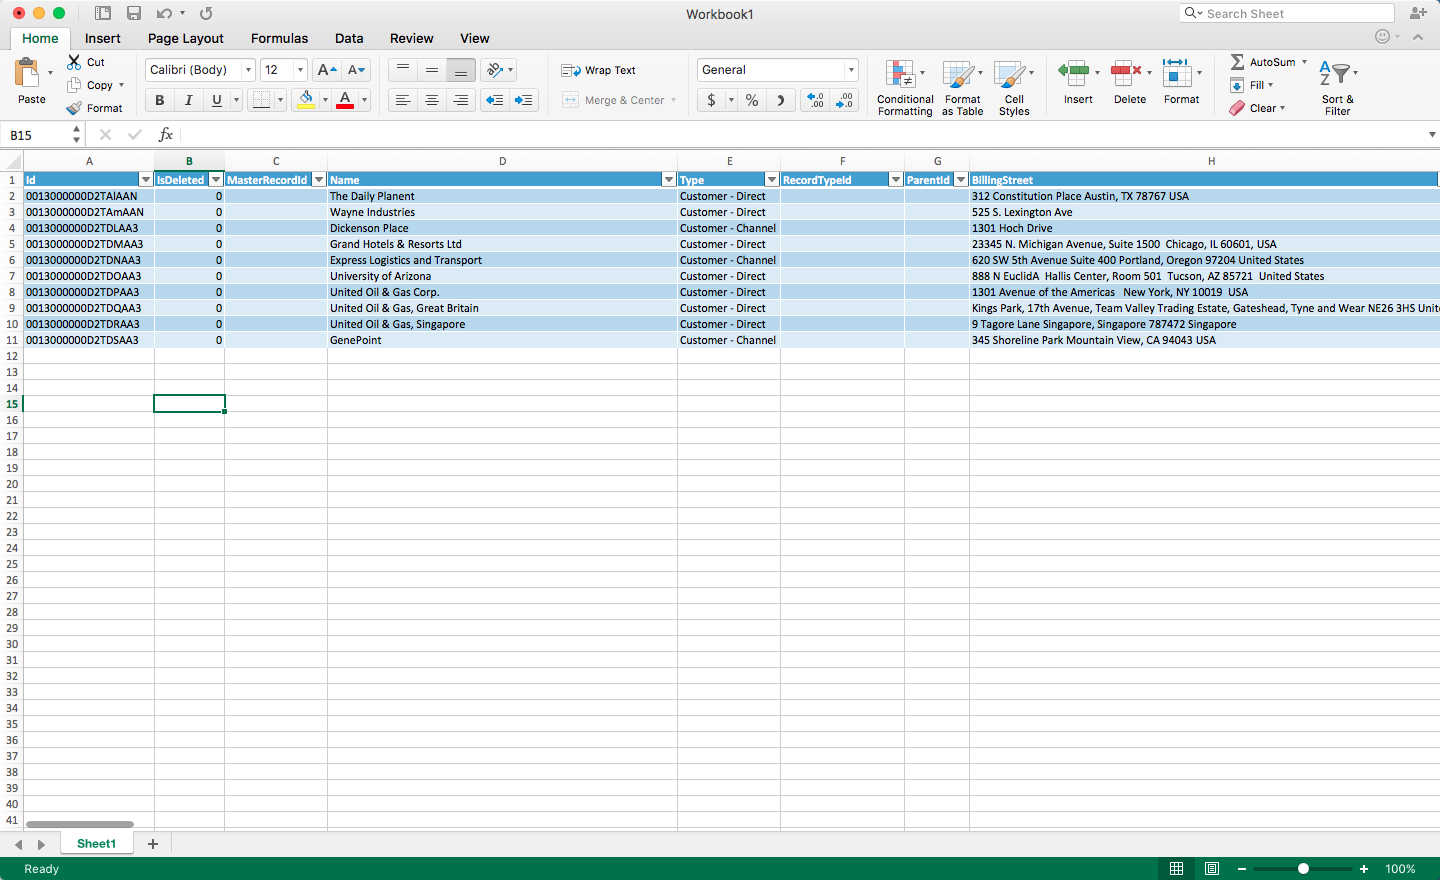
![Querying for data (Salesforce is shown.)]()
- Click Return Data to execute the query and pull data into Excel.

Using the CData ODBC Driver for QuickBooks POS, you can easily pull your QuickBooks POS data directly into Excel. Once there, you can leverage all of the powerful features native to Excel to analyze, report, transform your QuickBooks POS data, and more!


