Discover how a bimodal integration strategy can address the major data management challenges facing your organization today.
Get the Report →Enable the Salesforce JDBC Driver in KNIME
Use standard data access components in KNIME to create charts and reports with Salesforce data.
One of the strengths of the CData JDBC Driver for Salesforce is its cross-platform support, enabling integration with major BI tools. Follow the procedure below to access Salesforce data in KNIME and to create a chart from Salesforce data using the report designer.
Define a New JDBC Connection to Salesforce Data
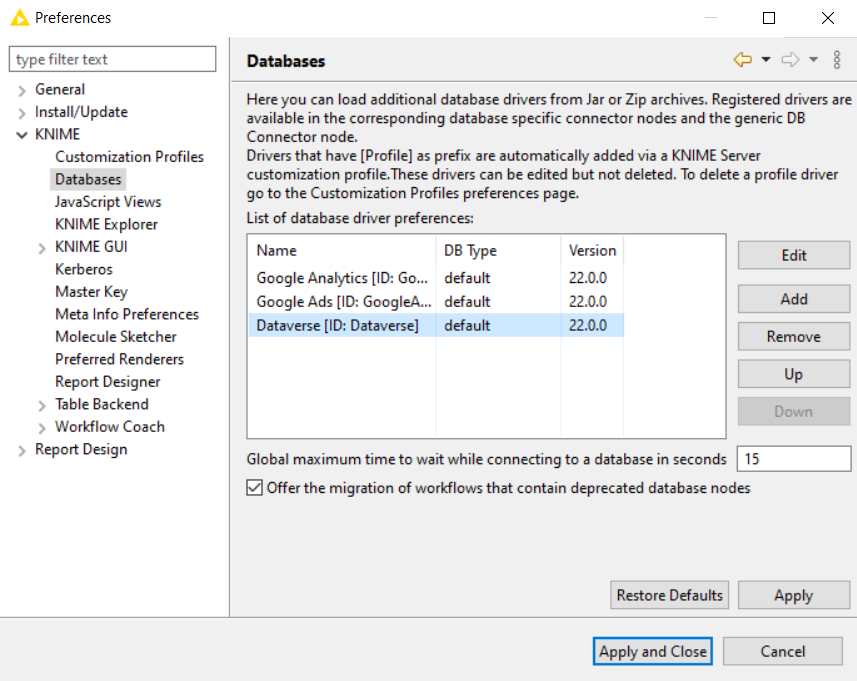
- Go to File -> Preferences -> KNIME -> Databases
- Click Add File and add the cdata.jdbc.salesforce.jar. The driver JAR file is located in the lib subfolder of the installation directory.
![CData drivers added to a KNIME workflow. CData drivers added to a KNIME workflow.]()
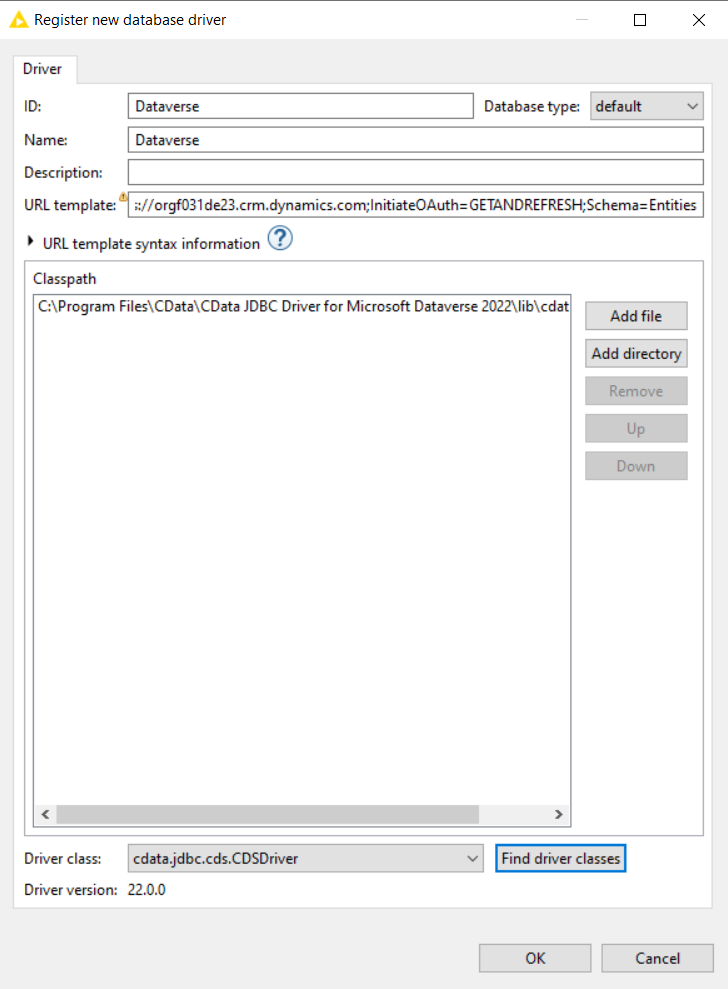
- Click Find driver classes
- Set the ID and the Name of the connection (you can set any values you prefer for these fields as they are not restricted)
- Set the URL template. A typical JDBC URL is provided below:
jdbc:salesforce:User=username;Password=password;SecurityToken=Your_Security_Token; - Click OK to close the configuration section.
![Registering new database CData drivers in KNIME workflow. Registering new database CData drivers in KNIME workflow.]()
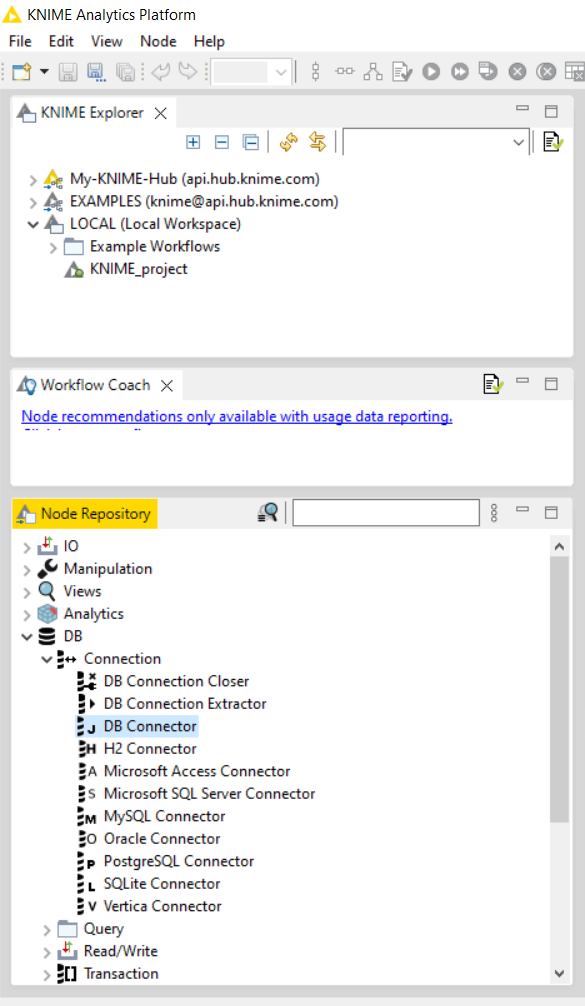
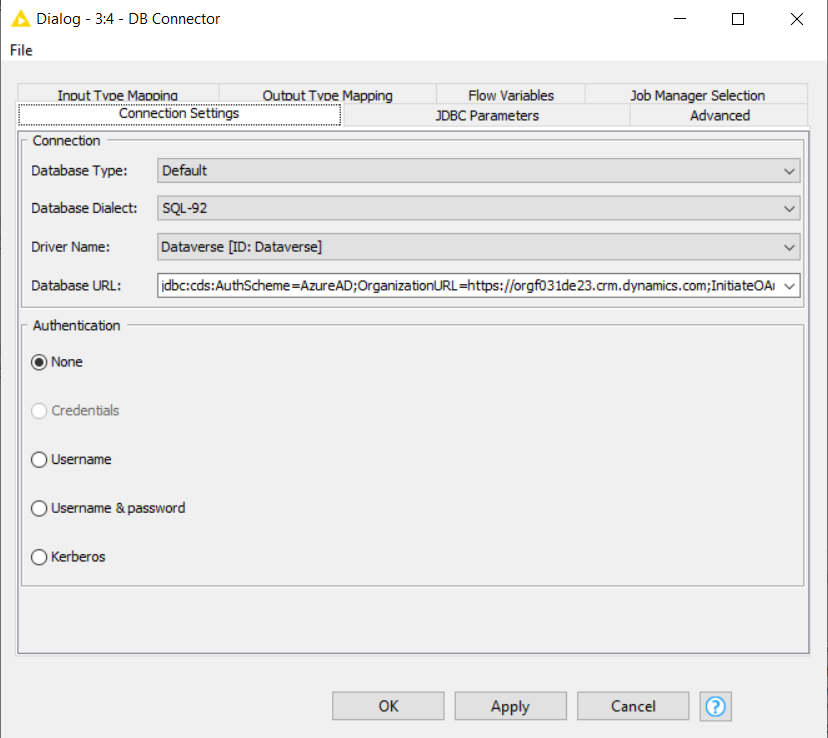
- Under Node Repository go to DB -> Connection -> drag and drop DB Connector. Double-click on it and change the driver name to the driver you just configured, in this case, Salesforce (ID: Salesforce). The Database URL should change automatically.
![Configuring the CData driver Configuring the CData driver]()
- Click Apply and OK to save changes.
![Authentication Authentication]()
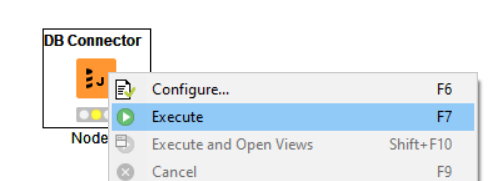
- Right-click on the connector and select Execute. You will see that the connector will allow you to redirect to the browser where you will need to log in and allow access. After that, you will get connected successfully.
![Executing the DB Connector Executing the DB Connector]()
-
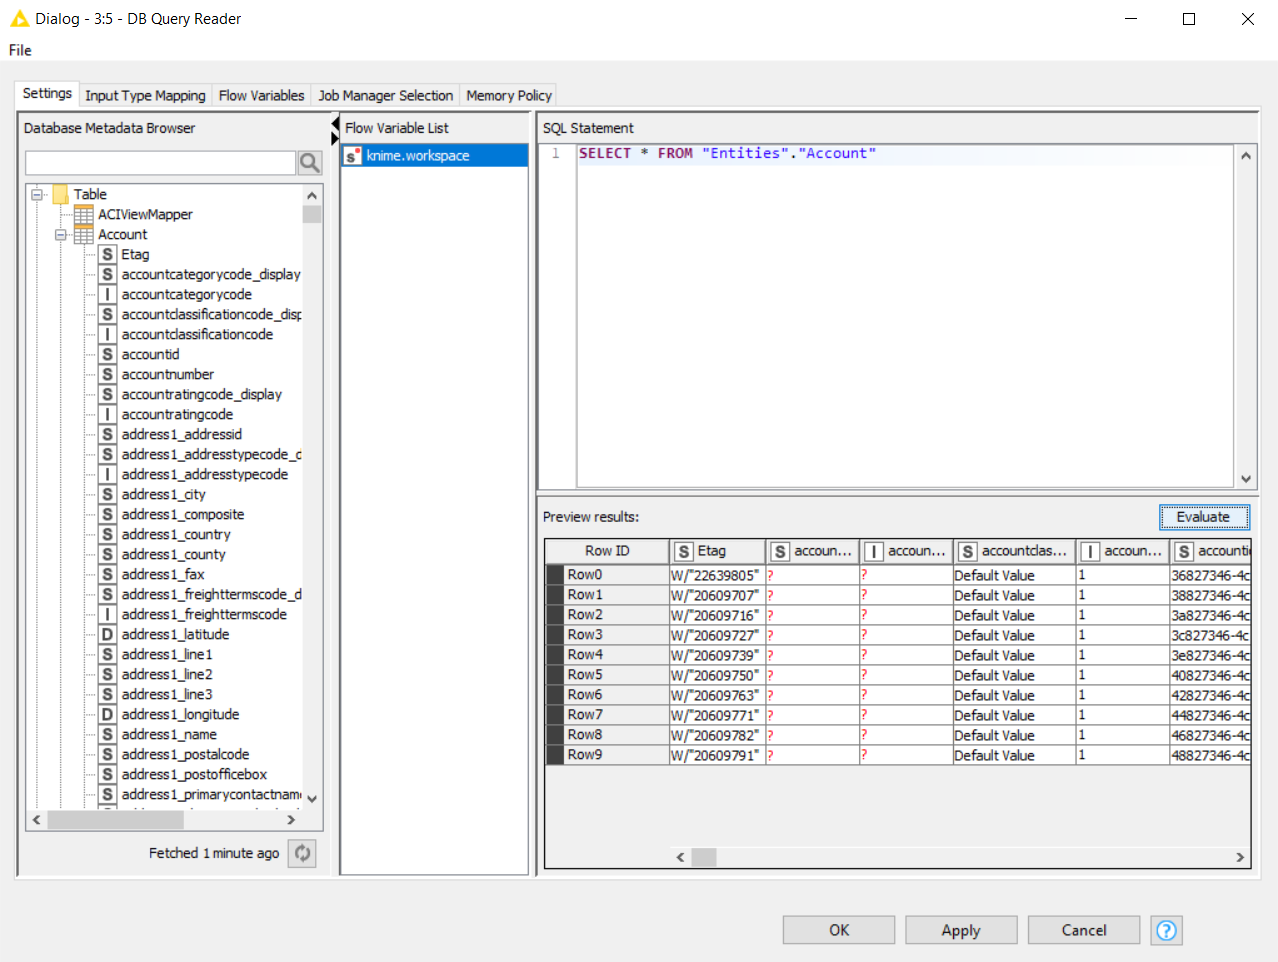
Double-click on your DB Query Reader and click the refresh button to load the metadata. Create an SQL Statement and click Evaluate. After clicking Evaluate you will be able to see the records requested. To learn more about the tables/views that are listed in our driver please refer to our Data Model.
![DB Query Reader to load the metadata DB Query Reader to load the metadata]()
For assistance in constructing the JDBC URL, use the connection string designer built into the Salesforce data JDBC Driver. Either double-click the JAR file or execute the jar file from the command-line.
java -jar cdata.jdbc.salesforce.jar
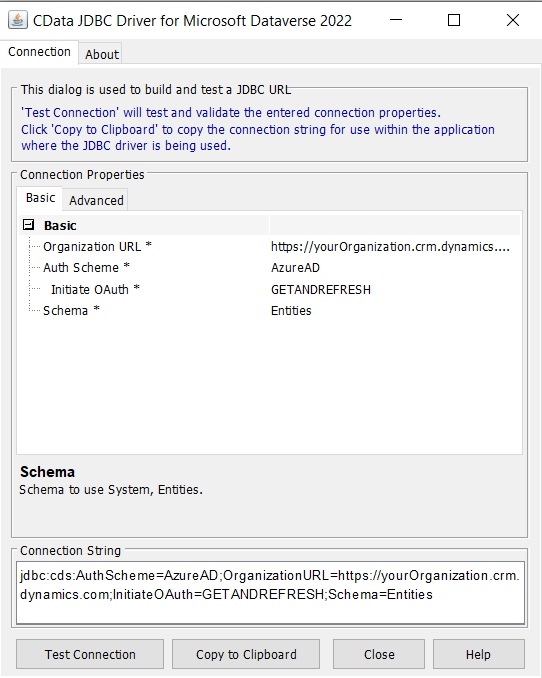
Additionally, please refer to our documentation to learn more about Connection Properties
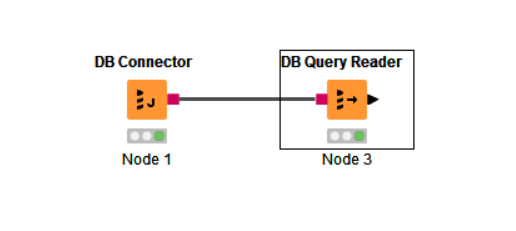
Now you can go to the Read/Write section in Node Repository and get a DB Query Reader, to be able to execute a query.
Get Started Today
Download a free, 30-day trial of the CData JDBC Driver for Salesforce and start building Salesforce-connected charts and reports with KNIME. Reach out to our Support Team if you have any questions.


