ノーコードでクラウド上のデータとの連携を実現。
詳細はこちら →
CData


こんにちは!ドライバー周りのヘルプドキュメントを担当している古川です。
CData ODBC Drivers は、CRM からMA、Web 解析、広告など幅広い種類のデータソースのデータを扱うことを可能にします。この記事では、Azure Data Lake Storage に接続してQlikView でデータビジュアライゼーションを作成する簡単な手順を説明します。
CData ODBC ドライバは、以下のような特徴を持ったリアルタイムデータ連携ソリューションです。
CData ODBC ドライバでは、1.データソースとしてAzure Data Lake Storage の接続を設定、2.QlikView 側でODBC Driver との接続を設定、という2つのステップだけでデータソースに接続できます。以下に具体的な設定手順を説明します。
まずは、本記事右側のサイドバーからADLS ODBC Driver の無償トライアルをダウンロード・インストールしてください。30日間無償で、製品版の全機能が使用できます。
下記の手順では、SQL クエリ結果をQlikView のビジュアライゼーションに提供します。 この記事では、次のクエリを使って棒グラフを作成します:
SELECT FullPath, Permission FROM Resources WHERE Type = 'FILE'
未指定の場合は、初めにODBC DSN (data source name) で接続プロパティを指定します。ドライバーのインストールの最後にアドミニストレーターが開きます。Microsoft ODBC Data Source Administrator を使用して、ODBC DSN を作成および構成できます。
Gen 1 DataLakeStorage アカウントに接続するには、はじめに以下のプロパティを設定します。
Gen 1 は、認証方法としてAzure Active Directory OAuth(AzureAD)およびマネージドサービスID(AzureMSI)をサポートしています。認証方法は、ヘルプドキュメントの「Azure DataLakeStorage Gen 1 への認証」セクションを参照してください。
Gen 2 DataLakeStorage アカウントに接続するには、はじめに以下のプロパティを設定します。
Gen 2は、認証方法としてアクセスキー、共有アクセス署名(SAS)、Azure Active Directory OAuth(AzureAD)、マネージドサービスID(AzureMSI)など多様な方法をサポートしています。AzureAD、AzureMSI での認証方法は、ヘルプドキュメントの「Azure DataLakeStorage Gen 2 への認証」セクションを参照してください。
アクセスキーを使用して接続するには、AccessKey プロパティを取得したアクセスキーの値に、AuthScheme を「AccessKey」に設定します。
Azure ポータルからADLS Gen2 ストレージアカウントのアクセスキーを取得できます。
共有アクセス署名を使用して接続するには、SharedAccessSignature プロパティを接続先リソースの有効な署名に設定して、AuthScheme を「SAS」に設定します。 共有アクセス署名は、Azure Storage Explorer などのツールで生成できます。
Microsoft ODBC データソースアドミニストレーターで必要なプロパティを設定する方法は、ヘルプドキュメントの「はじめに」をご参照ください。
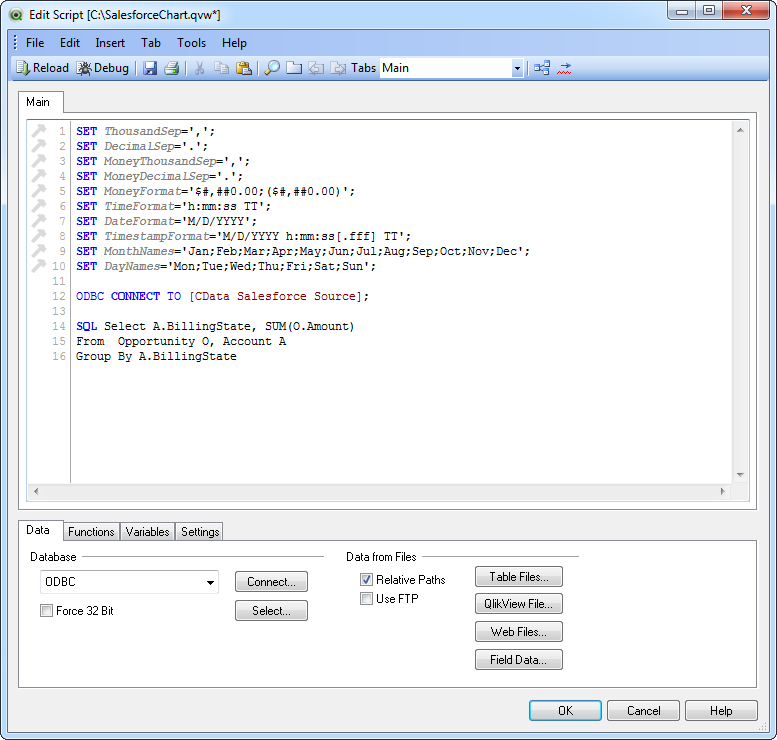
ODBC CONNECT TO [My DSN];
ウィザードを終了してチャートを生成します。
このようにCData ODBC ドライバと併用することで、270を超えるSaaS、NoSQL データをコーディングなしで扱うことができます。30日の無償評価版が利用できますので、ぜひ自社で使っているクラウドサービスやNoSQL と合わせて活用してみてください。
CData ODBC ドライバは日本のユーザー向けに、UI の日本語化、ドキュメントの日本語化、日本語でのテクニカルサポートを提供しています。

