こんにちは!ウェブ担当の加藤です。マーケ関連のデータ分析や整備もやっています。
Tableau といえば、直感的に使えるUI と高度なデータ分析・ダッシュボード構築機能を備えた人気のBI ツールですね。Tableau Server を利用することで、Tableau Desktop で作成したダッシュボードを社内で広く共有できます。そしてTableau にCData Tableau Connector for ADLS を組み合わせて使えば、Tableau Server からシームレスにAzure Data Lake Storage データを連携利用することができるようになります。この記事では、Tableau Server でAzure Data Lake Storage データに接続してシンプルなチャートを作る方法と、Tableau Desktop でAzure Data Lake Storage データソースをパブリッシュする方法の二つを説明します。
CData Tableau Connectors とは?
CData Tableau Connectors は、以下のような特徴を持った製品です。
- Azure Data Lake Storage をはじめとする、CRM、MA、会計ツールなど多様なカテゴリの270種類以上のSaaS / オンプレデータソースに対応
- Tableau でリアルタイムAzure Data Lake Storage データへのハイスピードなデータアクセス
- ノーコードでの手軽な接続設定
CData Tableau Connectors では、1.データソースとしてAzure Data Lake Storage の接続を設定、2.Tableau 側でコネクタとの接続を設定、という2つのステップだけでデータソースに接続できます。以下に具体的な設定手順を説明します。
Tableau Server にAzure Data Lake Storage Connector をインストール
まずは、Tableau Server をホストしているマシンにCData Tableau Connector をインストールします。本記事右側のサイドバーからADLS Tableau Connectors の無償トライアルをダウンロード・インストールしてください。30日間無償で、製品版の全機能が使用できます。
- Tableau Desktop がインストールされていない環境の場合、インストール中に「This setup could not copy important connector files to ...」というダイアログが表示されます。サーバーマシン上で、cdata.adls.taco と cdata.tableau.adls.lic ファイルを、インストールディレクトリ(C:\Program Files\CData\CData Tableau Connector for ADLS\lib\)からコピーします。
- コピーしたファイルをTableau Server Connectors のフォルダに貼り付けて「サインイン」をクリックして接続します。
C:\ProgramData\Tableau\Tableau Server\data\tabsvc\vizqlserver\Connectors
- ファイルをコピーしたら、後のダイアログはOK ボタンをクリックしてインストールを完了します。
- Tableau Server を再起動します。
Tableau Server にブラウザからAzure Data Lake Storage データをビジュアライズ
Tableau Server にブラウザからアクセスして、ブラウザからAzure Data Lake Storage データに連携する設定を行い、Azure Data Lake Storage のダッシュボードを作成することができます。
Tableau Server でのAzure Data Lake Storage データへの接続
- Tableau Server サイトにブラウザでアクセスします。
- 「Create」 -> 「Workbook」でワークブックを作成します。「Connect to Data」ダイアログでConnectors タブを開きます。コネクタ一覧内の「Azure Data Lake Storage by CData」を選択します。
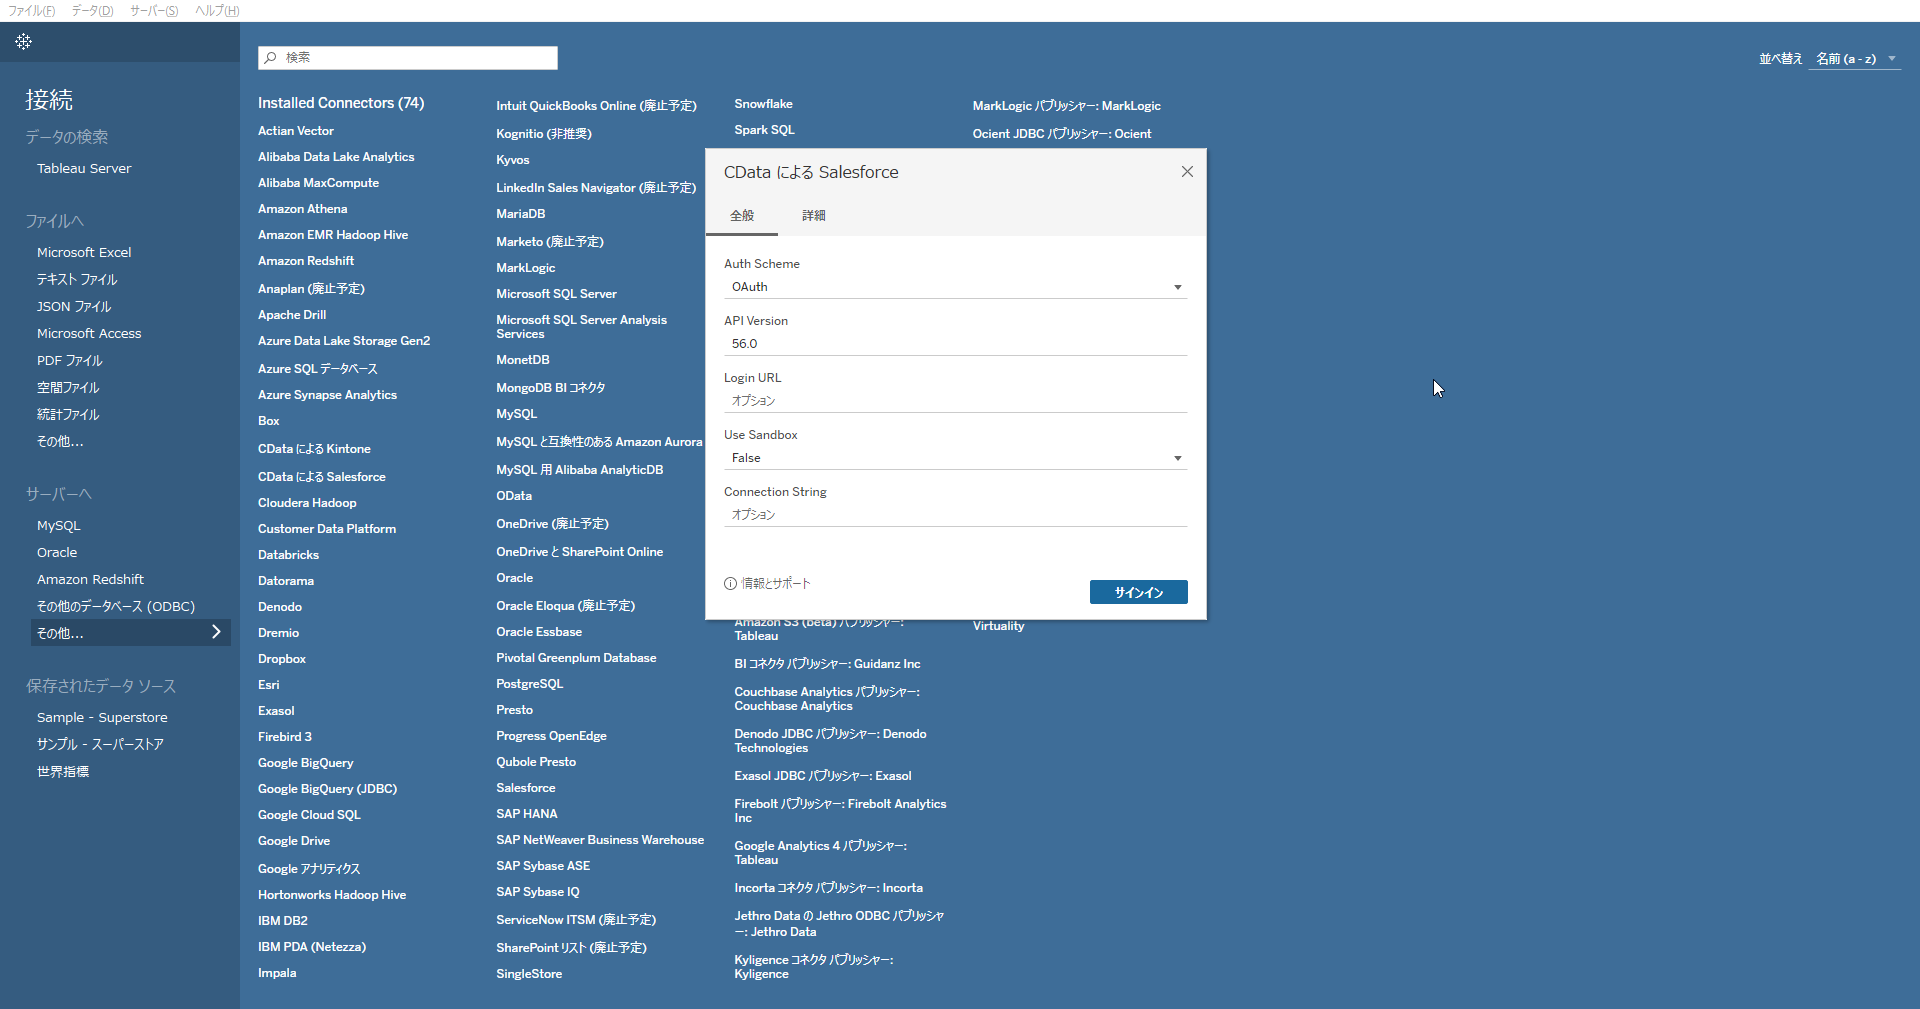
- 接続プロパティを設定して「SignIn」をクリックして接続を確立します。
Azure DataLakeStorage 接続プロパティの取得・設定方法
Azure DataLakeStorage Gen 1 への接続
Gen 1 DataLakeStorage アカウントに接続するには、はじめに以下のプロパティを設定します。
- Schema:ADLSGen1 を指定。
- Account:アカウント名に設定。
- AzureTenant:テナントId に設定。Azure Portal 内のAzure Data Lake プロパティから取得できます。
- Directory:(オプション)複製したファイルを格納するためのパスを設定。指定しない場合は、ルートディレクトリが使用されます。
Azure DataLakeStorage Gen 1 への認証
Gen 1 は、認証方法としてAzure Active Directory OAuth(AzureAD)およびマネージドサービスID(AzureMSI)をサポートしています。認証方法は、ヘルプドキュメントの「Azure DataLakeStorage Gen 1
への認証」セクションを参照してください。
Azure DataLakeStorage Gen 2 への接続
Gen 2 DataLakeStorage アカウントに接続するには、はじめに以下のプロパティを設定します。
- Schema:ADLSGen2 に設定。
- Account:ストレージアカウント名に設定。
- FileSystem:このアカウントで使用するファイルシステム名に設定。例えば、Azure Blob コンテナ名など。
- Directory:(オプション)複製したファイルを格納するためのパスを設定。指定しない場合は、ルートディレクトリが使用されます。
Azure DataLakeStorage Gen 2 への認証
Gen 2は、認証方法としてアクセスキー、共有アクセス署名(SAS)、Azure Active Directory
OAuth(AzureAD)、マネージドサービスID(AzureMSI)など多様な方法をサポートしています。AzureAD、AzureMSI での認証方法は、ヘルプドキュメントの「Azure DataLakeStorage Gen 2
への認証」セクションを参照してください。
アクセスキーを使用した認証
アクセスキーを使用して接続するには、AccessKey プロパティを取得したアクセスキーの値に、AuthScheme を「AccessKey」に設定します。
Azure ポータルからADLS Gen2 ストレージアカウントのアクセスキーを取得できます。
- Azure ポータルのADLS Gen2 ストレージアカウントにアクセスします。
- 設定で「アクセスキー」を選択します。
- 利用可能なアクセスキーの1つの値を「AccessKey」接続プロパティにコピーします。
共有アクセス署名(SAS)
共有アクセス署名を使用して接続するには、SharedAccessSignature プロパティを接続先リソースの有効な署名に設定して、AuthScheme を「SAS」に設定します。
共有アクセス署名は、Azure Storage Explorer などのツールで生成できます。
Connection String での設定の場合には、スタートメニューのConnection Builder をクリック、もしくはインストールディレクトリのlib フォルダの.jar ファイルをダブルクリックしてConnection Builder を開き、プロパティを設定をすることでConnection String を取得することができます。「接続テスト」をクリックして、接続を確認します。Builder の「接続文字列」に表示された文字列をコピーしてTableau の接続画面のConnection String に貼り付けて「SignIN」をクリックして接続します。
![コネクタの接続を設定]()
接続したAzure Data Lake Storage データのビジュアライズをブラウザから作成
- 「Database」のプルダウンメニューが表示された場合にはCData もしくは表示されたデータベース名で使用するものを選択します。
- 「Schema」のプルダウンメニューが表示された場合にはADLS もしくは表示されたスキーマ名を選択します。
- 左ペインの「Table」にAzure Data Lake Storage で使用可能なテーブルが表示されます。ビジュアライズで使うテーブルをデータセット作成エリアにドラッグ&ドロップします。複数のテーブルを選択してドロップすることが可能です。複数のテーブルを選択して、リレーションを設定することが可能です。
- 右上の接続モード選択で、「ライブ」もしくは「抽出」を選択します。
- 「今すぐ更新」もしくは「自動更新」 をクリックします。「今すぐ更新」では、はじめの10,000行を取得します。取得する行数は個別に行ボックスで設定可能です。「自動更新」ではプレビューエリアのデータが自動的に更新されます。
- 「ワークシート」タブをクリックします。選択したデータのカラムがデータ型によりディメンションかメジャーとしてリスト表示されています。CData Tableau Connector は、自動的にデータ型を検出してくれるので、このようにすぐにデータをビジュアライズで使うことができます。
- 「ディメンション」 もしくは 「メジャー」 を「列」 もしくは 「行」 にドラッグ&ドロップします。
- 「表示形式」 タブから、お好みのグラフタイプを選択します。Tableau がデータを選択したグラフタイプで表示します。
Tableau Desktop からAzure Data Lake Storage データソースをTableau Server にパブリッシュ
Tableau Desktop 側にも同じCData Tableau Connectors 製品をインストール済の場合は、Tableau Desktop で作成したデータソースをTableau Server にパブリッシュして利用することが可能です。Tableau Desktop への CData Tableau Connectors製品のインストール手順はこちら を参照してください。
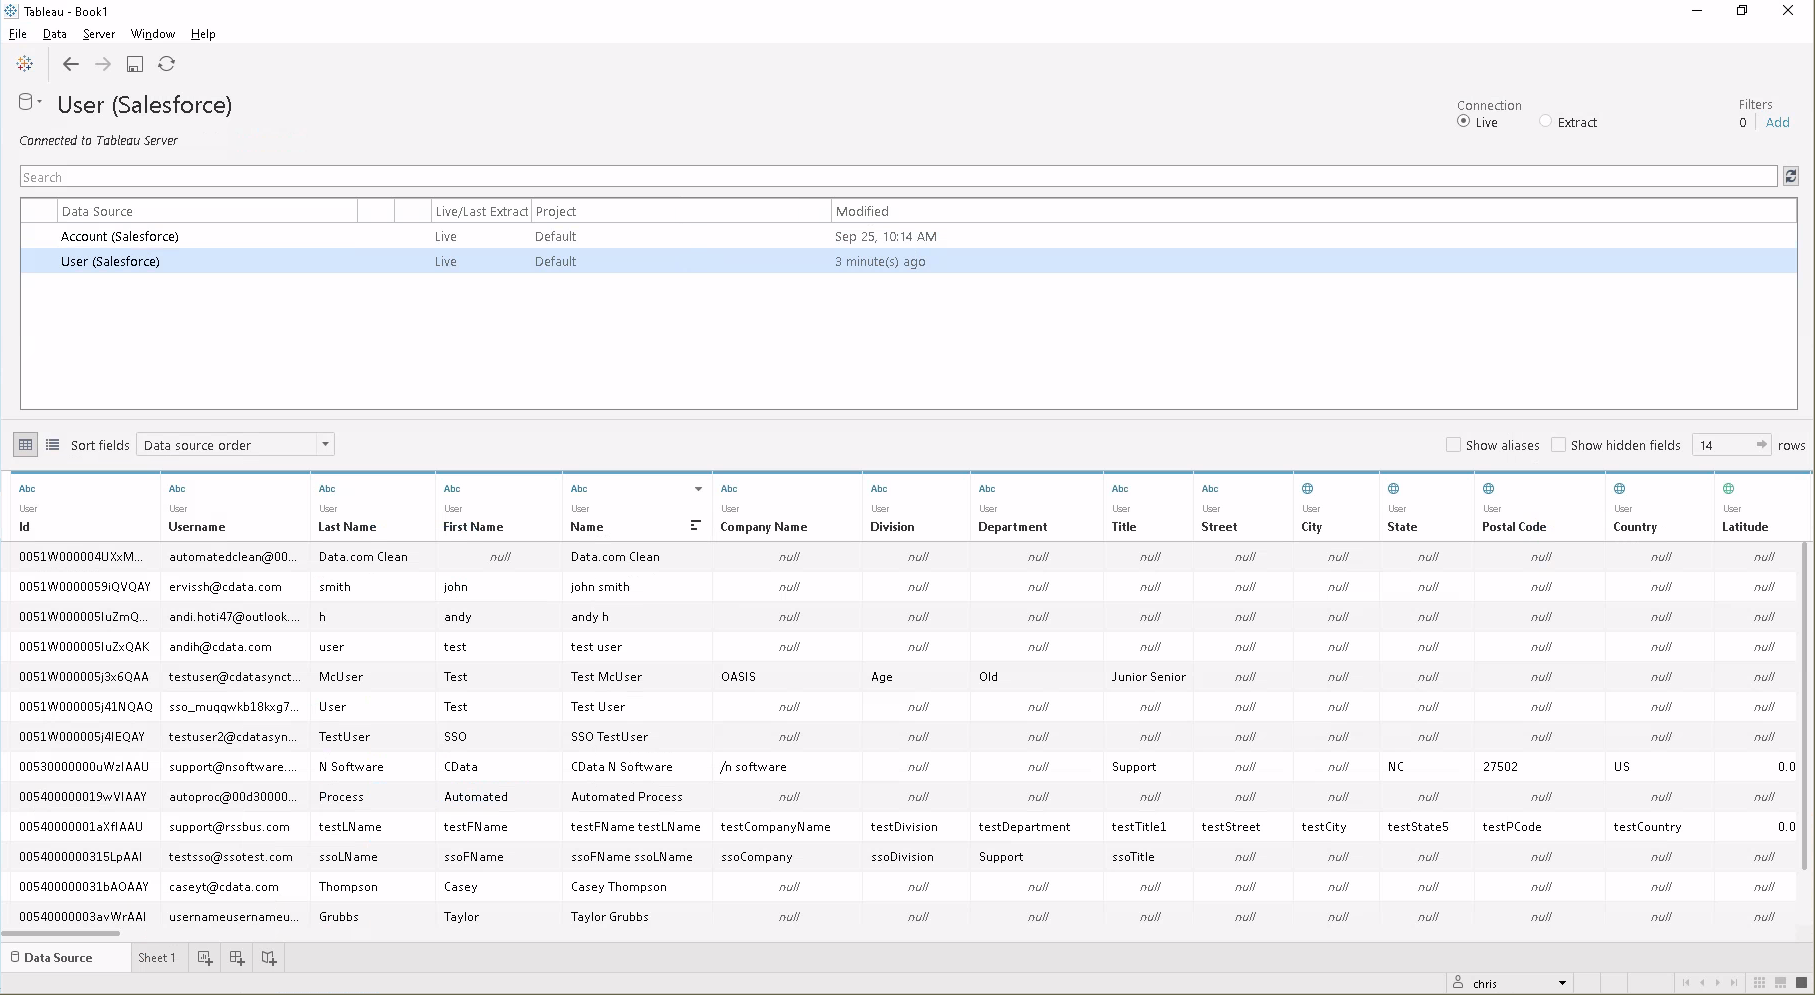
まずは、Tableau Desktop でAzure Data Lake Storage Connector でAzure Data Lake Storage データをデータソースとして設定します。
- 「接続」ペインから「Tableau Server」をクリックします。
- Tableau Server のURL をセットして、接続ボタンをクリックするとサインインダイアログが表示されるのでTableau Server にサインインします。
- Tableau Desktop のメニューで「サーバー」->「データソースのパブリッシュ」-> からパブリッシュするデータソース名をクリックします。
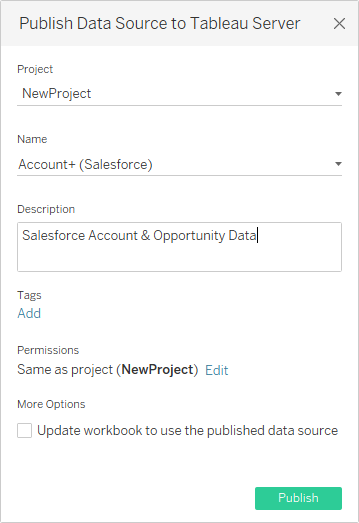
- Tableau Server にデータソースをパブリッシュするダイアログが表示されます。プロジェクトを選択して「パブリッシュ」をクリックします。
![Publish the Data Source to Tableau Server]()
- ブラウザが起動してTableau Server のパブリッシュしたデータソースが表示されます。Connections タブ内のDataSource 右下の「...」をクリックして「Edit Connection...」を開きます。
- パスワードをコネクションに埋め込むために、Password を「Embedded password in conneciton」に変更してパスワードをセット、Test Connection で接続を確認してSave します。
- これで、New > Workbook using this datasource から本データソースを利用したワークブックが作成できるようになります。
- 可視化を作成します。
![Visualizing live Azure Data Lake Storage データ in Tableau Server]()
Azure Data Lake Storage からTableau Server へのデータ連携には、ぜひCData Tableau Connectors をご利用ください
このようにCData Tableau Connectors と併用することで、270を超えるSaaS、NoSQL データをTableau Server からコーディングなしで扱うことができます。30日の無償評価版が利用できますので、ぜひ自社で使っているクラウドサービスやNoSQL と合わせて活用してみてください。
CData ODBC ドライバは日本のユーザー向けに、UI の日本語化、ドキュメントの日本語化、日本語でのテクニカルサポートを提供しています。


