RazorSQL からAzure Synapse データに連携。
データベース管理ツールのRazorSQL からGUI でウィザードとクエリからAzure Synapse データに連携する。.
古川えりか
コンテンツスペシャリスト
最終更新日:2023-04-25
CData

こんにちは!ドライバー周りのヘルプドキュメントを担当している古川です。
CData JDBC Driver for AzureSynapse を使って、各種ツールからAzure Synapse データにアクセスすることが可能になります。本記事では、Azure Synapse データにRazorSQL のウィザードから連携利用する方法を紹介します。
Azure Synapse JDBC Data Source の設定
- RazorSQL アプリケーションを開いて、Connections メニューから、Add Connection Profile -> Other -> JDBC にナビゲートします。
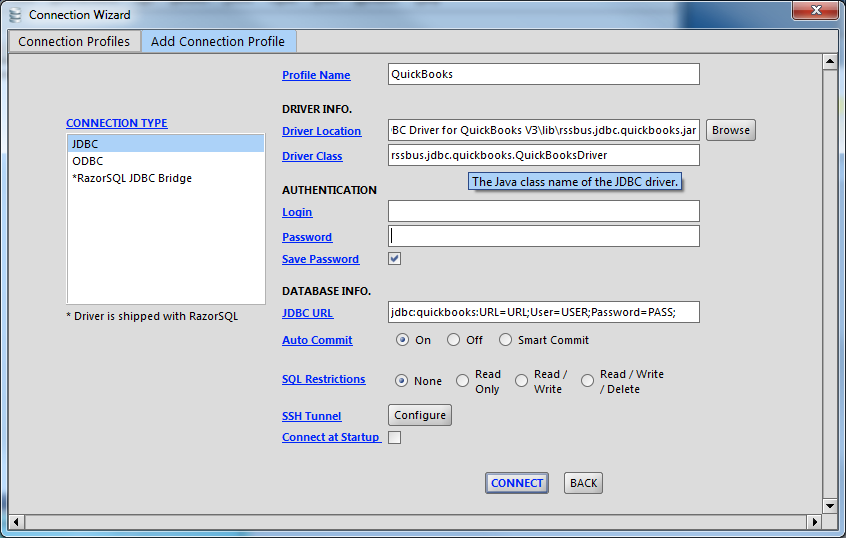
- Connection Wizard で、以下を設定します:
- Driver Location:JDBC Driver のインストールディレクトリのlib サブフォルダに設定します。
- Driver Class: ドライバークラスを cdata.jdbc.azuresynapse.AzureSynapseDriver に設定します。
- Username:ユーザー名。(ユーザー名をブランクにして、JDBC URL 内で設定することも可能です。)
- Password:パスワード。(ユーザー名をブランクにして、JDBC URL 内で設定することも可能です。)
JDBC URL:接続パラメータを入力します:jdbc:azuresynapse: から始まるJDBC URL を入力します。接続プロパティをカンマ区切りで書きます。
Azure Synapse への接続
Azure Synapse データベースに接続するには、認証に加えて(下記参照)、次のプロパティを設定します。
- Server:Azure を実行しているサーバー。Azure ポータルにログインして、[Azure Synapse Analytics]->[Select your
database]->[Overview]->[Server name]に進むと確認できます。
- Database:[Azure Synapse Analytics]ページのAzure ポータルに表示されるデータベース名。
Azure Synapse への認証
次のプロパティを使用してAzure Synapse に接続します。
- User:Azure との認証のためのユーザー名。
- Password:認証ユーザーに関連付けられたパスワード。
一般的なURL ::
jdbc:azuresynapse:User=myuser;Password=mypassword;Server=localhost;Database=Northwind;
-
Azure Synapse への接続
Azure Synapse データベースに接続するには、認証に加えて(下記参照)、次のプロパティを設定します。
- Server:Azure を実行しているサーバー。Azure ポータルにログインして、[Azure Synapse Analytics]->[Select your
database]->[Overview]->[Server name]に進むと確認できます。
- Database:[Azure Synapse Analytics]ページのAzure ポータルに表示されるデータベース名。
Azure Synapse への認証
次のプロパティを使用してAzure Synapse に接続します。
- User:Azure との認証のためのユーザー名。
- Password:認証ユーザーに関連付けられたパスワード。
![The JDBC data source, defined by the JAR path, driver class, and JDBC URL.接続文字列はJDBC URL で接続情報を指定します。(QuickBooks is shown.)]()
Azure Synapse からテーブルを選択してクエリを実行
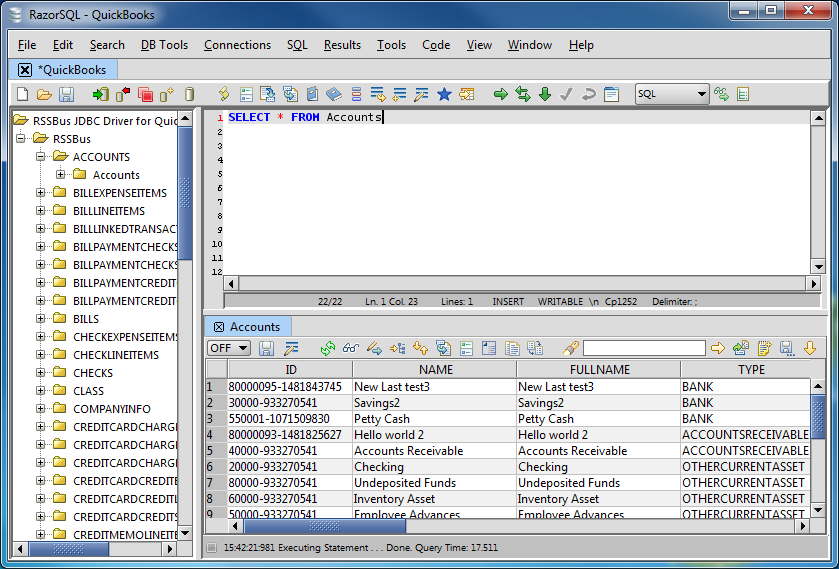
接続を確立後、Wizard が閉じ、接続はコネクションパネルで接続が利用可能になります。テーブルをクエリしてみます。
![The results of a query in RazorSQL.(QuickBooks is shown.)]()
関連コンテンツ