製品をチェック

無償トライアル:

無償トライアルへ

製品の情報と無償トライアルへ:

ShipStation JDBC Driver

ShipStation データに連携するJava アプリケーションを素早く、簡単に開発できる便利なドライバー。

データ連携でお困りですか?

お問い合わせ

NetBeans IDE でShipStation データに仮想RDB として連携


データソース構成ウィザードを使ってNetBeans IDE でShipStation に仮想DB として連携接続。


加藤龍彦
ウェブデベロッパー


CData JDBC Driver for ShipStation は、JDBC をサポートするIDE にリアルタイムShipStation データへの仮想DB 連携を実現します。JDBC 標準では、ビルトインのデータアクセスウィザードや、迅速な開発をサポートするその他のツールを使用できます。この記事では、NetBeans でShipStation に接続する方法を説明します。接続を作成してロード していきます。

NetBeans にShipStation のJDBC データソースを作成

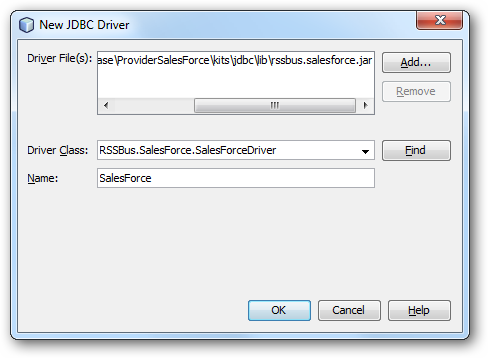
JDBC データソースを作成するには、[Service]ウィンドウの[Database]ノードを展開し、[Drivers]ノードを右クリックして[New Driver]を選択します。[New Driver]ウィザードが表示されたら、以下の情報を入力します:

  • Driver File(s):[Add]をクリックして、ファイルエクスプローラダイアログが表示されたらcdata.jdbc.shipstation.jar ファイルを選択。ドライバーのJAR はインストールディレクトリの[lib]サブフォルダ内にあります。
  • Driver Class:[Find]をクリックしてJAR 内のドライバークラスを検索し、cdata.jdbc.shipstation.ShipStationDriver をメニューから選択。
  • Name:ドライバーの名前を入力。
The JDBC driver definition. (Salesforce is shown.)

接続パラメータを定義

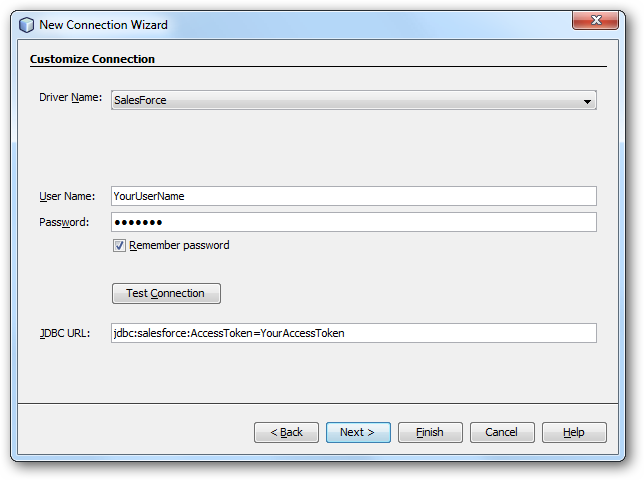
下記の手順に従って、必要な接続プロパティを定義します:

  1. [Service]ウィンドウで、[Database]ノードを右クリックし[New Connection]をクリックします。

  2. [New Connection]ウィザードで次の接続プロパティを入力します:

    • Driver Name:CData JDBC Driver for ShipStation を選択。
    • User Name:ユーザーネームを入力。JDBC URL でも定義できます。
    • Password:パスワードを入力。JDBC URL でも定義できます。
    • JDBC URL:JDBC URL を指定。

      Use the BASIC Authentication standard to connect.

      1. Login to your ShipStation account
      2. Click on the settings icon in the upper right corner. A column menu will show up on the left
      3. Click Account -> API Settings
      4. On the API Settings page, note the API Key and API Secret.

      Authenticating to ShipStation

      • APIKey: Set this to the API key from the API settings page.
      • APISecret: Set this to the Secret key from the API settings page.

      以下は一般的なJDBC URL です:

      jdbc:shipstation:APIKey='YourAPIKey';APISecret='YourAPISecret'
Required connection properties defined in the JDBC URL. (Salesforce is shown.)

リアルタイムShipStation データをクエリ

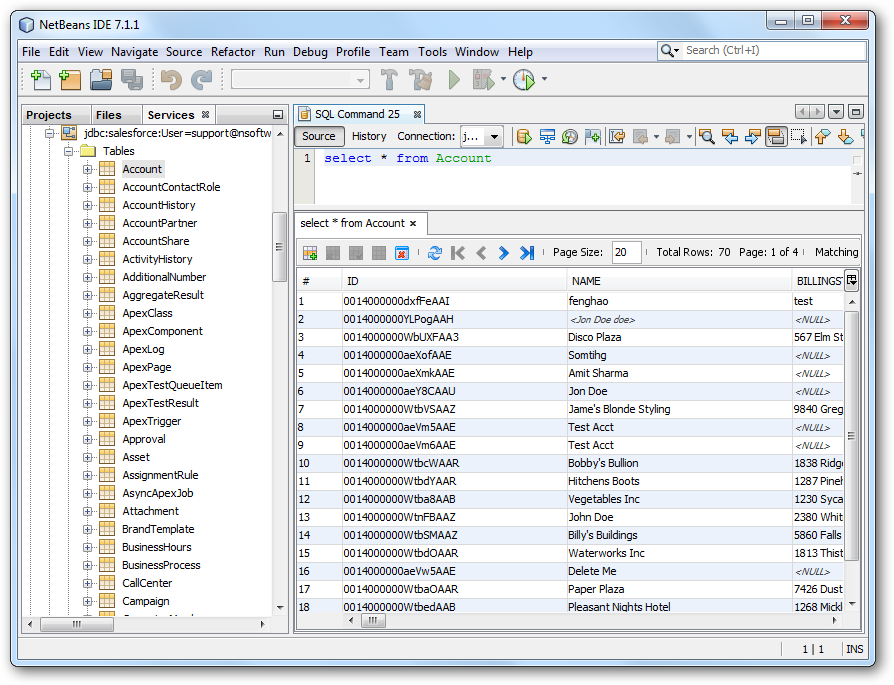
ShipStation に接続するには、[Database]ノードにある接続を右クリックし[Connect]をクリックします。接続が確立されたら、展開してスキーマ情報を見ることができます。

[Data Views]ウィンドウにテーブルをロードするには、テーブルを右クリックしてから[View Data]をクリックします。。

The results of a query in NetBeans. (Salesforce is shown.)