ノーコードでクラウド上のデータとの連携を実現。
詳細はこちら →


CData Sync dbt変換機能 - Google BigQueryをサポートしました
はじめに
CData Sync 製品では2022/09リリースのV22から ELT処理の「T(Transform:データ変換)」機能で dbt Core プロジェクトを指定・実行できるようになりました。20223/02リリースの今回の機能強化で本dbt統合機能でサポート可能なデータソースとしてGoogle BigQuery が新たに加わりました。
- Snowflake
- Amazon Redshift
- Databricks
- PostgreSQL
- New! Google BigQuery
本記事では、CData Sync製品を利用してBigQueryのデータ変換をdbtで行う方法を説明します。
本記事でご紹介するシナリオ
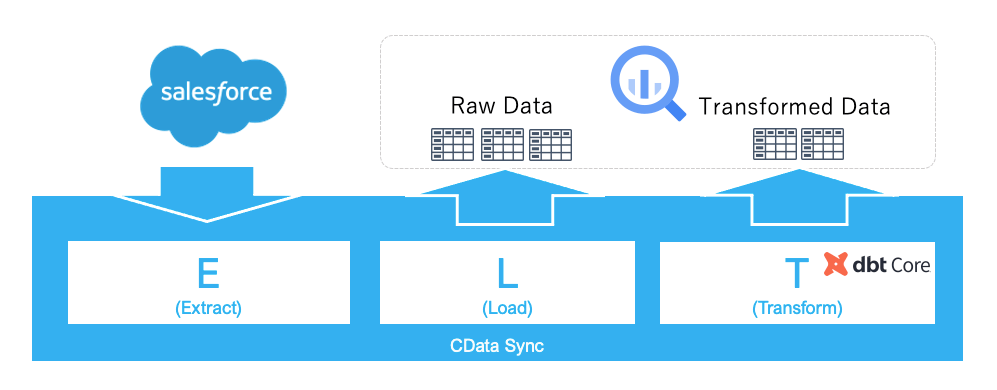
本記事では、Salesforce の商談(Opportunities)と注文(Orders)データをGoogle BigQueryに収集して、CData Sync のdbt Core 統合機能を利用して変換した加工済みデータをGoogle BigQuery上にテーブルとして作成します。
前提
本記事では、以下のソフトウェアを利用しています。
- macOS Moterey 12.5.1
- CData Sync 22.0.8424.0
- dbt Core(1.3.2)、および、dbt-bigquery(1.3.0)
- Python 3.10.4 (上記dbt製品はpipでインストール)
- Salesforce Sales Cloud
- Google BigQuery
手順
dbtのインストール
pipコマンドで、dbt Core、および、Google BigQueryプラグインを以下コマンドでCData Syncのマシンにインストールします。
> pip install dbt-bigquery
インストールが完了したら以下コマンドで確認します。
> dbt --version
Core:
  - installed: 1.3.2
  - latest:    1.3.2 - Up to date!

Plugins:
  - bigquery:  1.3.0 - Up to date!
dbt プロジェクトの作成
既に他マシンで作成したdbt プロジェクトが存在しているのであれば、本手順は不要です。今回は CData Sync と同じマシンでdbt プロジェクトの作成、および、dbt run で実行してからCData Sync 製品からも実行する流れで進めてみます。
dbt プロジェクトを作成するフォルダを作成します。今回は /Applications/dbt 配下に作成しました。dbt init コマンドでウィザードに従ってGoogle BigQuery に接続するdbt プロジェクトを作成します。
> cd /Applications/dbt
> dbt init cdata_dbt
09:12:57  Running with dbt=1.3.2
Which database would you like to use?
[1] bigquery
[2] snowflake

(Don't see the one you want? https://docs.getdbt.com/docs/available-adapters)

Enter a number: 1
[1] oauth
[2] service_account
Desired authentication method option (enter a number): 1
project (GCP project id): cdatajp-support
dataset (the name of your dbt dataset): sync_dbt
threads (1 or more): 1
job_execution_timeout_seconds [300]: 300
[1] US
[2] EU
Desired location option (enter a number): 1
09:14:16  Profile cdata_dbt written to /Users/*****/.dbt/profiles.yml using target's profile_template.yml and your supplied values. Run 'dbt debug' to validate the connection.
09:14:16
Your new dbt project "cdata_dbt" was created!

For more information on how to configure the profiles.yml file,
please consult the dbt documentation here:

  https://docs.getdbt.com/docs/configure-your-profile

One more thing:

Need help? Don't hesitate to reach out to us via GitHub issues or on Slack:

  https://community.getdbt.com/

Happy modeling!
認証方法はOAuthとservice_accountが選択できますが、本手順ではOAuthを選択しました。OAuthを利用の場合はこちらの手順の通り、gcloud CLIをインストールして以下のコマンドを実行してブラウザで認可する必要があります。
gcloud auth application-default login \
  --scopes=https://www.googleapis.com/auth/bigquery,\
https://www.googleapis.com/auth/drive.readonly,\
https://www.googleapis.com/auth/iam.test
作成したdbt プロジェクトのフォルダ内を確認してプロジェクト設定ファイルである「dbt_project.yml」が作成されていることを確認します。
> cd cdata_dbt
> ls -l
total 16
-rw-r--r--  1 *****  staff   571  1 24 15:17 README.md
drwxr-xr-x  3 *****  staff    96  1 24 15:17 analyses
-rw-r--r--  1 *****  staff  1331  1 25 18:12 dbt_project.yml
drwxr-xr-x  3 *****  staff    96  1 24 15:17 macros
drwxr-xr-x  3 *****  staff    96  1 24 15:17 models
drwxr-xr-x  3 *****  staff    96  1 24 15:17 seeds
drwxr-xr-x  3 *****  staff    96  1 24 15:17 snapshots
drwxr-xr-x  3 *****  staff    96  1 24 15:17 tests
また、models\exampleフォルダ配下にはサンプルのsqlファイルが2つ格納されています。
> cd models/example
> ls -l
total 24
-rw-r--r--  1 *****  staff  475  1 24 15:17 my_first_dbt_model.sql
-rw-r--r--  1 *****  staff  115  1 24 15:17 my_second_dbt_model.sql
-rw-r--r--  1 *****  staff  437  1 24 15:17 schema.yml
それでは、dbt runコマンドで上記サンプルのSQLファイルを実行してみます。dbtプロジェクトフォルダに移動してdbt run コマンドを実行します。Completed successfully が表示されれば成功です。
> dbt run
09:18:38  Running with dbt=1.3.2
09:18:38  Partial parse save file not found. Starting full parse.
09:18:39  Found 2 models, 4 tests, 0 snapshots, 0 analyses, 319 macros, 0 operations, 0 seed files, 0 sources, 0 exposures, 0 metrics
09:18:39
09:18:42  Concurrency: 1 threads (target='dev')
09:18:42
09:18:42  1 of 2 START sql table model sync_dbt.my_first_dbt_model ....................... [RUN]
09:18:45  1 of 2 OK created sql table model sync_dbt.my_first_dbt_model .................. [CREATE TABLE (2.0 rows, 0 processed) in 2.97s]
09:18:45  2 of 2 START sql view model sync_dbt.my_second_dbt_model ....................... [RUN]
09:18:47  2 of 2 OK created sql view model sync_dbt.my_second_dbt_model .................. [CREATE VIEW (0 processed) in 1.09s]
09:18:47
09:18:47  Finished running 1 table model, 1 view model in 0 hours 0 minutes and 7.51 seconds (7.51s).
09:18:47
09:18:47  Completed successfully
09:18:47
09:18:47  Done. PASS=2 WARN=0 ERROR=0 SKIP=0 TOTAL=2
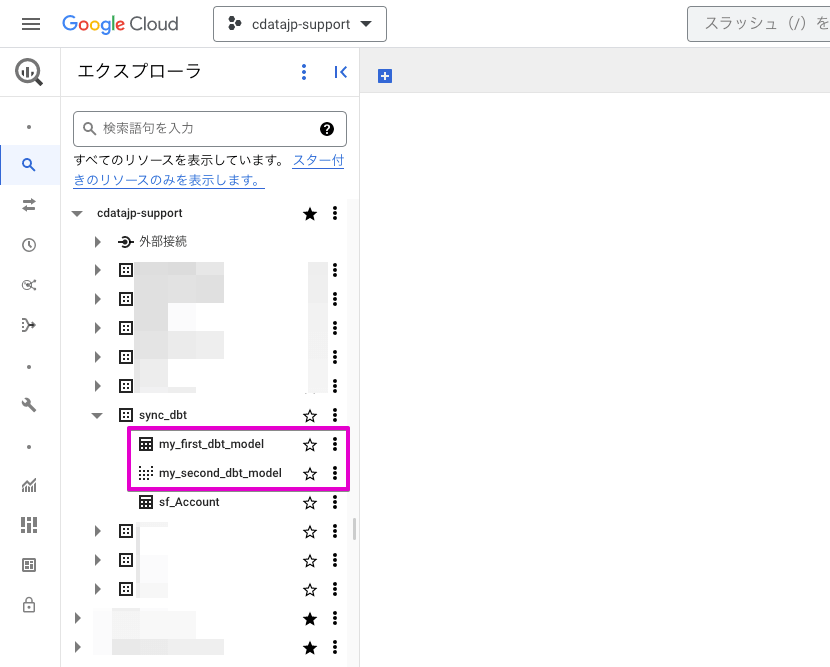
Google BigQueryのコンソールから作成されたテーブル(MY_FIRST_DBT_MODEL)、および、ビュー(MY_SECOND_DBT_MODEL)参照してみましょう。
CData Syncからの実行
本手順では、CData Sync製品のインストール、および、Salesforce からGoogle BigQuery のジョブ作成については割愛いたします。詳細はこちらの記事をご参照ください。今回はSalesforce の商談(Opportunities)と注文(Orders)をGoogle BigQuery にレプリケートするジョブを作成しています。

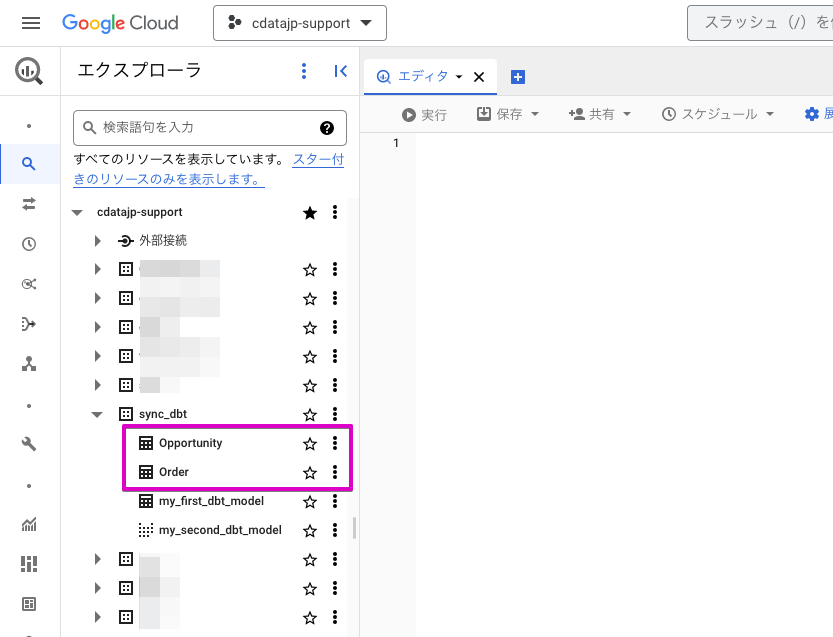
ジョブを実行してGoogle BigQueryのコンソールで2つのテーブルが作成されていることを確認します。
今回のシナリオでは、商談(Opportunities)と注文(Orders)データの集計をUNION ALLで結合したデータを加工後データとして別テーブルに作成します。まず、クエリエディタで以下のSQLを実行してSQL自体が意図した結果を返すかを確認してください。
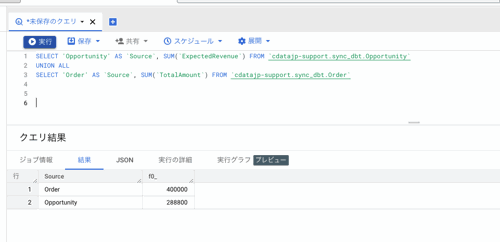
SELECT 'Opportunity' AS Source, SUM(ExpectedRevenue) AS Amount FROM cdatajp-support.sync_dbt.Opportunity
UNION ALL
SELECT 'Order' AS Source, SUM(TotalAmount) AS Amount FROM cdatajp-support.sync_dbt.Order
次に、上記SQL 文を組み込んだ SalesSummay.sql ファイルを作成します。
/*
    Welcome to your first dbt model!
    Did you know that you can also configure models directly within SQL files?
    This will override configurations stated in dbt_project.yml

    Try changing "table" to "view" below
*/

{{ config(materialized='table') }}

with source_data as (
SELECT 'Opportunity' AS Source, SUM(ExpectedRevenue) AS Amount FROM cdatajp-support.sync_dbt.Opportunity
 UNION ALL
SELECT 'Order' AS Source, SUM(TotalAmount) AS Amount FROM cdatajp-support.sync_dbt.Order
)

select *
from source_data

/*
    Uncomment the line below to remove records with null `id` values
*/

-- where id is not null
作成したらdbt プロジェクトのmodels フォルダ配下に格納します。
> cd /Applications/dbt/cdata_dbt/models
> ls -l
total 8
-rw-r--r--@ 1 ****** staff 602 1 27 20:23 SalesSummay.sql
drwxr-xr-x 6 ****** staff 192 1 27 20:09 example
次に、CData Sync の変換タブを開き、「+変換を作成」ボタンをクリックします。

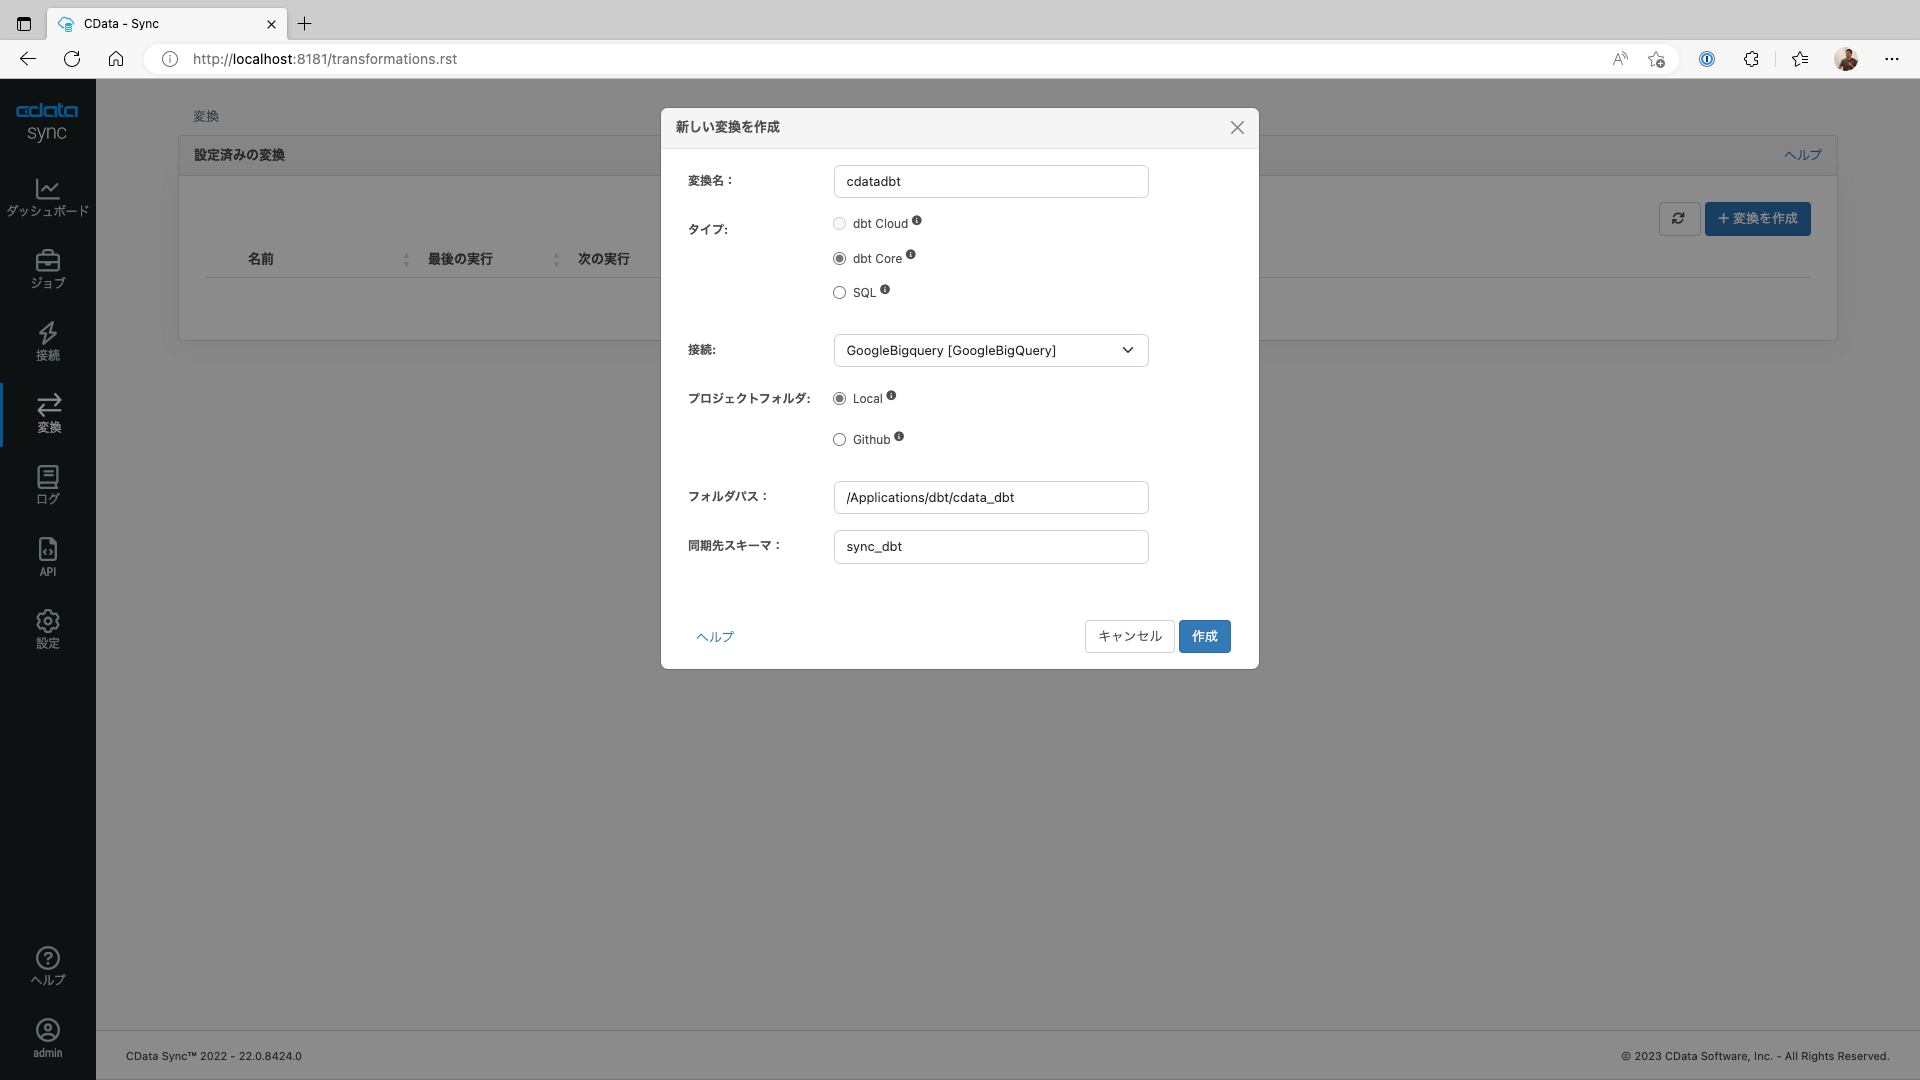
新しい変換を作成画面で以下の項目をセットして「作成」します。
- 変換名 : 任意(例:cdatadbt)
- 接続 : Google BigQueryのコネクション(例:GoogleBigQuery[GoogleBigQuery])
- タイプ:DBT
- プロジェクトフォルダ:Local
- フォルダパス:dbt プロジェクトのパス(例:/Applications/dbt/cdata_dbt)
- 同期先スキーマ:Google BigQueryのDataset(例:sync_dbt)
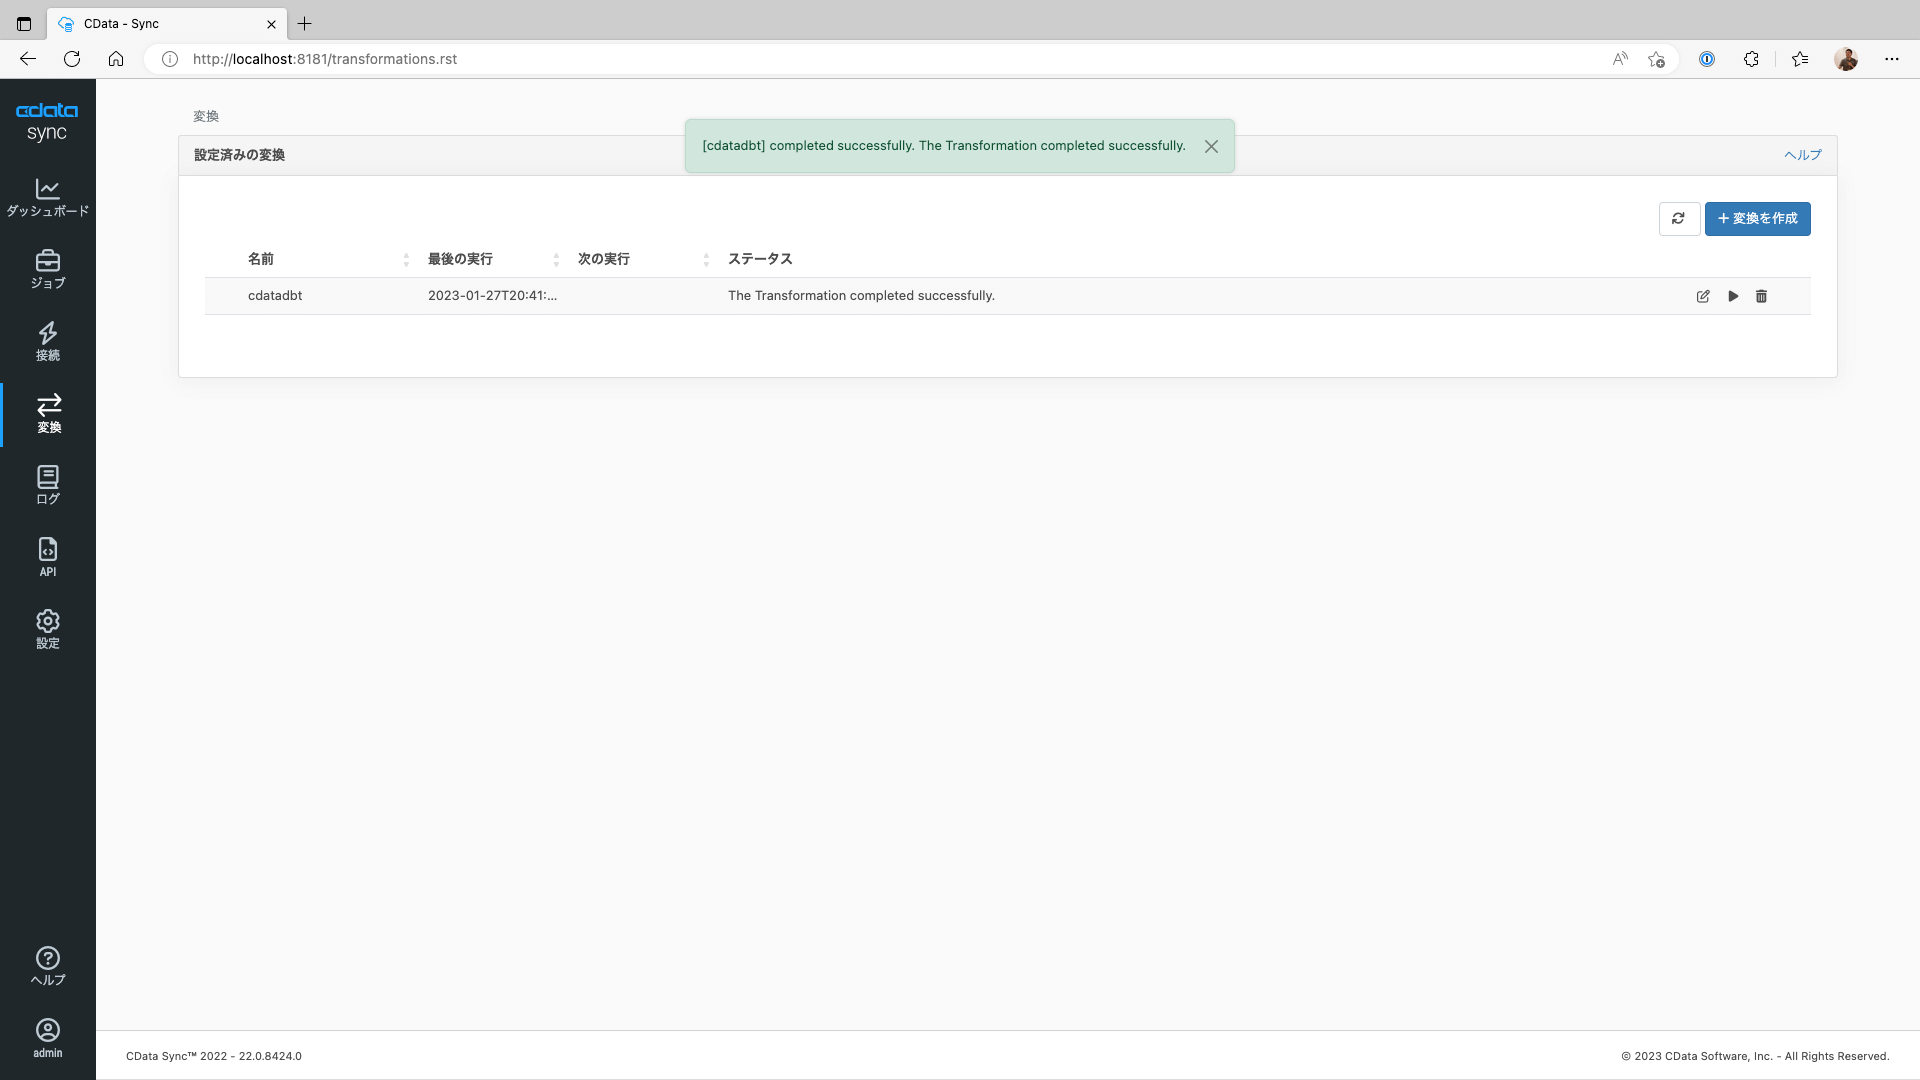
変換の一覧画面に戻り、作成した変換を▶︎ボタンで手動実行します。しばらくして「The Transformation completed successfully.」と表示されればCData Sync からのdbt プロジェクト実行は成功です。
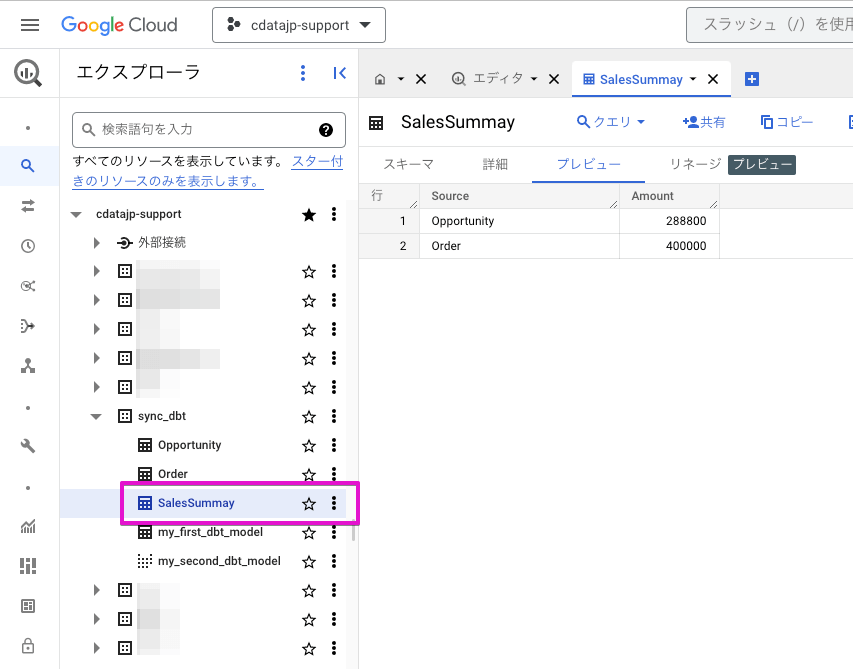
Google BigQuery のコンソールからSalesSummary テーブルが作成されていることを確認します。クエリエディタ で商談と注文の合計金額が格納されていることもか確認できます。
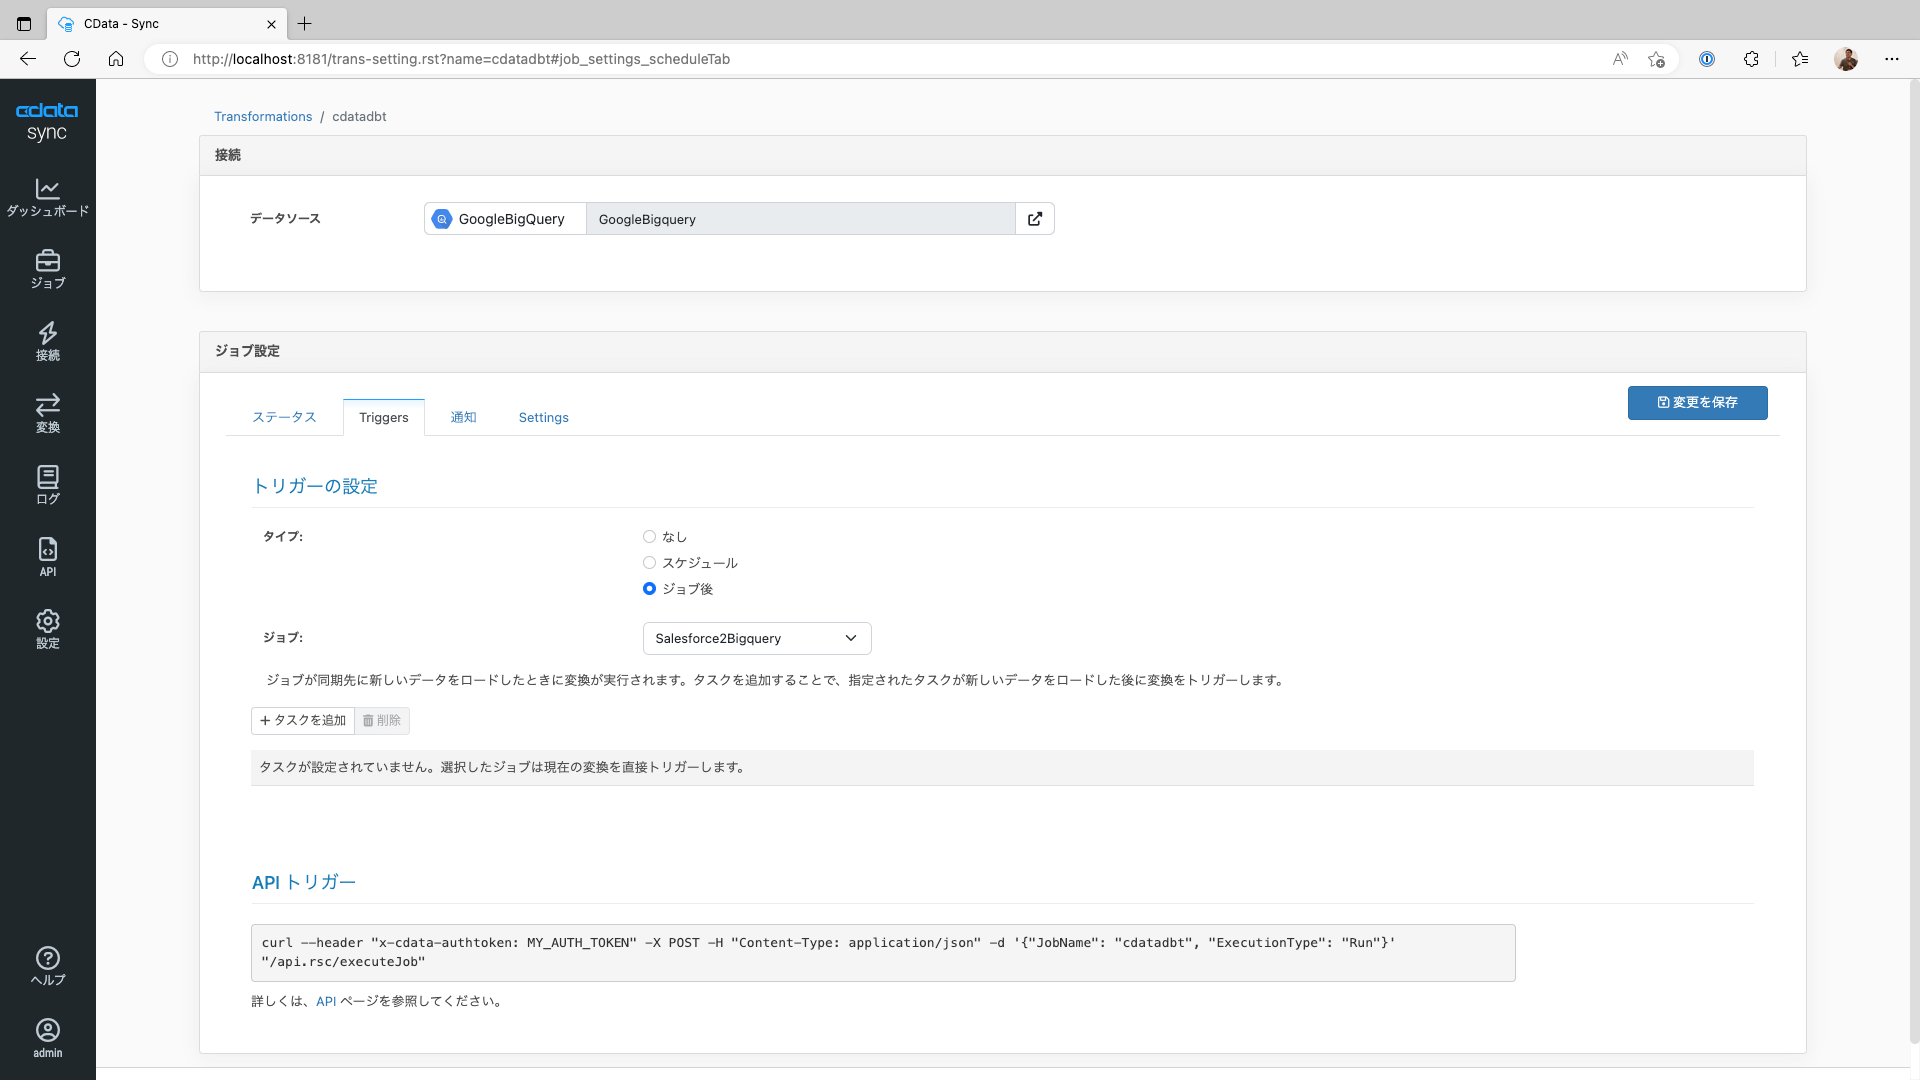
上記は手動で変換ジョブを実行してみましたが、変換のジョブ設定のTrigger タブより変換処理をジョブ(Salesforce データのGoogle BigQuery へのロード)の終了後に実行する設定も可能です。本設定によりEL(Extract & Load)後にT(Transform)処理も続けて実行することができます。
まとめ
本記事では、CData Sync でSalesforce のデータをGoogle BigQuery にロードした後にdbt プロジェクトを実行する例をご紹介しました。本機能を活用することで、CData Sync製品で400を超える多種多様なデータのデータ統合基盤(DataLake/DWH)への取り込みだけでなく、CData Sync からdbt プロジェクト内のテンプレート化されたSQL のコンパイルと実行が可能となり、モダンなデータモデリング環境の構築を実現することができるようになります。CData Sync 製品は以下のWebページより30日間の無償評価版も提供しておりますので是非お試しください。