製品をチェック
Autify SSIS Component の30日間無償トライアルをダウンロード
30日間の無償トライアルへ
製品の詳細
 Autify SSIS Components
相談したい
Autify SSIS Components
相談したい
SQL Server にリアルタイムAutify データをSSIS ワークフロー経由で連携できるパワフルなSSIS Component。
Autify Data Flow Components を使って、Autify のテストシナリオ、テスト結果などをデータ連携。データ同期、ローカルへのバックアップ、ワークフロー自動化などに最適!
SSIS を使ってAutify データをSQL Server にインポート
CData SSIS Components を使用して簡単にSQL Server へAutify をバックアップします。
古川えりか
コンテンツスペシャリスト
最終更新日:2022-07-10
CData

こんにちは!ドライバー周りのヘルプドキュメントを担当している古川です。
SQL Server に基幹業務データのバックアップを保管しておくことは、ビジネス上のセーフティネットとなります。また、ユーザーはSQL Server のバックアップデータからレポーティングや分析を簡単に行うことができます。
ここでは、SQL サーバー SSIS ワークフロー内でCData SSIS Tasks for Autify を使用して、Autify データをMicrosoft SQL Server データベースに転送する方法を説明します。
Components の追加
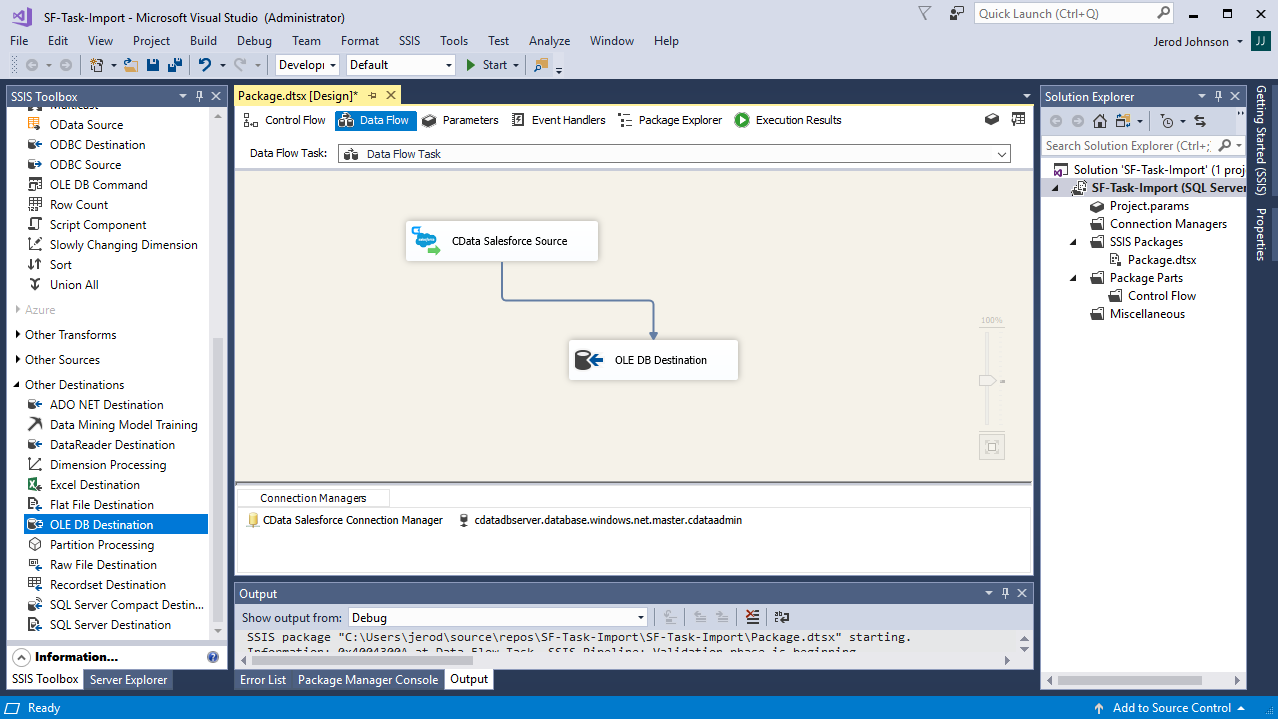
開始するには、新しいAutify ソースとSQL Server ADO.NET 転送先を新しいデータフロータスクに追加します。
![The Data Flow task used in this example.(Salesforce is shown.)]()
新しいコネクションマネジャーを作成
以下のステップに従って、接続マネジャーでAutify 接続プロパティを保存します。
- Connection Manager ウィンドウで、右クリックで[New Connection] を選択します。Add SSIS Connection Manager ダイアログが表示されます。
- [Connection Manager type]メニューでAutify を選択します。CData Autify Connection Manager が表示されます。
- 接続プロパティを構成します。
認証するには、ApiKey およびProjectId を指定する必要があります。
- ApiKey:アカウントにログインし、「設定」->「個人設定」->に移動して「新しいパーソナルアクセストークン」を作成します。
- ProjectId:アカウントURL にあるプロジェクトのId。例:URL が"https://app.autify.com/projects/343/scenarios" の場合は、343 がProjectId
になります。
Autify Source の構成
以下のステップに従って、Autify の抽出に使用するクエリを指定します。
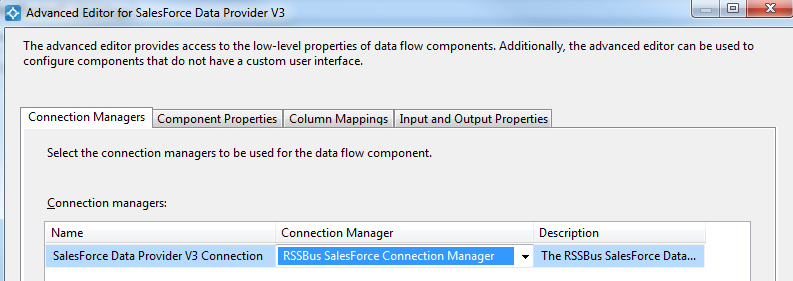
- Autify ソースをダブルクリックしてソースコンポーネントエディタを開きます。
- [Connection Manager]メニューで、以前作成した接続マネジャーを選択します。
![The Connection Manager to be used for the source component.(Salesforce is shown.)]()
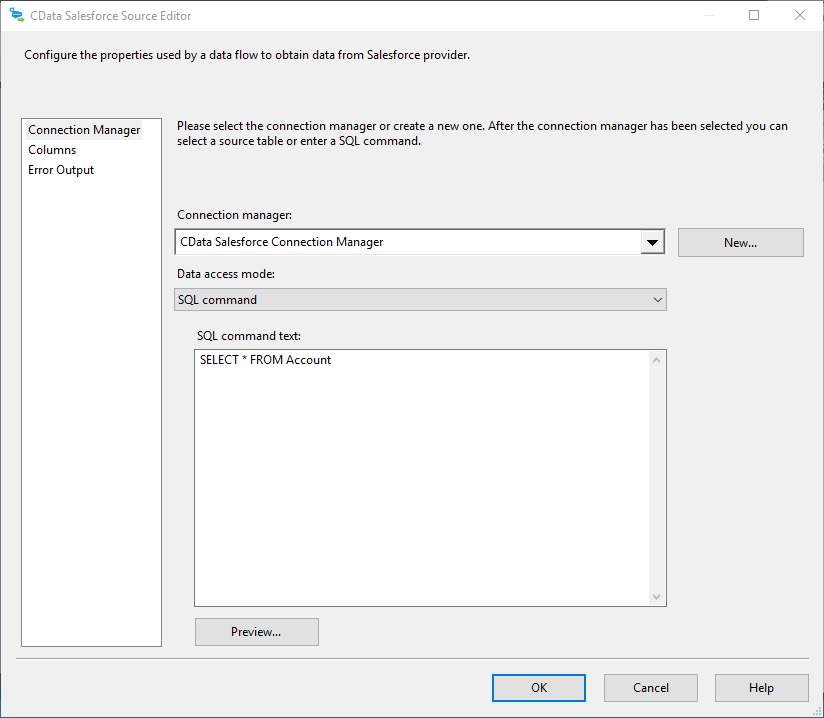
- データの書き出しに使用するクエリを指定します。例:
SELECT Name, ProjectURL FROM Scenarios WHERE Id = '46292'
![The SQL query to retrieve records.(Salesforce is shown.)]()
- Autify Source コントロールを閉じて、ADO.NET Destination に接続します。
SQL Server Destination を構成する
以下のステップに従って、Autify をロードするSQL サーバーテーブルを指定します。
- ADO.NET Destination を選択して、新しい接続を追加します。接続するサーバーおよびデータベースの情報を入力。
- Data access モードメニューで、[table or view]を選択します。
- [Table Or View]メニューで、設定するテーブルまたはビューを選択します。
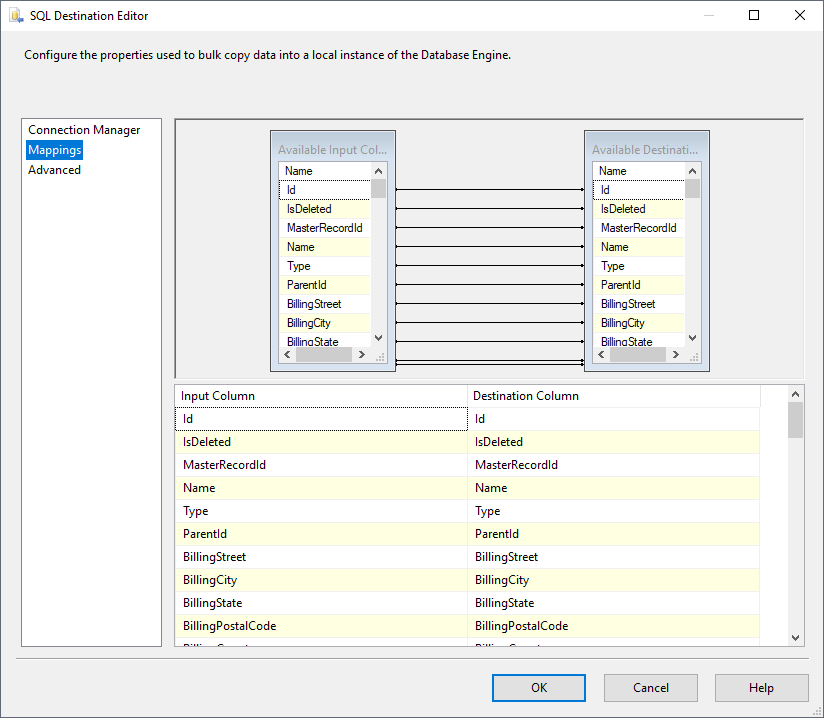
- [Mappings]画面で必要なプロパティを設定します。
![The mappings from the SSIS source component to SQL Server.(Salesforce is shown.)]()
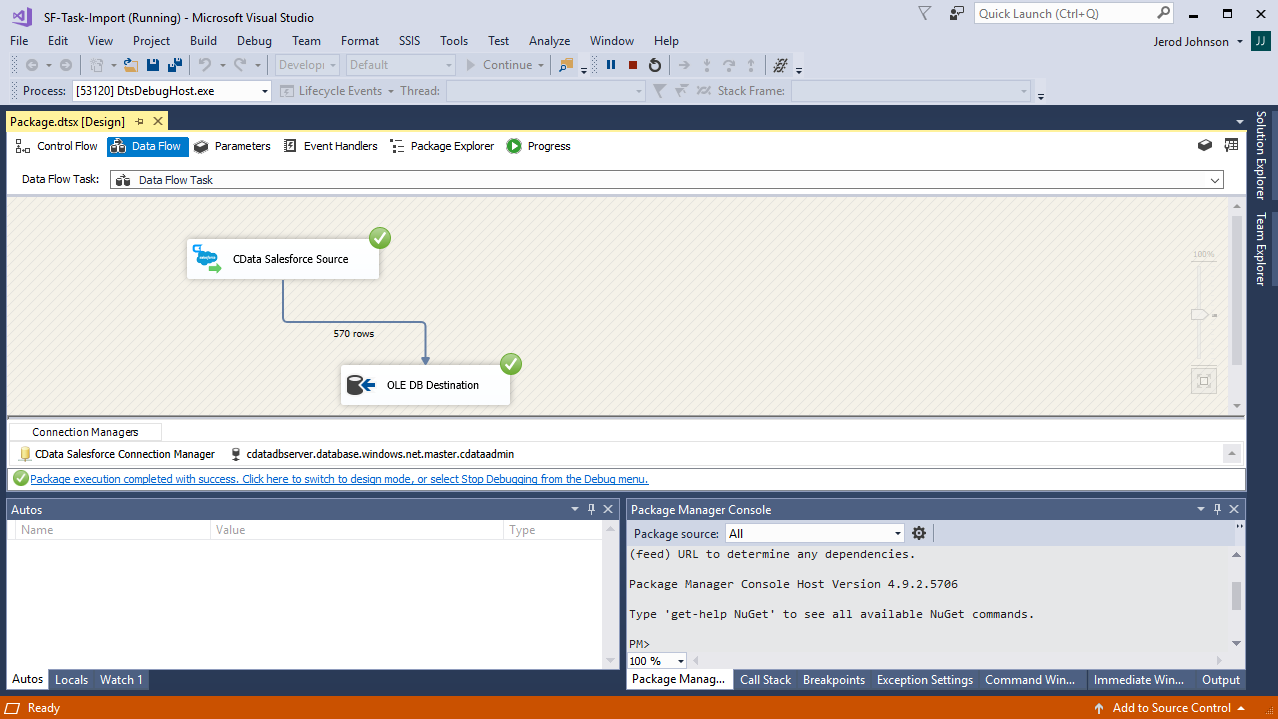
プロジェクトの実行
プロジェクトを実行できるようになりました。SSIS Task の実行が完了すると、データベースにAutify データが入力されます。
![The completed import.(Salesforce is shown.)]()