ADO.NET 経由でTIBCO Spotfire でADP データに連携してをビジュアライズ
TIBCO Spotfire のダッシュボードにADP データの連携が驚くほど簡単に。
加藤龍彦
デジタルマーケティング
最終更新日:2022-09-16
こんにちは!ウェブ担当の加藤です。マーケ関連のデータ分析や整備もやっています。
この記事では、CData ADO.NET Provider for ADP をTIBCO Spotfire で使う方法を説明します。接続を確立して、簡単なダッシュボードを作成していきます。
- [Add Data Tables]をクリックして、CData ADO.NET データソースを追加します。
- [Add]>[Database]をクリックします。
- プロバイダーを選択して[Configure]をクリックします。
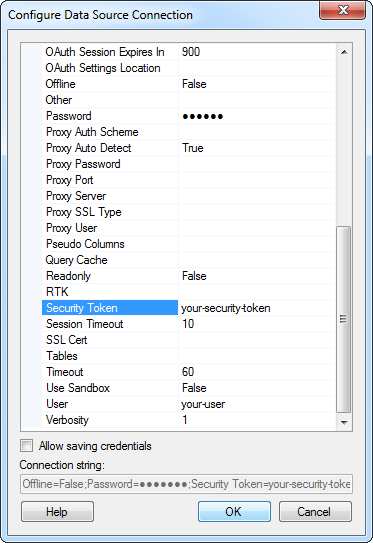
- 接続設定を定義します。一般的な接続文字列は次のとおりです。
OAuthClientId=YourClientId;OAuthClientSecret=YourClientSecret;SSLClientCert='c:\cert.pfx';SSLClientCertPassword='admin@123'
ADP 接続プロパティの取得・設定方法
接続を確立する前に、ADP に連絡してOAuth アプリとそれに関連するクレデンシャルを提供してもらう必要があります。
これらのクレデンシャルはADP からのみ取得が可能で、直接取得することはできません。
ADP への接続
次のプロパティを指定してADP に接続します。
- OAuthClientId:ADP より提供されたアプリのクライアントId に設定。
- OAuthClientSecret:ADP より提供されたアプリのクライアントシークレットに設定。
- SSLClientCert:ADP より提供された証明書に設定。
- SSLClientCertPassword:証明書のパスワードに設定。
- UseUAT:CData 製品はデフォルトで、本番環境にリクエストを行います。開発者アカウントを使用している場合は、UseUAT をtrue に設定します。
- RowScanDepth:テーブルで利用可能なカスタムフィールドカラムをスキャンする行数の最大値。デフォルト値は100に設定されています。大きい値を設定すると、パフォーマンスが低下する場合があります。
![Connection properties in the Configure Data Source Connection dialog. (Salesforce is shown.)]()
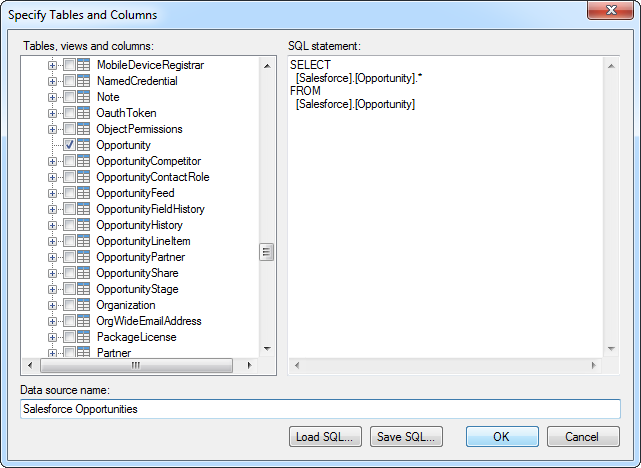
- ダッシュボードに追加したいテーブルを選択します。この例ではWorkers を使います。SQL クエリも指定できます。ドライバーは標準SQL シンタックスをサポートしています。
![Tables and columns selected in the tree or specified by an SQL query. (Salesforce is shown.)]()
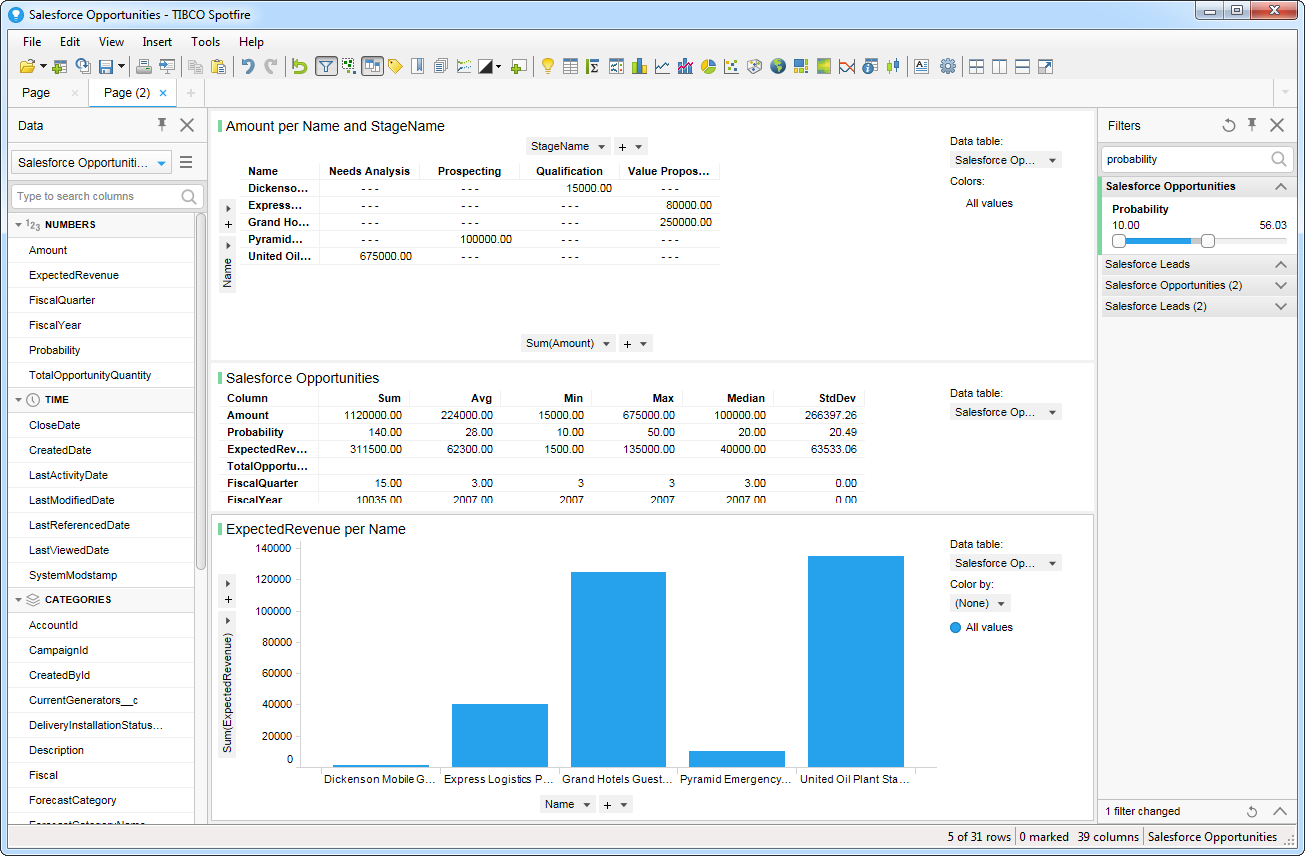
- リアルタイムデータを使いたい場合は、[Keep Data Table External]オプションをクリックします。このオプションは、データの変更をリアルタイムでダッシュボードに反映します。
データをメモリにロードしてローカルで処理したい場合は、[Import Data Table]オプションをクリックします。このオプションは、オフラインでの使用、またはスローなネットワーク接続によりダッシュボードがインタラクティブでない場合に使用します。
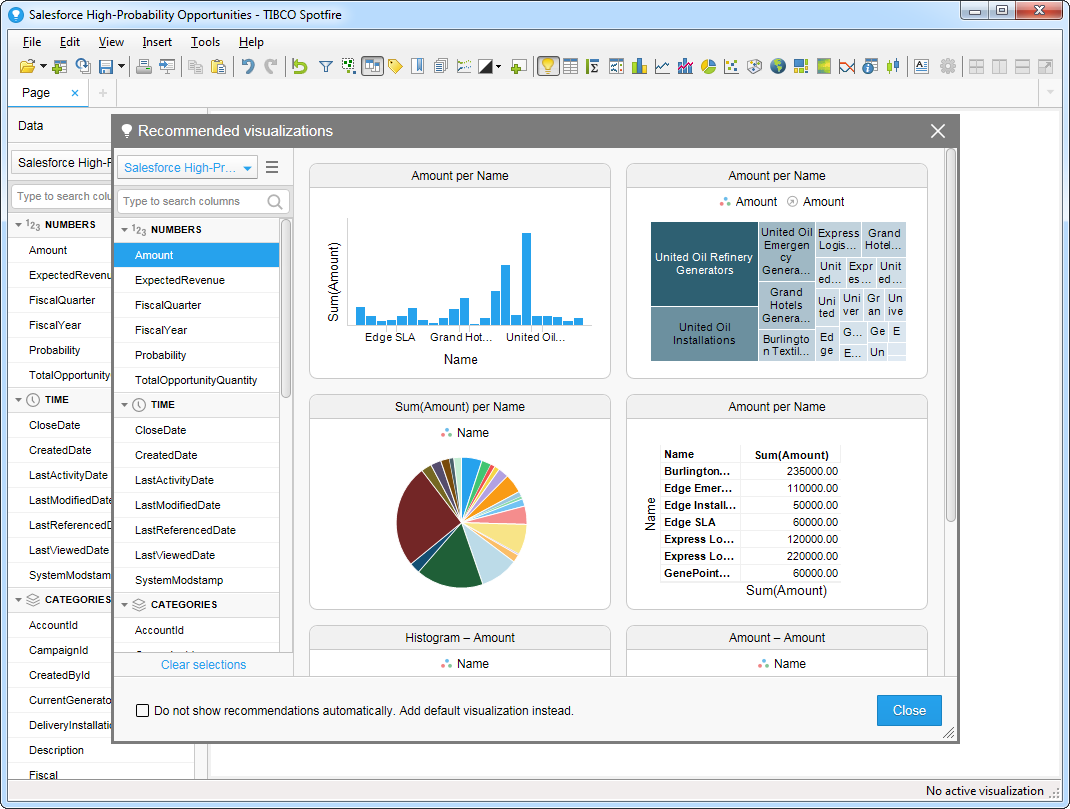
- テーブルを追加すると[Recommended Visualizations]ウィザードが表示されます。テーブルを選択すると、Spotfire はカラムのデータ型を使ってnumber、time、category カラムを検出します。この例ではNumbers セクションでWorkerID を、Categories セクションでAssociateOID を使用しています。
![Recommended visualizations for the imported data table. (Salesforce is shown.)]()
[Recommended Visualizations]ウィザードでいくつかビジュアライズしたら、ダッシュボードにその他の修正を加えられます。例えば、ページにフィルタを適用することで、高確率なopportunities にズームインできます。フィルタを追加するには、[Filter]ボタンをクリックします。各クエリで利用可能なフィルタは、[Filters]ペインに表示されます。
![A simple dashboard with a global filter. (Salesforce is shown.)]()
関連コンテンツ