ノーコードでクラウド上のデータとの連携を実現。
詳細はこちら →こんにちは!ウェブ担当の加藤です。マーケ関連のデータ分析や整備もやっています。
AngularJS(Angular)は、動的Web アプリを構造化するフレームワークであり、CData Connect Server と組み合わせることで、Workday のリアルタイムデータにアクセスできるシングルページアプリケーション(SPA)を構築することができます。 CData Connect Server は、Workday の仮想データベースを作成し、Workday のOData API(Angular からネイティブに使用可能)を生成するために使用できます。この記事では、CData Connect Server のセットアップとWorkday データへのライブアクセスを持つシンプルなSPA を作成する方法について説明します。
Angular アプリでリアルタイムWorkday データを操作するには、Connect Server からWorkday に接続し、新しい仮想データベースへユーザーアクセスを提供してWorkday データのOData エンドポイントを作成する必要があります。
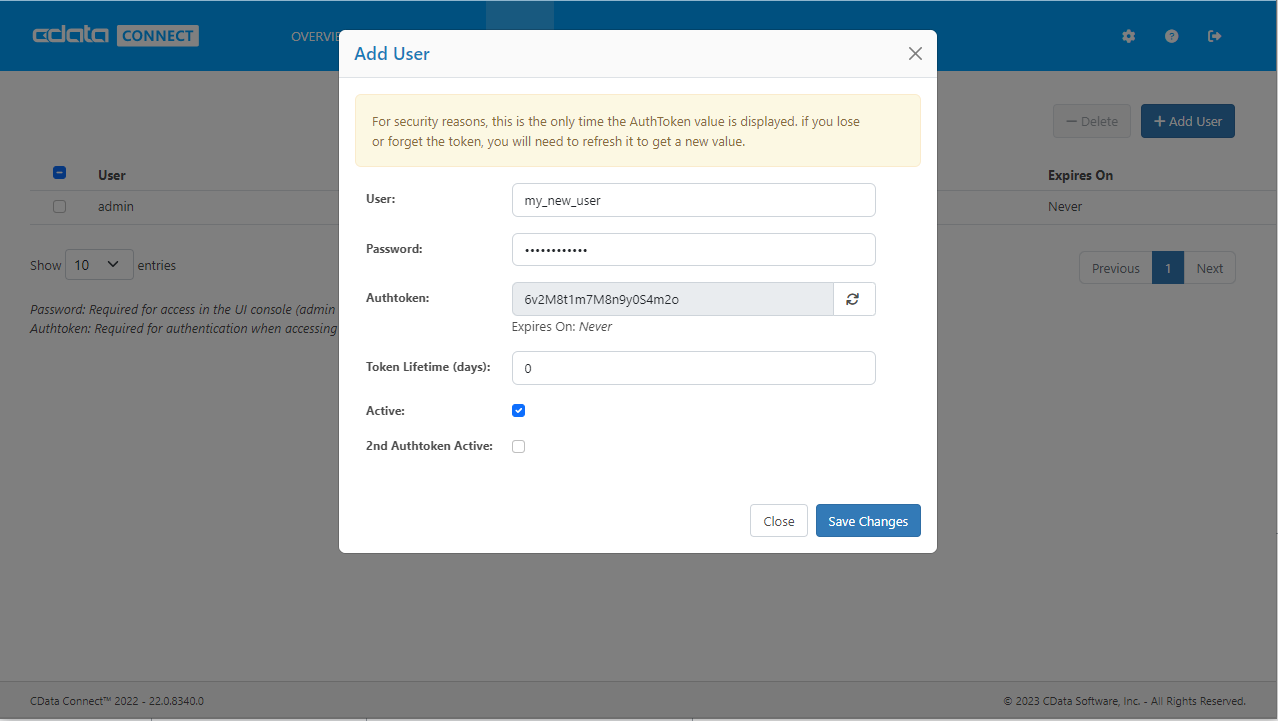
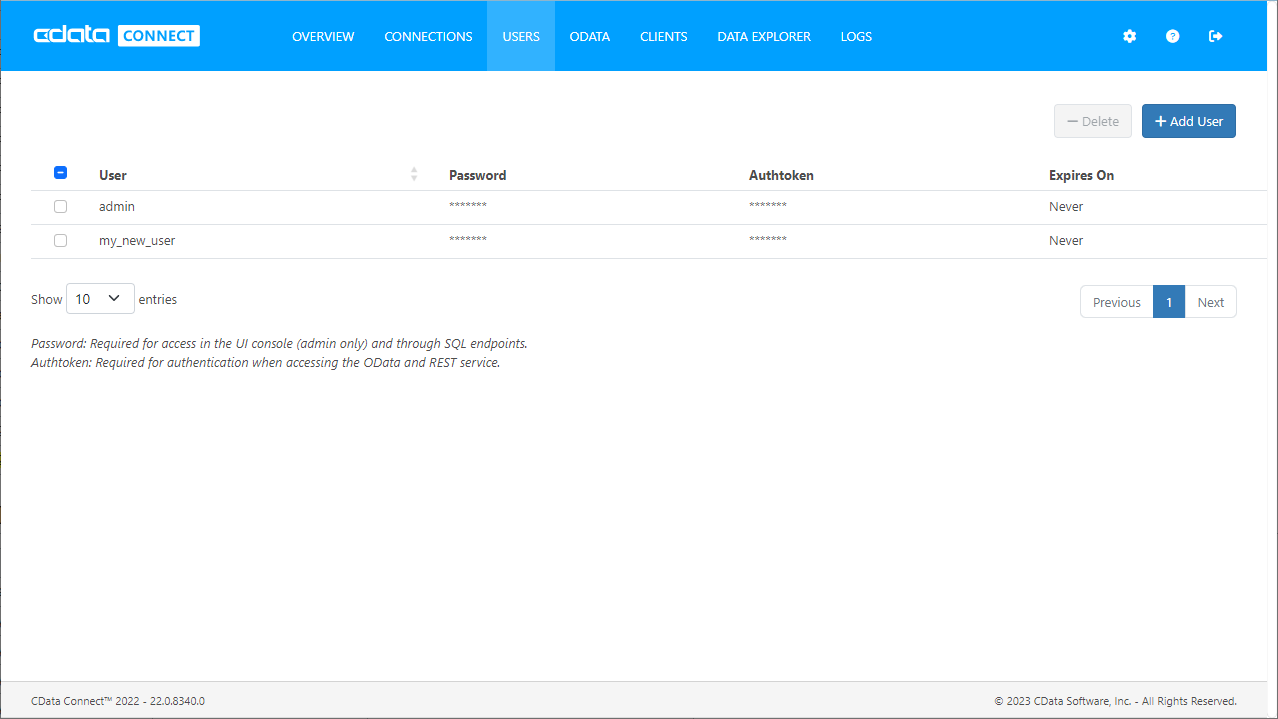
AngularJS からConnect Server を介してWorkday に接続するユーザーを作成します。
CData Connect Server は、簡単なポイントアンドクリックインターフェースを使用してAPI を生成します。
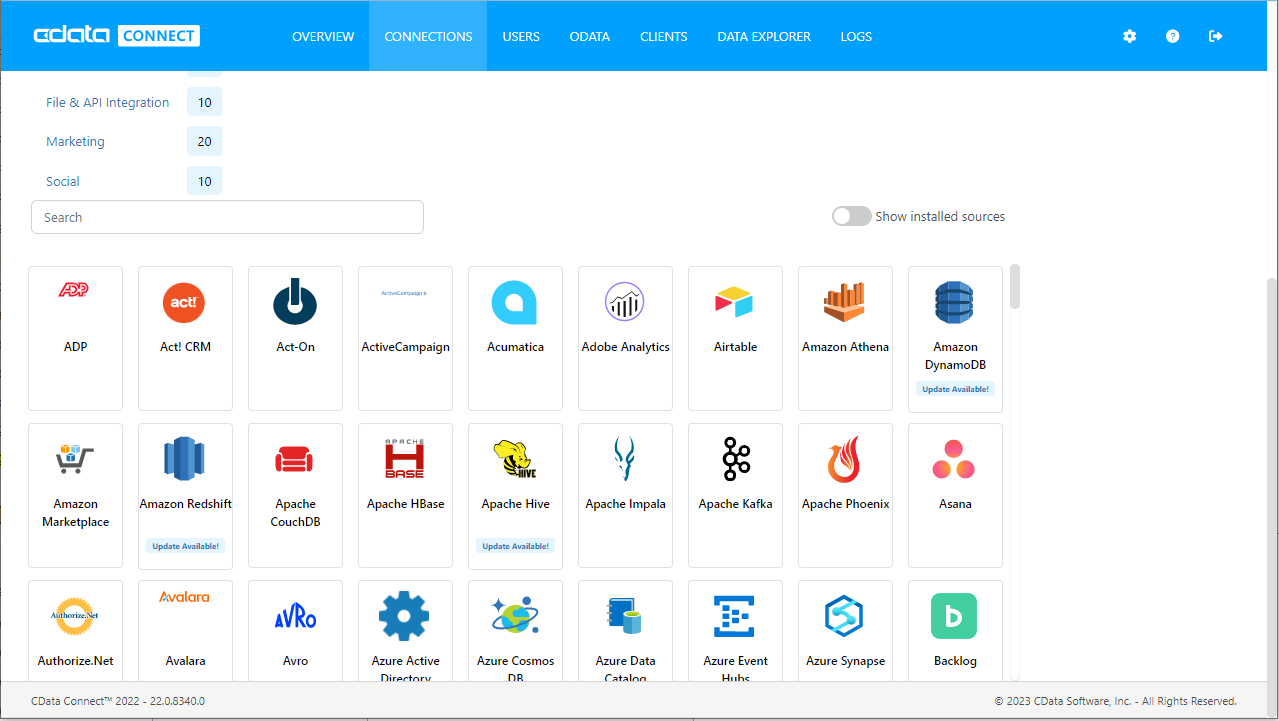
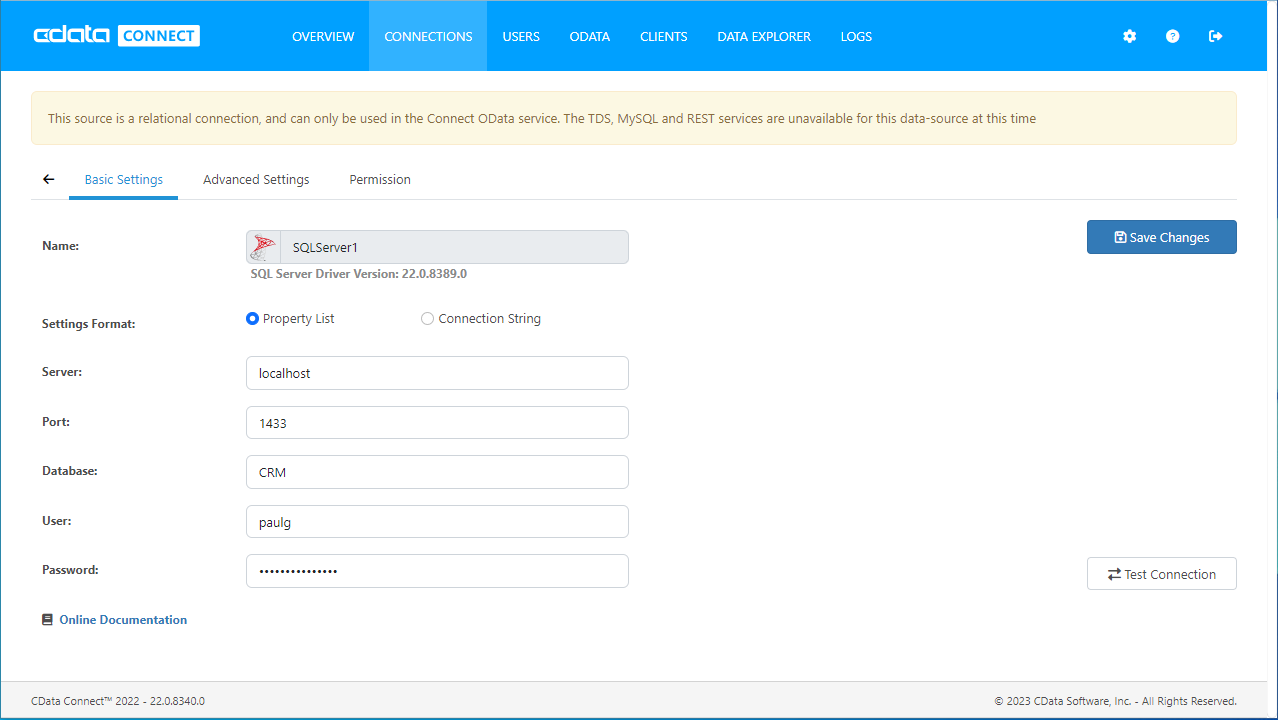
ここでは、4つのWorkday API の接続パラメータを設定する方法、およびTenant とBaseURL を取得する方法について説明します。必要なAPI のパラメータが設定され、カスタムOAuth および / またはAzure AD API クライアントを作成したら、接続の準備は完了です。
API / 前提条件 / 接続パラメータ
WQL / WQL サービスを有効化(下記参照) / ConnectionType: WQL
Reports as a Service / カタログレポートの設定(ヘルプドキュメントの「データアクセスのファインチューニング」参照) / ConnectionType:
Reports
REST / 自動で有効化 / ConnectionType: REST
SOAP / 自動で有効化 / ヘルプドキュメントのWorkday SOAP API への認証を参照
BaseURL およびTenant プロパティを取得するため、Workday にログインしてView API Clients を検索します。 この画面では、Workday はBaseURL とTenant の両方を含むURL であるWorkday REST API Endpoint を表示します。
REST API Endpoint のフォーマットは、
https://domain.com/subdirectories/mycompany です。ここで、
例えば、REST API エンドポイントがhttps://wd3-impl-services1.workday.com/ccx/api/v1/mycompany の場合、 BaseURL はhttps://wd3-impl-services1.workday.com であり、Tenant はmycompany です。
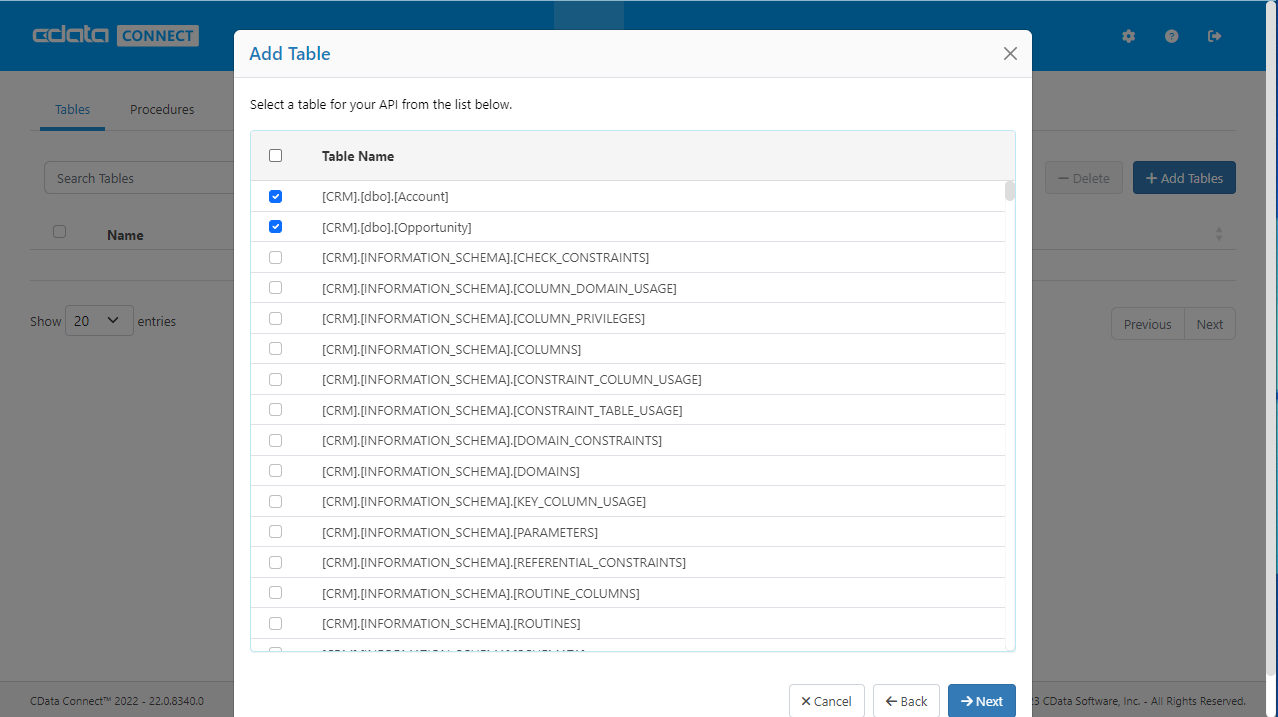
Workday に接続したら、目的のテーブルのOData Endpoints を作成します。
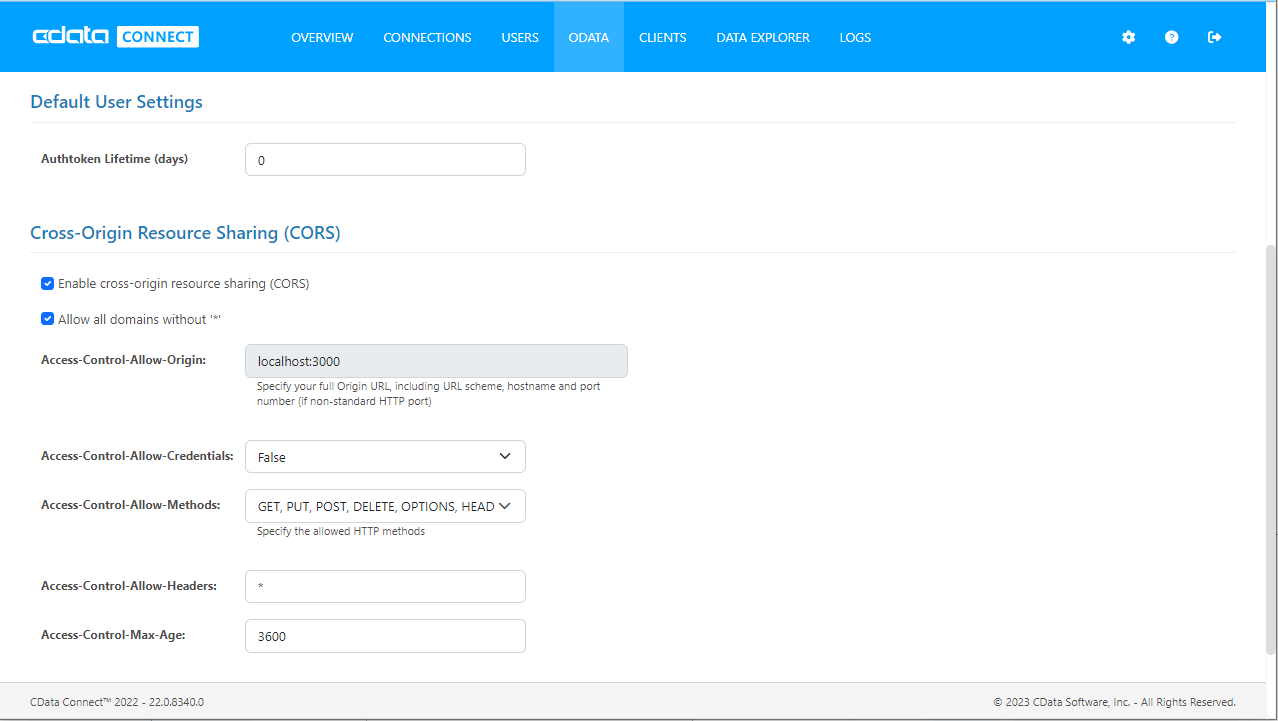
Ajax などのアプリケーションから複数のドメインにアクセスして接続すると、クロスサイトスクリプティングの制限に違反する恐れがあります。その場合には、「OData」->「Settings」でCORS 設定を構成します。
設定への変更を保存します。
Workday への接続を構成してユーザーを作成し、Connect Server でOData エンドポイントを作成すると、Workday データのOData フィードにアクセスできるようになります。 以下は、テーブルにアクセスするためのURL とテーブルのリストです。テーブルへのアクセスについては、Connect Server のAPI ページを参照してください。(Connect Server web ページの右上にある「API」リンクをクリックします。) URL については、Connect Server のURL が必要になります。(例:CONNECT_SERVER_URL/) Angular を使用しているため、デフォルトでJSON データを返さないURL の末尾には@json パラメータを追加します。
| テーブル | URL | |
|---|---|---|
| エンティティ(テーブル)のリスト | CONNECT_SERVER_URL/api.rsc/ | |
| Workers テーブルのメタデータ | http://www.cdatacloud.net/myinstance/api.rsc/Workers/$metadata?@json | |
| Workers | http://www.cdatacloud.net/myinstance/api.rsc/Workday_Workers |
標準のOData フィードと同様に、返されるフィードを制限する場合は、$filter、$orderby、$skip、$top などほかの標準OData URL パラメータとともに、$select パラメータをクエリに追加することができます。 サポートされているOData クエリの詳細については、ヘルプドキュメントを参照してください。
Connect Server のセットアップが完了したら、SPA を構築することができるようになります。本記事は簡単なデモンストレーションなので、すべてのCSS、スクリプト、およびAngular コントローラーを一つのファイルにまとめることで、AngularJS サービス、ファクトリー、カスタムディレクティブが提供する機能を使用しないようにします。
まず、いくつかのCSS ルールセットを作成してtable、th、td、tr 要素を変更し、データのテーブルをフォーマットします。SPA で使用するためには、AngularJS ライブラリをインポートする必要があります。
  <style>
  table, th, td {
    border:1px solid grey;
    border-collapse: collapse;
    padding:5px;
  }
  table tr:nth-child(odd) {
    background-color: #f1f1f1;
  }
  table tr:nth-child(even) {
    background-color: #ffffff;
  }
  </style>
  <script src="http://ajax.googleapis.com/ajax/libs/angularjs/1.7.8/angular.min.js"></script>
次に、HTML の本文でのみAngular を使用するため、このbody タグにng-app およびng-controller ディレクティブを追加します。 そして、HTML 本文の最後にスクリプトタグを作成し、このタグでAngular アプリとコントローラー作成して定義します。
<body ng-app="DataApp" ng-controller="SimpleController">
...
<script>
var app = angular.module('DataApp', []);
app.controller('SimpleController', function($scope, $http) {
    //we will add code here
    });
</script>
</body>
この例でのコントローラーは、Angular オブジェクトを初期化してSPA を設定するinit、選択したテーブルのカラムを取得するgetTableColumns、そして選択したカラムから選択したフィールドのデータを取得するgetTableData の3 つの機能で構成されます。 コントローラーを作成する際、最初に実行するアクションは、init 関数を呼び出すことです。 ほかのすべての関数は必要に応じて呼び出され、これらの関数呼び出しでは、Workday データを取得するためにConnect Server に対して要求されたHTTP GET 呼び出しを行います。
init();

/*
 * Initialize the data object, which will be used with Angular to
 * build the different parts of our SPA and to retrieve data from
 * Connect Server.
 */
function init() {
  $scope.data = {
  availableTables: [],
                 availableColumns: [],
                 selectedTable: {},
                 tableData: []
  };

  /*
   * Call to Connect Server to get the list of Tables, select the
   * first table by default, and retrieve the available columns.
   *
   * The call to Connect Server returns standard OData, so the
   * data we need is in the value object in the JSON returned.
   */
  $http.get("http://www.cdatacloud.net/myinstance/api.rsc",{headers: {"x-cdata-authtoken":"MyAuthtoken"}})
    .then(function (response) {
        $scope.data.availableTables = response.data.value;
        $scope.data.selectedTable = $scope.data.availableTables[0];
        $scope.getTableColumns();
        });
}

/*
 * Call to Connect Server to get the list of columns for the
 * selected table.
 *
 * The data returned here is not standard OData, so we drill
 * down into the response to extract exactly the data we need
 * (an array of column names).
 *
 * With the column names retrieved, we will transform the array
 * of column names into an array of objects with a name and Id
 * field, to be used when we build an HTML select.
 */
$scope.getTableColumns = function () {
  $scope.data.tableData = [];
  $scope.data.selectedColumns = [];
  table = $scope.data.selectedTable.url;
  if (table != "") {
    $http.get("http://www.cdatacloud.net/myinstance/api.rsc/" + table + "/$metadata?@json", {headers: {"x-cdata-authtoken":"MyAuthtoken"}})
      .then(function (response) {
          $scope.data.availableColumns = response.data.items[0]["odata:cname"];
          for (i = 0; i < $scope.data.availableColumns.length; i++) {
            $scope.data.availableColumns[i] = { id: i, name: $scope.data.availableColumns[i] };
          }
          });
  }
}

/*
 * Call to Connect Server to get the requested data.We get the data
 * based on the table selected in the associated HTML select.
 * Then we create a comma-separated string of the selected columns.
 *
 * With the table and columns known, we can make the appropriate call
 * to Connect Server.Because the driver returns standard OData, the
 * table data is found in the value field of the response.
 */
$scope.getTableData = function () {
  table = $scope.data.selectedTable.url;
  columnsArray = $scope.data.selectedColumns;
  columnString = "";
  for (i = 0; i < columnsArray.length; i++) {
    if (columnString != "") {
      columnString += ",";
    }
    columnString += columnsArray[i].name;
  }

  if (table != "") {
    $http.get("http://www.cdatacloud.net/myinstance/api.rsc/" + table + "?$select=" + columnString, {headers: {"x-cdata-authtoken":"MyAuthtoken"}})
      .then(function (response) { $scope.data.tableData = response.data.value; });
  } else {
    $scope.data.tableData = [];
  }
}
コントローラーを定義したら、Angular を使用してWeb ページが作成できるようになります。この例のページは、テーブルを選択するためのセレクトボックス、カラムを選択するための(マルチ)セレクトボックス、データを取得するためのボタン、そしてデータを表示するためのテーブルという4 つの主要部分で構成されます。 これらの4 つの部分を一つずつ取り上げて、Angular の使用方法について説明します。
最初のselect 要素では、ng-options ディレクティブを使用して使用可能なテーブル(前述のinit 関数から取得)を繰り返し処理し、select 要素を設定します。 ng-model ディレクティブを使用して、選択したオプションの値をdata.selectedTable フィールドに割り当てます。 選択した要素が変更されると、getTableColumns 要素が呼び出され、使用可能なカラムが再入力されます。
  <label>Select a Table</label>
  <br />
  <select name="tableDropDown" id="tableDropDown"
          ng-options="table.name for table in data.availableTables track by table.url"
          ng-model="data.selectedTable"
          ng-change="getTableColumns()">
  </select>
2 番目のselect 要素でもng-options ディレクティブを使用しますが、今回は、使用可能なカラム(getTableColumns 関数によって取得されるカラム)を繰り返し使用します。 使いやすくするために、select 要素を入力する前にカラムを名前でソートします。 このselect にはmultiple 属性が含まれるため、複数のカラムを選択できます。 選択したカラムは、それぞれdata.selectedColumns 配列に追加されます。カラムを選択すると、それぞれのカラムにテーブルヘッダーが作成されます(以下のデータテーブルセクションを参照してください)。
  <label>Select Columns</label>
  <br />
  <select name="columnMultiple" id="columnMultiple"
          ng-options="column.name for column in data.availableColumns | orderBy:'name' track by column.id"
          ng-model="data.selectedColumns"
          multiple>
  </select>
このボタンがクリックされるたびにgetTableData 関数を呼び出します。ng-disabled ディレクティブを使用すると、ユーザーがカラムを選択していない時は常にボタンが無効になります。 また、選択したテーブルの名前で、ボタンのテキストを動的に更新します。
  <button name="getTableData" id="btnGetTableData"
          ng-click="getTableData()"
          ng-disabled="data.selectedColumns.length == 0">
  Get {{data.selectedTable.name}} Data
  </button>
このセクションでは、選択したテーブルのデータを表示する、というSPA の最終目標を完了します。選択したテーブルのデータを表示するには、いくつかのng-repeat ディレクティブを使用します。まず、選択したカラムを繰り返し処理してテーブルヘッダーを作成するディレクティブ、次に、返されたデータ行を繰り返し処理するディレクティブ、そして、選択したカラムを繰り返し処理して指定したデータ行に対応するデータを表示するディレクティブです。
Angular を使用することで、表示するカラムを動的に決定することができます。ボタンがクリックされる「前」に選択されたカラムにのみデータが含まれることに注意してください。 しかし、使用可能なすべてのカラムを選択し、ボタンをクリックしてデータを取得した後に、戻って別のカラムを選択または選択解除することも簡単です。 選択したテーブルを変更すると、すべてのデータが消去されます。
  <table>
    <tr>
      <th ng-repeat="column in data.selectedColumns | orderBy:'name'">{{column.name}}</th>
    </tr>
    <tr ng-repeat="row in data.tableData">
      <td ng-repeat="column in data.selectedColumns">{{ row[column.name] }}</td>
    </tr>
  </table>
<!DOCTYPE html>

<html>
<style>
table, th, td {
border:1px solid grey;
        border-collapse: collapse;
padding:5px;
}
table tr:nth-child(odd) {
  background-color: #f1f1f1;
}
table tr:nth-child(even) {
  background-color: #ffffff;
}
</style>
<script src="http://ajax.googleapis.com/ajax/libs/angularjs/1.7.8/angular.min.js"></script>
<body ng-app="DataApp" ng-controller="SimpleController">
<label>Select a Table</label>
<br>
<select name="tableDropDown" id="tableDropDown"
ng-options="table.name for table in data.availableTables track by table.url"
ng-model="data.selectedTable"
ng-change="getTableColumns()">
</select>
<br />
<br />
<label>Select Columns</label>
<br />
<select name="columnMultiple" id="columnMultiple"
ng-options="column.name for column in data.availableColumns | orderBy:'name' track by column.id"
ng-model="data.selectedColumns"
multiple>
</select>
<br />
<br />
<button name="getTableData" id="btnGetTableData"
ng-click="getTableData()"
ng-disabled="data.selectedColumns.length == 0">
Get {{data.selectedTable.name}} Data
</button>
<br />
<br />

<table>
<tr>
<th ng-repeat="column in data.selectedColumns | orderBy:'name'">{{column.name}}</th>
</tr>
<tr ng-repeat="row in data.tableData">
<td ng-repeat="column in data.selectedColumns">{{ row[column.name] }}</td>
</tr>
</table>
<script>
var app = angular.module('DataApp', []);
app.controller('SimpleController', function($scope, $http) {
    init();

    /*
     * Initialize the data object, which will be used with Angular to
     * build the different parts of our SPA and to retrieve data from
     * Connect Server.
     */
    function init() {
    $scope.data = {
    availableTables: [],
    availableColumns: [],
    selectedTable: {},
    tableData: []
};

/*
 * Call to Connect Server to get the list of tables, select the
 * first table by default, and retrieve the available columns.
 *
 * The call to Connect Server returns standard OData, so the
 * data we need is in the value object in the JSON returned.
 */
$http.get("CONNECT_SERVER_URL/api.rsc",{headers: {"x-cdata-authtoken":"MyAuthtoken"}})
.then(function (response) {
    $scope.data.availableTables = response.data.value;
    $scope.data.selectedTable = $scope.data.availableTables[0];
    $scope.getTableColumns();
    });
}

/*
 * Call to Connect Server to get the list of columns for the
 * selected table.
 *
 * The data returned here is not standard OData, so we drill
 * down into the response to extract exactly the data we need
 * (an array of column names).
 *
 * With the column names retrieved, we will transform the array
 * of column names into an array of objects with a name and Id
 * field, to be used when we build an HTML select.
 */
$scope.getTableColumns = function () {
  $scope.data.tableData = [];
  $scope.data.selectedColumns = [];
  table = $scope.data.selectedTable.url;
  if (table != "") {
    $http.get("CONNECT_SERVER_URL/api.rsc/" + table + "/$metadata?@json", {headers: {"x-cdata-authtoken":"MyAuthtoken"}})
      .then(function (response) {
          $scope.data.availableColumns = response.data.items[0]["odata:cname"];
          for (i = 0; i < $scope.data.availableColumns.length; i++) {
          $scope.data.availableColumns[i] = { id: i, name: $scope.data.availableColumns[i] };
          }
          });
  }
}

/*
 * Call to Connect Server to get the requested data.We get the data
 * based on the table selected in the associated HTML select.
 * Then we create a comma-separated string of the selected columns.
 *
 * With the table and columns known, we can make the appropriate call
 * to Connect Server.Because the driver returns standard OData, the
 * table data is found in the value field of the response.
 */
$scope.getTableData = function () {
  table = $scope.data.selectedTable.url;
  columnsArray = $scope.data.selectedColumns;
  columnString = "";
  for (i = 0; i < columnsArray.length; i++) {
    if (columnString != "") {
      columnString += ",";
    }
    columnString += columnsArray[i].name;
  }

  if (table != "") {
    $http.get("CONNECT_SERVER_URL/api.rsc/" + table + "?$select=" + columnString, {headers: {"x-cdata-authtoken":"MyAuthtoken"}})
      .then(function (response) { $scope.data.tableData = response.data.value; });
  } else {
    $scope.data.tableData = [];
  }
}
});
</script>
</body>
</html>
Angularで構築されたWeb アプリケーションからWorkday データ(またはサポートされているほかのデータソースからのデータ)に接続したい場合には、CData Connect Server の無料トライアルに今すぐ登録してください。 Connect Server の詳細と、サポートされているほかのデータソースについては、Connect Server ページを参照してください。