ノーコードでクラウド上のデータとの連携を実現。
詳細はこちら →ADP Driver の30日間無償トライアルをダウンロード
30日間の無償トライアルへこんにちは!ウェブ担当の加藤です。マーケ関連のデータ分析や整備もやっています。
CData JDBC Driver for ADP は、標準ベースのコントロールであり、PowerBuilder を含むJDBC をサポートするプラットフォームまたは開発テクノロジーから使用できます。 また、PowerBuilder でCData JDBC Driver for ADP を使用する方法についても詳しく説明します。
この記事では、CData JDBC Driver for ADP を使用して読み取りと書きこみを実行する基本的なPowerBuilder アプリケーションを作成する方法を説明します。
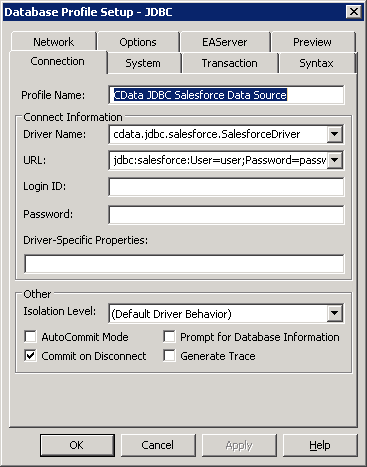
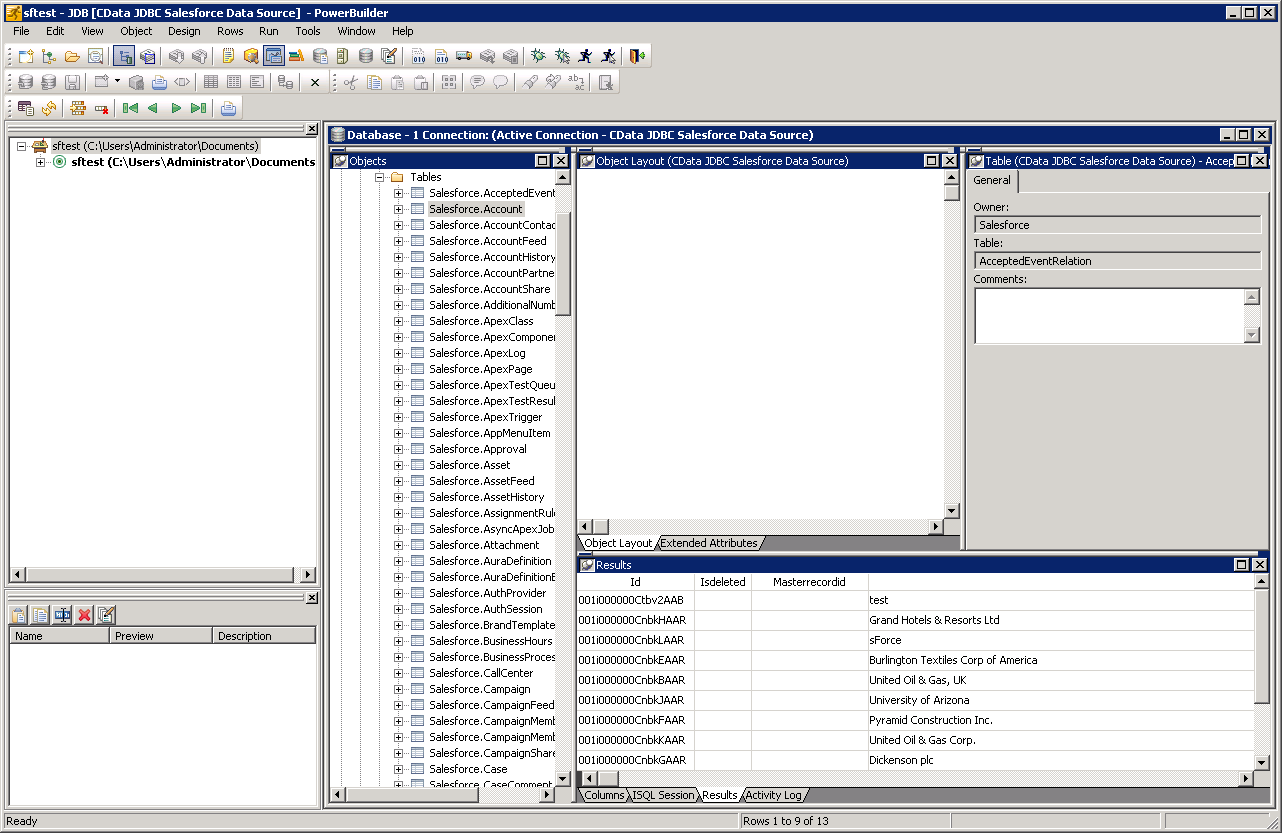
以下のステップに従ってDatabase Painter ツールを使用し、JDBC URL for ADP に基づいてデータベースプロファイルを作成します。データベースプロファイルを使用して、接続プロパティを保存できます。Ⅾatabase Painter では、データをグラフィカルに操作したり、SQL クエリを実行したりできます。
ドライバーJAR をPowerBuilder クラスパスに追加します。CLASSPATH システム環境変数を、インストールディレクトリのlib サブフォルダにあるドライバーJAR へのパスに設定します。
NotePowerBuilder Classic を使用している場合は、[Tools]->[System Options]->[Java]をクリックし、ドライバーJAR へのパスを追加することもできます。
接続を確立する前に、ADP に連絡してOAuth アプリとそれに関連するクレデンシャルを提供してもらう必要があります。 これらのクレデンシャルはADP からのみ取得が可能で、直接取得することはできません。
次のプロパティを指定してADP に接続します。
JDBC URL の構成については、ADP JDBC Driver に組み込まれている接続文字列デザイナを使用してください。JAR ファイルのダブルクリック、またはコマンドラインからJAR ファイルを実行します。
java -jar cdata.jdbc.adp.jar
接続プロパティを入力し、接続文字列をクリップボードにコピーします。以下は一般的なJDBC URL です。
jdbc:adp:OAuthClientId=YourClientId;OAuthClientSecret=YourClientSecret;SSLClientCert='c:\cert.pfx';SSLClientCertPassword='admin@123'InitiateOAuth=GETANDREFRESH標準のPowerBuilder オブジェクトを使用してJDBC データソースに接続し、クエリを実行できます。以下の例は、ADP をDataWindowに取得する方法を示しています。次のコードをopen メソッドに追加できます。
SQLCA.DBMS = "JDBC"
SQLCA.AutoCommit = False
SQLCA.DBParm = "Driver='cdata.jdbc.adp.ADPDriver',URL='jdbc:adp:OAuthClientId=YourClientId;OAuthClientSecret=YourClientSecret;SSLClientCert='c:\cert.pfx';SSLClientCertPassword='admin@123'InitiateOAuth=GETANDREFRESH";
CONNECT USING SQLCA;
dw_workers.SetTransObject(SQLCA);
dw_workers.Retrieve();