製品をチェック

無償トライアル:

無償トライアルへ

製品の情報と無償トライアルへ:

Azure Data Lake Storage JDBC Driver

Azure Data Lake Storage データに連携するJava アプリケーションを素早く、簡単に開発できる便利なドライバー。

データ連携でお困りですか?

お問い合わせ

Denodo Platform でAzure Data Lake Storage データソースを作成


CData JDBC Driver for ADLS を使ってDenodo Virtual DataPort Administrator でAzure Data Lake Storage データ の仮想データソースを作成します。


桑島義行
テクニカルディレクター

azuredatalake ロゴ画像

JDBC Driver

jdbc ロゴ画像
Denodo ロゴ画像

Denodo Platform は、エンタープライズデータベースのデータを一元管理するデータ仮想化製品です。CData JDBC Driver for ADLS と組み合わせると、Denodo ユーザーはリアルタイムAzure Data Lake Storage データと他のエンタープライズデータソースを連携できるようになります。この記事では、Denodo Virtual DataPort Administrator でAzure Data Lake Storage の仮想データソースを作成する手順を紹介します。

最適化されたデータ処理が組み込まれたCData JDBC Driver は、リアルタイムAzure Data Lake Storage データを扱う上で比類のないパフォーマンスを提供します。Azure Data Lake Storage にSQL クエリを発行すると、ドライバーはフィルタや集計などのサポートされているSQL 操作をAzure Data Lake Storage に直接渡し、サポートされていない操作(主にSQL 関数とJOIN 操作)は組み込みSQL エンジンを利用してクライアント側で処理します。組み込みの動的メタデータクエリを使用すると、ネイティブデータ型を使ってAzure Data Lake Storage データを操作および分析できます。

Azure Data Lake Storage Virtual Port を作成

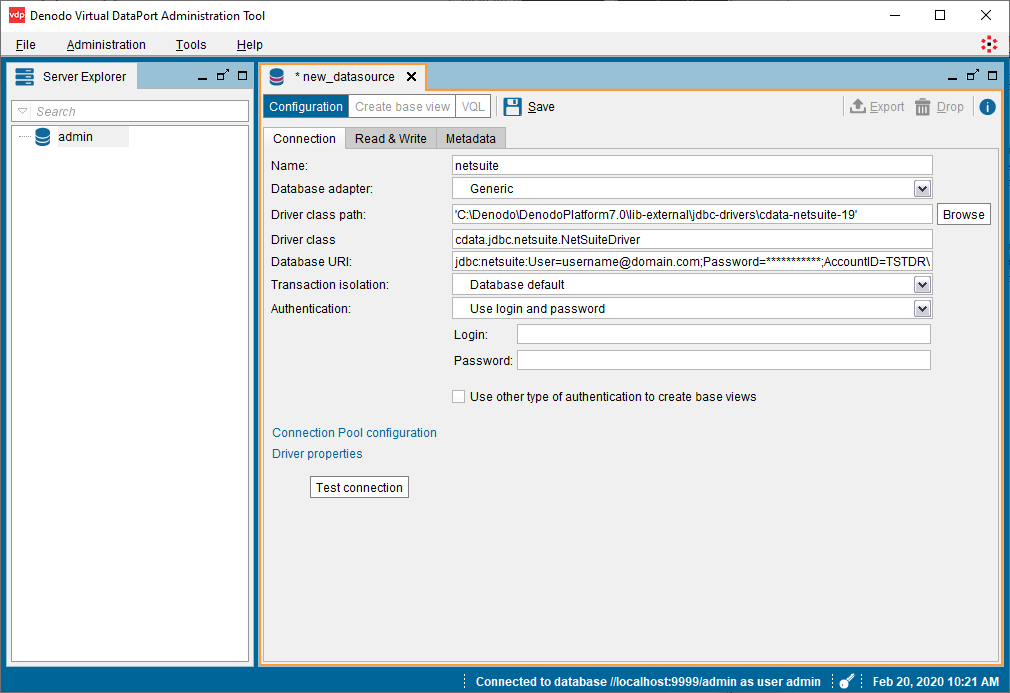
Denodo からリアルタイムAzure Data Lake Storage データに接続するには、JDBC Driver のJAR ファイルをDenodo の外部ライブラリディレクトリにコピーし、Virtual DataPort Administration Tool から新しいJDBC データソースを作成する必要があります。

  1. CData JDBC Driver for ADLS インストーラーをダウンロードしてパッケージを展開し、JAR ファイルを実行してドライバーをインストールします。
  2. JAR ファイル(およびライセンスファイルがある場合はそれも)をインストール先(通常はC:\Program Files\CData\CData JDBC Driver for ADLS\lib\)からDenodo 外部ライブラリディレクトリ(C:\Denodo\Denodo Platform\lib-external\jdbc-drivers\cdata-adls-19)にコピーします。
  3. Denodo Virtual DataPort Administration Tool を開き、Server Explorer タブに移動します。
  4. 「admin」を右クリックし、「New」->「Data source」->「JDBC」を選択します。 新しいJDBC データソースを作成
  5. JCBC Connection を設定します。
    • Name:任意の名前(例:adls)
    • Database adapter:Generic
    • Driver class path:C:\Denodo\Denodo Platform\lib-external\jdbc-drivers\cdata-adls-19
    • Driver class:cdata.jdbc.adls.ADLSDriver
    • Database URI:必要な接続プロパティを使用してJDBC のURL に設定。例えば次のようになります。

      jdbc:adls:Schema=ADLSGen2;Account=myAccount;FileSystem=myFileSystem;AccessKey=myAccessKey;InitiateOAuth=GETANDREFRESH

      JDBC コネクションを設定(NetSuite の場合)

      Database URI の作成については以下を参照してください。

      組み込みの接続文字列デザイナー

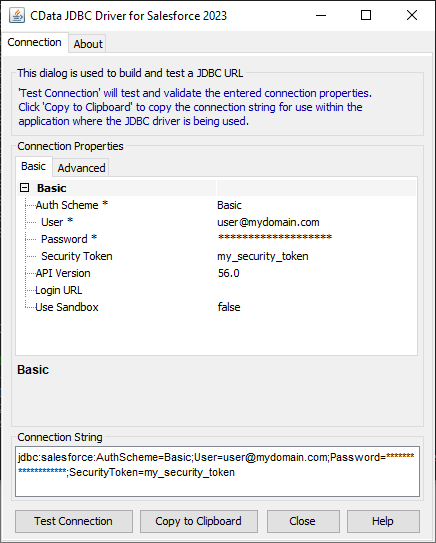
      JDBC URL の作成の補助として、Azure Data Lake Storage JDBC Driver に組み込まれている接続文字列デザイナーが使用できます。JAR ファイルをダブルクリックするか、コマンドラインからjar ファイルを実行します。

      java -jar cdata.jdbc.adls.jar

      接続プロパティを入力し、接続文字列をクリップボードにコピーします。

      Authenticating to a Gen 1 DataLakeStore Account

      Gen 1 uses OAuth 2.0 in Azure AD for authentication.

      For this, an Active Directory web application is required. You can create one as follows:

      1. Sign in to your Azure Account through the .
      2. Select "Azure Active Directory".
      3. Select "App registrations".
      4. Select "New application registration".
      5. Provide a name and URL for the application. Select Web app for the type of application you want to create.
      6. Select "Required permissions" and change the required permissions for this app. At a minimum, "Azure Data Lake" and "Windows Azure Service Management API" are required.
      7. Select "Key" and generate a new key. Add a description, a duration, and take note of the generated key. You won't be able to see it again.

      To authenticate against a Gen 1 DataLakeStore account, the following properties are required:

      • Schema: Set this to ADLSGen1.
      • Account: Set this to the name of the account.
      • OAuthClientId: Set this to the application Id of the app you created.
      • OAuthClientSecret: Set this to the key generated for the app you created.
      • TenantId: Set this to the tenant Id. See the property for more information on how to acquire this.
      • Directory: Set this to the path which will be used to store the replicated file. If not specified, the root directory will be used.

      Authenticating to a Gen 2 DataLakeStore Account

      To authenticate against a Gen 2 DataLakeStore account, the following properties are required:

      • Schema: Set this to ADLSGen2.
      • Account: Set this to the name of the account.
      • FileSystem: Set this to the file system which will be used for this account.
      • AccessKey: Set this to the access key which will be used to authenticate the calls to the API. See the property for more information on how to acquire this.
      • Directory: Set this to the path which will be used to store the replicated file. If not specified, the root directory will be used.
      組み込みの接続文字列デザイナーを使ってJDBC URL を生成(Salesforce の場合)
  6. 「接続テスト」をクリックして設定を確認し、「保存」をクリックします。

Virtual DataPort Administration Tool でAzure Data Lake Storage データを表示

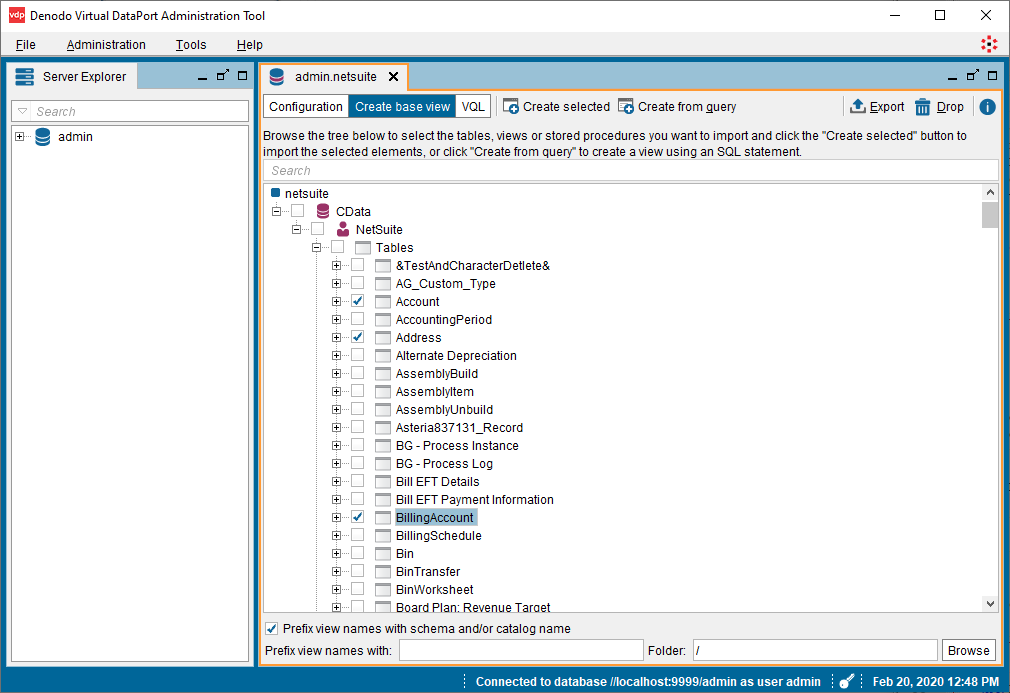
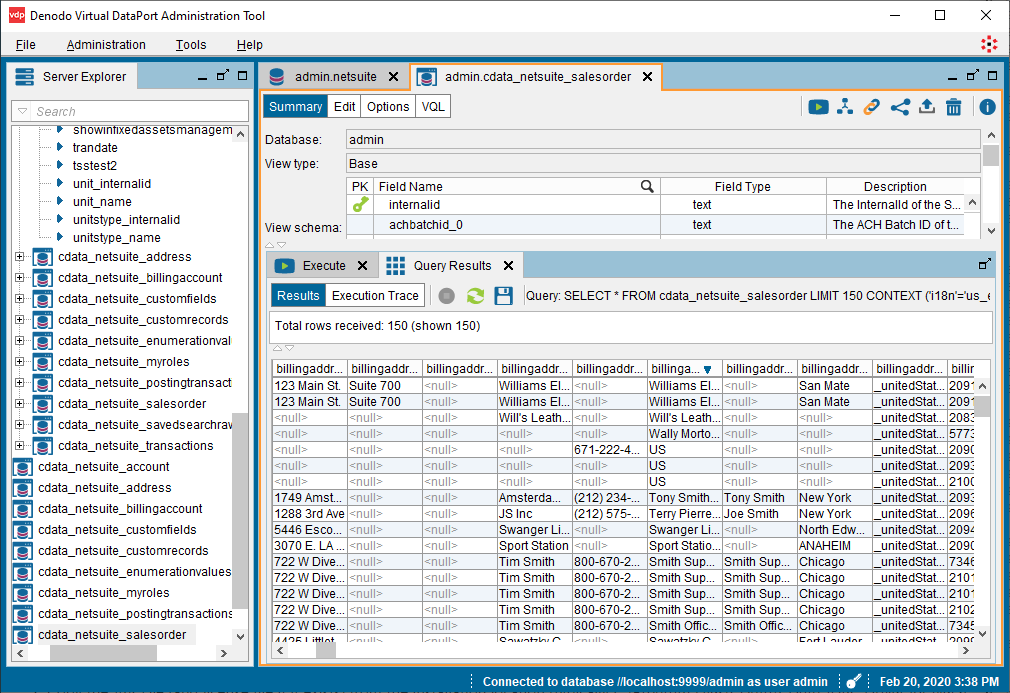
データソースを作成したら、Denodo Platform で使用するAzure Data Lake Storage データの基本ビューを作成できます。

  1. 新しく作成したVirtualPort(admin.ADLS)で「Create base view」をクリックします。
  2. オブジェクトツリーを展開し、インポートしたいオブジェクト(テーブル)を選択します。 インポートするオブジェクトの選択(NetSuite の場合)
  3. 「Create selected」をクリックしてAzure Data Lake Storage データのビューを作成します。
    オプション:「Create associations from foreign keys」をクリックして、オブジェクト間の関係を定義します。
  4. ビューを作成した状態で、Server Explorer のテーブル(cdata_adls_resources)に移動し、選択したテーブルをダブルクリックします。
  5. 新しいタブで「Execution panel」をクリックしてクエリパネルを開きます。
  6. 「Execute」タブでクエリをカスタマイズするか、デフォルトを使用します。
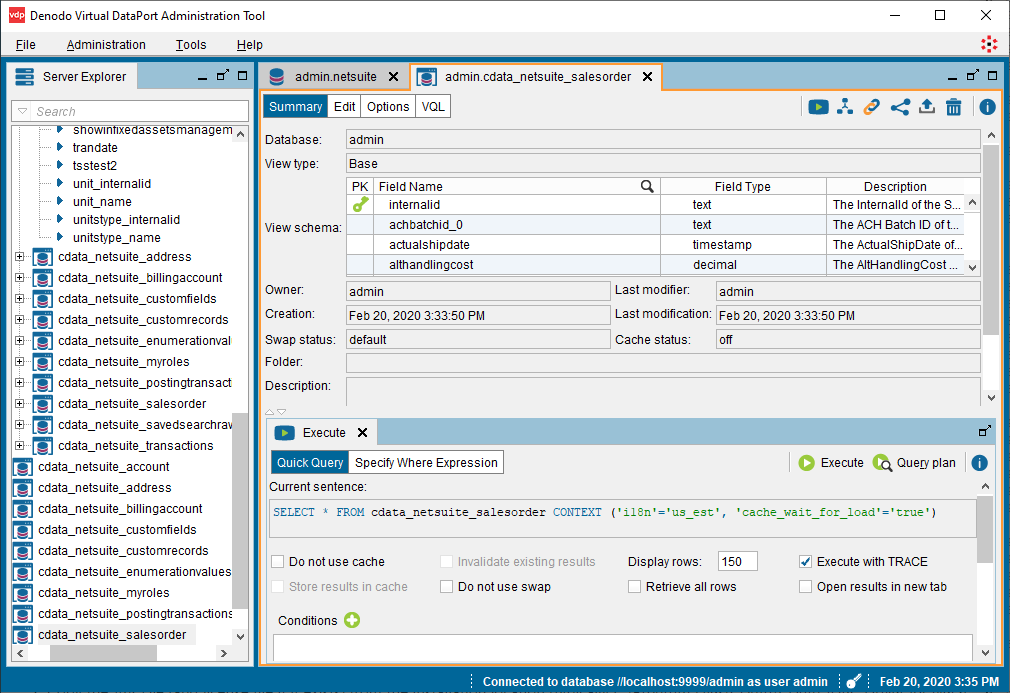
    SELECT * FROM cdata_adls_resources CONTEXT ('i18n'='us_est', 'cache_wait_for_load'='true')
    
    データを表示するクエリを設定
  7. 「Execute」をクリックすると、データが表示されます。 データを表示

基本ビューを作成すると、Denodo Platform の他のデータソースと同様にリアルタイムAzure Data Lake Storage データを操作できるようになります。例えば、Denodo Data Catalog でAzure Data Lake Storage にクエリを実行できます。

CData JDBC Driver for ADLS の30日の無償評価版をダウンロードして、Denodo Platform でリアルタイムAzure Data Lake Storage データの操作をはじめましょう!ご不明な点があれば、サポートチームにお問い合わせください。