ノーコードでクラウド上のデータとの連携を実現。
詳細はこちら →Azure Data Lake Storage Driver の30日間無償トライアルをダウンロード
30日間の無償トライアルへ製品の詳細
Azure Data Lake Storage データに連携するJava アプリケーションを素早く、簡単に開発できる便利なドライバー。
CData


こんにちは!ウェブ担当の加藤です。マーケ関連のデータ分析や整備もやっています。
本記事では、KNIME からAzure Data Lake Storage データにアクセスし、レポートデザイナを使用してAzure Data Lake Storage からチャートを作成する方法を解説します。
CData ODBC ドライバは、以下の特徴を持つリアルタイムデータ接続ソリューションです。
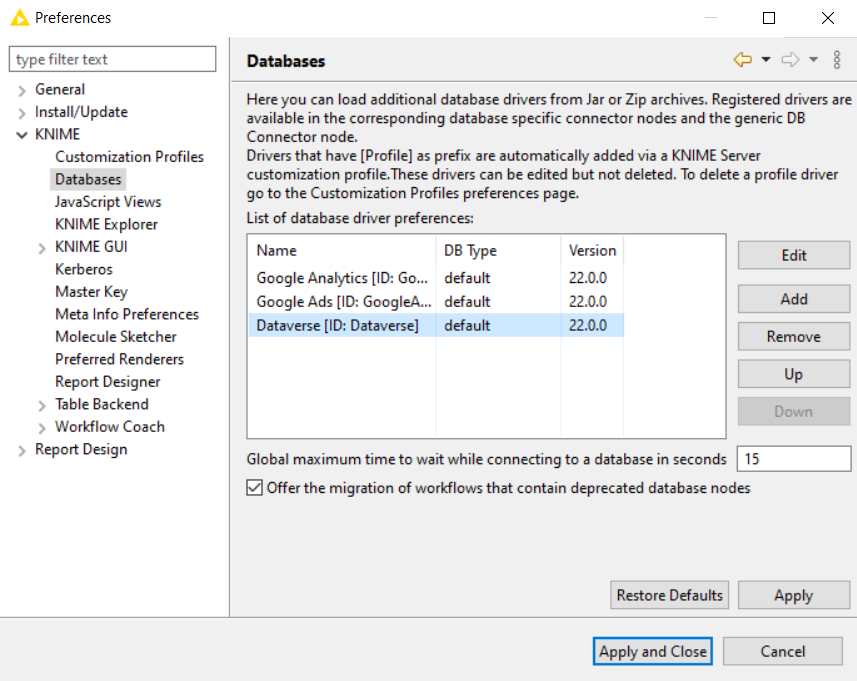
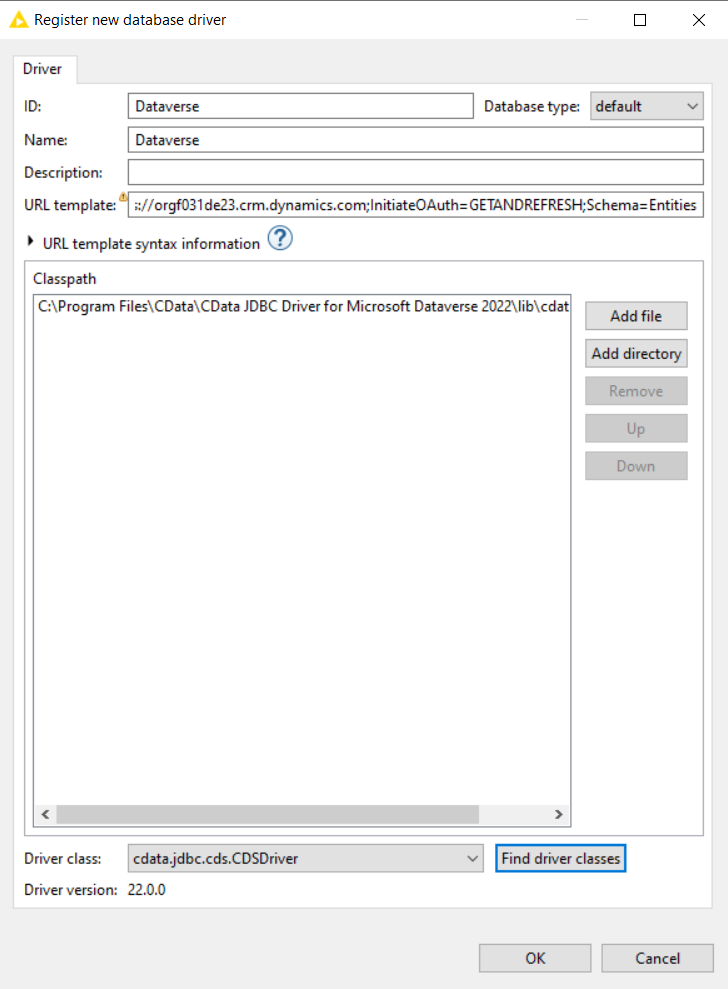
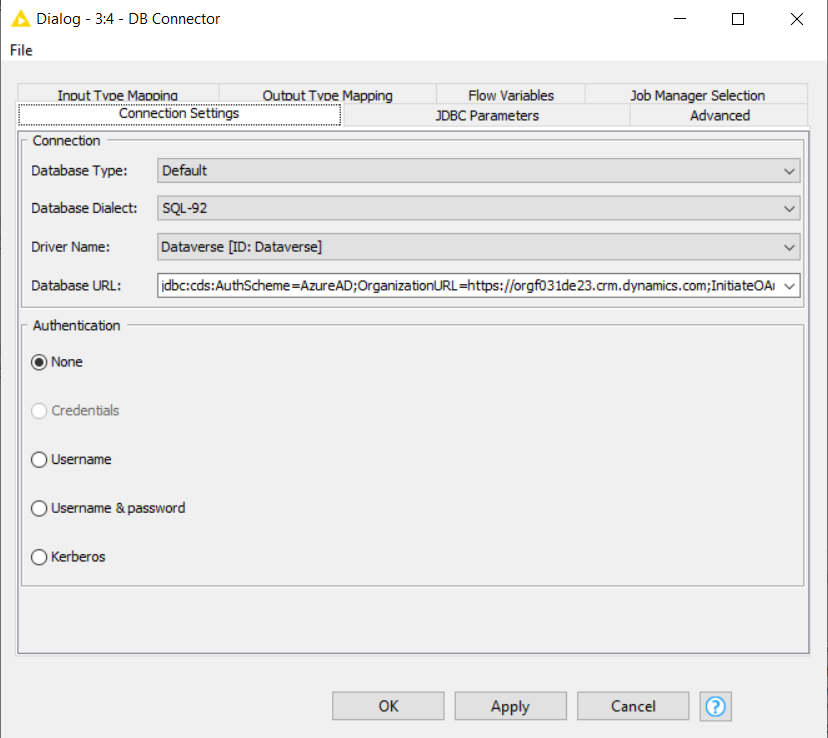
CData JDBC ドライバでは、1.データソースとしてAzure Data Lake Storage の接続を設定、2.KNIME 側でJDBC Driver との接続を設定、という2つのステップだけでデータソースに接続できます。以下に具体的な設定手順を説明します。
まずは、本記事右側のサイドバーからADLS JDBC Driver の無償トライアルをダウンロード・インストールしてください。30日間無償で、製品版の全機能が使用できます。
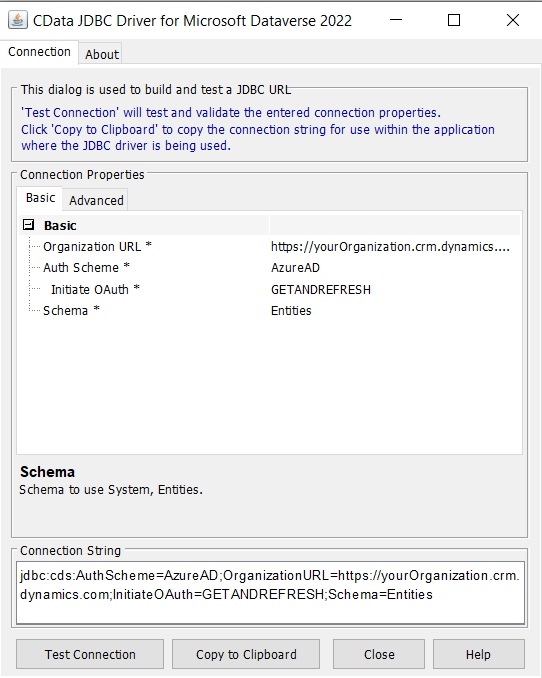
jdbc:adls:Schema=ADLSGen2;Account=myAccount;FileSystem=myFileSystem;AccessKey=myAccessKey;InitiateOAuth=GETANDREFRESH
JDBC URL の構成については、Azure Data Lake Storage JDBC Driver に組み込まれている接続文字列デザイナを使用してください。JAR ファイルをダブルクリックするか、またはコマンドラインからjar ファイルを実行します。
java -jar cdata.jdbc.adls.jar
接続プロパティについて、詳しくはドキュメントを参照してください。
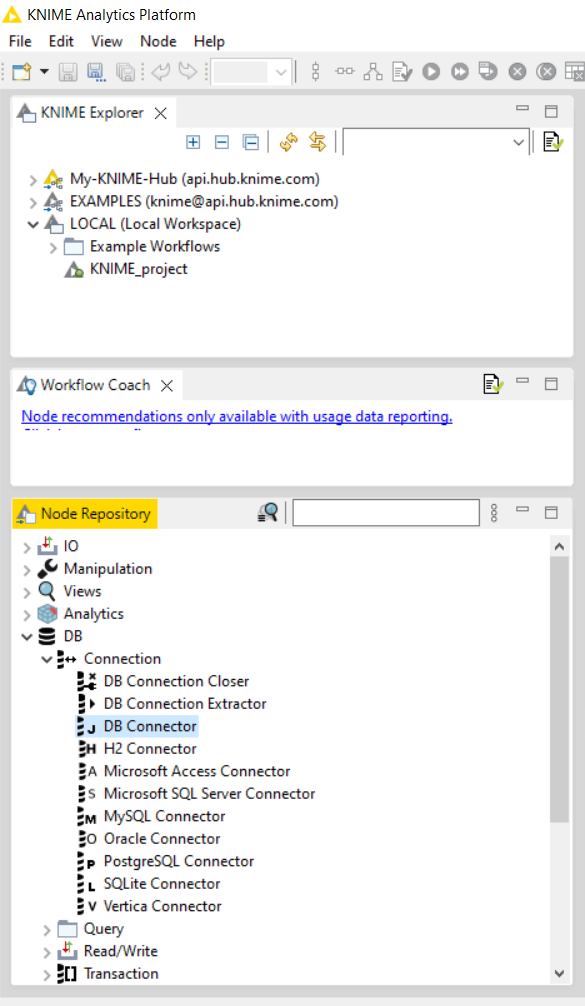
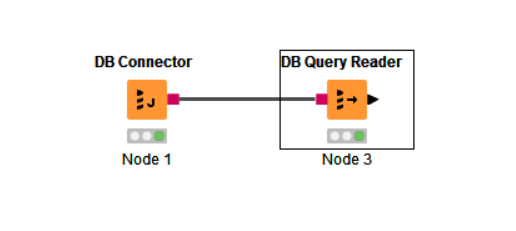
これで、Node Repository のRead/Write セクションからDB Query Reader を取得し、クエリを実行できるようになります。
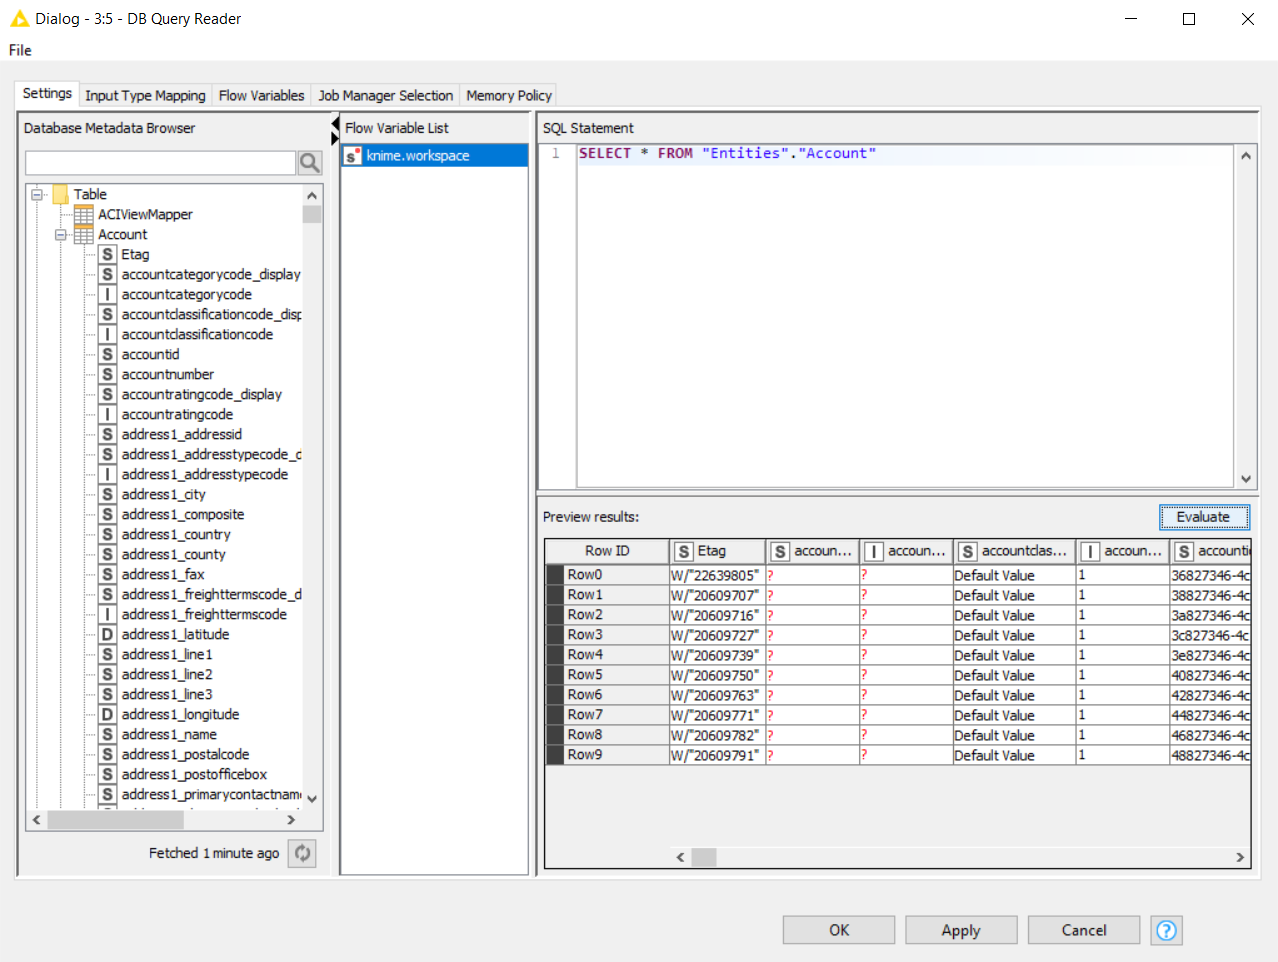
DB Query Reader をダブルクリックし、更新ボタンをクリックしてメタデータを読み込みます。SQL を記述して、Evaluate をクリックします。Evaluate をクリックすると、リクエストされたレコードが表示されます。ドライバーに記載されているテーブル / ビューの詳細については、データモデルを参照してください。
本記事で紹介したようにCData JDBC ドライバと併用することで、270を超えるSaaS、NoSQL、DB のデータをコーディングなしで扱うことができます。30日の無償評価版が利用できますので、ぜひ自社で使っているクラウドサービスやNoSQL と合わせて活用してみてください。
CData JDBC ドライバは日本のユーザー向けに、UI の日本語化、ドキュメントの日本語化、日本語でのテクニカルサポートを提供しています。製品の使用方法、購入方法などについてご質問がありました、お気軽にお問い合わせください。