ノーコードでクラウド上のデータとの連携を実現。
詳細はこちら →
CData


こんにちは!ウェブ担当の加藤です。マーケ関連のデータ分析や整備もやっています。
CData JDBC Driver for JiraServiceDesk はダッシュボードや帳票ツールからリアルタイムJira Service Desk データへの連携を可能にします。この記事では、Jira Service Desk をJDBC データソースとして接続する方法と、Pentaho でJira Service Desk を元に帳票を作成する方法を説明します。
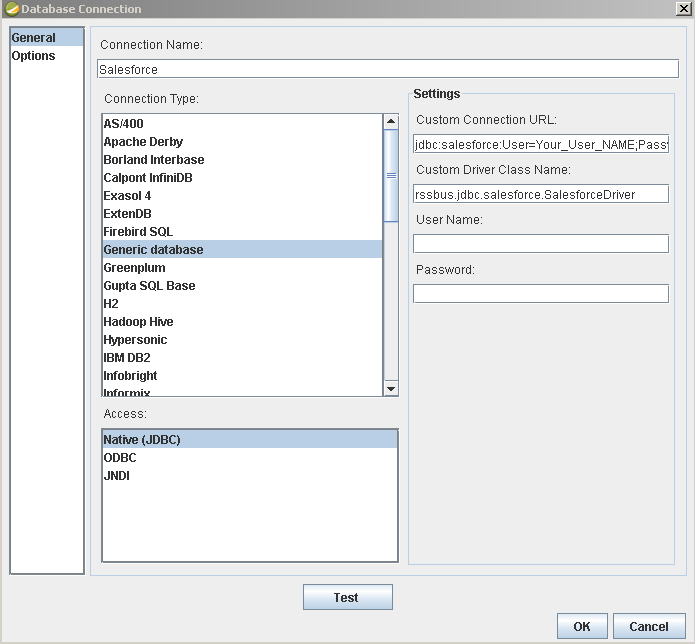
以下の手順でドライバーを新しいデータソースに設定します。[Data]>[Add Data Source]>[Advanced]>[JDBC (Custom)]とクリックし、新しいJira Service Desk 接続を作成します。ダイアログが表示されたら、次のように接続プロパティを設定します。
Custom Connection URL property:JDBC URL を入力。初めに以下を入力し jdbc:jiraservicedesk: 次にセミコロン区切りで接続プロパティを入力します。
任意のJira Service Management Cloud またはJira Service Management Server インスタンスへの接続を確立できます。接続するにはURL プロパティを設定します。
デフォルトでは、CData 製品はシステムフィールドのみを表示します。Issues のカスタムフィールドにアクセスするには、IncludeCustomFields を設定します。
ローカルサーバーアカウントで認証するためには、次の接続プロパティを指定します。
Cloud アカウントに接続するには、APIToken を取得する必要があります。API トークンを生成するには、Atlassian アカウントにログインして「API トークン」 -> 「API トークンの作成」をクリックします。生成されたトークンが表示されます。
データに接続するには以下を設定します。
ちなみに、Cloud アカウントへの接続でパスワード認証を使うことも可能ですが、非推奨となっています。
この場合、AuthSchemeをすべてのOAuth フローでOAuth に設定する必要があります。また、すべてのシナリオでカスタムOAuth アプリケーションを作成して構成する必要があります。詳しくは、ヘルプドキュメントの「OAuth」セクションを参照してください。
以下は一般的なJDBC URL です:
jdbc:jiraservicedesk:ApiKey=myApiKey;User=MyUser;
これで、Jira Service Desk の帳票を作成する準備が整いました。
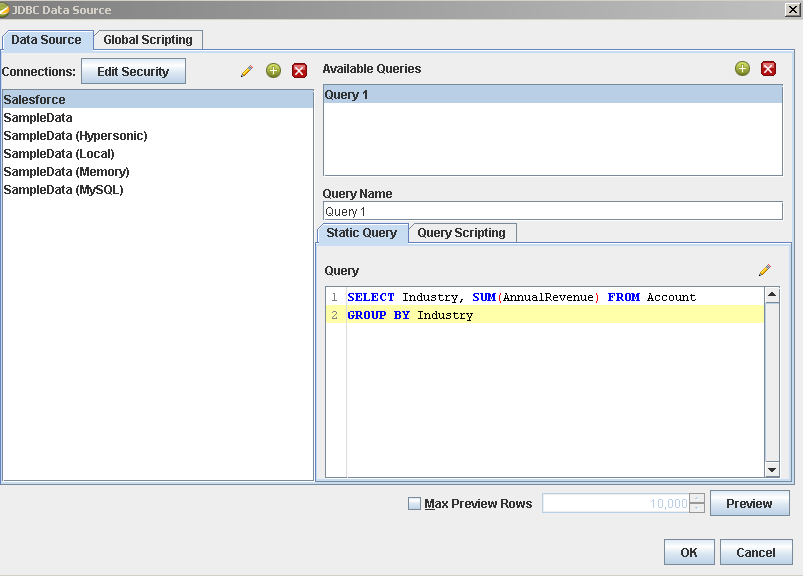
帳票にJira Service Desk データソースを追加します:[Data]>[Add Data Source]>[JDBC]をクリックし、データソースを選択します。
クエリを設定します。この記事では次を使います:
SELECT RequestId, ReporterName FROM Requests WHERE CurrentStatus = 'Open'


