Discover how a bimodal integration strategy can address the major data management challenges facing your organization today.
Get the Report →Create Dynamics NAV Data Visualizations in Power BI
The CData ODBC Driver for Dynamics NAV provides a streamlined, secure way to visualize your Dynamics NAV data in Power BI. The CData ODBC Driver for Dynamics NAV links your dashboards and reports to the live Dynamics NAV data. By scheduling refreshes and refreshing on demand, you can create dashboards that reflect changes to your data in real time. This article details how to use the ODBC driver to create dashboards featuring Dynamics NAV data in the Microsoft Power BI Designer.
Create Data Visualizations
Follow the steps below to connect to Dynamics NAV data, create a visualization, and interact with it in the Editing View.
If you have not already done so, specify connection properties defined in the data source name (DSN).
Below is a typical connection string:
http://myserver:7048;User=myserver\Administrator;Password=admin;ServerInstance=DYNAMICSNAV71;
You can configure the DSN in the built-in Microsoft ODBC Data Source Administrator. This is the last step of the driver installation. See the "Getting Started" chapter in the help documentation for a guide to use the Microsoft ODBC Data Source Administrator to create and configure a DSN.
![Connection properties stored in the ODBC Data Source Administrator.]()
- Open the Power BI Designer and click Get Data. To start the Power BI Designer from PowerBI.com, click the download button and then click Power BI Designer.
- If you want to use SQL to import the data, click ODBC Query. If you want to import one or more tables visually, using the Navigator dialog, click ODBC Tables.
Enter the ODBC connection string. Below is a connection string using the default DSN created when you install the driver:
Provider=;Persist Security Info=False;DSN=CData DynamicsNAV Source
-
Enter the SELECT statement to retrieve the data you want to see in the report. The standard SQL is supported. The following query imports the Customer table:
SELECT * FROM Customer
![The DSN to your data source and the SELECT statement to use to import the data.]()
-
The data is displayed on the Query tab. Start creating the report on the Report tab. To create a visualization, drag a field from the Fields list onto the Report view. For example, to create a bar chart, simply click Name from the Customer table. The Power BI Designer selects the Balance_LCY column as the measure.
You can change the visualization by clicking one of the visualizations on the Home tab:
![A bar chart showing Customer Names and Balance (LCY).]()
You can change sort options by right-clicking the chart. Options to select the sort column and change the sort order are displayed.
You can apply view filters to all the visualizations in a page. When you are editing the report, you can apply view filters from the Fields and Filters pane. Let's filter the customer balances by Country: Click the Country_Region_Code field and drag it to Filters. On the Filters pane, select a country code, for example, US.
![Customers filtered by country values.]()
You can use both highlighting and filtering to focus on data. Filtering removes unfocused data from visualizations; highlighting dims unfocused data. You can highlight fields by clicking them:
![A highlighted customer in a pie chart.]()
Click Refresh to synchronize your report with any changes to the data.
Upload Dynamics NAV Reports to Power BI
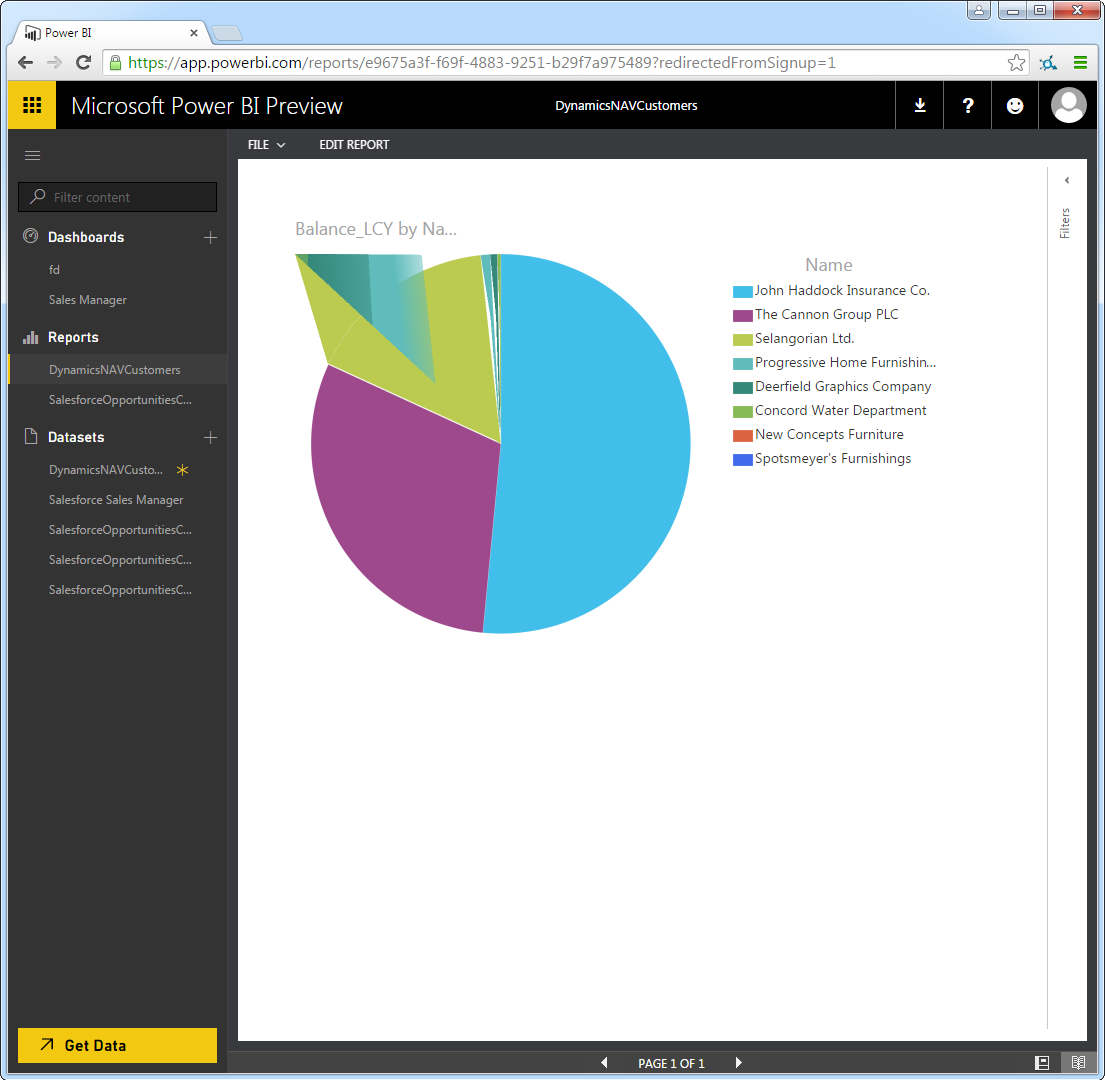
You can share reports based on ODBC data sources with other PowerBI users in your organization. To upload a dashboard or report, log into PowerBI.com, click Get Data -> Files, and navigate to a Power BI Designer file or Excel workbook. You can then view and edit the report in the Reports section.
Refresh on Schedule and on Demand
You can use the Power BI Personal Gateway to automatically refresh the dataset associated with your report. You can also refresh the dataset on demand. After installing the Personal Gateway, follow the steps to configure the Personal Gateway for an ODBC DSN:
- If you have not already done so, log into Power BI.
- In the Dataset section, right-click the Dynamics NAV Dataset.
- Click Schedule Refresh.
- In the Settings section for your dataset, expand the Manage Data Sources node. In the ODBC section, click Edit.
- In the Authentication Method menu, select Anonymous, as your Dynamics NAV account credentials are already saved in the DSN.
After configuring the Personal Gateway, you can refresh on demand and schedule refreshes.
To schedule refreshes, expand the Schedule Refresh node and select Yes for the Keep Your Data Up-To-Date option. After specifying the refresh interval, click Apply.
To refresh on demand, right-click the Dynamics NAV dataset in the Datasets section and click Refresh Now.


