Discover how a bimodal integration strategy can address the major data management challenges facing your organization today.
Get the Report →Provide OData Services of Certinia Data from a WCF Application
In this article, we will demonstrate the process of generating an OData feed for Certinia data by developing a WCF Service Application.
The CData ADO.NET Provider for Certinia enables you to rapidly develop service-oriented applications using the Windows Communication Foundation (WCF) framework, providing Certinia data data to OData consumers. This article guides you through creating an entity data model for connectivity and a WCF Data Service to expose OData services. You can then consume the feed with various OData clients, such as Power Pivot or applications using the CData ADO.NET Provider for OData.
Create the OData Service
Follow the steps below to create a WCF service application that will provide connectivity to Certinia data via OData.
- Open Visual Studio and create a new project. Select the WCF Service Application template.
- Delete the autogenerated IService.cs and Service1.svc.
- Install Entity Framework 6:
Use the Package Manager Console in Visual Studio to install the latest version of Entity Framework. Run the following command to download and install Entity Framework automatically:
Install-Package EntityFramework - Register the Entity Framework provider:
- Add the following provider entry in the "providers" section of your App.config or Web.config file. This section should already exist if the Entity Framework installation was successful.
<configuration> ... <entityFramework> <providers> ... <provider invariantName="System.Data.CData.Certinia" type="System.Data.CData.Certinia.CertiniaProviderServices, System.Data.CData.Certinia.Entities.EF6" /> </providers> </entityFramework> </configuration> - Add a reference to System.Data.CData.Certinia.Entities.dll, located in lib/4.0 in the installation directory.
- Build the project to complete the setup for using EF6.
- Add the following provider entry in the "providers" section of your App.config or Web.config file. This section should already exist if the Entity Framework installation was successful.
- Click Project -> Add New Item -> ADO.NET Entity Data Model.
- In the Entity Data Model wizard that is displayed, select the 'EF Designer from Database' option.
- In the resulting Choose Your Connection dialog, click New Connection.
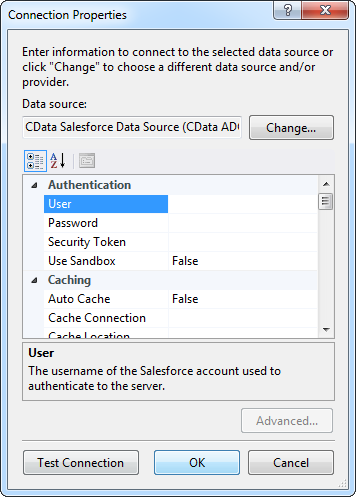
In the Connection properties dialog, select the CData Certinia Data Source and enter the necessary credentials.
A typical connection string is below:
User=myUser;Password=myPassword;Security Token=myToken;InitiateOAuth=GETANDREFRESHThere are several authentication methods available for connecting to Certinia: login credentials, SSO, and OAuth.
Authenticating with a Login and Token
Set the User and Password to your login credentials. Additionally, set the SecurityToken. By default, the SecurityToken is required, but you can make it optional by allowing a range of trusted IP addresses.
To disable the security token:
- Log in to Certinia and enter "Network Access" in the Quick Find box in the setup section.
- Add your IP address to the list of trusted IP addresses.
To obtain the security token:
- Open the personal information page on certinia.com.
- Click the link to reset your security token. The token will be emailed to you.
- Specify the security token in the SecurityToken connection property or append it to the Password.
Authenticating with OAuth
If you do not have access to the user name and password or do not want to require them, use the OAuth user consent flow. See the OAuth section in the Help for an authentication guide.
Connecting to Certinia Sandbox Accounts
Set UseSandbox to true (false by default) to use a Certinia sandbox account. Ensure that you specify a sandbox user name in User.
![Required connection properties, specified in the Add Connection dialog. (Salesforce is shown.)]()
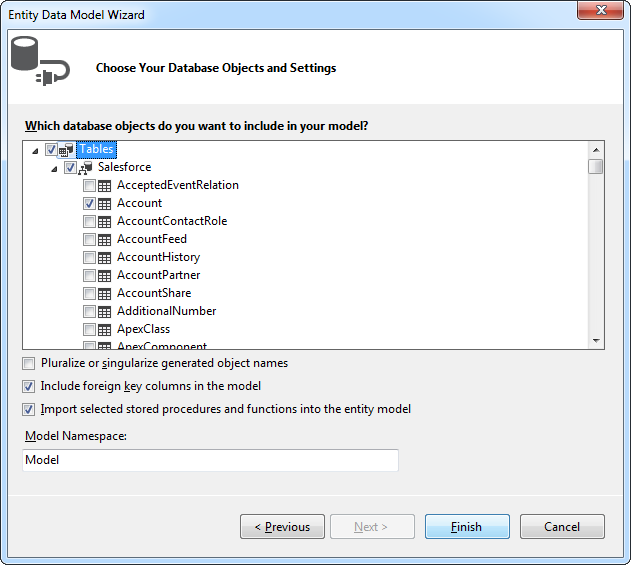
- Select Certinia tables and views that you want OData clients to access.
![Available tables in the Entity Data Model Wizard. (Salesforce is shown.)]()
- Click Project -> Add New Item -> WCF Data Service.
Specify the data source class and configure access to the new WCF Data Service. In the example below, the Access Rule for the entities is set to All. This means that any user will be able to read and modify data.
using System; using System.Collections.Generic; using System.Data.Services; using System.Data.Services.Common; using System.Linq; using System.ServiceModel.Web; using System.Web; namespace CertiniaService{ public class CertiniaDataService : DataService<CertiniaEntities> { public static void InitializeService(DataServiceConfiguration config) { config.SetEntitySetAccessRule("*", EntitySetRights.All); config.DataServiceBehavior.MaxProtocolVersion = DataServiceProtocolVersion.V3; } } }-
Run the project. Applications that support OData can now access the Salesforce data and reflect any changes. You can access the feed in your browser. The feed will resemble the following:
![The raw OData feed. (Salesforce is shown.)]()
Consume the OData Service from Power Pivot
You can now use the service from any OData client; for example, Excel Power Pivot.
- Open Excel and click on the Power Pivot Window button.
- A new pop-up will appear. Select the option From Data Feeds.
- In the resulting Table Import Wizard, enter the OData URL. For example, http://localhost:12449/CertiniaDataService.svc/.
![The OData URL for Certinia.]()
- After connecting to the OData service, click the Next button at the bottom of the window.
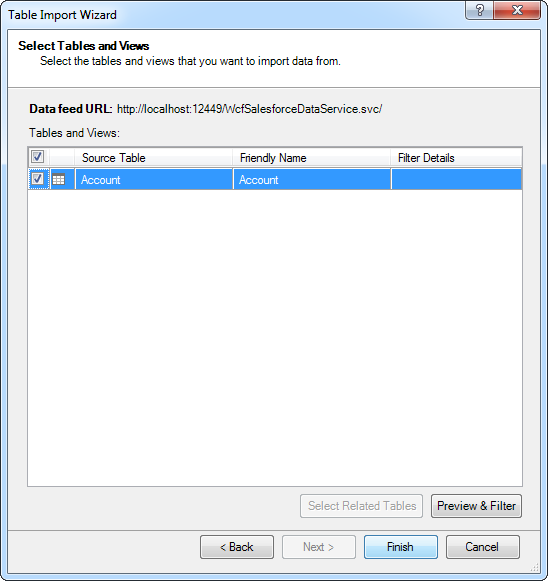
- A table listing of the available tables will appear in the next window of the wizard. Select which tables you want to import and click Finish.
![Available tables in the Table Import Wizard. (Salesforce is shown.)]()
- Click Close to import the data in Power Pivot.
![The table loaded in Power Pivot. (Salesforce is shown.)]()


