Discover how a bimodal integration strategy can address the major data management challenges facing your organization today.
Get the Report →How to connect to ClickUp Data with Squirrel SQL client
Connect to ClickUp data and execute queries in the Squirrel SQL Client.
The CData JDBC Driver for ClickUp enables you to execute queries to ClickUp data in tools like Squirrel SQL Client. In this article, you will create a JDBC data source for ClickUp data and execute queries.
Add the JDBC Driver for ClickUp
Follow the steps below to add the driver JAR.
- In Squirrel SQL, click Windows -> View Drivers.
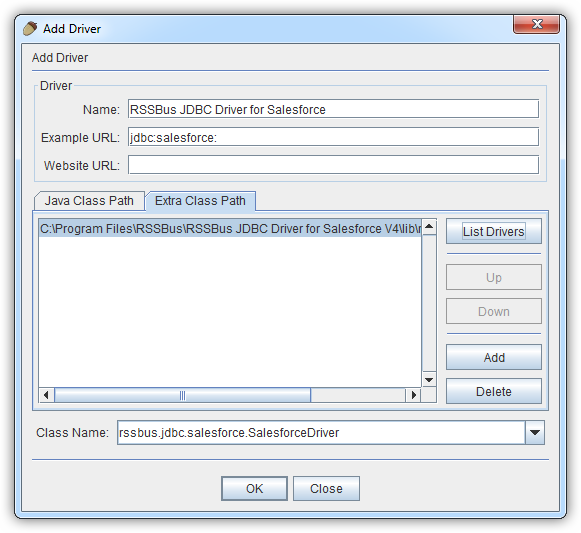
- Click the plus icon to open the Add Driver wizard.
- In the Name box, enter a user-friendly name for the driver; for example, CData JDBC Driver for ClickUp.
- In the Example URL box, enter jdbc:api:
- In the Extra Class Path tab, click Add.
- In the file explorer dialog that opens, select the JAR file for the driver, located in the lib subfolder of the installation directory.
- Click List Drivers to populate the Class Name menu with the class name for the driver, cdata.jdbc.api.APIDriver.

Define Connection Properties
Follow the steps below to save connection properties in the driver alias.
- Click Windows -> View Aliases.
- In the pane that lists the aliases, click the plus icon.
In the Add Alias wizard that opens, the following fields are required for the JDBC driver:
- Name: Enter a name for the alias; for example, CData ClickUp Source.
- Driver: Select the CData JDBC Driver for ClickUp.
- URL: Enter jdbc:api:
![The alias definition, containing the connection parameters. (Salesforce is shown.)]()
- If you want to define any additional properties, click Properties.
- In the Driver properties tab of the dialog that appears, select the Use driver properties checkbox.
- In the Specify column, select the checkboxes for the required connection properties.
Start by setting the Profile connection property to the location of the ClickUp Profile on disk (e.g. C:\profiles\ClickUp.apip). Next, set the ProfileSettings connection property to the connection string for ClickUp (see below).
ClickUp API Profile Settings
In order to authenticate to ClickUp, you'll need to provide your API Key. You can find this token in your user settings, under the Apps section. At the top of the page you have the option to generate a personal token. Set the API Key to your personal token in the ProfileSettings property to connect.
Below is a typical connection string:
jdbc:api:Profile=C:\profiles\ClickUp.apip;ProfileSettings='APIKey=my_personal_token';![Connection properties automatically detected by Squirrel SQL. (Salesforce is shown.)]()
- In the dialog that appears after you click OK, click connect to test the connection.
Discover Schemas and Query ClickUp Data
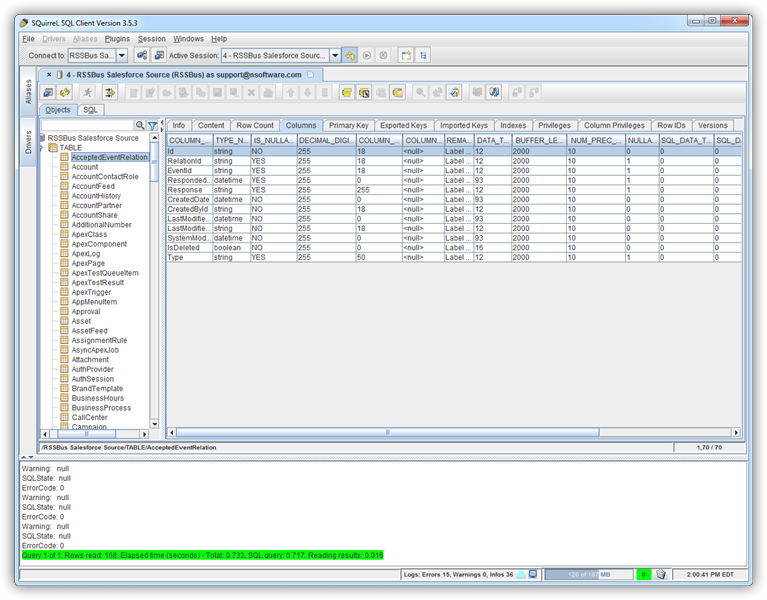
After the metadata has loaded, a new tab for the ClickUp data source is displayed. On the Objects subtab, you can discover schema information, such as the available tables and views.

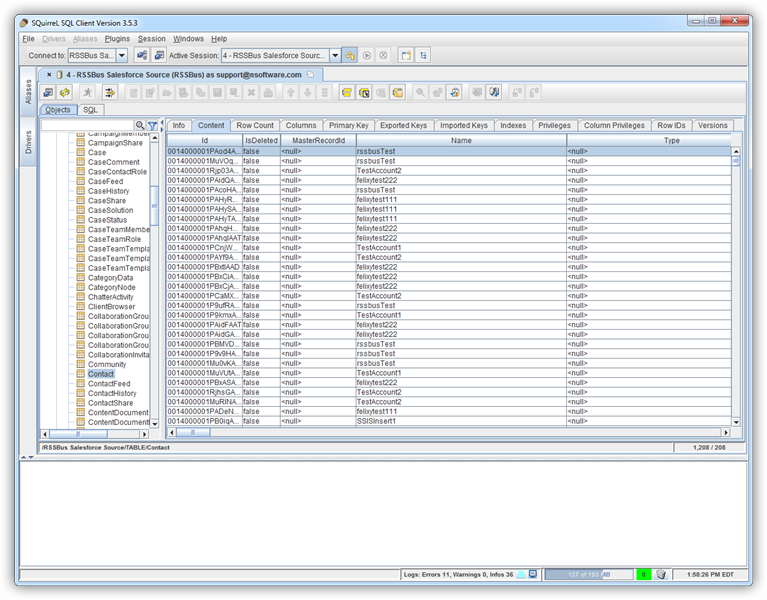
To view table data, select the table on the Objects tab. The table data is then loaded in a grid on the Content tab.

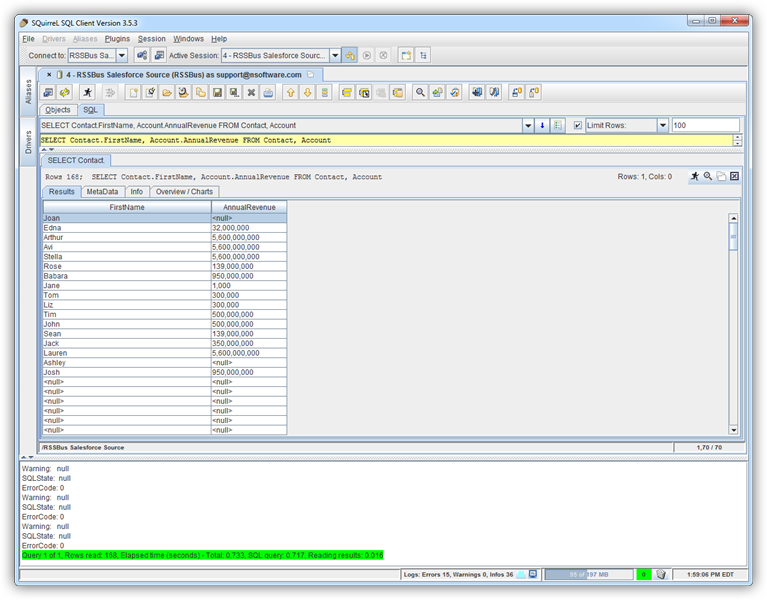
To execute an SQL query, enter the query on the SQL tab and then click Run SQL (the runner icon). For example:
SELECT Id, Name FROM Tasks WHERE Priority = 'High'


