





How to Easily Query JD Edwards Data in OpenOffice Base

Apache OpenOffice Base is a versatile, free database tool that makes connecting and managing data easy. With CData ODBC Driver for JD Edwards, you can seamlessly integrate and query live JD Edwards data, bringing real-time insights directly into OpenOffice.
This guide simplifies the setup, showing you how to connect JD Edwards to OpenOffice Base so you can easily generate reports, analyze trends, and make informed decisions right within your familiar workspace.
Overview
Here is an overview of the steps:
- CONFIGURE: Configure the DSN for JD Edwards data in the CData ODBC Driver for JD Edwards, using the required connection properties.
- CONNECT: Set up the ODBC connection in OpenOffice Base using the configured DSN.
- IMPORT: Once connected, review the available metadata and tables.
- CREATE: Create a report based on the queried JD Edwards data data.
Configure the JD Edwards DSN Using the CData ODBC Driver for JD Edwards
To start, configure the DSN (Data Source Name) for JD Edwards data in your system using the CData ODBC Driver for JD Edwards. Download and install a 30-day free trial with all the features from here.
Once installed, launch the ODBC Data Source Administrator:
- On Windows: Search for ODBC Data Source Administrator in the Start menu and open the application.
- On Mac: Open Applications, go to Utilities, and select ODBC Manager.
- On Linux: Use the command line to launch ODBC Data Source Administrator or use unixODBC if installed.
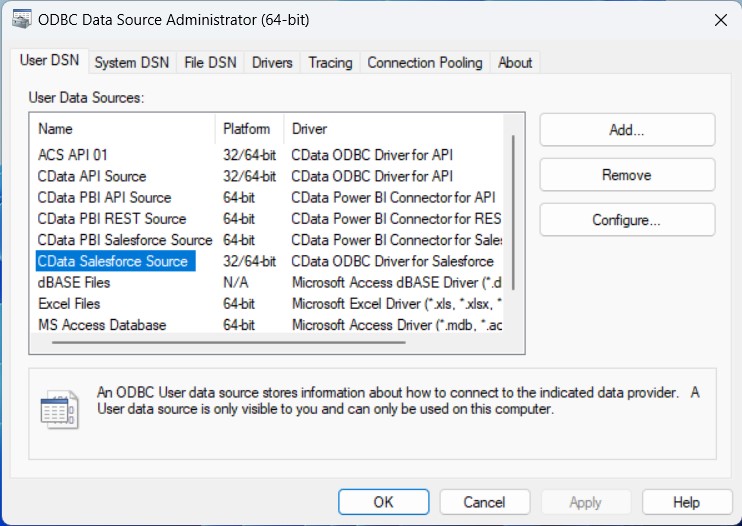
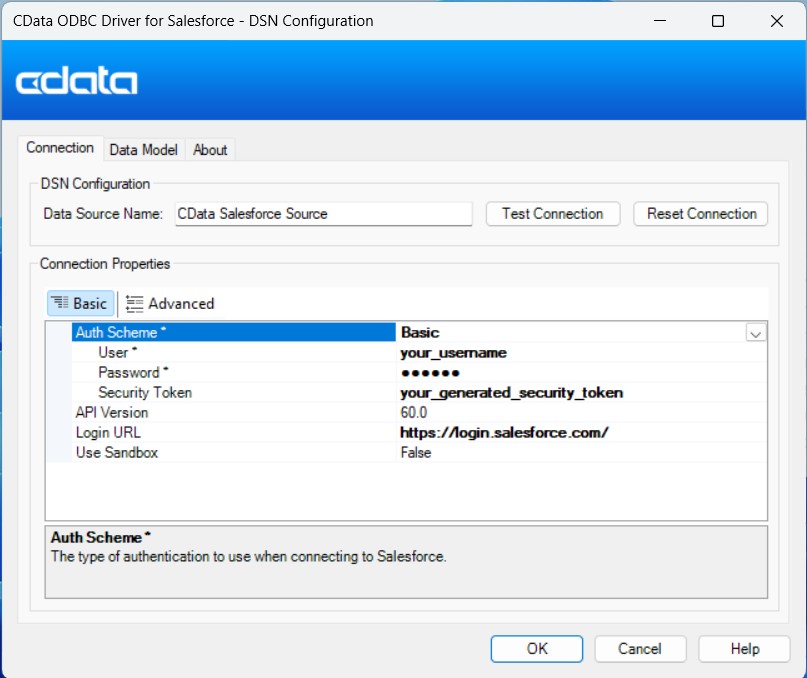
Once launched, double-click on the CData JD Edwards data Source and enter the required values to establish a connection:
The driver connects to JD Edwards through your Application Interface Services (AIS) Server. Set the following connection properties:
- URL: The base HTTPS URL of your AIS Server (e.g., https://jde-ais.example.com:8300).
- User: Your JD Edwards username.
- Password: Your JD Edwards password.
- Environment (optional): The JD Edwards environment to use (e.g., PD920 for production or DV920 for development). If not specified, the AIS Server's default environment is used.
- Role (optional): The JD Edwards role for the session. If not specified, the AIS Server's default role is used.
- DeviceName (optional): An identifier for the connecting device or application, used for auditing and logging on the AIS Server.
- Jasserver (optional): The specific Java Application Server (JAS) instance to route requests through, useful in clustered environments.
Choosing Which Data Is Exposed
JD Edwards organizes tables and business views by System Code, and the driver exposes each System Code as its own schema. Use these properties to control which schemas are available:
- DataModel: One or more ERP modules (comma-separated) whose System Codes are exposed as schemas, or All to expose every System Code in the connected instance. Defaults to FinancialManagement.
- SystemCodes: A comma-separated list of additional System Codes to expose alongside those from DataModel (e.g., 42,43).
When you connect, the driver sends your credentials to the AIS Server to obtain a session token and caches it. The driver requests a new token automatically before the session expires.
Setup an ODBC Connection in OpenOffice Base
Once you've set up the DSN, it's time to connect to it in OpenOffice Base and start querying data:
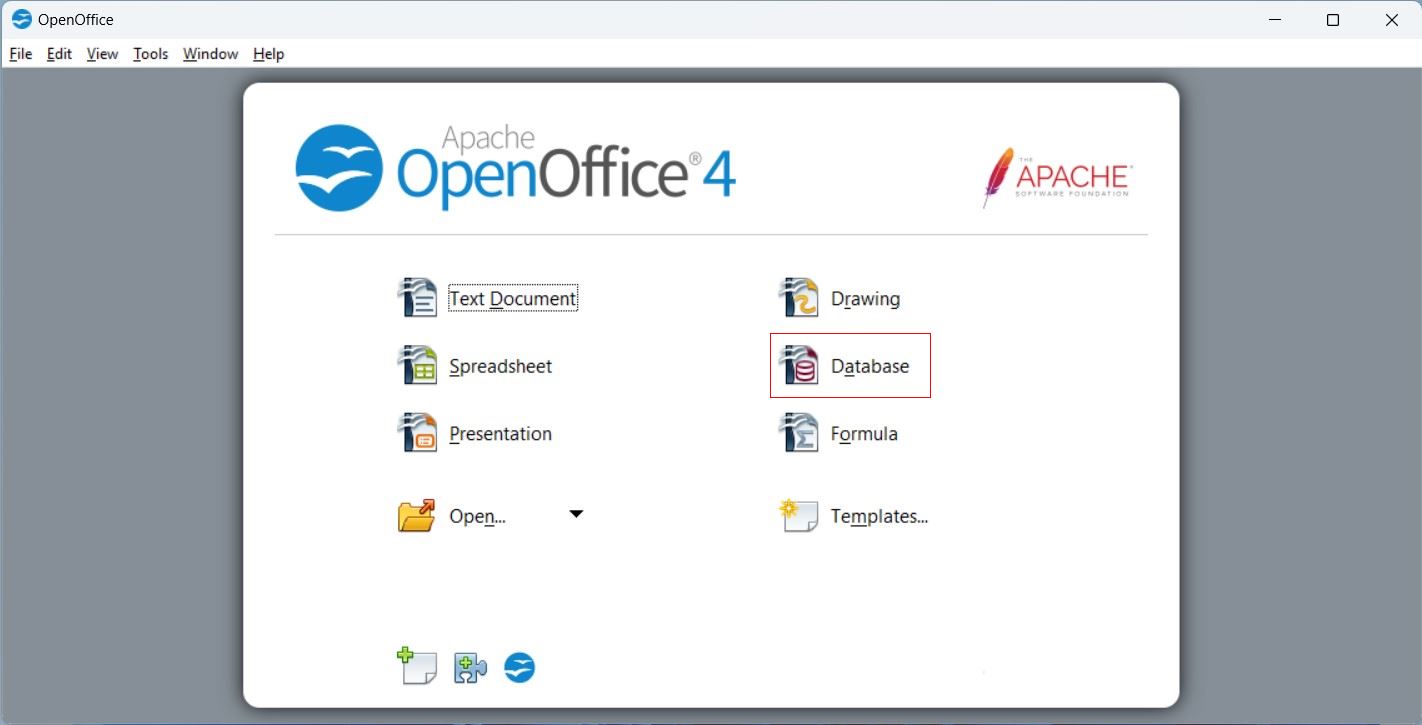
- Launch OpenOffice Base and select Database from the home screen.
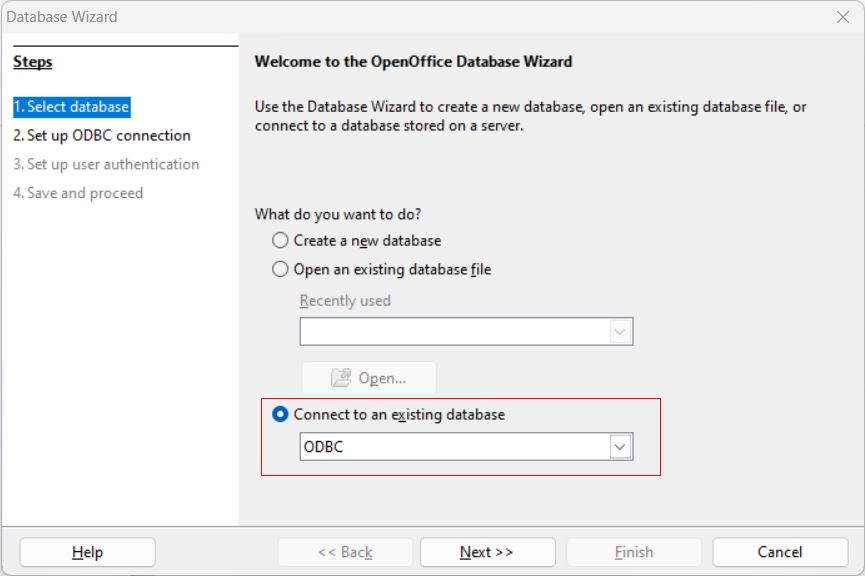
- In the Database Wizard, choose ODBC from the 'Connect to an existing database' option and click Next.
- Click Browse to locate and select the DSN you created, then click OK.
- Enter the username associated with the DSN, click Test Connection to verify, and then click Next.
- Finally, click Finish to save the new database file to your desired directory. This will connect OpenOffice Base to your live JD Edwards data data, ready for querying and analysis.
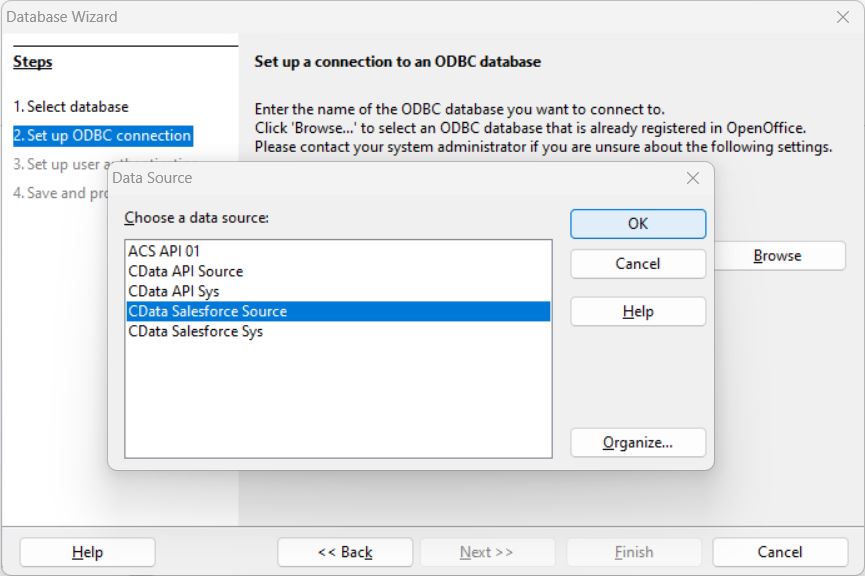
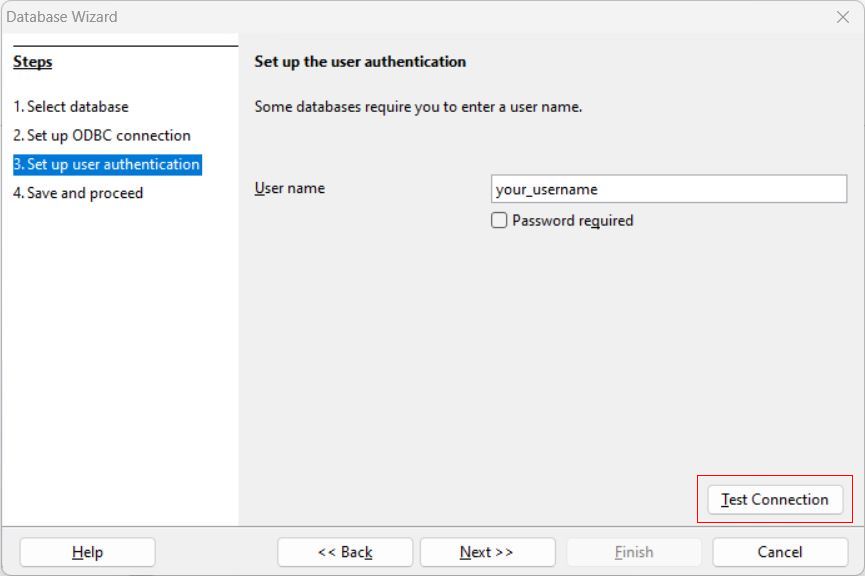
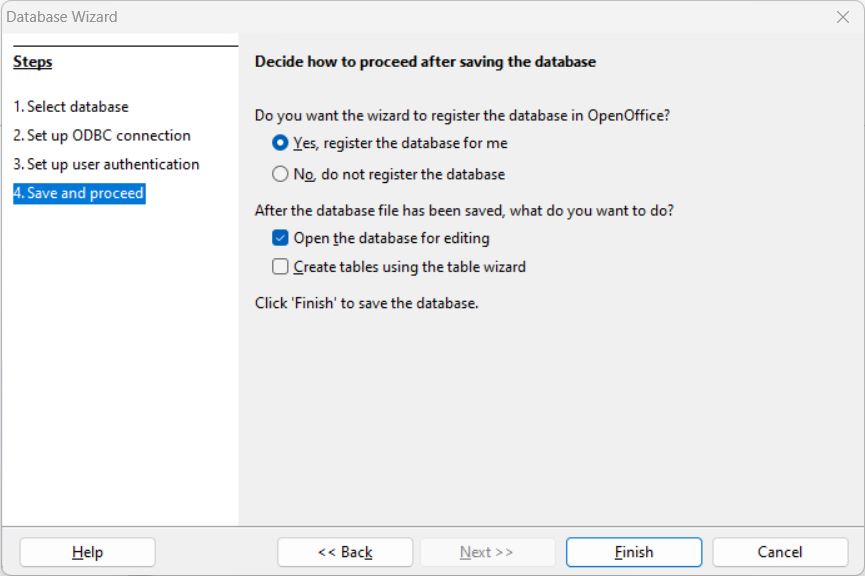
Your connection is now established — ready to query and analyze data seamlessly within OpenOffice Base.
Review the Metadata and Tables
After the database file is created and the connection is established, the table list will automatically display all available JD Edwards data objects.
- Review the JD Edwards data Object List: In the left pane, click on Tables to view the JD Edwards data objects now available within OpenOffice Base.
- View Object Data: Click on any object to view its contents. The JD Edwards data data will display directly within OpenOffice Base, allowing you to review records and fields with ease.
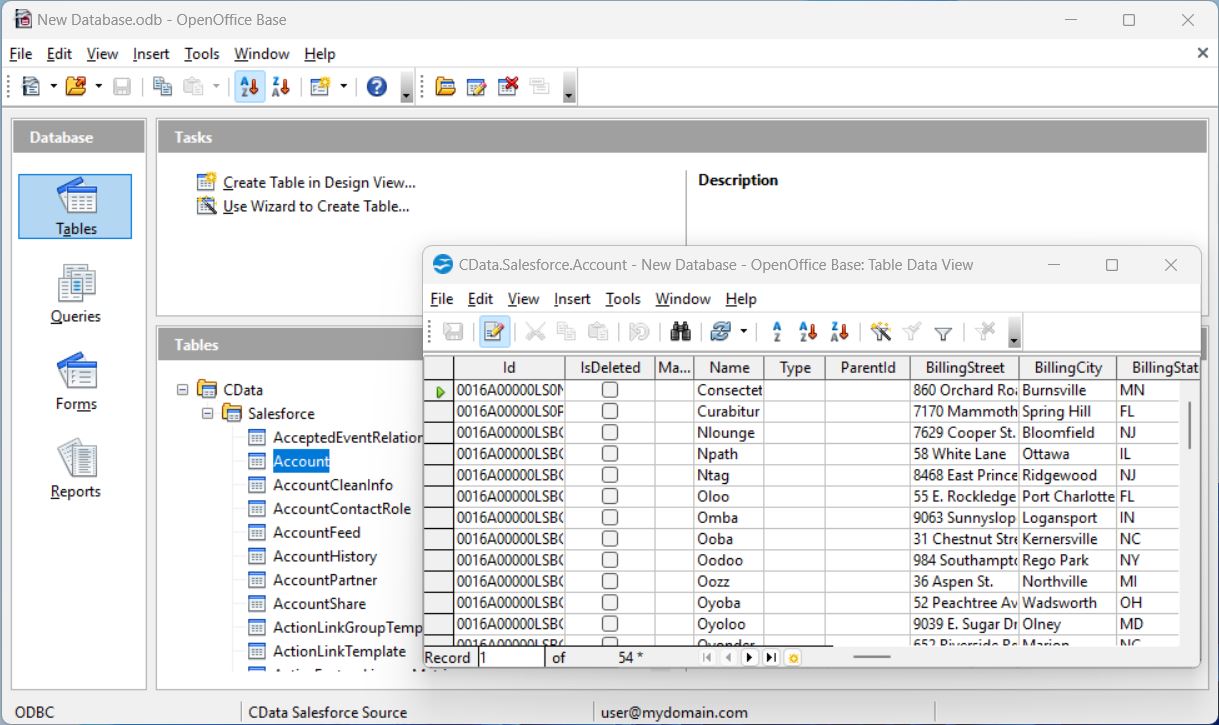
That's it! You have now successfully established a connection to JD Edwards data in OpenOffice Base, with data readily available for analysis and reporting.
Create a Report
Now, let's generate a report based on your JD Edwards data data.
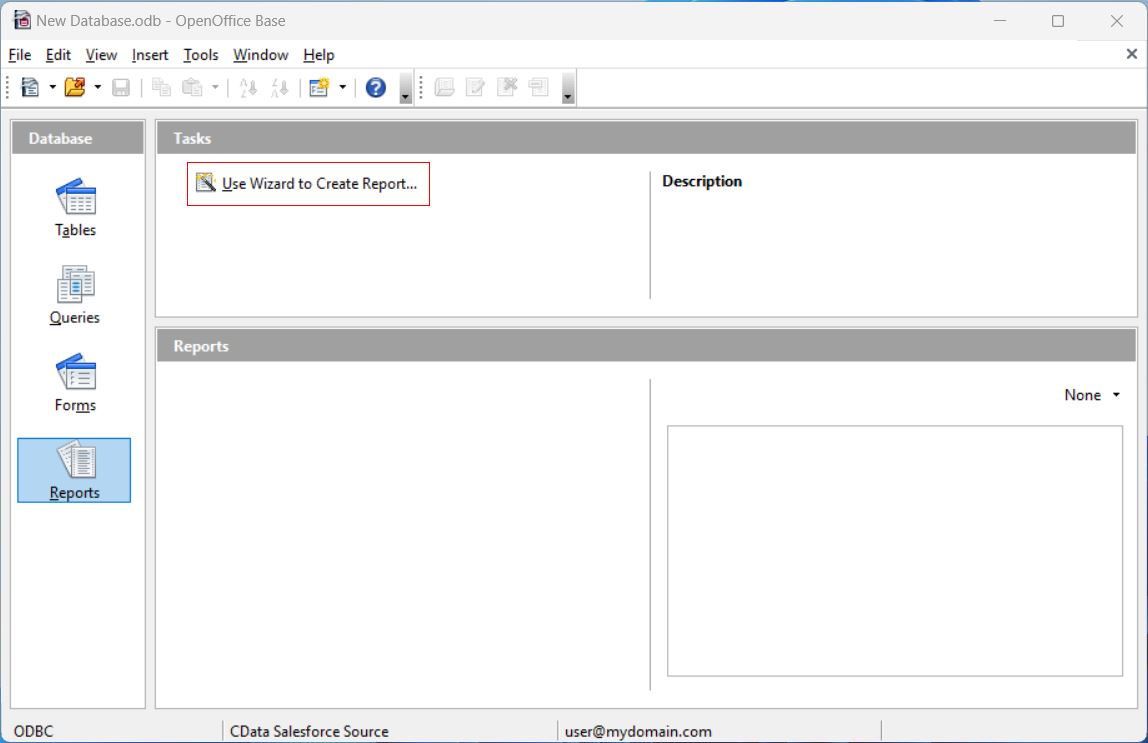
- Open your database and go to the Reports tab, then select Create Report Using Wizard.
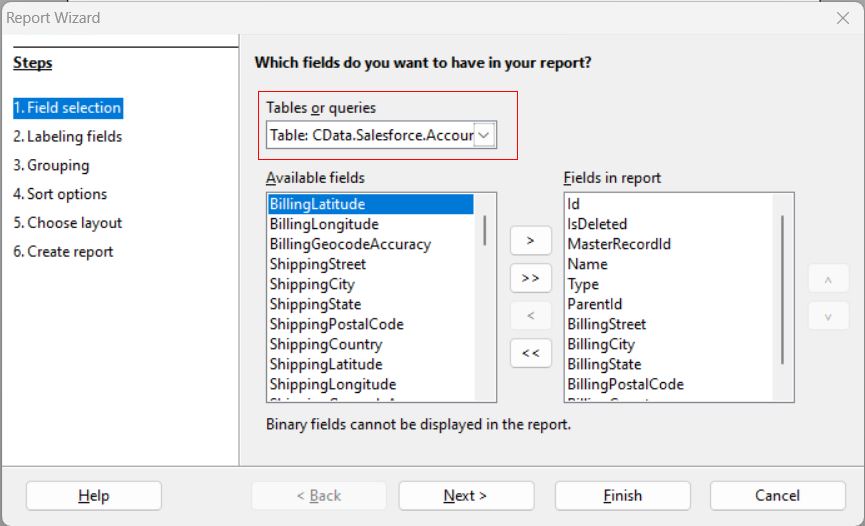
- In the Report Wizard, choose the JD Edwards data table from the Table or Query section. Select the columns from Available Fields that you want to include in your report and move them to the Fields in Report section using the arrows.
- After configuring the fields, click Finish to generate your report.
- Analyze, adjust, save, and publish the report as needed.
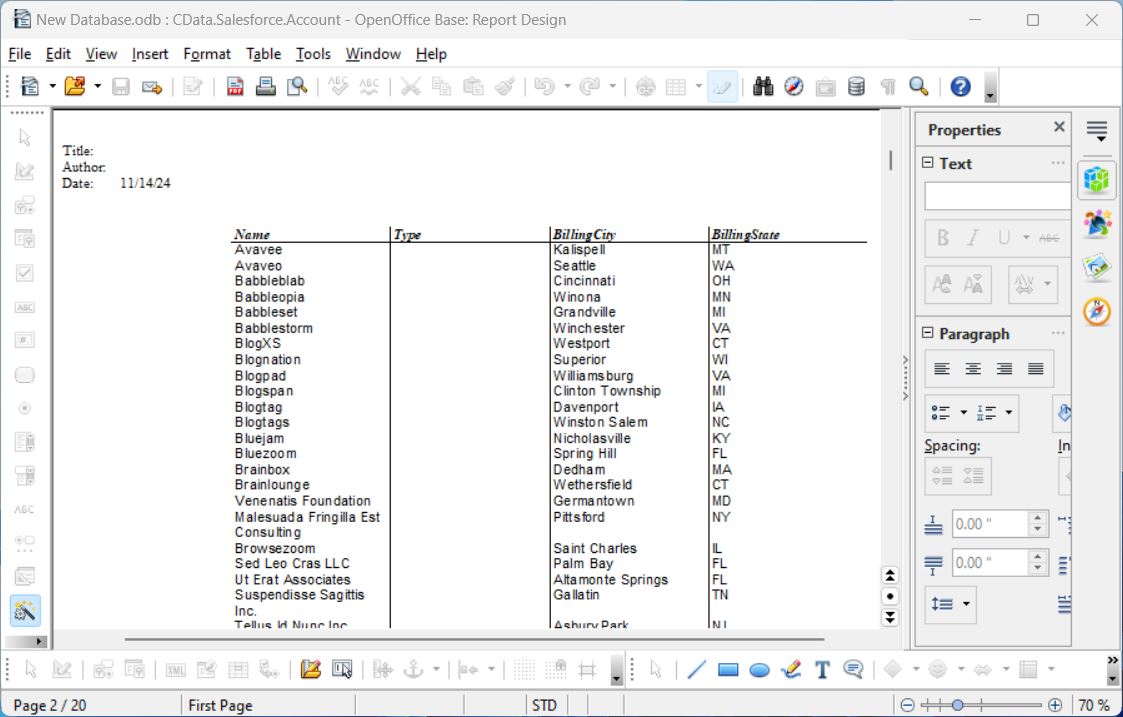
Your report is now created, drawing live data directly from JD Edwards data, and ready for analysis.
Try CData Free for 30 Days
Experience the power of live JD Edwards data data at your fingertips and seamlessly integrate it into OpenOffice Base. Start your free trial today!
Ready to get started?
Download a free trial of the JD Edwards ODBC Driver to get started:
Download NowLearn more:
 JD Edwards ODBC Driver
The JD Edwards ODBC Driver is a powerful tool that allows you to connect with live data from JD Edwards, directly from any applications that support ODBC connectivity.
Access JD Edwards data like you would a database - read JD Edwards AccountLedger, ProposalofPayment, ContractRevenueSummary, EmployeeEnrollment, RentIncreaseAmounts, etc. through a standard ODBC Driver interface.