





Import and Visualize JD Edwards Data in Power View

NOTE: For Excel for the web (Excel 365) and Excel 2019 or higher, Power View is no longer supported. Microsoft encourages the use of Power BI for those users. Please read our article on working with JD Edwards in Power BI using our Power BI connector for more information.
You can use the built-in ODBC support in Excel to rapidly create Power View reports featuring JD Edwards data. This article shows how to use the Data Connection Wizard, accessible from the Data ribbon, to import JD Edwards data into a Power View report.
Connect to JD Edwards as an ODBC Data Source
If you have not already, first specify connection properties in an ODBC DSN (data source name). This is the last step of the driver installation. You can use the Microsoft ODBC Data Source Administrator to create and configure ODBC DSNs.
The driver connects to JD Edwards through your Application Interface Services (AIS) Server. Set the following connection properties:
- URL: The base HTTPS URL of your AIS Server (e.g., https://jde-ais.example.com:8300).
- User: Your JD Edwards username.
- Password: Your JD Edwards password.
- Environment (optional): The JD Edwards environment to use (e.g., PD920 for production or DV920 for development). If not specified, the AIS Server's default environment is used.
- Role (optional): The JD Edwards role for the session. If not specified, the AIS Server's default role is used.
- DeviceName (optional): An identifier for the connecting device or application, used for auditing and logging on the AIS Server.
- Jasserver (optional): The specific Java Application Server (JAS) instance to route requests through, useful in clustered environments.
Choosing Which Data Is Exposed
JD Edwards organizes tables and business views by System Code, and the driver exposes each System Code as its own schema. Use these properties to control which schemas are available:
- DataModel: One or more ERP modules (comma-separated) whose System Codes are exposed as schemas, or All to expose every System Code in the connected instance. Defaults to FinancialManagement.
- SystemCodes: A comma-separated list of additional System Codes to expose alongside those from DataModel (e.g., 42,43).
When you connect, the driver sends your credentials to the AIS Server to obtain a session token and caches it. The driver requests a new token automatically before the session expires.
When you configure the DSN, you may also want to set the Max Rows connection property. This will limit the number of rows returned, which is especially helpful for improving performance when designing reports and visualizations.
Connect with the Data Connection Wizard
Follow the steps below to connect to the DSN from the Data Connection Wizard in Excel.
- In recent versions of Excel the Data Connection Wizard is not visible by default. To enable the Data Connection Wizard in Excel, go to File -> Options -> Data and under Show legacy data import wizards check the From Data Connection Wizard (Legacy).
- After enabling the Data Connection Wizard, on the Data tab you can click Get Data -> Legacy Wizards -> From Data Connection Wizard (Legacy).
- In the Data Connection Wizard, select the ODBC DSN option.
- Select the ODBC DSN for JD Edwards from the list.
Select the tables you want to work with.
If you want to import multiple tables, deselect the "Connect to a specific table" option. After you connect to the data source, you can select multiple tables: After you click Finish to close the Data Connection Wizard, select the "Enable selection of multiple tables" option in the Select Table dialog.
- In the Import Data dialog, select the destination for your data. For example, select the Table option and the Existing worksheet option. Then click the cell in your worksheet where results should be output.
- Click Insert -> Power View to create a new Power View report.
Create a Table
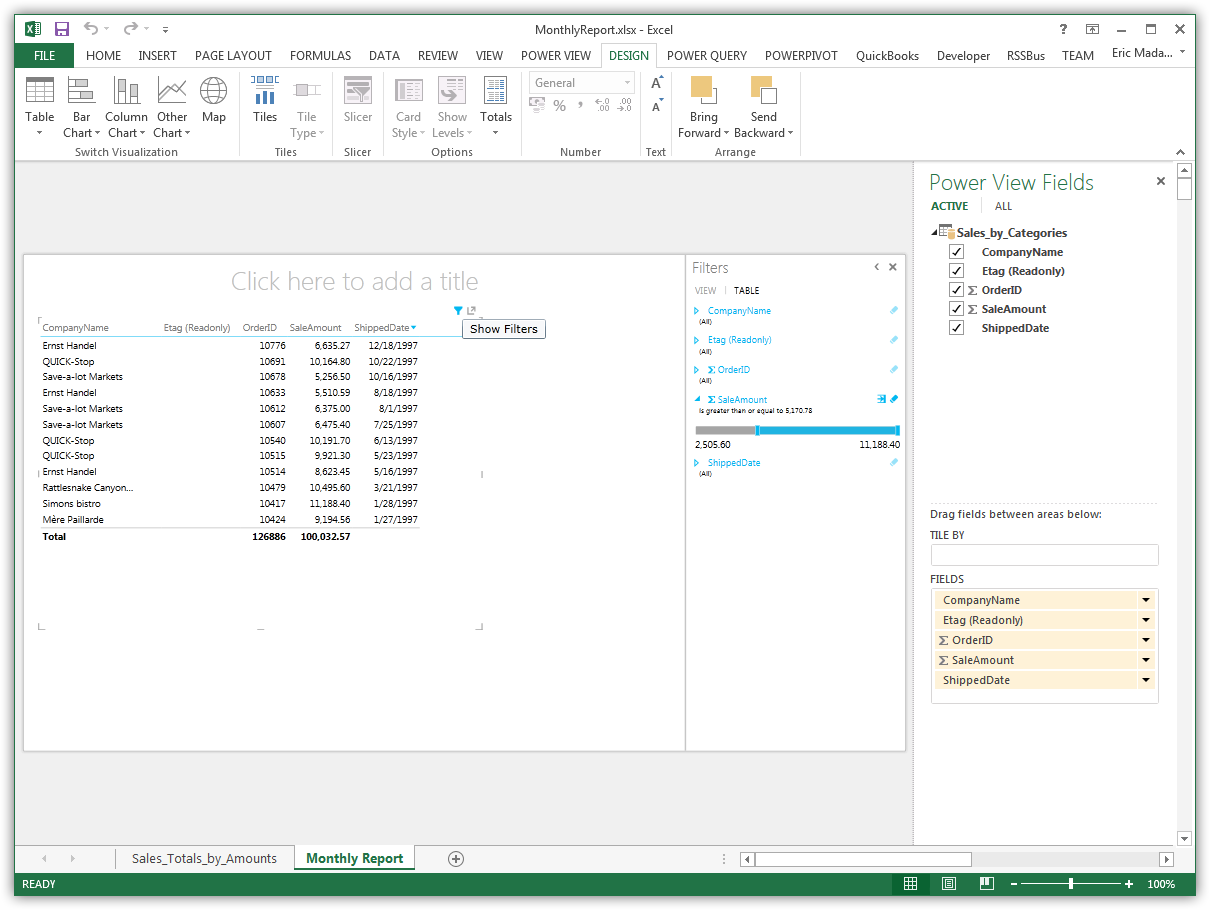
Tables are the starting point for charts and other representations of your data. To create a table, select a column in the field list. You can also drag and drop table names and column names onto the view.
Create Data Visualizations
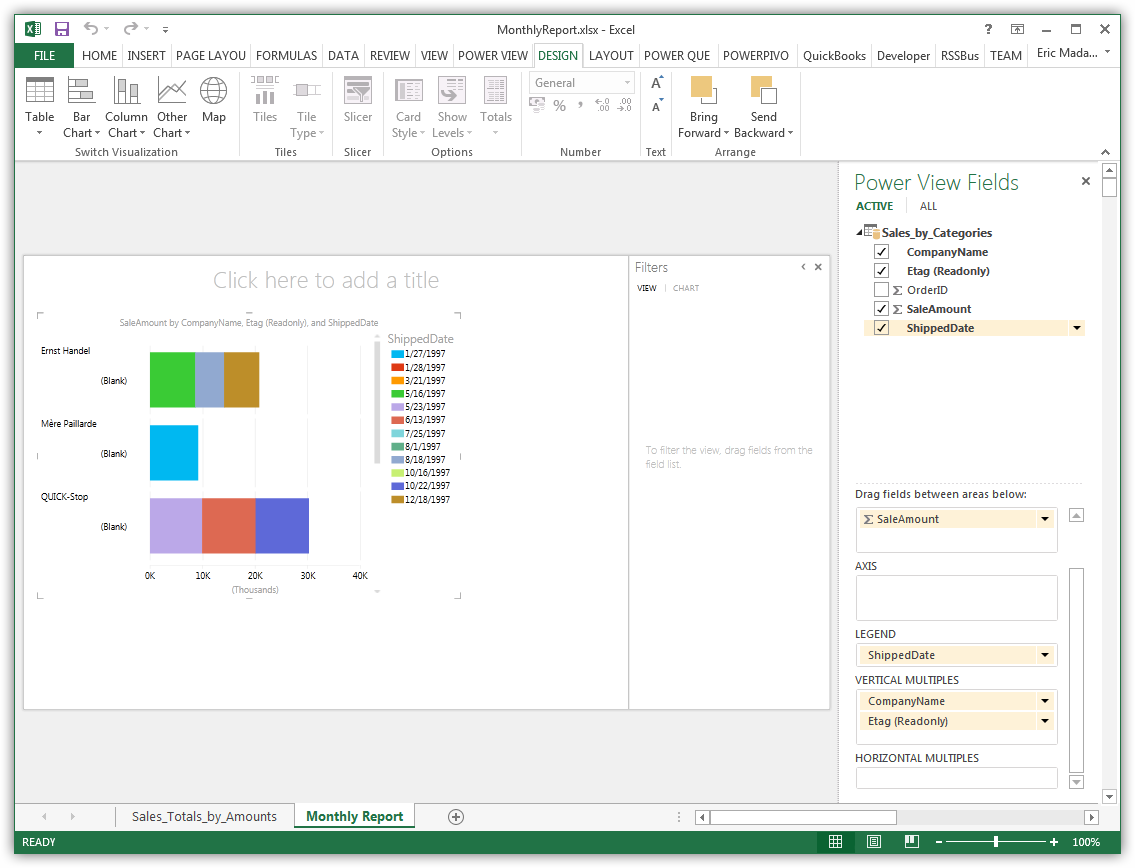
On the Design tab, you can change tables into charts and other visualizations.
Ready to get started?
Download a free trial of the JD Edwards ODBC Driver to get started:
Download NowLearn more:
 JD Edwards ODBC Driver
The JD Edwards ODBC Driver is a powerful tool that allows you to connect with live data from JD Edwards, directly from any applications that support ODBC connectivity.
Access JD Edwards data like you would a database - read JD Edwards AccountLedger, ProposalofPayment, ContractRevenueSummary, EmployeeEnrollment, RentIncreaseAmounts, etc. through a standard ODBC Driver interface.